Save Your Blocks Into Our System (Save Block)
- Preparing Your Block or Linework to Save
- Saving a Block
- Naming and Saving Options for the Block
- Creating a Thumbnail Slide for Your Block
- Block Units
- Creating Your Own Block Subfolders
- Creating & Saving Your Own Discipline Graphic Blocks With Attributes
- Editing a Saved Block
- Re-Creating Your Custom Blocks Using Our Default Blocks
- Saving Hatches
- Related Webinars
- Troubleshooting
Want to use one of your own plant symbols or site amenity blocks in your drawings? Save it into our software in seconds using the Save Block tool. Save Block quickly grabs a block – or even linework – and saves it into our system of block folders. This handy tool also creates a thumbnail preview slide of your saved block. This slide will be available in a dialog box within CAD, ready for you to select in order to place your block in a drawing.
In past versions of our software, Save Block required you to explode existing blocks before saving them. You can now simply select a block to save.
When you use Save Block, you can control a block's scale and rotation input, automatically create a thumbnail preview slide of the object, and make it immediately available to use when placing a block in a drawing using one of our tools. Examples of these tools include:
Preparing Your Block or Linework to Save
Once the Save Block tool is active, it will grab any block or linework you select and turn it into a block within our system.
Before opening the Save Block tool, zoom in to the image you want to save as a block until it essentially fills your screen. That view will become the thumbnail preview of the block, which you'll see when you select the the saved block to place it in a drawing.
Avoid using ellipses in your block drawings. Ellipses can cause several issues in the creation of blocks and their corresponding thumbnail slides. If you do have ellipses in your block drawing, you will need to convert them to arc objects.
Saving a Block
Once your block is prepared to save, open the Save Block tool:
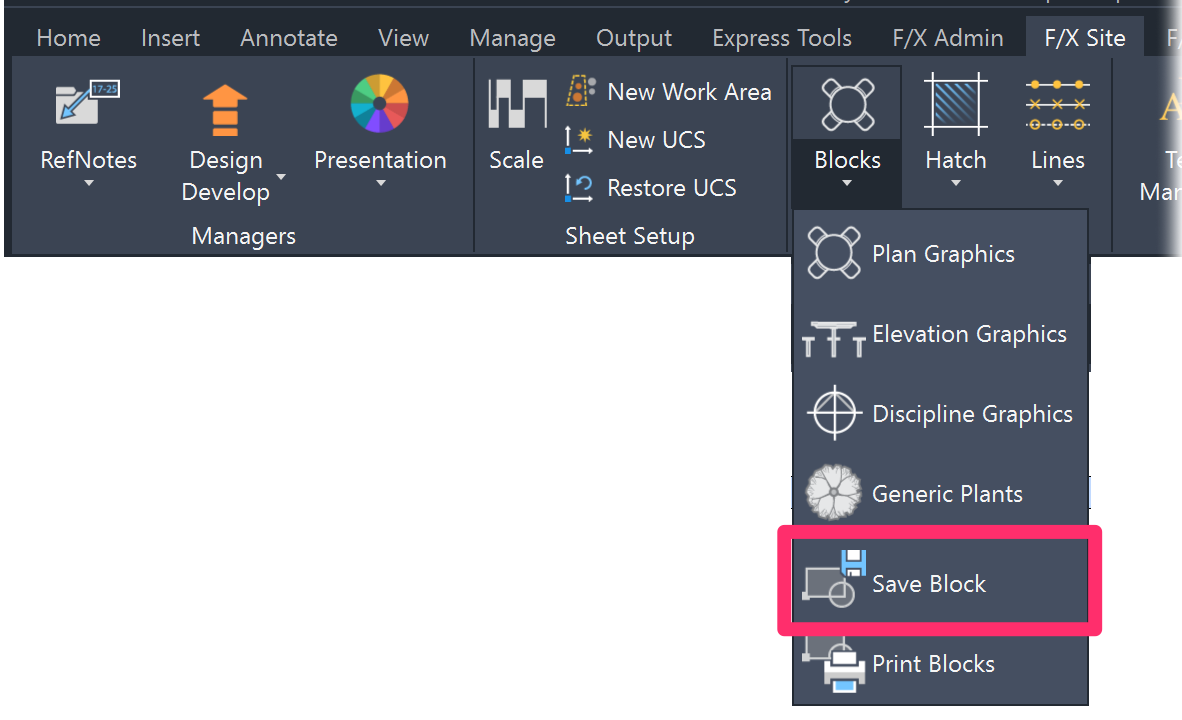
F/X Site ribbon
or type FX_AddBlock in the Command line
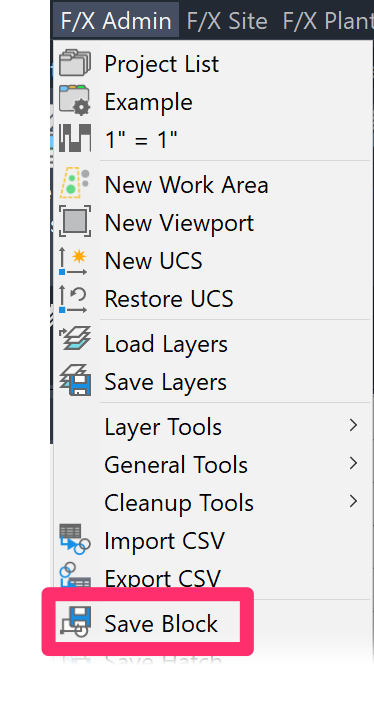
F/X Admin pull-down menu
The Command Line will prompt: Insertion point, <existing block>. You now have two options:
- Option 1: Saving an Existing Block into Our System
To select an existing block, right-click.
When prompted, select the block you want to save.
Make sure you right-click when the option to select existing blocks comes up. Once you've right-clicked, you can then select the block to save.
- Option 2: Saving Linework or an Exploded Block into Our System
If you're saving linework or an exploded block, click a location to set as the saved block's insertion point – usually at the center of the symbol or the center of a tree trunk, if applicable.
You'll then be prompted to Select objects.
Select all objects you want to include in this plant symbol, including the shadow (if you would like your symbol to include one).
The Save Block As dialog box will open.
Navigate to the folder location where you want to save your block. Type a name for the block, and click Save.
The directory structure in the Save Block As dialog box is LandFX\Blocks and then the subfolders. Save Block can only save to these folders and their subfolders. For further information, see the Where to Save Your Block instructions below.

Where to Save the Block
The subfolder where you save your block will determine which one of our tools you'll use when placing the saved block. You're also free to create your own subfolders to store your custom blocks. Find out how >
For information on the structure of the Blocks folder and its subfolders, see our LandFX/Blocks Folder documentation.
Site & Detail Blocks
If you're saving a block of a site object (such as a piece of furniture or a boulder), or a block you plan to use in your details, you have several options for where to save the block. Each of the folder names listed below mirrors the tool that you'll use to place blocks from that folder. For example, the discipline_graphics folder contains blocks you'll place using our Discipline Graphics tool.
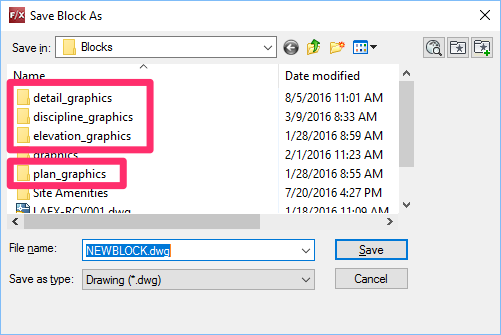
- detail_graphics: Detail Graphics are components of items to be inserted while creating details, such as bricks, bolts, wood, etc.
- discipline_graphics: Discipline Graphics are general symbols used in construction documents, and those used by disciplines other than landscape, such as civil or electrical. This subfolder also includes a User Defined (see image below) for your custom blocks, such as registrations stamps, general notes, etc.
- elevation_graphics: Elevation Graphics are general graphics of site items in elevation view.
- plan_graphics: Plan Graphics are general graphics of site items in plan view, such as cars, furniture, people, etc.
Each of these folders contains several subfolders, allowing you to save your block into a logical location that will be easy to find later when you want to place the block in a drawing.
For example, if you go into the discipline_graphics folder, you'll see the subfolders pictured to the right.
Note: The Callouts folder in our Discipline Graphics library is hard coded, meaning you won't be able to save your custom blocks into that folder. If you have callout blocks you want to save into the Discipline Graphics library, we recommend saving them to the User Defined folder instead.
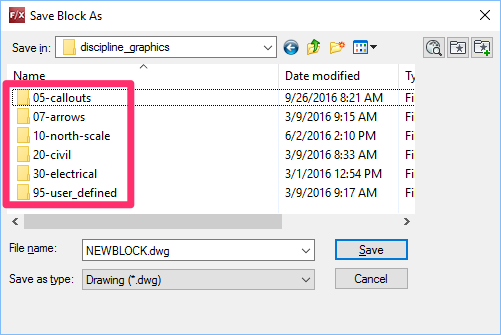
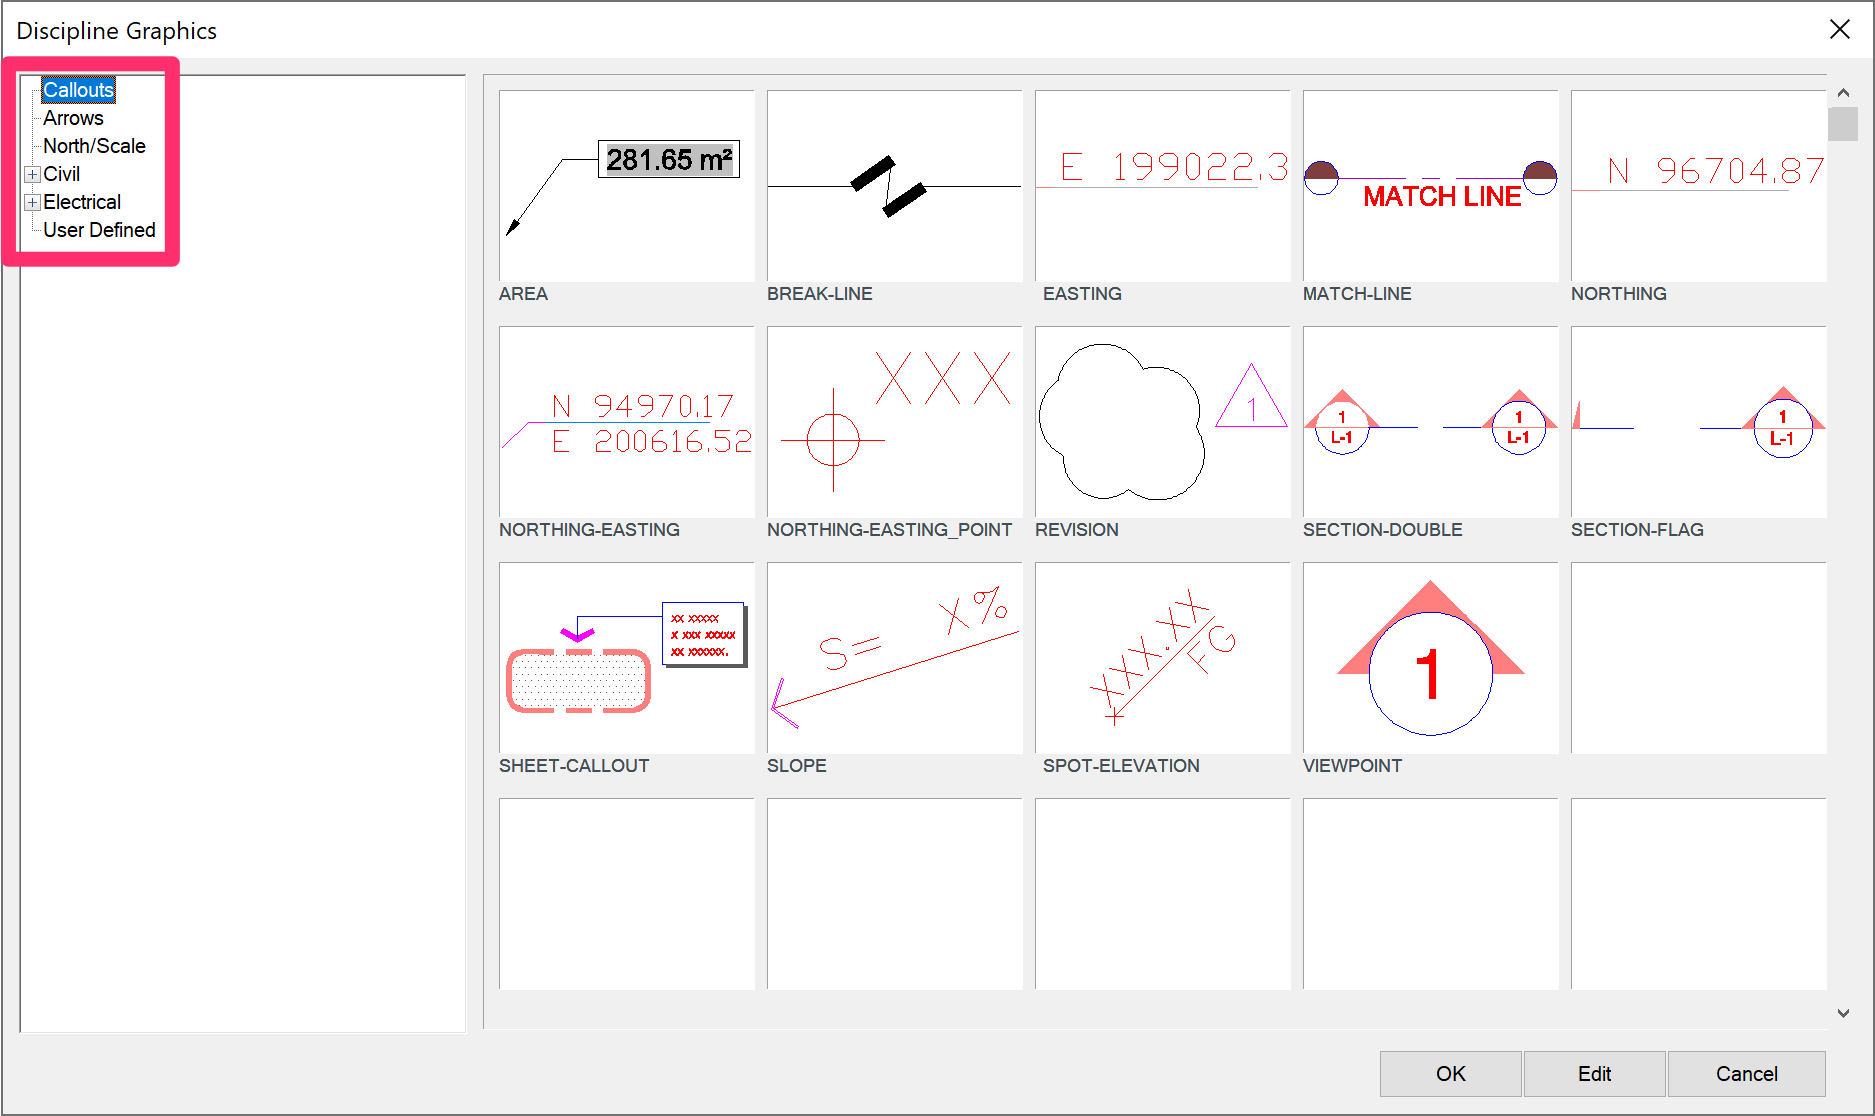
These subfolders correspond with the block categories you see when you open our Discipline Graphics tool. If you save a block into one of these subfolders, it will be available from the tool, and the category within that tool, that match the folders where you saved the blok.
For example, the image below shows the available blocks in the folder Blocks/discipline_graphics/05-callouts. You'll see the blocks from this folder when you open our Discipline Graphics tool and select the Callouts category from the left pane of the dialog box.
Plant Symbols
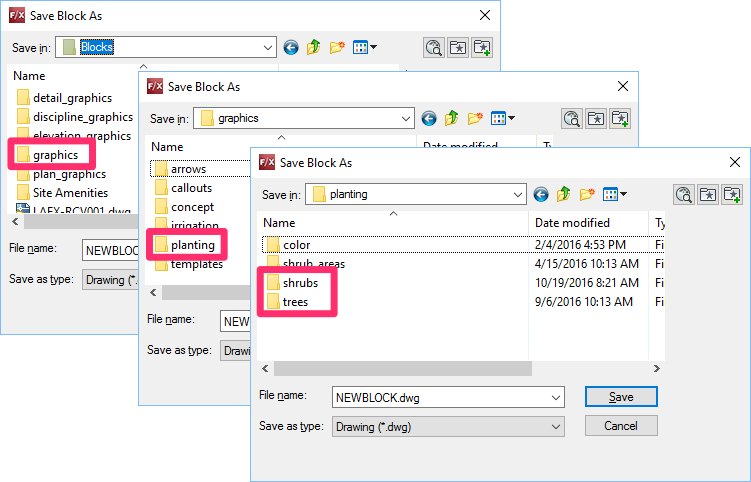
Plant symbols are saved within the folder Blocks/graphics/planting, in either the shrubs or trees subfolder.
For specific instructions for saving plant symbol blocks, including details on the planting folder's subfolder structure, see our Add New Plant Symbols page.
Naming and Saving Options for the Block
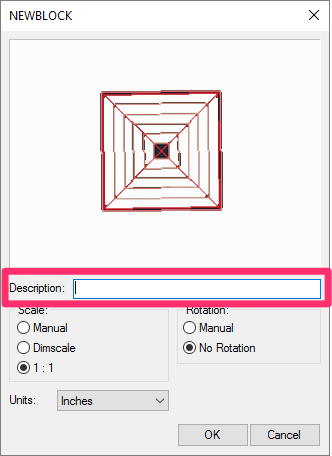
Saving your block will bring up the Block Manager dialog box. Here, you can enter a description for the block, as well as insertion scale and rotation information.
The file name for the block can be a cryptic simple name, such as RPBF01.dwg (for reduced pressure backflow 01), or a more specific name, such as RPBF-FEBC860-1.5IN.dwg (for reduced pressure backflow, Febco 860, 1.5 inch size). The Block Manager provides a field to type a more detailed description for your block, so you can name it as you wish.

1. Thumbnail slide of your block, saved automatically when you use Save Block.
2. Description (optional): If you want, enter a description for the saved block.
3. Scale: Select one of three option for one of three scaling options for your saved block.
4. Units: Select the units that will apply to your block (meters, feet, etc.).
5. Rotation: Select an option for the rotation of your block when inserted into a drawing.
Click OK once the settings are to your liking.
The Write Block (WBlock) command will be applied automatically to your selection, and it will be copied out to the location and name as entered. The new block will be added to our database.
For information on how the Write Block command works, see our Creating a Block with WBLOCK documentation.
Description
If you want, enter a description for the saved block in the Description field. You can also leave this field blank.
If you're happy with the name you gave the block when you saved it, you don't need to describe it further here.
However, if you think the block needs a clearer description, you can use this area to describe the block more thoroughly.
- For example, if you saved the block as RPBF01.dwg, you can use this field to describe the block better (example: Febco Model 860 RP Backflow 1.5 inch). You have no limitations on its description or spaces between words, as you do when naming an AutoCAD block drawing.
- When you select a block to place in a detail, for instance, you'll see the Description name in the left information column, if you gave it one. If you didn't give the block a Description, you'll just see the name you gave the block when you saved it.
Quick video
Scale
The Scale options allow you to select a scaling method for your saved block.

Select one of the three scaling options:
- Manual: This option is seldom used – primarily for specialty items such as plant symbols.
- Dimscale: This option is appropriate for graphic symbols that will have to be scaled for the drawing scale, or dimscale.
- 1:1, or one-to-one scale: This option is appropriate for material objects such as detail graphics that will be inserted at full scale.
Rotation
Use the Rotation options to select a method for setting the rotation of your saved block when you place it in a drawing.
Select one of two options for the rotation of your block when inserted:
- Manual: This option allows you to define the block's rotation after inserting it.
- No Rotation: If you select this option, the block will be inserted without any rotation.

Creating a Thumbnail Slide for Your Block
Quick video
Save Block automatically creates a thumbnail slide of the block you save. This slide will be saved as a .sld file within the subfolder you selected when saving. You'll see this slide whenever you select this block to place in a drawing.
For example, if you add or edit a block for a plant symbol to the system, you'll see a thumbnail image of that block in the Planting dialog box when you go to select a symbol, as well as in the Plant Info dialog box once you've selected that symbol for a plant in your Land F/X project.


Best Practices for Creating the Thumbnail Slide
Save Block is designed to create the thumbnail slide automatically. However, you can do a few things to optimize this process and prevent errors.
• Don't Use Ellipses in Your Block
Using ellipses in the construction of your blocks can truncate your block in the slide, as well as affect the system's ability to scale the block to match a desired width. If you have ellipses in a drawing you wish to save as a block, you will need to replace them with arc objects.
• Pay Attention to the AutoCAD Window
The size and shape of the AutoCAD window while saving blocks is extremely important for the shooting of the slide. It's best to resize your AutoCAD window to a 4:3 aspect ratio, and ideally no larger than the target slide – which is actually very small.
When we reshoot slides, we just make the AutoCAD window as small as we can realistically handle.
Reshooting the Thumbnail Slide
If you're unsatisfied with the preview slide for your block, you can always manually reshoot any slide as necessary by completing the following steps:
1. Open the source block drawing from within the folder LandFX\Blocks.
2. Zoom in as closely as possible.
3. Type MSLIDE in the Command line.
4. You'll be brought to the Create Slide File dialog box. Save the slide to the subfolder where you saved your block.

Remember to match the aspect ratio of the target image as closely as possible with your display window. So for instance, if your AutoCAD window is spanning two monitors, the resulting slide could have an aspect ratio of 8:3, while the one in the dialog is 4:3, which will result in it not being zoomed in enough.
Block Units
Although you can always edit a block's units once you've saved it, it's a good idea to specify the units you most commonly use in your drawings. That way, your block will be more likely to come in at the correct units when you place it in one of your drawings.
Block Units and Reference Notes
If you add a block to your project as a Reference Note (RefNote), that Units setting will also be applied to the RefNote. Keep in mind that if you change the block's units in the Plan Graphics or Elevation Graphics dialog box (see below), you'll need to remember to update the units in the RefNote as well.
Creating Your Own Block Subfolders
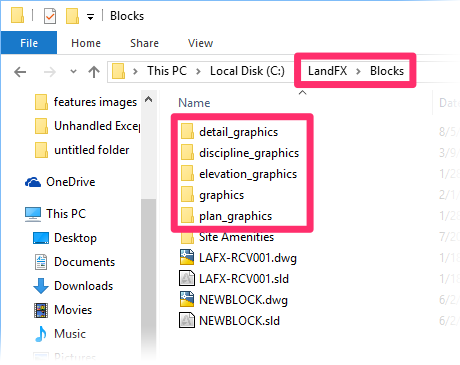
Save Block can only save to the folders within the folder LandFX/Blocks, pictured to the right.
However, you're free to create your own subfolders within any of these folders.
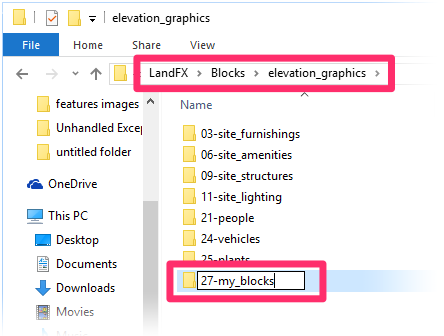
For example, if you want to create your own category of Elevation Graphics, go into the folder LandFX/Blocks/elevation_graphics and create a subfolder.
The name of your subfolder needs to have a prefix consisting of a double-digit number and a hyphen.
Use a number that hasn't been used yet in the same folder. In our example, we'll name our folder 27-my_blocks.
The number and hyphen allow our software to read the blocks within the subfolder you create, which will allow you to place these blocks into a drawing.
Once you've created a subfolder, you can use Save Block to save your blocks into that subfolder.
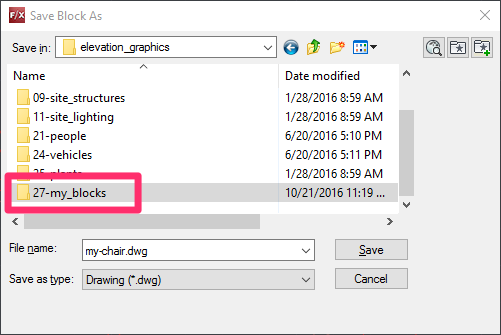
In our example, we'll use Save Block to save a block named my-chair into our 27-my_blocks subfolder within the elevation_graphics folder.
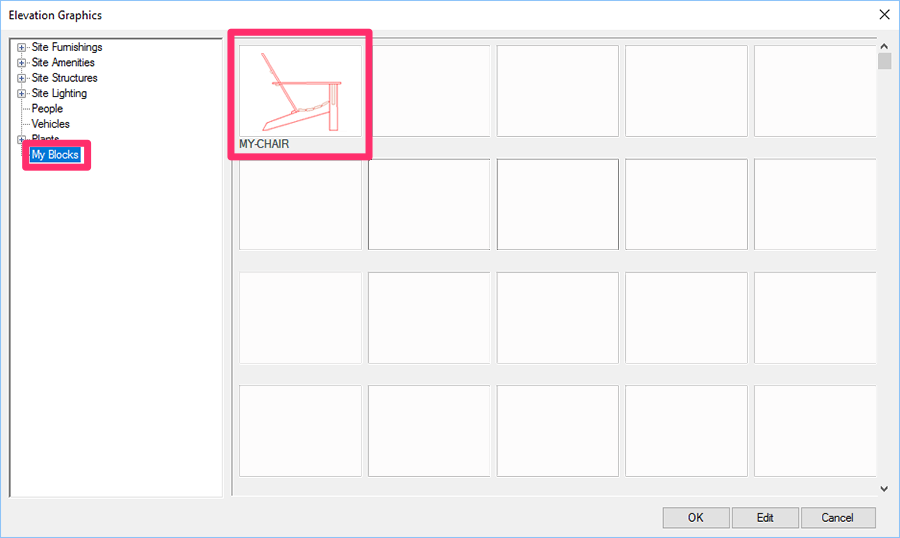
Now, when we go into the Elevation Graphics tool, the category My Blocks will be listed with the other categories, and our block will be available within that category to place in a drawing.
Creating & Saving Discipline Graphic Blocks With Attributes
You can create your own custom Discipline Graphic blocks that include attributes – dynamic text components that can reflect different values each time the block is placed. For instructions, see our Discipline Graphics with Attributes documentation .
Editing a Saved Block
You can always edit a saved block, and confirm that its units are set correctly, from the Plan Graphics or Elevation Graphics dialog box, depending on where the block is saved.
Re-Creating Your Custom Blocks Using Our Default Blocks
Has something gone wrong with any of your custom blocks? We recommend using our default blocks as a basis for your custom blocks, as they're already set up correctly for best performance in CAD. Use them to repair or re-create your custom blocks.
See our Re-Creating Custom Blocks from Default Blocks Power Tip, linked to the right, for more information and instructions.
Saving Hatches
Looking to save a hatch? Note that hatches are not saved as blocks. For information on saving hatches, see our Save Hatches documentation.
Related Webinars
- Fundamentals of Blocks: Take a tour of the streamlined process for proper block creation and management brought to you by Land F/X. We’ll cover the dos and and don’ts of creating and saving blocks, and demonstrate how our numerous block library locations work with different parts of the software. (1 hr 2 min)
- Working with Blocks: We go over the role played by blocks within our software, showing the various types of blocks you have access to and how they all function. We'll also show you how to integrate your personal set of custom blocks into our system. (51 min)
- Implementing Your Office CAD Standards: Find out how easily you can adapt your own office standards to Land F/X – and how effectively the software will then apply them to your projects. (1 hr 2 min)
Troubleshooting
Issue: "You must save the block into the ... folder tree" error when saving a block


