Create a Zip File of a Drawing and All Project Data
- Step 1: Saving Your Drawing and All Necessary Files on Computer 1 Using Our Support Tool
- Step 2: Transporting the Zip File
- Step 3: Opening the Zip File/Folder
- Step 4: Updating Your Files & Continuing to Work
- Step 5: Saving Your Changes and Transporting Your Drawing Back to Another Computer
- What Does the Support Tool Actually Do?
An AutoCAD drawing created using our software is dependent on several files, including the drawing file itself (DWG file) as well as the project data and Preference Set used when creating the design (both saved as LFX files). If you need to transfer the drawing to another computer or send it to another user outside your network, you'll need to compile all these files into a single folder to transport. Our Support tool accomplishes this task quickly, creating a single zip file that contains every file you'll need to transfer.
In the example on this page, we'll refer to the computer where the drawing originated as Computer 1, and any other computer where you (or other users) need to open the drawing file as Computer 2.
Step 1: Saving Your Drawing and All Necessary Files on Computer 1 Using Our Support Tool
On Computer 1, open the drawing you want to transport. Make sure the correct project is open. If you've configured a Preference Set and/or a CTB file, make sure these items are active as well.
Make sure you've saved your drawing before completing the following steps.
Open our Support tool:

Any Land F/X ribbon, Support button (F/X Admin pictured)

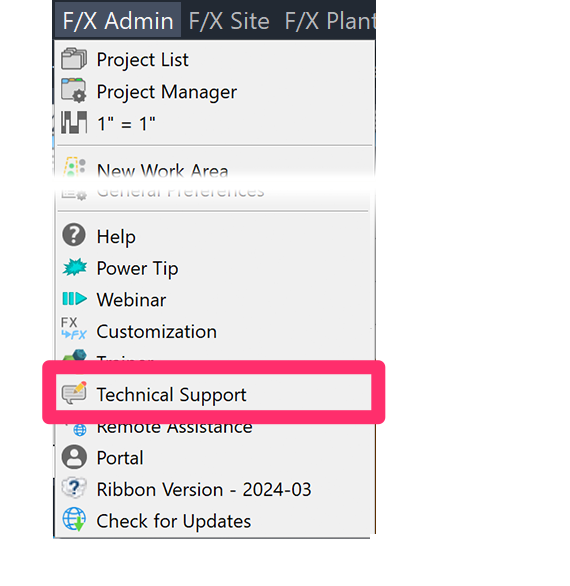
F/X Admin menu, Technical Support option
Or type TechSupport in the Command line
You'll now be prompted: Copy the DWG to the Desktop, so it can be uploaded to the Technical Support team?
Click Yes to copy the drawing file and all associated data to the desktop.


You might receive a message that This drawing contains custom objects that are not supported in previous versions. If so, just click Close to continue.
You'll see a message that a zip file of your drawing named LandFX Export.zip has been saved on the desktop.
This zip file also includes your project data, Preference Set, CTB file, and any attached Xrefs.

At this point, our Submit a Technical Support Ticket page will open. Close that page.
Step 2: Transporting the Zip File
Locate the file LandFX Export.zip on the desktop of your computer.
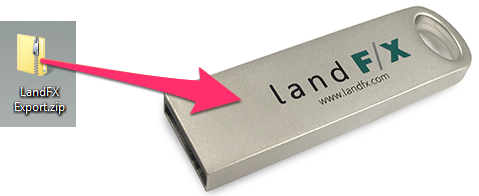
To transport your drawing and all project data, you can drag this file to an external medium, such as a thumb drive. You can also use a file sharing website such as Dropbox or Google Drive, or even email this zip file.

Step 3: Opening the Zip File/Folder
Opening (double-clicking) the zip file LandFX Export.zip will unzip the file and create a folder named LandFX Export.
This folder will contain all files you or the other user will need in order to open and work on the drawing. These include:
- Your CAD drawing (saved as a DWG file)
- Any DWG files you've attached to your drawing as external references (Xrefs)
- The Land F/X project and Preference Set you had active when you last saved the drawing (both saved as LFX files)
- Any CTB settings you've configured (saved as a CTB file)

Our Support tool saves all these items into the LandFX Export zip file, automating what would otherwise be a tedious process of moving multiple files back and forth. For more detailed information on this automated process, please see What Does the Support Tool Actually Do? below.
Please note that the following items will not be included in the zip file:
- Images (such as JPG files) you've attached to your drawing as Xrefs
- Block files you've created or edited
- Details you've created or edited (except for those you've placed in the drawing)
To transport these items, you'll need to drag and drop them onto the external medium each time you move computers.
Step 4: Updating Your Files & Continuing to Work
Assigning the Project to the Drawing
You (or the other user) can now open the drawing on Computer 2 and use our Restore feature – available in the Land F/X Projects dialog box – to restore the project.
To re-assign the project to the drawing, open the project with the drawing still open.
Transferring Your CTB File (If Applicable)
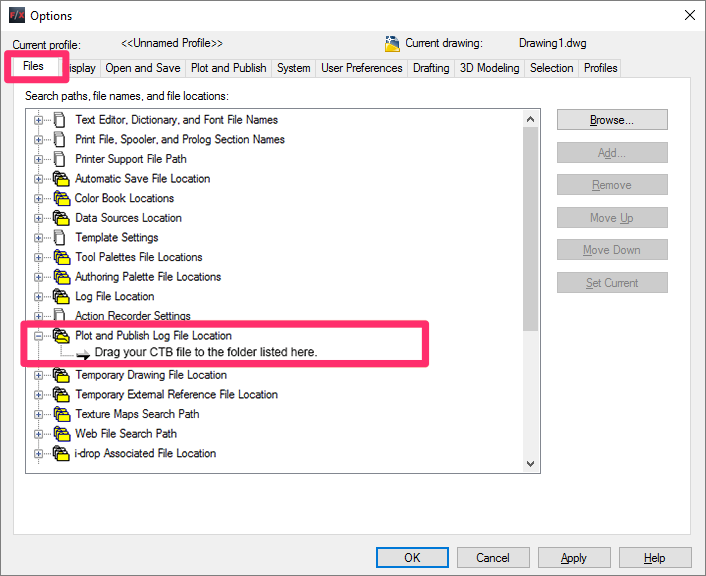
If you've transported a CTB plotting file with your drawing, you (or the other user) can copy that file into the folder that's currently designated as the Plot and Publish folder on Computer 2.
To locate this folder path, open the CAD Options dialog box by typing OP in the CAD command line and pressing Enter. Select the Files tab, then scroll to and expand the Plot and Publish Log File Location entry. The folder listed in this location (shown below) is the folder where you want to drag your CTB file.

Step 5: Saving Changes and Transporting the Files to Another Computer
When you're ready to save your drawing and transport it to yet another computer – or back to Computer 1 – simply repeat this process, starting at Step 1, where you use our Support tool to create a zip file. (For the sake of these instructions, of course, the computer you're currently on will become Computer 1.)
What Does the Support Tool Actually Do?
Our Support tool automates the bulk of what would otherwise be a tedious process. We originally developed it as a simple tool for anyone who is having issues with a drawing and needs to send it to our technical support team for diagnosis. The Support tool packages the drawing file, along with the associated project and Preference Set, into a single easy-to-send zip file. In fact, if you're ever having trouble with one of your drawings and need to contact tech support, it's highly likely that we'll ask you to use the Support tool to send us your drawing via a technical support ticket.
If you're just trying to transport your drawing file between computers, you won't need to bother with sending us a tech support ticket. However, the Support tool provides the quickest and most effective way to package your drawing file for easy transport – all by automating the following processes at a single mouse click:
- Saving your DWG file
- Backing up and saving your Land F/X project
- Saving any applicable CTB files and Preference Sets
All these files are saved into the zip file on your desktop, allowing you to easily transport it using the How To steps above or, if you need to, send it to us using our technical support system.


