Edit Our Default Color Plant Symbols
Quick video
- Editing the Color Plant Symbols
- Shooting Thumbnail Slides for Edited Color Plant Symbols
- Re-Creating Your Custom Color Plant Symbols Using Our Default Blocks
- Related Webinars
Our Color Render tool temporarily substitutes plant symbols in your drawings with colorized symbols for use in presentations. As with our other default plant symbol blocks, you can edit the color plant symbols to meet your standards.
To edit a color symbol, you'll simply open and edit the source DWG associated with that symbol. You'll also need to shoot a thumbnail slide for each color symbol you edit.
You can also use this technique to create your own custom color plant symbols based on our default symbols.

Currently, custom color symbols will only show correctly within the Plant Info dialog box, pictured to the left.
The symbol selection window will still show the old symbol preview because those previews are connected to the AWS block library and not the LANDFX/Blocks folder.
Editing the Color Plant Symbols
The color symbols are located in the folder LandFX/Blocks/graphics/Planting/color.
To edit any of these symbols, open the DWG file associated with that symbol (example: LAFX-TREE-COLR-A100-16.dwg).
Like our other default blocks, the color plant symbols are cloud based. Each of these symbol files will only download once you've used it in a drawing.

Once you've opened the source drawing of the symbol you want to edit, make any necessary edits to that drawing. Repeat this step for each of the color plant symbols you want to edit.
We recommend saving each edited file under its original filename, in its original folder. If you want to revert to the default block, you can always download it by moving the edited file to a different location and using the original color symbol in a drawing.
Shooting Thumbnail Slides for Edited Color Plant Symbols
The thumbnail preview slides for our normal default plant symbols are created as SLD files. Because of the color fills within the colorized plant symbols, the thumbnail previews of these symbols need to be JPG files. To create slides for any color plant symbols you've edited, complete the following steps.
1. Adjust your CAD window to match a dimension of 128 x 94.

2. Type JPGOUT in the Command line and press Enter.
This step will result in a test export of the JPG file you're about to create.


3. Navigate to the location where you want to save the preview slide.
You can use a test folder if you want. Just keep the test JPGs clear of your working files.
4. When prompted to Select objects or <all objects and viewports>, right-click.


5. Repeat resizing the CAD window until you get a dimension of 128 x 94.
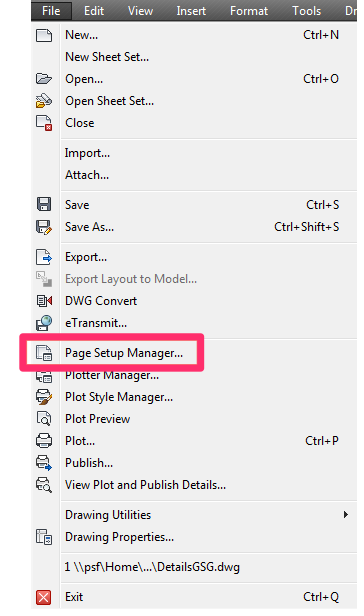
6. Open the Page Setup Manager:

Output ribbon, Page Setup Manager button
or type PAGESETUP in the Command line

File pull-down menu, Page Setup Manager option
7. In the Page Setup Manager, click Modify.

8. In the Page Setup dialog box:
- Select LFX.ctb from the Plot style table menu.
- Check the Display plot styles box.
- Select a plotter from the Name menu.
- Select 8.50 x 11.00 Inches under Paper Size.
These steps will only work with the 8.5-by-11-inch paper size, and only in the Imperial measurement system.
If you want to use your own CTB file, you'll need to edit the LISP file to match the CTB file being used.

9. Once you've set the dimensions properly, type JPGOUT in the Command line and press Enter. Navigate to the location where you want to save your slides, and verify that this location is correct.
If you choose a plant type folder (such as trees) within the path Landfx/blocks/graphics/planting/color/, the JPGs should overwrite the originals. If you choose another folder, you'll need to copy your final JPGs back into that folder to see the preview when you click Edit Plant.

10. Open our BatchMan tool, and click Add Folder.
11. Navigate to the folder that contains the symbol blocks whose slides you need to reshoot. This folder should be a plant type folder (such as trees) within the path Landfx/blocks/graphics/planting/color/
Click OK.


13. The BatchMan dialog box should now be set up similarly to what you see pictured to the right.


BatchMan will create JPG preview slides for each of the color symbols you've edited. To see the new slides, edit a plant and click on its color symbol.
The new slides will replace their original versions.
Currently, custom color symbols will only show correctly within the Plant Info dialog box. The symbol selection window will still show the old symbol preview because those previews are connected to the AWS block library and not the LANDFX/Blocks folder.
Re-Creating Your Custom Color Plant Symbols Using Our Default Blocks
Has something gone wrong with any of your custom color plant symbol blocks? We recommend using our default blocks as a basis for your custom blocks, as they're already set up correctly for best performance in CAD. Use them to repair or re-create your custom blocks.
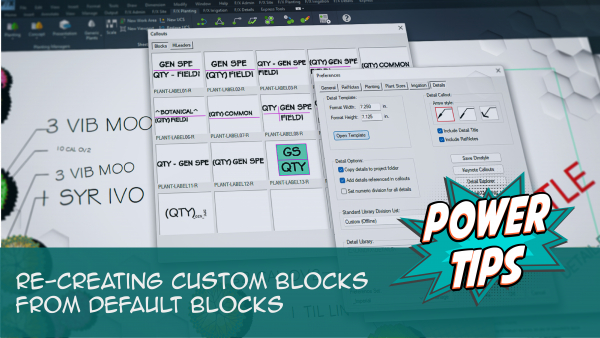
See our Re-Creating Custom Blocks from Default Blocks Power Tip, linked to the right, for more information and instructions.
Related Webinars
- Implementing Your Office CAD Standards: Find out how easily you can adapt your own office standards to Land F/X – and how effectively the software will then apply them to your projects. (1 hr 2 min)
- Rock Out With Your Block Out: We’ve formulated a workflow that incorporates Adobe Photoshop and Illustrator along with AutoCAD to create custom block content. Learn how to transform an image into a polished, optimized, and unique block for your library. (1 hr 5 min)
- Planting F/X Setup: If you're trying to make Planting F/X work with your firm's existing style standards, this webinar is for you. (58 min)
- Working With Blocks: Take a broad look into the role of blocks within Land F/X and how to integrate your personal set of blocks into our system. (1 hour 4 min)

Our software tailors AutoCAD®, Revit®, and SketchUp® to the needs of landscape architects, irrigation designers, and other professionals. We automate your most tedious tasks and ensure accuracy, giving you more time to design.


