Multileaders (MLeaders)
- How Multileaders (MLeaders) Work
- MLeaders and Reference Notes (RefNotes)
- Use the Old Text Leaders (Without MLeaders or Background Masks)
- Troubleshooting
An MLeader combines the entire callout – the leader, arrow, and text – into a single and contiguous entity.
We've built the AutoCAD Multileader (MLeader) tool into the following callouts:
Note that with our updated MLeaders, Ortho Mode no longer allows automatically canting the angle of your leaders at 45-degree increments. We are currently exploring the best way to restore this functionality. Our current recommendation is to have your Polarang set to 45, and use F10 instead of F8, using Polar Tracking instead of Ortho Mode.
How MLeaders Work
General Functionality
When you place a site leader with text, a RefNote callout, or another type of callout that uses MLeaders, most functionality will be offloaded to the AutoCAD MLeader command. Each type of callout you place will receive its own unique MLeader style, which you can easily control with the MLeader Style Manager. That style will remain active, allowing you to type MLD in the Command line to place another MLeader of the same type. (Just be careful which layer you're on when placing them.)
MLeader Text
Text that appears within callouts that now use MLeaders is now automatically set to use our Text Style known as Detail Text. You can select a different style if want.
The text within the callout will be on the same layer as the rest of the callout.
Note that the text will get its color assignment from the setting for the layer L-ANNO-TEXT and will not be set to Color ByLayer.
You're free to change this layer's color from the General Preferences, but keep in mind that your changes will affect other callout text on this same layer.

Moving a Text Box and Leader
Select the entire callout by clicking any part of the text, leader, or arrow. You can now move the text box wherever you need it. The leader will follow. (No pun intended.)
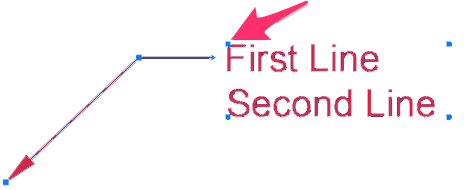
When the callout is selected, you'll see blue pickpoints on the arrow, leader, and text.
To move the callout, grab the pickpoint at the top corner of the text box that's closest to the leader (see the image to the left). Use that pickpoint to move the text box to the location of your choice.
The leader will follow the text as you move it.
If you move the text from the right side of the leader to the left (or vice versa), the leader will switch sides.
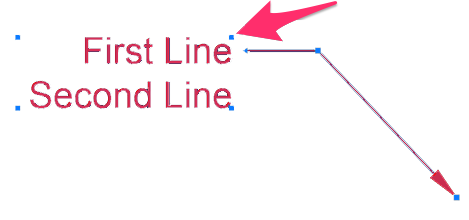
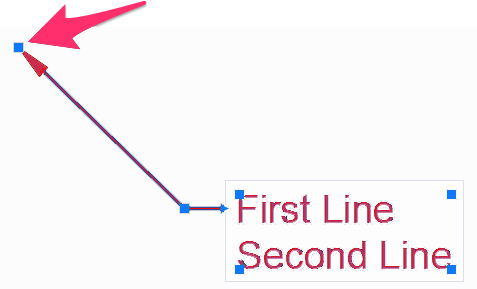
You can also move the arrow by grabbing and moving the arrow pickpoint, as well as change the shape of the text box by moving any of the pickpoints on the text.
The example to the left shows the arrow pickpoint.
Adding and Removing Leaders
To add one or more leaders to your callout, select anywhere on the leader, then right-click. The menu pictured to the right will open.
To add an extra leader, select Add Leader. You can now click to add a leader.

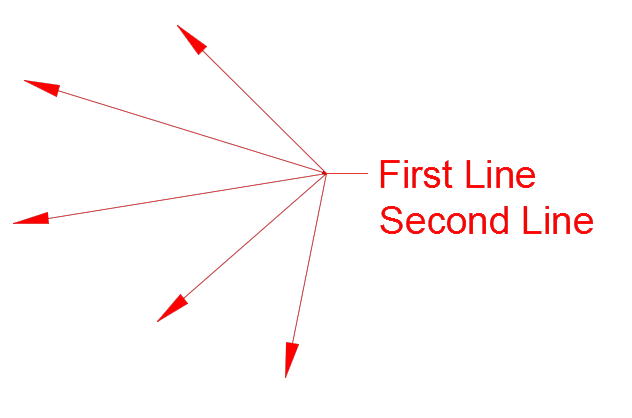
Continue clicking to add as many leaders as you need.
When finished placing leaders, right-click to end the Leader function.
If you need to move any of these leaders or arrows, you can still select the callout and move the appropriate pickpoint.
To remove leaders, click anywhere on the text or one of the leader to select the entire callout.
Right-click, and select Remove Leader from the menu that opens.

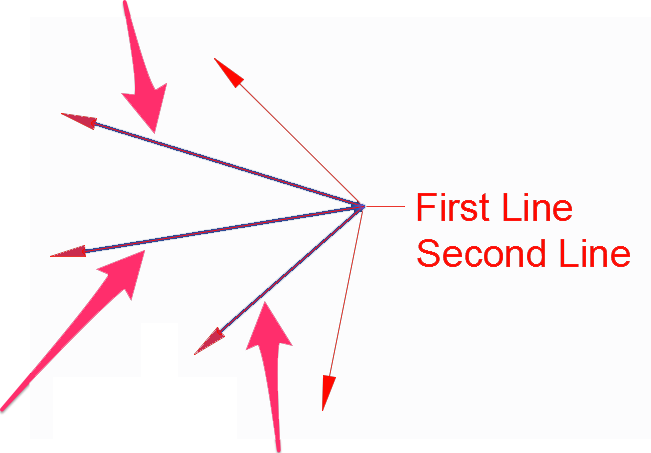
Click each leader you want to remove.
In this example, we'll select and remove the three middle leaders, as pictured to the left.
Right-click when finished selecting leaders to remove.
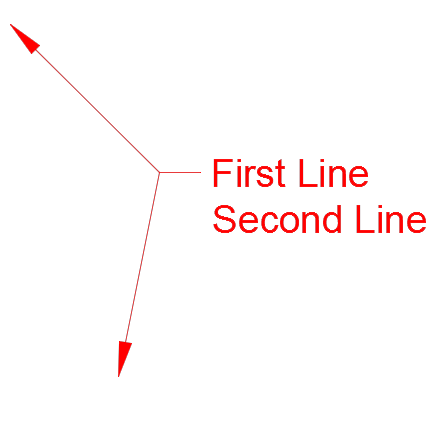
The leaders you selected will be removed.
Changing the Size of a Text Box
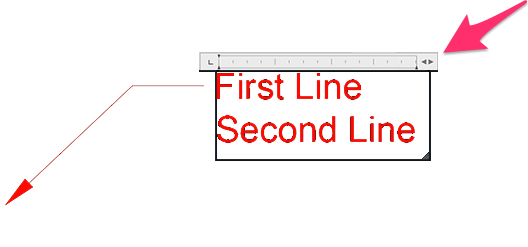
To change the size of a text box, double-click within the text.
You'll now see a ruler and a pair of arrows at the top of the text box (see the image to the left).
To change the size or configuration of the text box, grab and move the arrows.
Move the arrows until the text box has the size and shape you want. The text will wrap as needed to fit in the box.
In this example, we've made the box narrower, which has forced the text from two lines to four.

Background Masks
We've also built the capability of a background mask into the Text and MText leaders. A background mask renders your callout visible and distinct even when you need to place it on linework or on a hatch.
The two examples below show a text leader without a background mask in Model Space and Paper Space. Note that the text is essentially superimposed onto the hatch in the background.
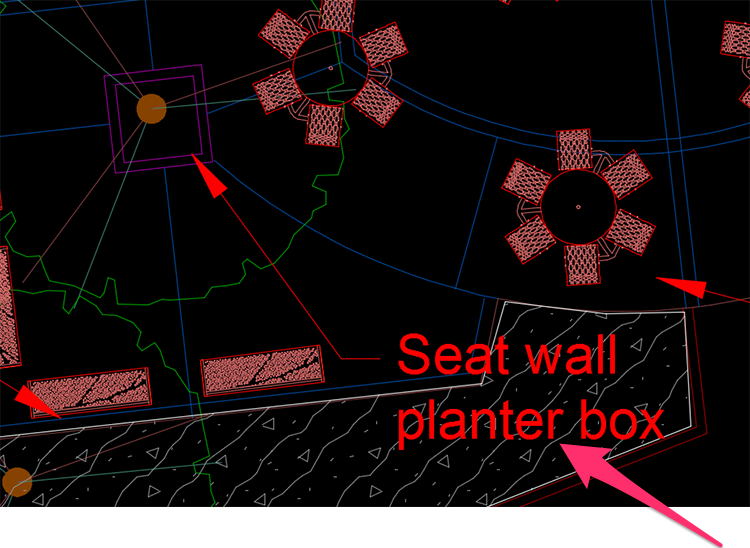
Text leader without a background mask, Model Space
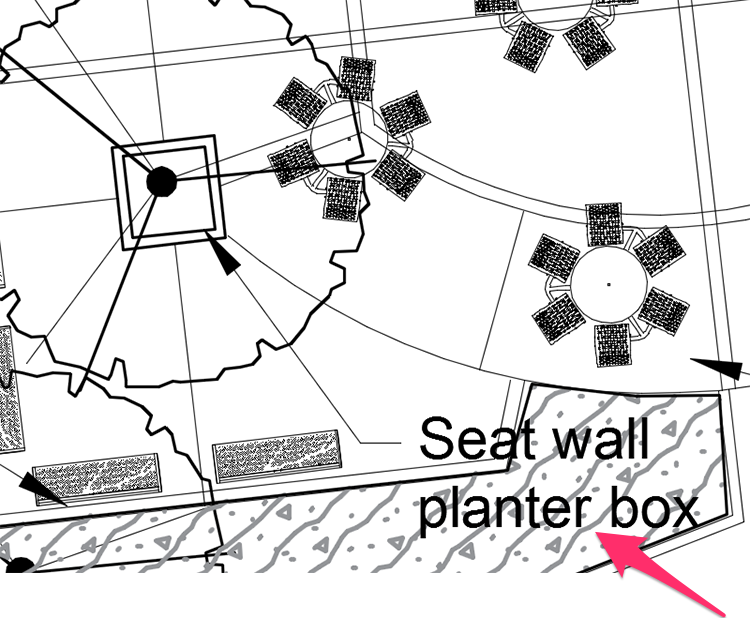
Text leader without a background mask, Paper Space
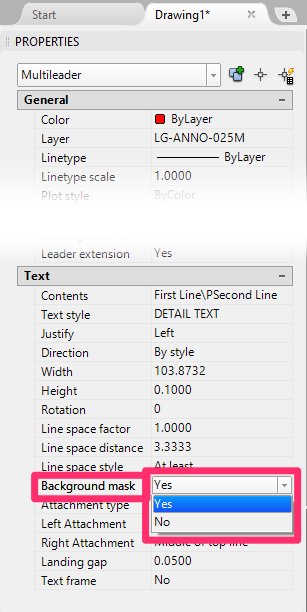
The Background Mask capability is included in the Properties panel. Open the Properties panel by selecting the callout, typing Prop in the Command line, and pressing Enter.
In the Properties panel, locate the Background mask menu, under the Text heading near the bottom of the panel.
This menu will be set to Yes by default, meaning that the background mask is a default setting.
To turn off the background mask, select No.
Want to turn the background mask on or off for all Mleader callouts in your drawing? Select one, right-click, and select the Select Similar option from the menu that opens. All Mleader callouts in the drawing will be selected, and you can turn the mask on or off as pictured to the right.
You can technically remove the default background mask for Spot Elevation callouts in this way, but we don't recommend it. Because Spot Elevations often tend to cross lines in your drawing such as contours, background masks allow you to place them without having to worry about obscuring them with these lines.
If your leaders and text seem to be appearing beneath the surrounding linework or hatch, type TextToFront in the Command line and press Enter.
Then select All from the menu that opens (see the image to the right).
All leaders and text in your drawing will be brought to the front (top) in the draw order.

The images below show a text leader with a background mask, and at the top of the draw order, in Model and Paper Space. Note that the text is surrounded by a blank rectangle in both images, making it more visible.
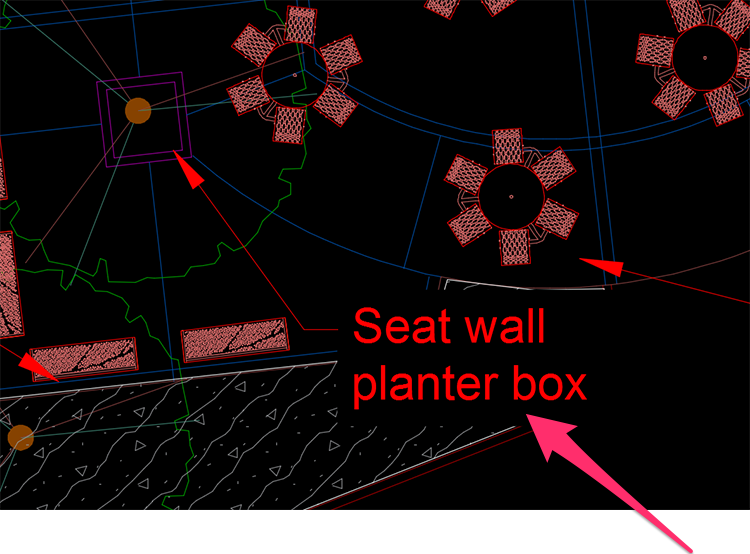
Text leader with a background mask, Model Space
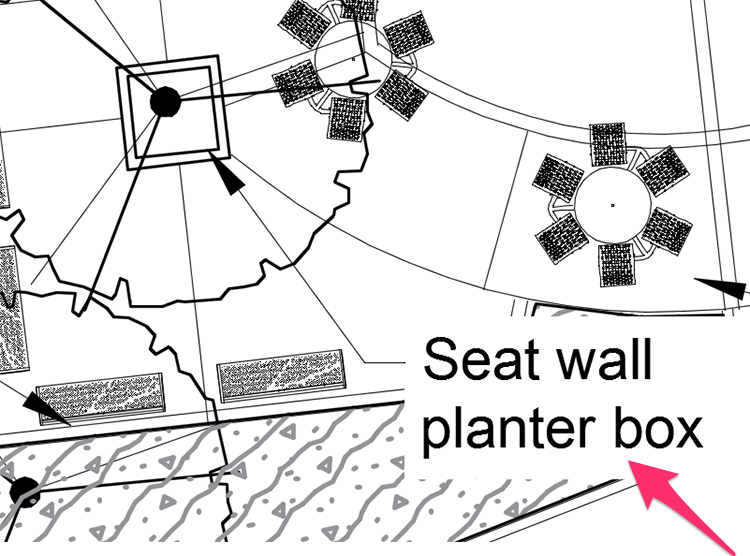
Text leader with a background mask, Paper Space
MLeader Styles
When you place an MLeader callout, that callout will have its own unique MLeader style, which you can easily control from the MLeader Style Manager.
Open the MLeader Style Manager:

Manage ribbon, Multileader Style button
type MLeaderStyle in the Command line
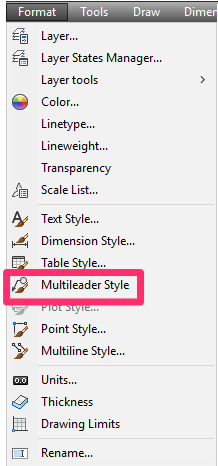
Format menu, Multileader Style option
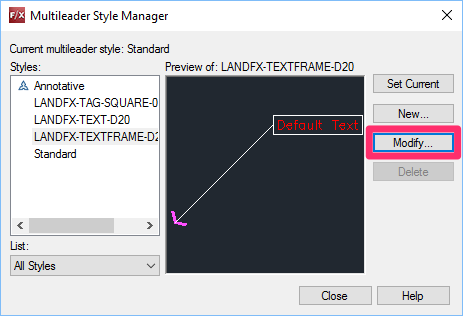
To edit an MLeader style, select it in the Multileader Style Manager and click Modify.
You can then modify a number of settings that apply to the selected MLeader style.
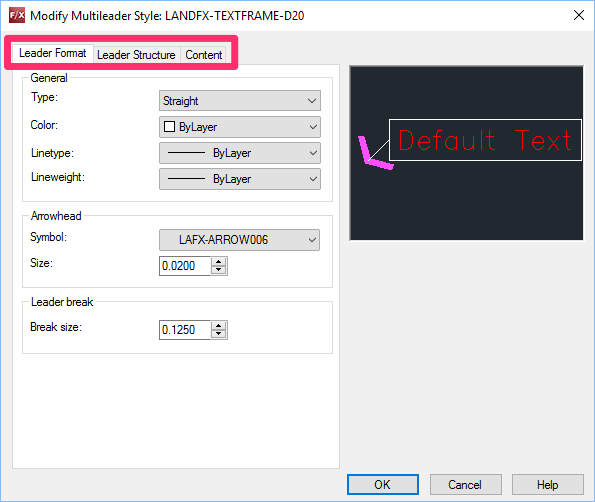
Use the Leader Format, Leader Structure, and Content tabs to edit the corresponding settings.
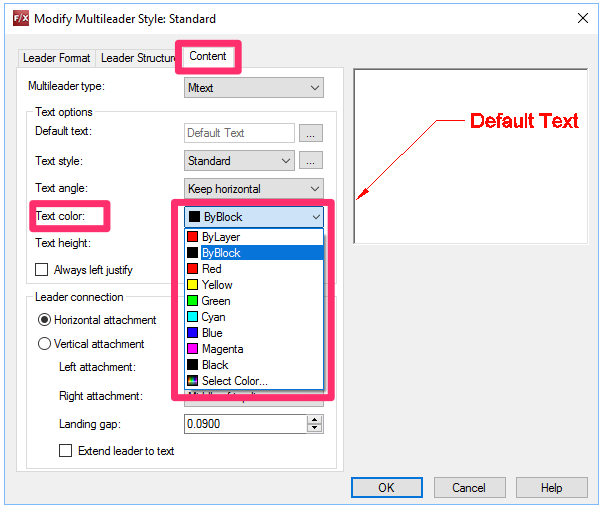
For example, if you want to edit the color of the text in your MLeaders, select the Content tab and select a color from the Text color menu.
If you want the entire callout to be the same color, you can also change the text color to ByLayer and then edit the callout layer, changing it to the color of your choice.
MLeaders and Reference Notes (RefNotes)
If you currently have any old style RefNotes that include shadows, and one of them has the shadow going down to the left, that RefNote it will continue to use the old style. Note that the new MLeader style does not alter the shadow direction, so the shadow will always extend downward and to the right.
Using the Old Text Leaders (Without MLeaders or Background Masks)
Don't like the MLeaders or background masks? At a few users' requests, we've added the old style of text leaders back into the software. Use the old text leaders;
Troubleshooting
Issue: You are unable to see the ruler and arrows that set the width of an MText box
Issue: Your MLeader callouts are only going to one side of their leaders – to the right or left
Issue: You received an Invalid Input error when attempting to place an MLeader callout


