Create a Custom Floating Ribbon Panel for Your Most-Used Tools
Issue
Quick video
You want to consolidate your most commonly used AutoCAD and/or Land F/X tools into a custom floating ribbon panel.
Autodesk is phasing out toolbars. However, we understand why many users who have become accustomed to toolbars prefer the convenience of having their most heavily used tools nearby and always available to click. The Quick Access Toolbar is handy but can’t be undocked. The Tool Palette already has a lot going on, and it can also crash CAD when certain commands are fired.
Another option to try first:
Do you just want to collapse the ribbon to save space, but still want to keep the tools you’re using open and unhidden? You can easily drag any ribbon panel off the ribbon right now!
Try going to the F/X Planting ribbon, clicking and holding on the Drafting panel’s title, and dragging it somewhere else within your AutoCAD interface.

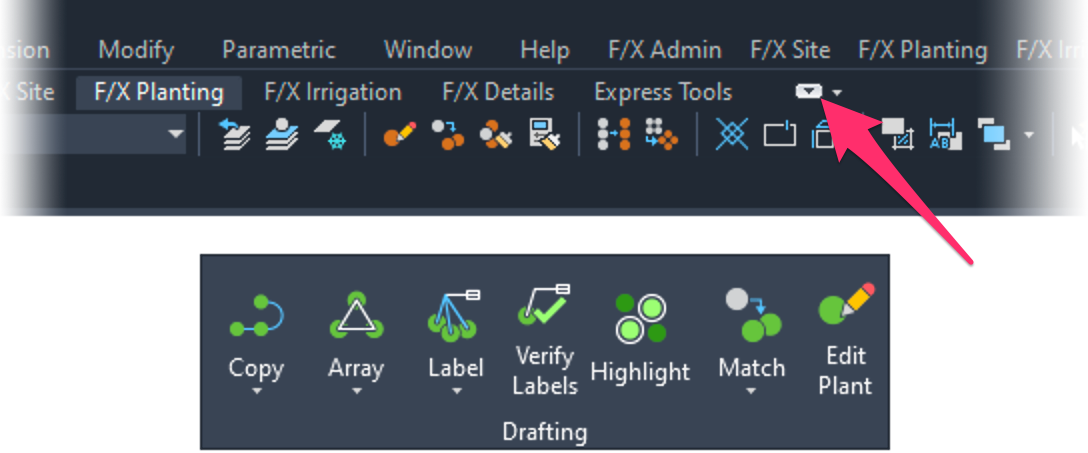
Then click to place the now-floating panel in the location of your choice.
You can then collapse the ribbon using the down-facing arrow button shown to the left.
Solution
Follow these steps to create your own custom ribbon panel. Any ribbon panel can undock from the ribbon and float. You can use small icons or large icons, and either include or exclude the command name – all options that make a ribbon pabel much more flexible and customizable than the old toolbars.
See the following steps in action. Watch our Customize Your Ribbons webinar.
Step 1: Create the panel.
1A. Type CUI in the Command line and press Enter to open the Customize User Interface.
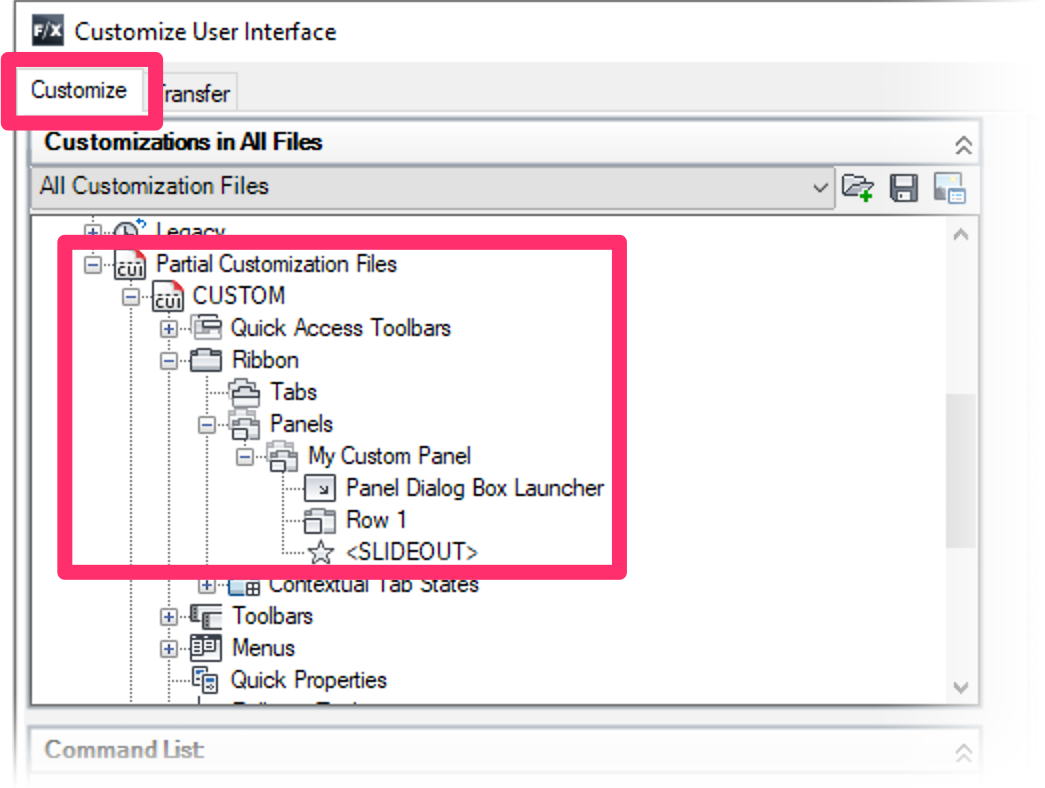
1B. Select the Customize tab.
Expand the following entries, as pictured to the left:
- Partial Customization Files
- CUSTOM
- Ribbon
- Panels
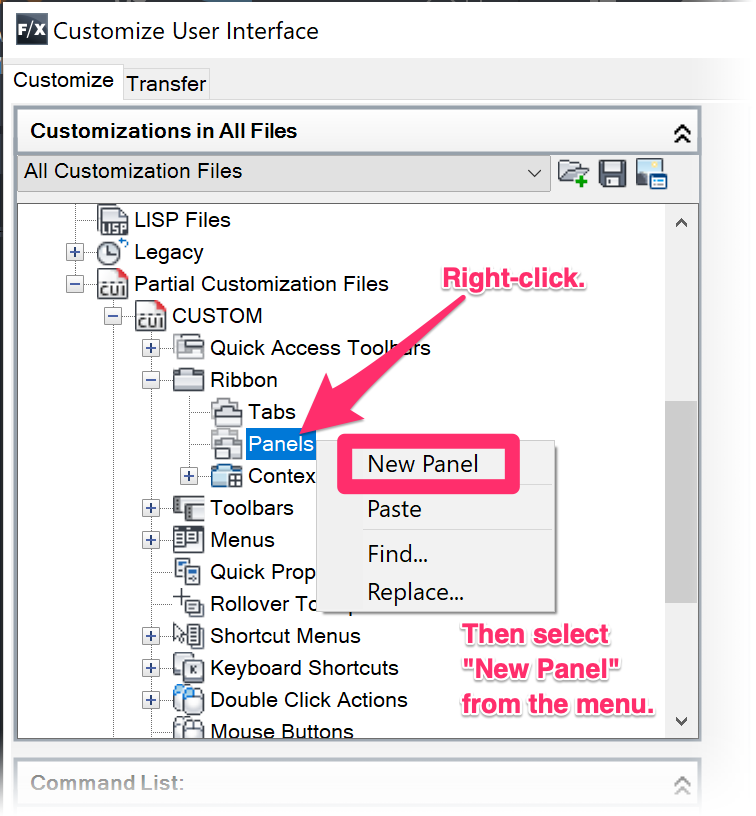
1C. Right-click the Panel entry, then select New Panel from the menu that opens.
Step 2: Add tools to the panel.
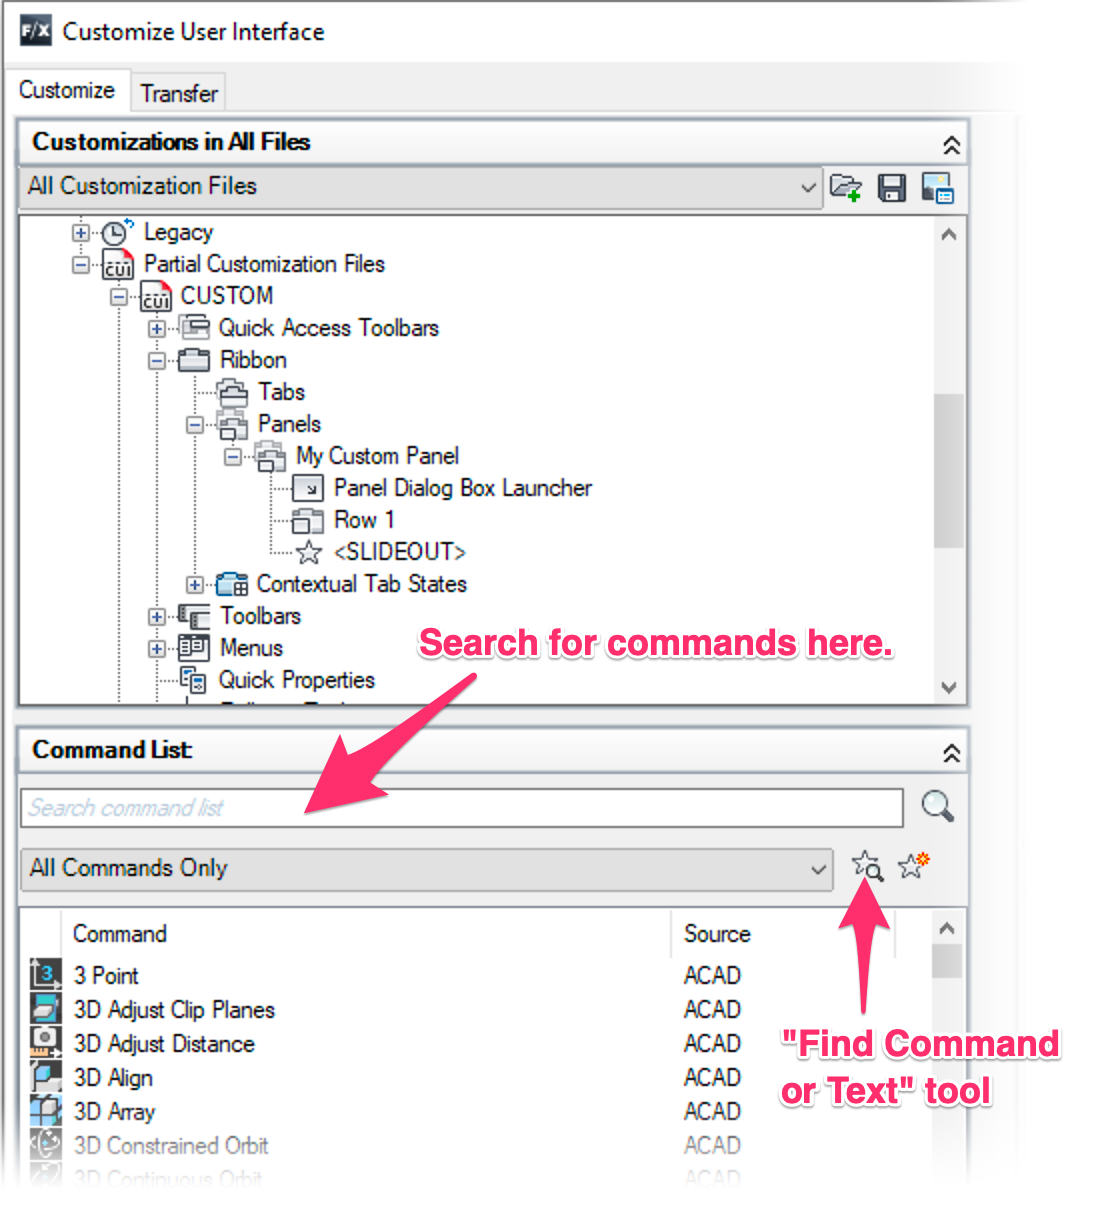
2A. Search the command list for the commands you want. Search by command name.
If you only know the command itself and can’t remember the full name, try using the Find Command or Text tool.
2B. Click a command to select it, then drag and drop that command into Row 1 of the panel.
Continue adding your desired commands in this way.
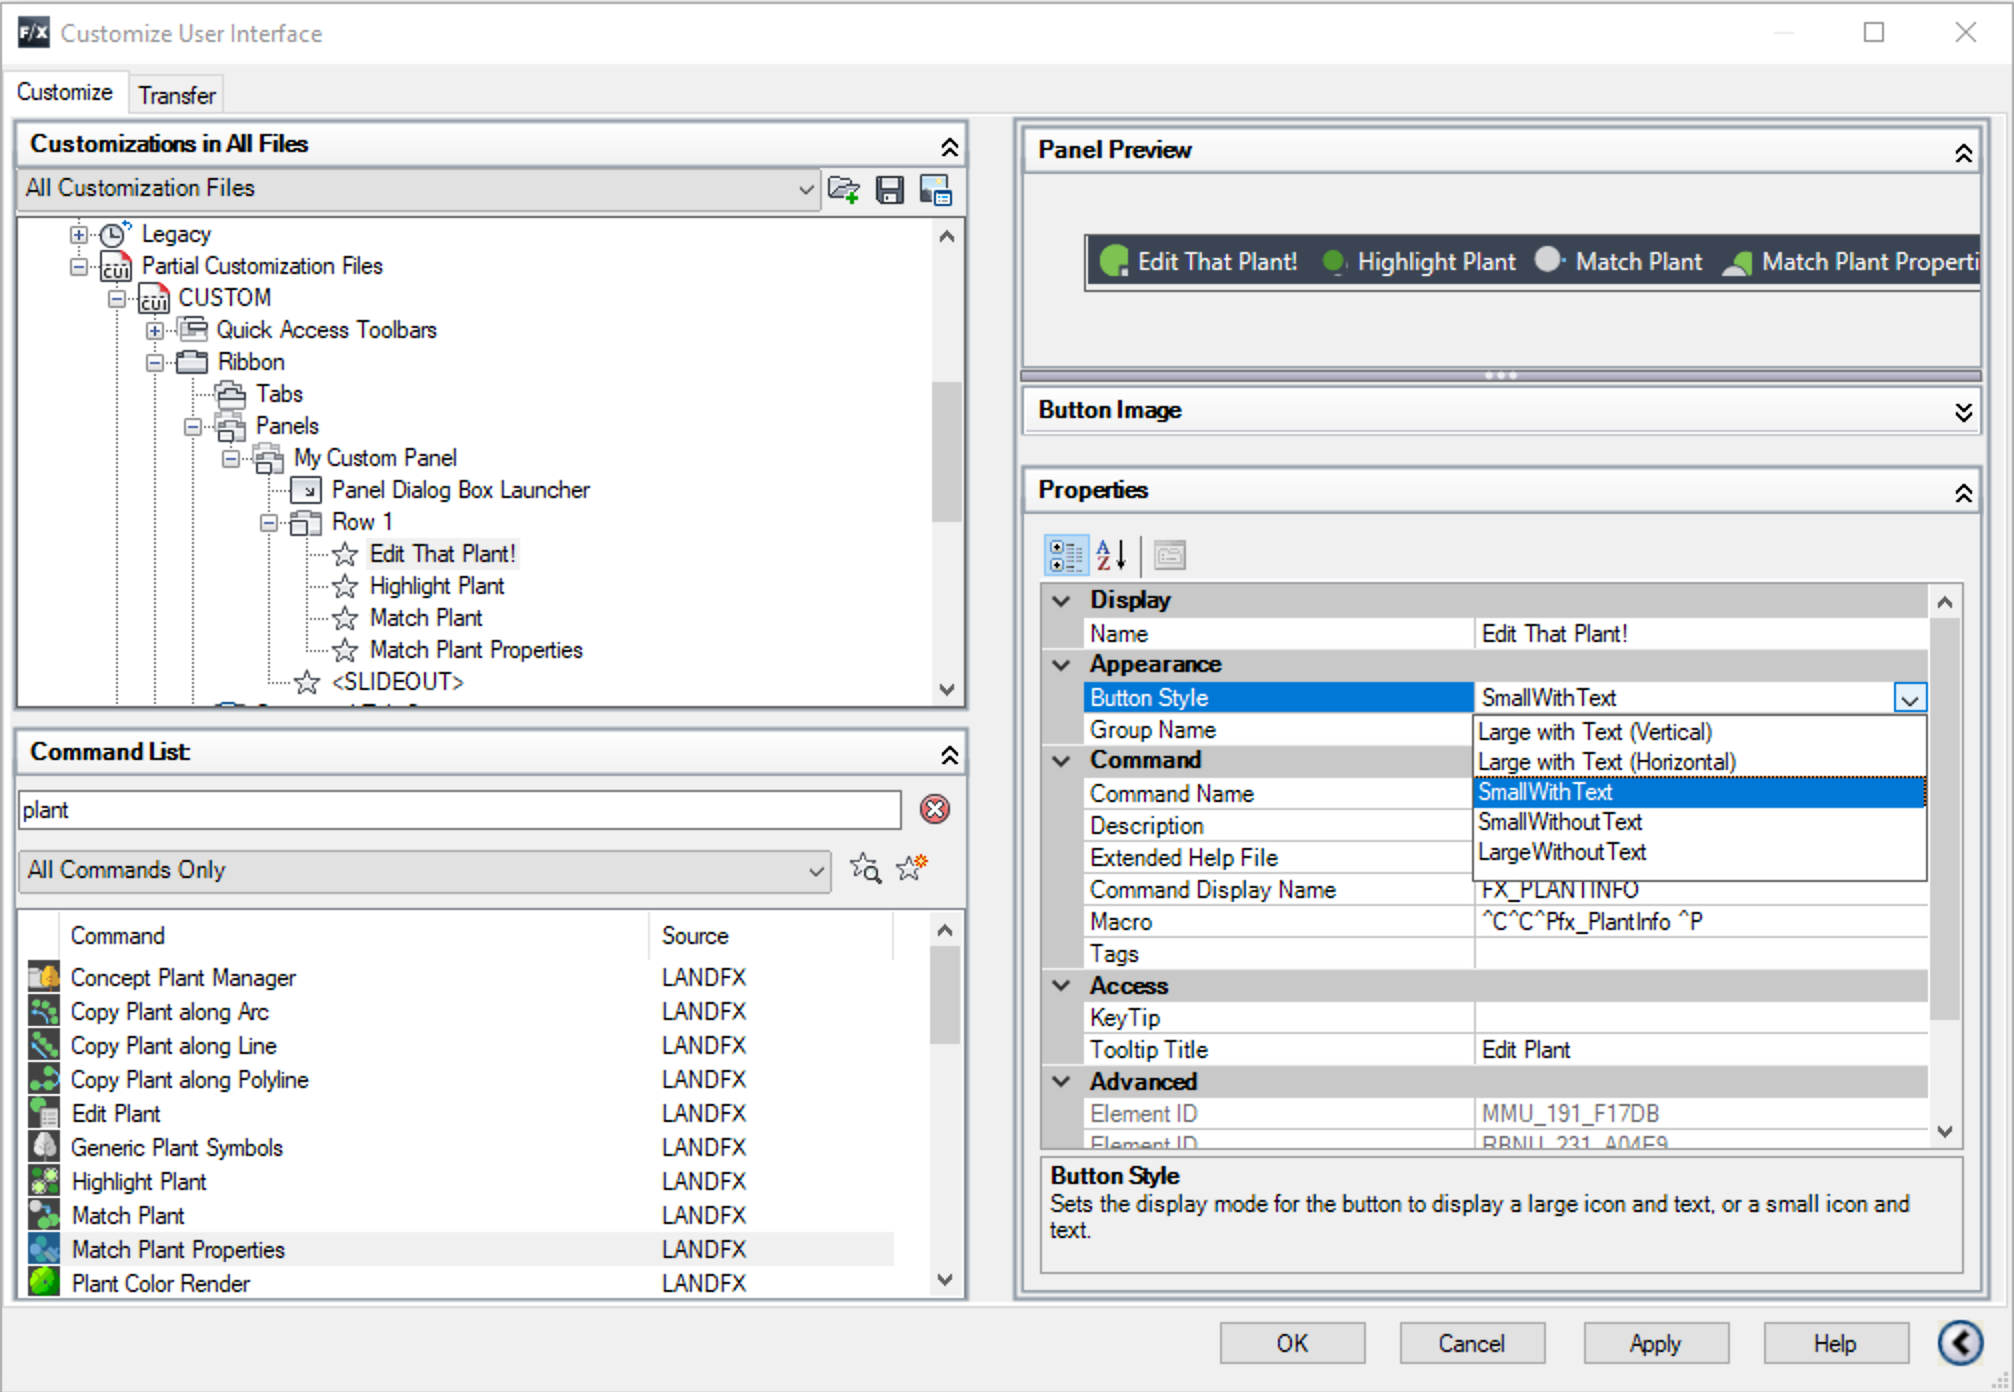
Step 3 (Optional): Customize the look of the tools in the panel.
If you want, you can add rows to your panel and then drag/drop commands into them.
See the acad.cuix panels or landfx.cuix panels for examples of how to organize your panel into rows, panels, and pull-downs.
For a simple organization similar to a toolbar, just keep all commands in Row 1 and change the Button Style to Small, with or without text.
For large buttons like regular ribbon panels, use large buttons with vertical text. Use the \n character to insert a linebreak into the name of a command. Do not change the Command Name entry, however. You can edit the Name field under Display for a custom name in this panel.
Step 4: Add your panel to a custom ribbon tab.
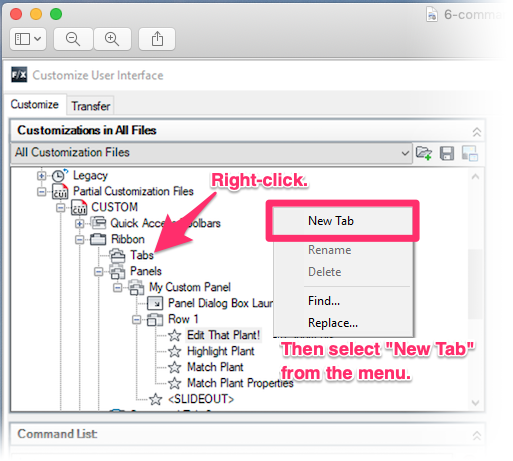
4A.Right-click Tabs under the CUSTOM ribbon.
Then select New Tab from the menu that opens.
4B. Drag and drop your custom panel into your custom ribbon tab.
Step 5: Add your ribbon to your workspace.
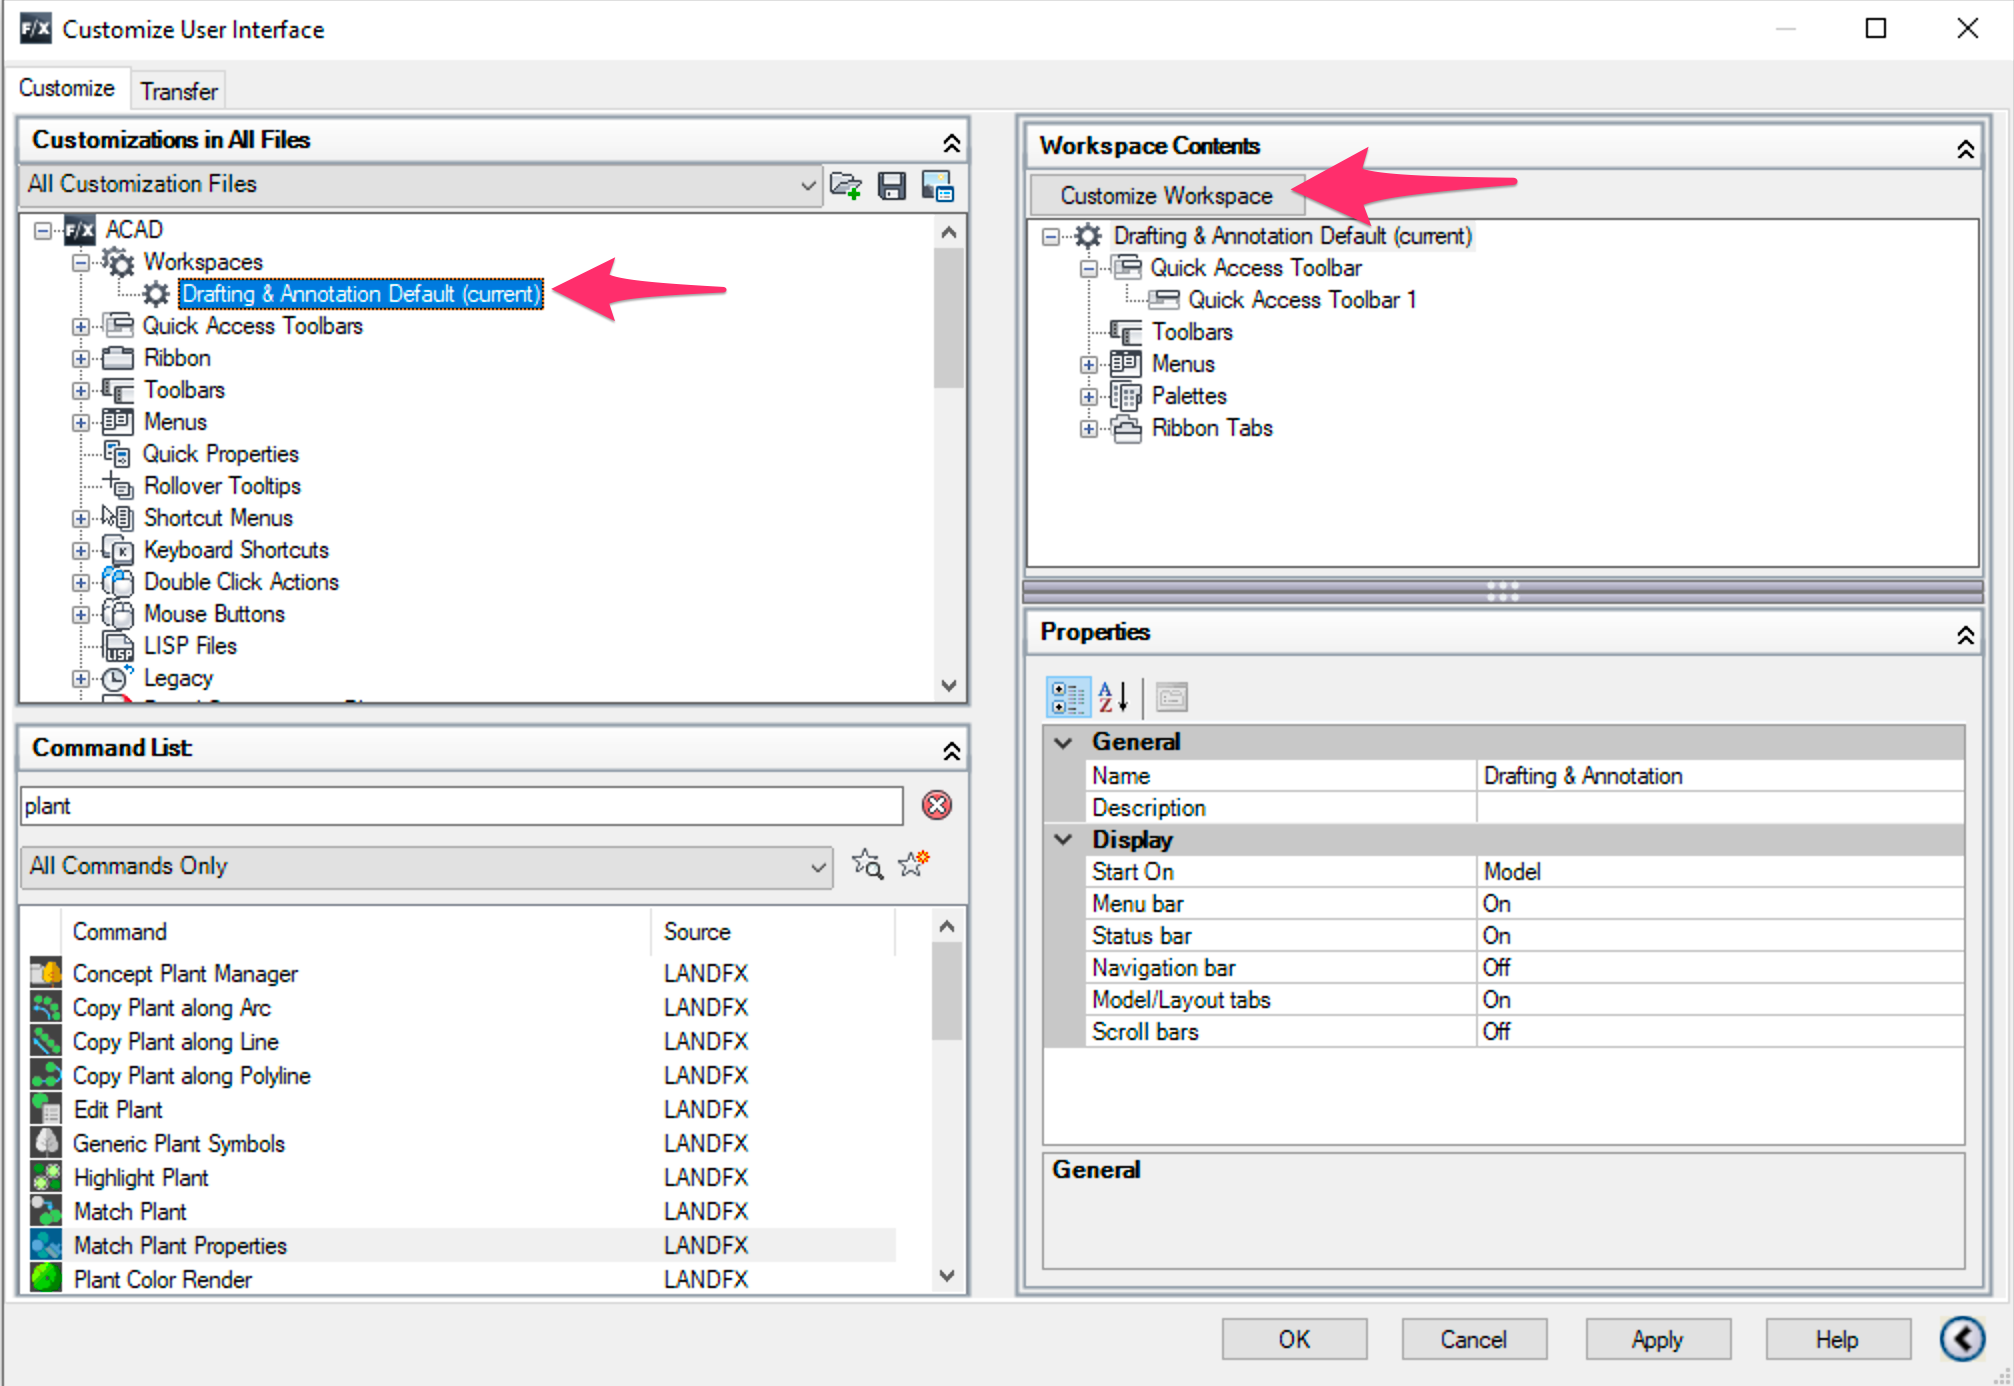
5A. At the top, select your workspace (commonly named Drafting & Annotation Default).
Click Customize workspace. Click twice until you see a checkmark on your custom ribbon. Click Done once the ribbon has been added.
5B. Click OK in the CUI window. Your custom ribbon tab should appear, along with your custom panel.
5C. You can now drag your custom panel anywhere on the screen.
This example shows long names, just to show what you can do. Your creation can use any style of button size – small or large, name hidden or not. You can make it look how you like!
Want to save this custom ribbon for future CAD installs? Copy the custom.cuix file from your C:\Users\(your username)\AppData\Roaming\Autodesk\AutoCAD (YEAR)\R23.1\enu\Support folder to another folder for safe keeping. With the new ACAD install, copy that custom.cuix file back to that folder for the new CAD version, overwriting the one there. Restart CAD, then repeat the steps to add the custom ribbon tab to your workspace.


