Paper Space Layout Sheet's Lower Left Corner is Not at 0,0
Issue
The lower left corner of one of your Paper Space layout sheets is not at 0,0.
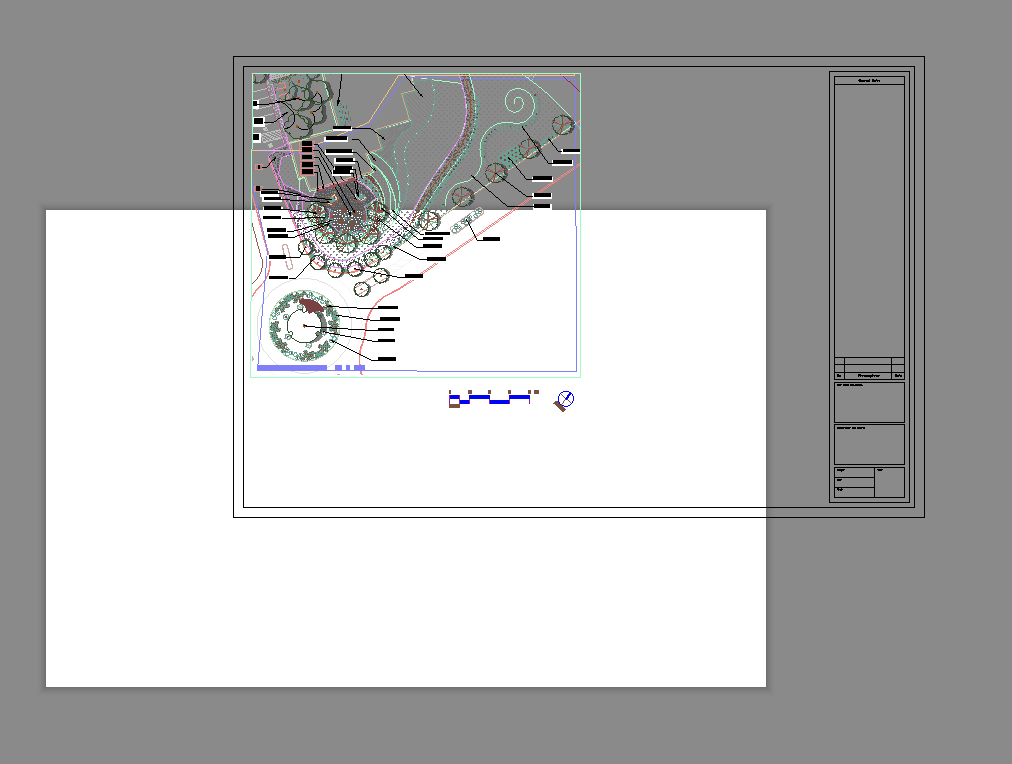
You may have modified something from the Plot Manager and noticed that the layout has shifted away from 0,0 and the contents are now off the page.
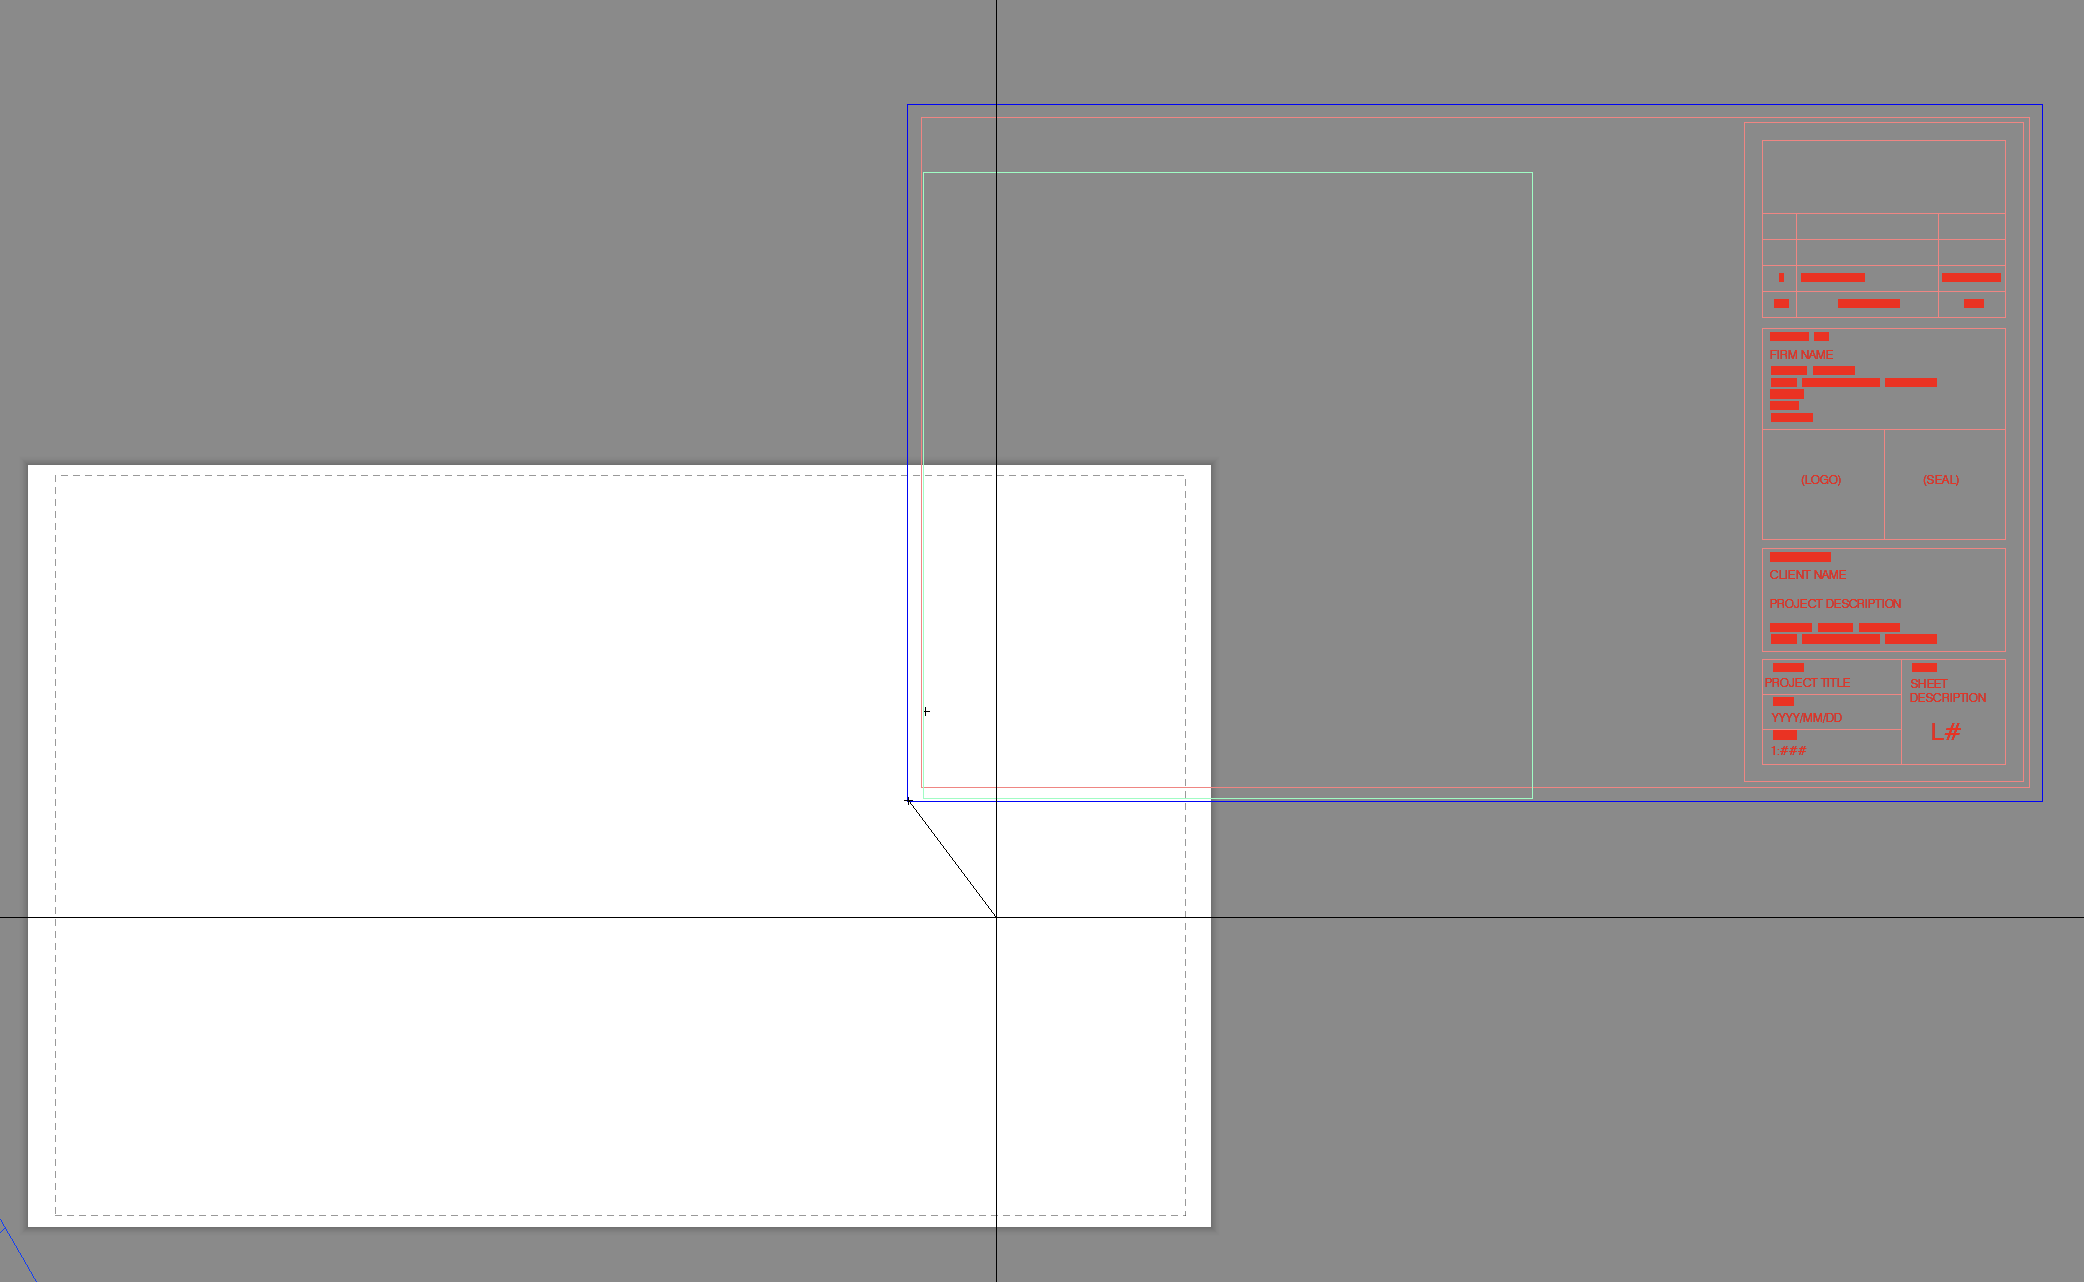
You might also have tried to insert an object at 0,0 within Paper Space and it didn't land in the lower left corner of the sheet but in a more arbitrary or obscure place within the layout.
Your layout may have moved locations, making it appear as if nothing is on the page anymore in CAD. You may have had your paper and title block all set, but then Plot Preview made the white shift somewhere else.
Cause
A problem with that layout sheet's setup is causing the issue. You may have your paper size set incorrectly, for example.
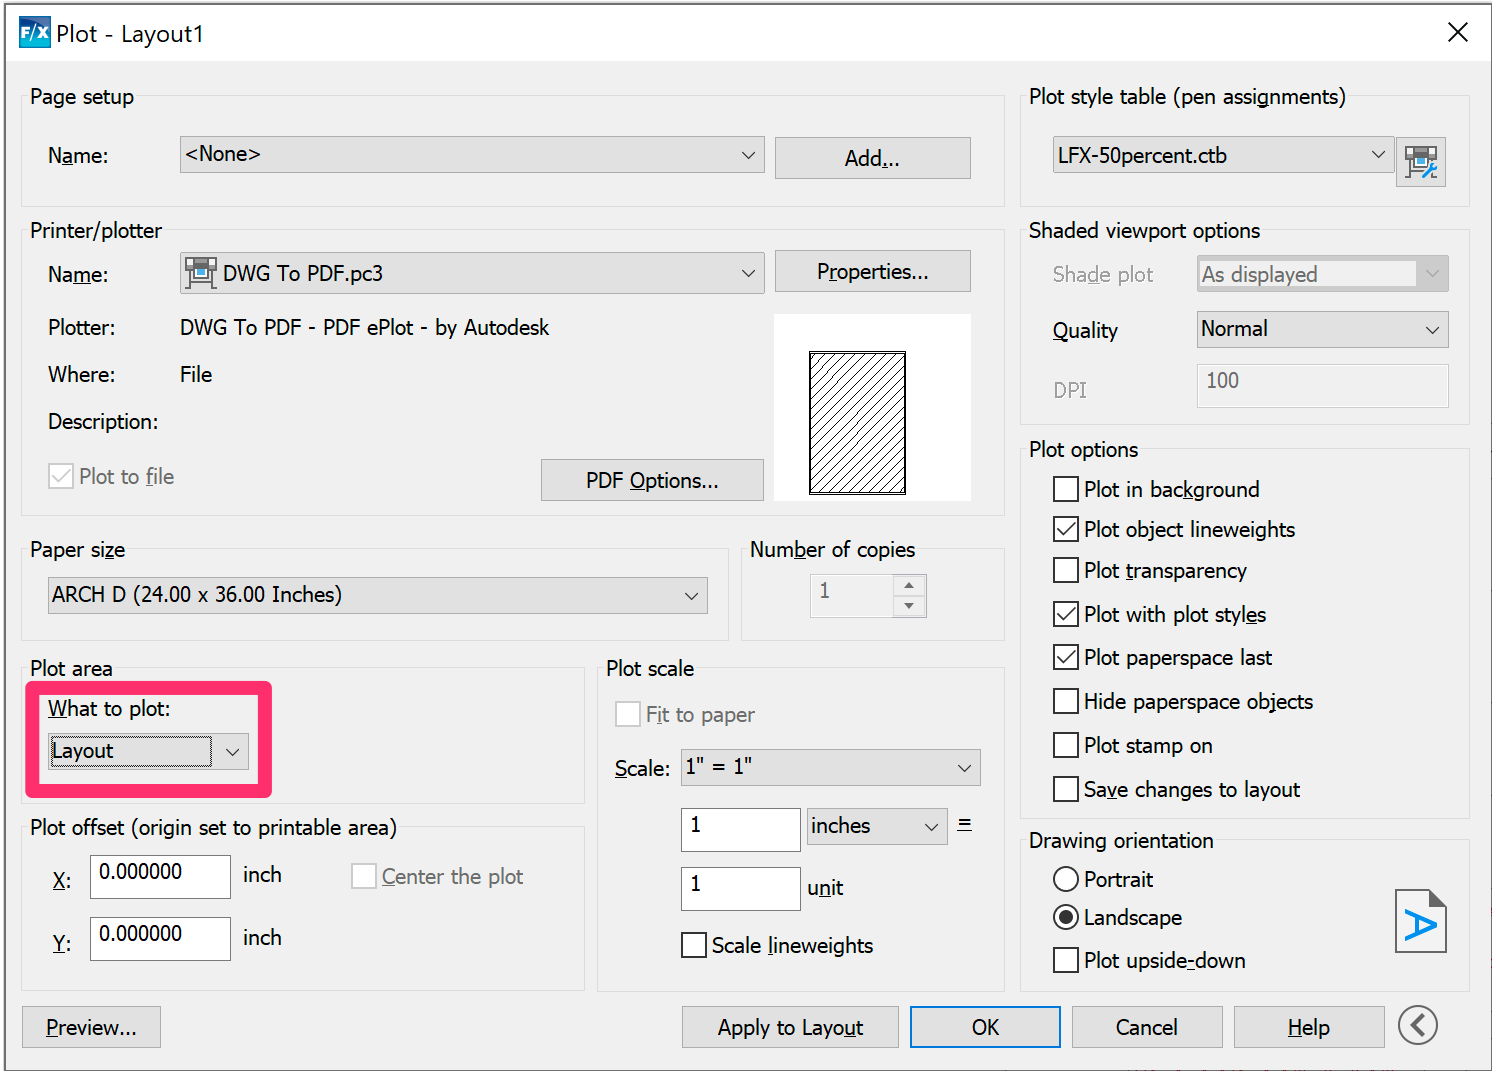
We've also seen this issue occur when a user selects an option besides Layout from the What to plot menu (Display, Extents, Window) and apply changes to that layout.
You may have made this change within the Page Setup Manager, or you may have run the PLOT command and canceled out before plotting.
After you close the Plot Manager in this scenario, Paper Space will move into a different position, making it appear shifted.

Solution
Step 1: Check whether your paper size is set incorrectly.
You may simply have the wrong paper size selected for the content you have on the layout(s) where you're having the issue.
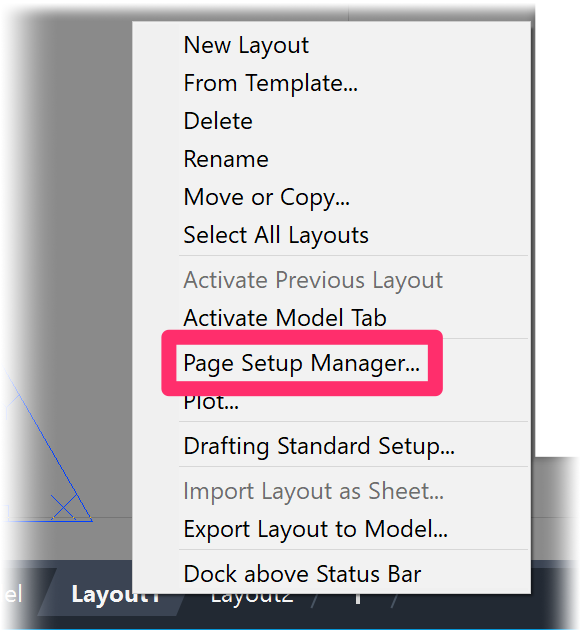
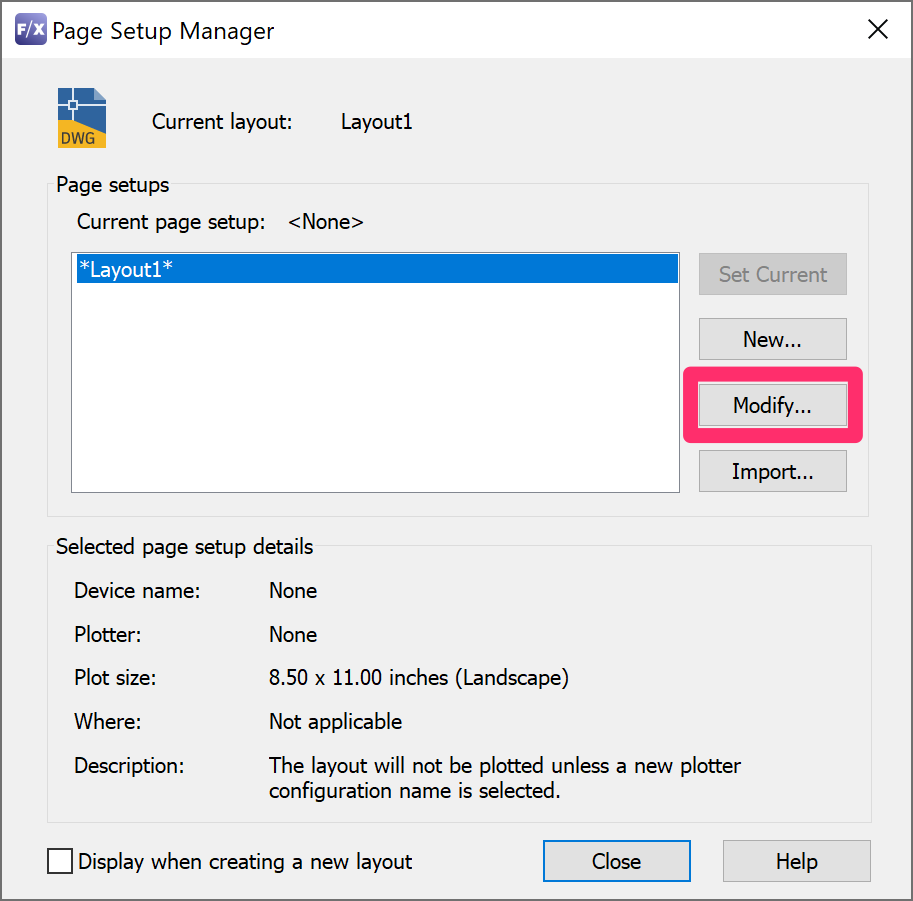
1A. Right-click the layout tab where you're having the issue, and select Page Setup Manager from the menu that opens.
1B. The Page Setup Manager will open. Click Modify.
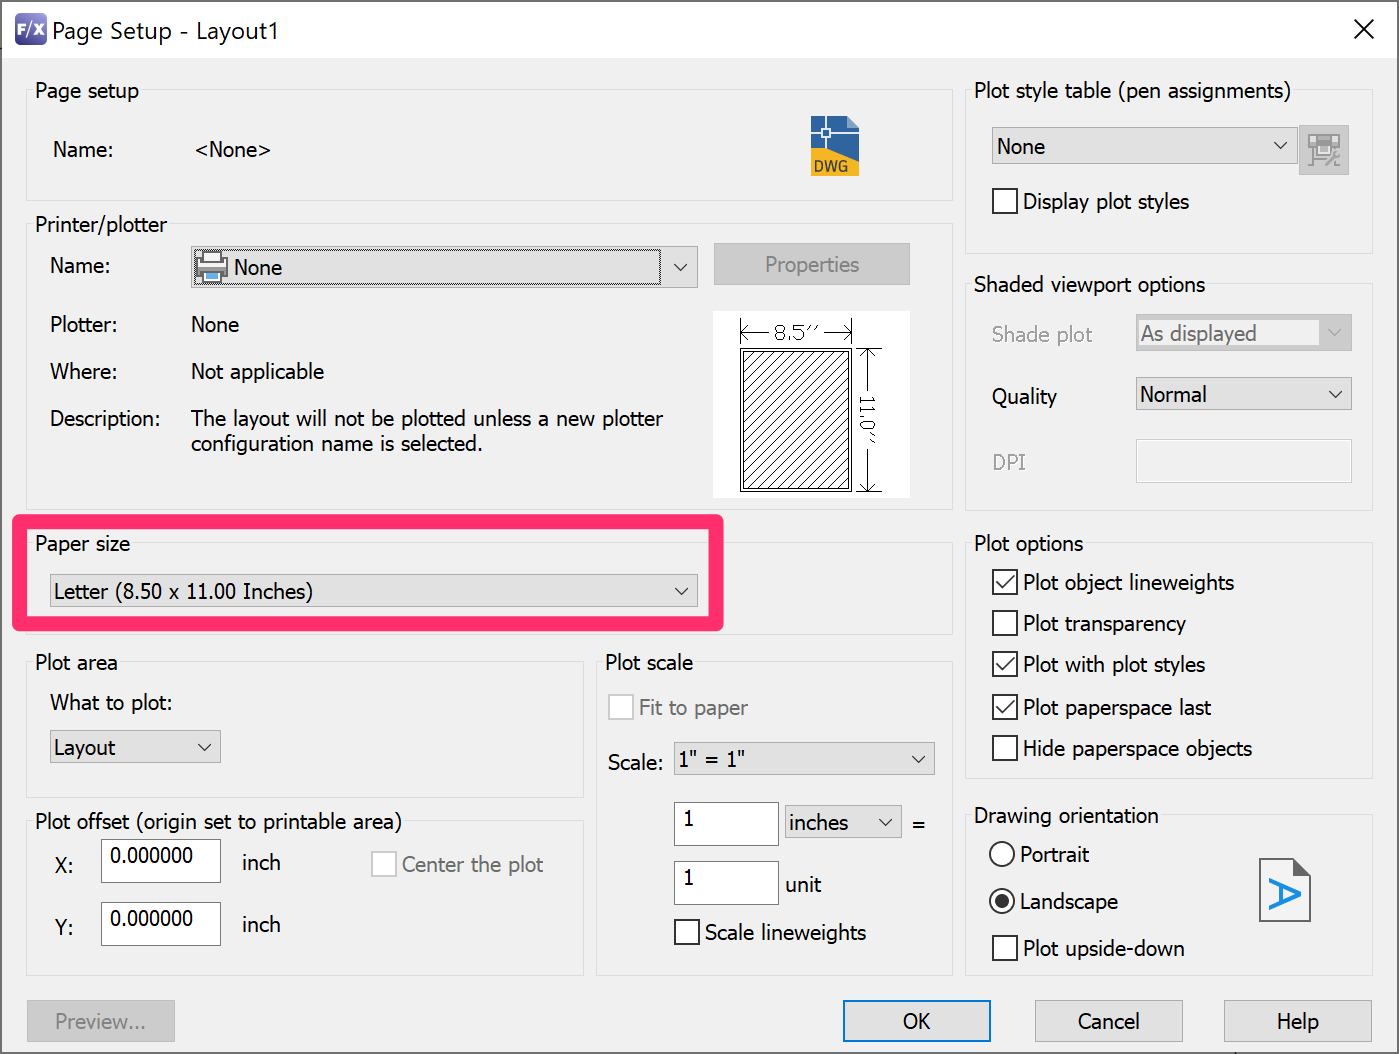
1C. Verify that you have the correct paper size selected in the Paper Size menu.
If not, select the correct size and click OK to save the change.
Repeat Step 1 for each layout sheet where you're having the issue.
Is your paper size set correctly? Or are you still having the issue with your layout sheet(s) after selecting the correct paper size? Move on to the next step.
Step 2 (if necessary): Confirm the layouts are in the incorrect position, and correct the issue.
If your paper size isn't the issue, it's time to troubleshoot the position of the layouts.
2A. Before making any further adjustments, you can confirm the layouts are indeed in the wrong position by typing LIMITS in the Command line and pressing Enter. Check this variable per page to make sure they're reading at the appropriate position.
This position might not be 0,0, so confirm where your printing limits start.

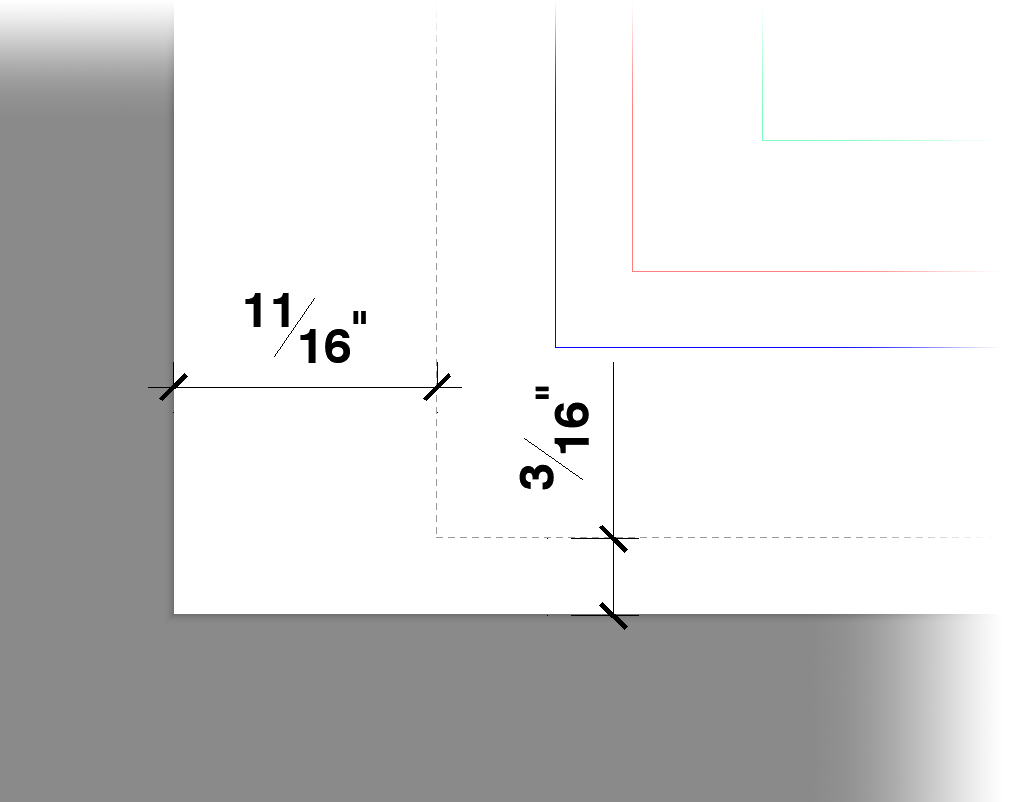
If you see a high value representing a location other than the lower corner of the paper (as in the example shown to the right), continue on to the next step.

Open the What to plot menu and select Window.
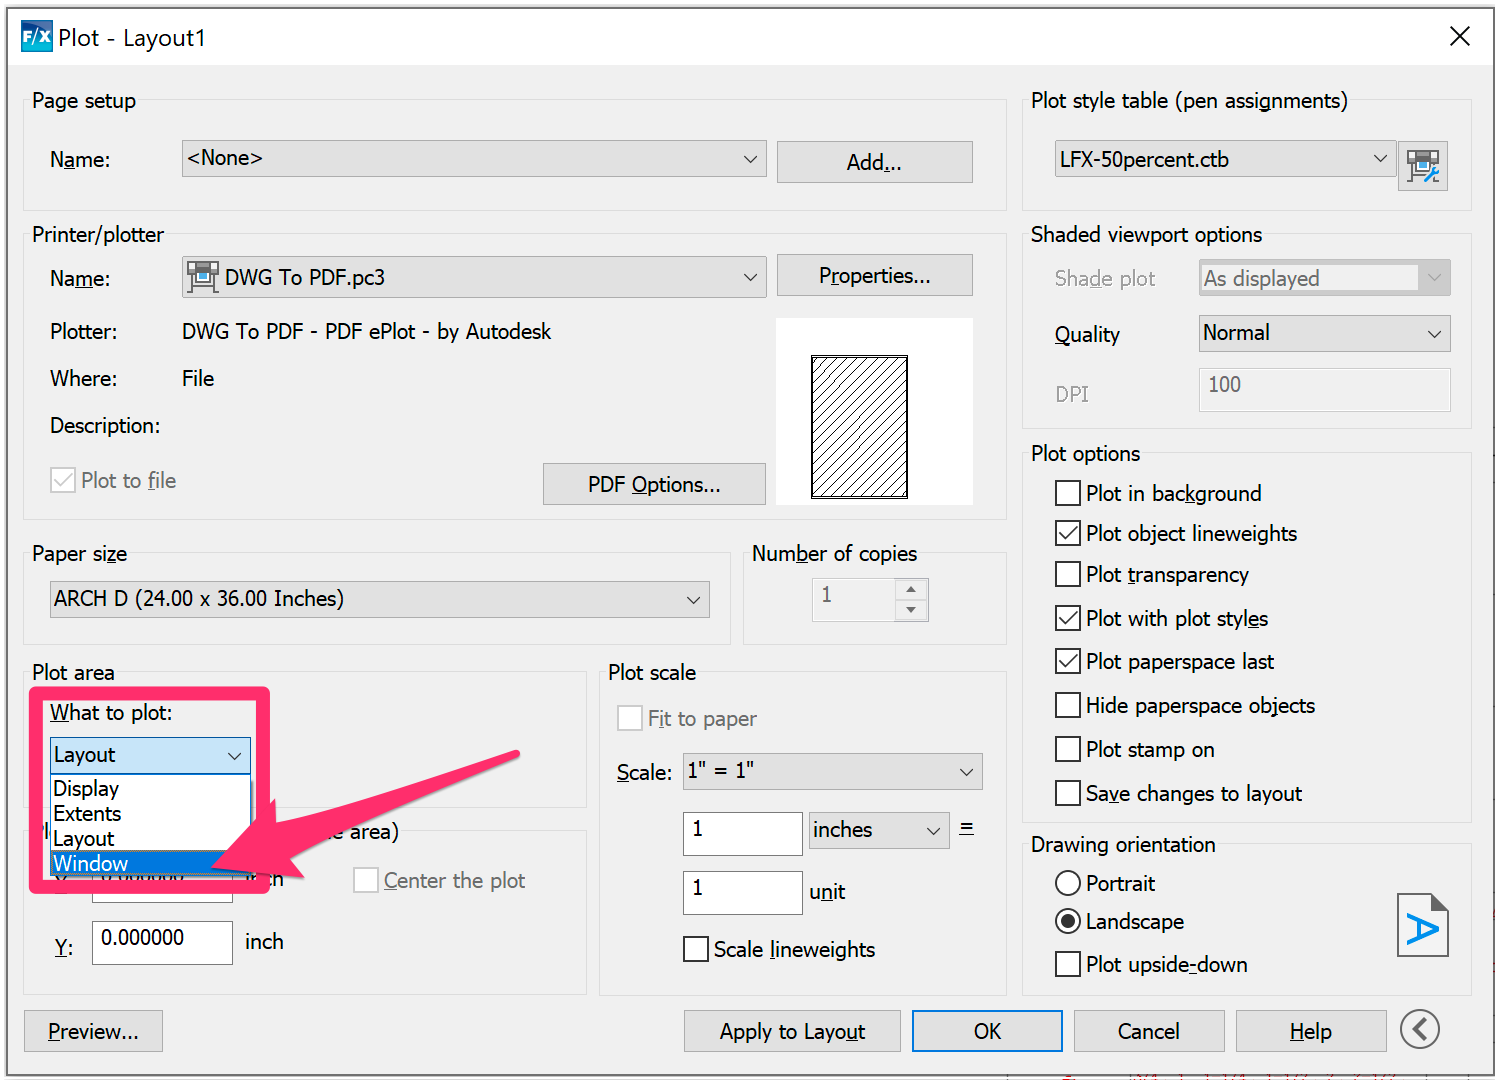
2C. When prompted to select the first corner, type 0,0 and press Enter.
Drag the window up and to the right as far as possible, then left-click with your mouse.
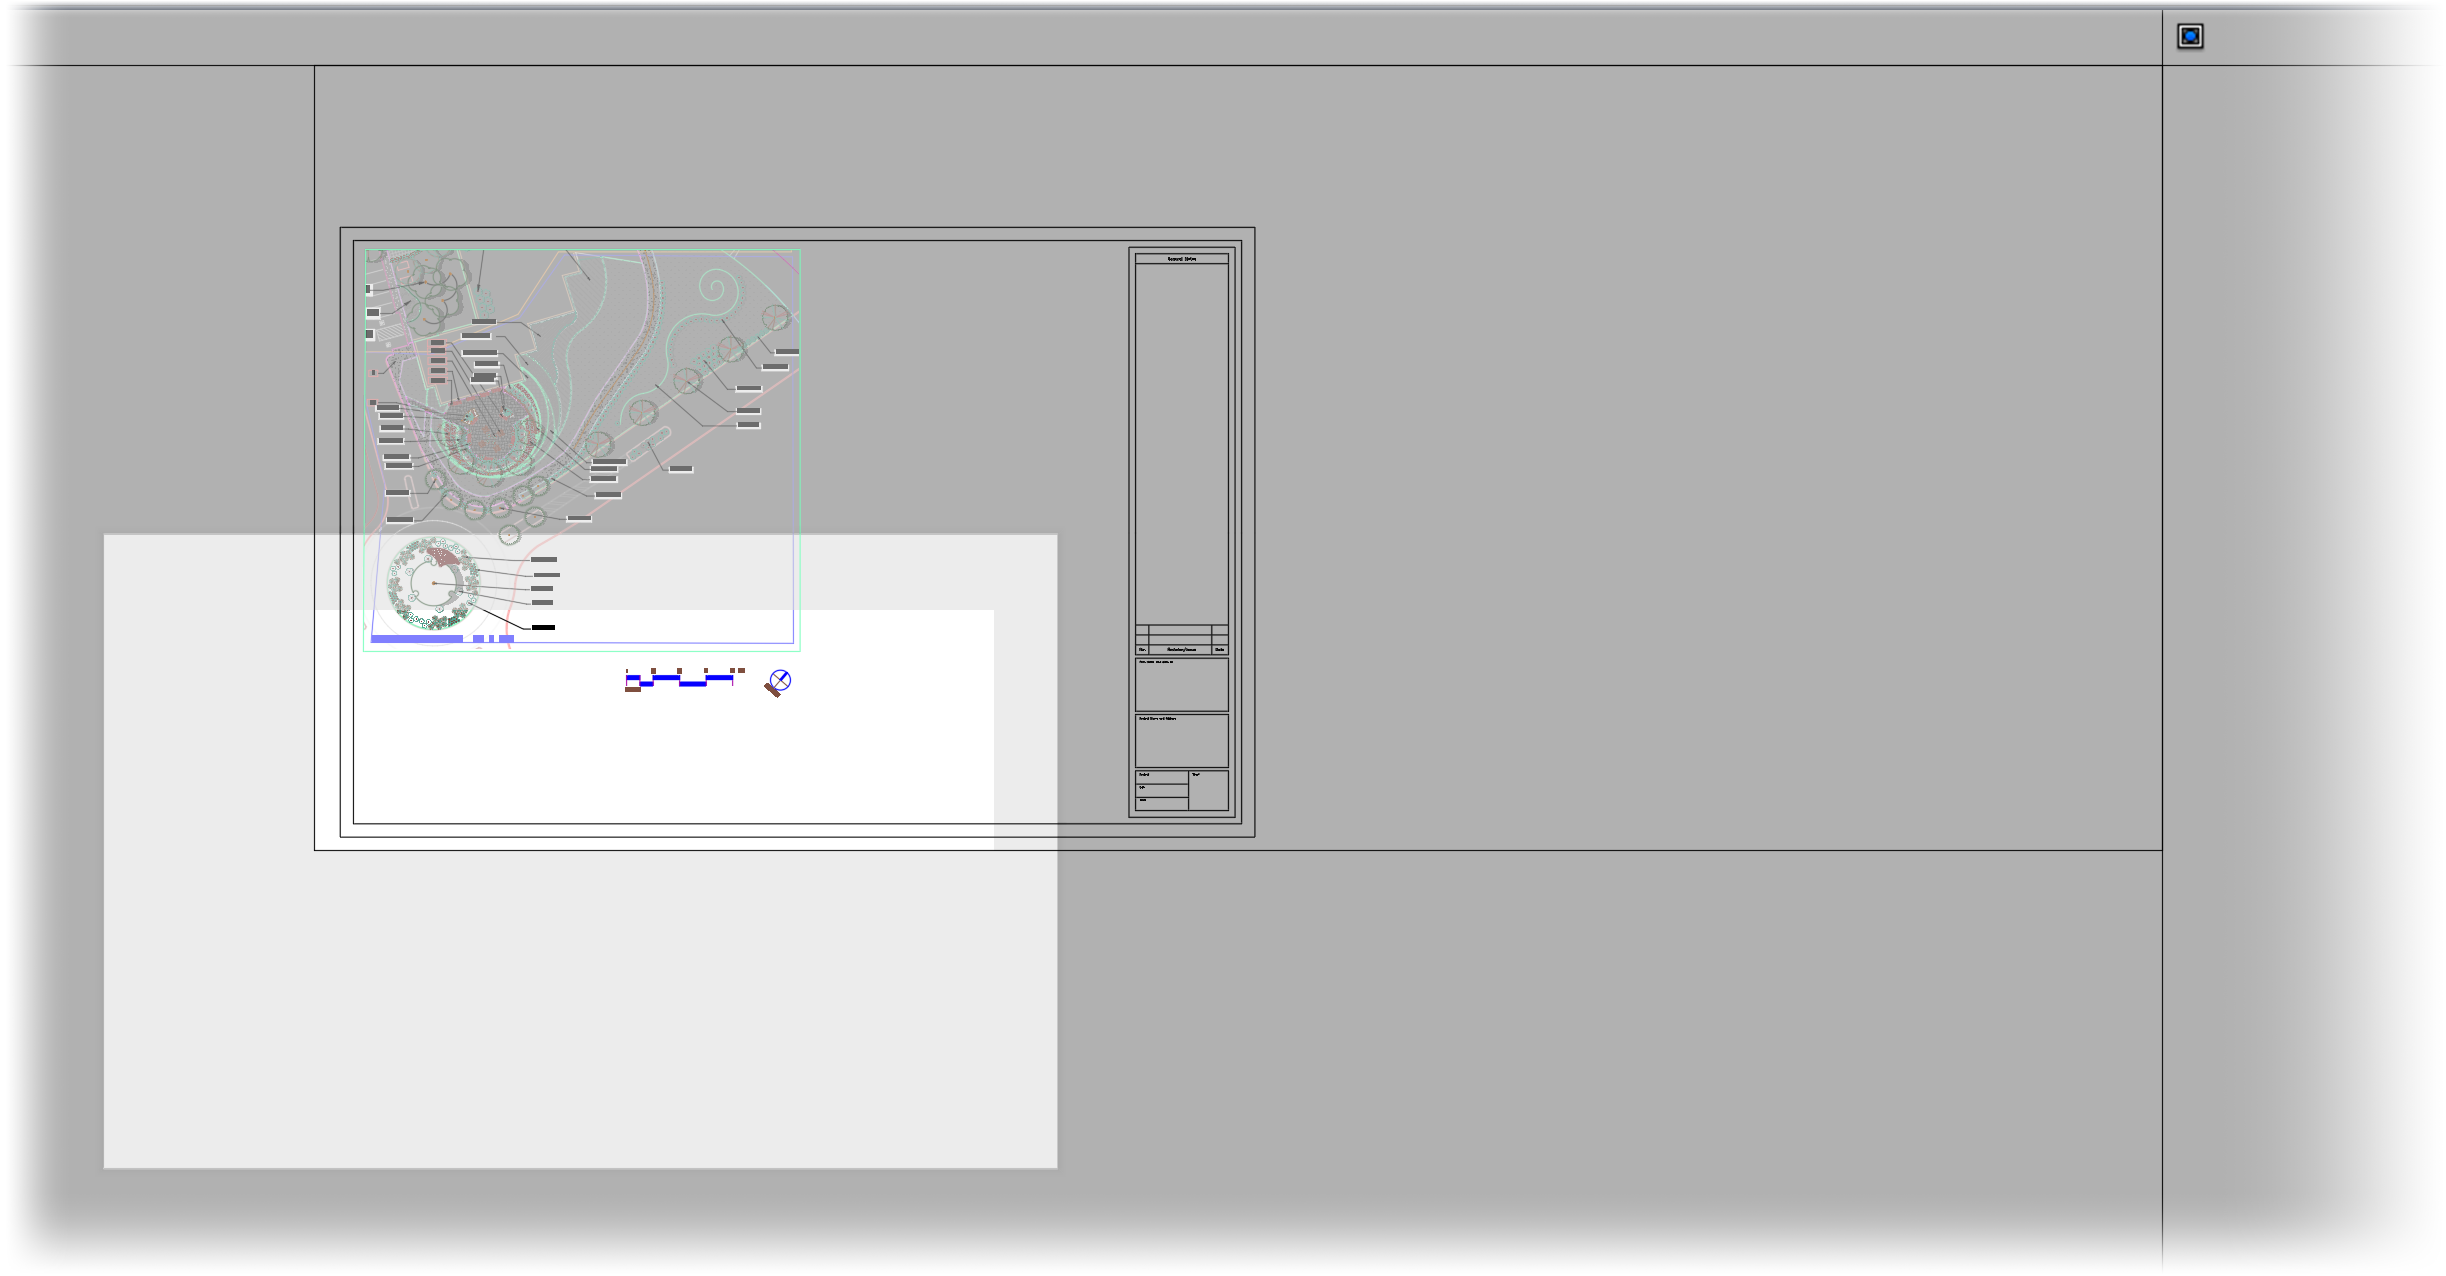

2D. Open the What to plot menu again, and change it back to Layout.
Click Apply to Layout and close the Plot Manager.
You should see the paper shift back into place and, the position should look correct.
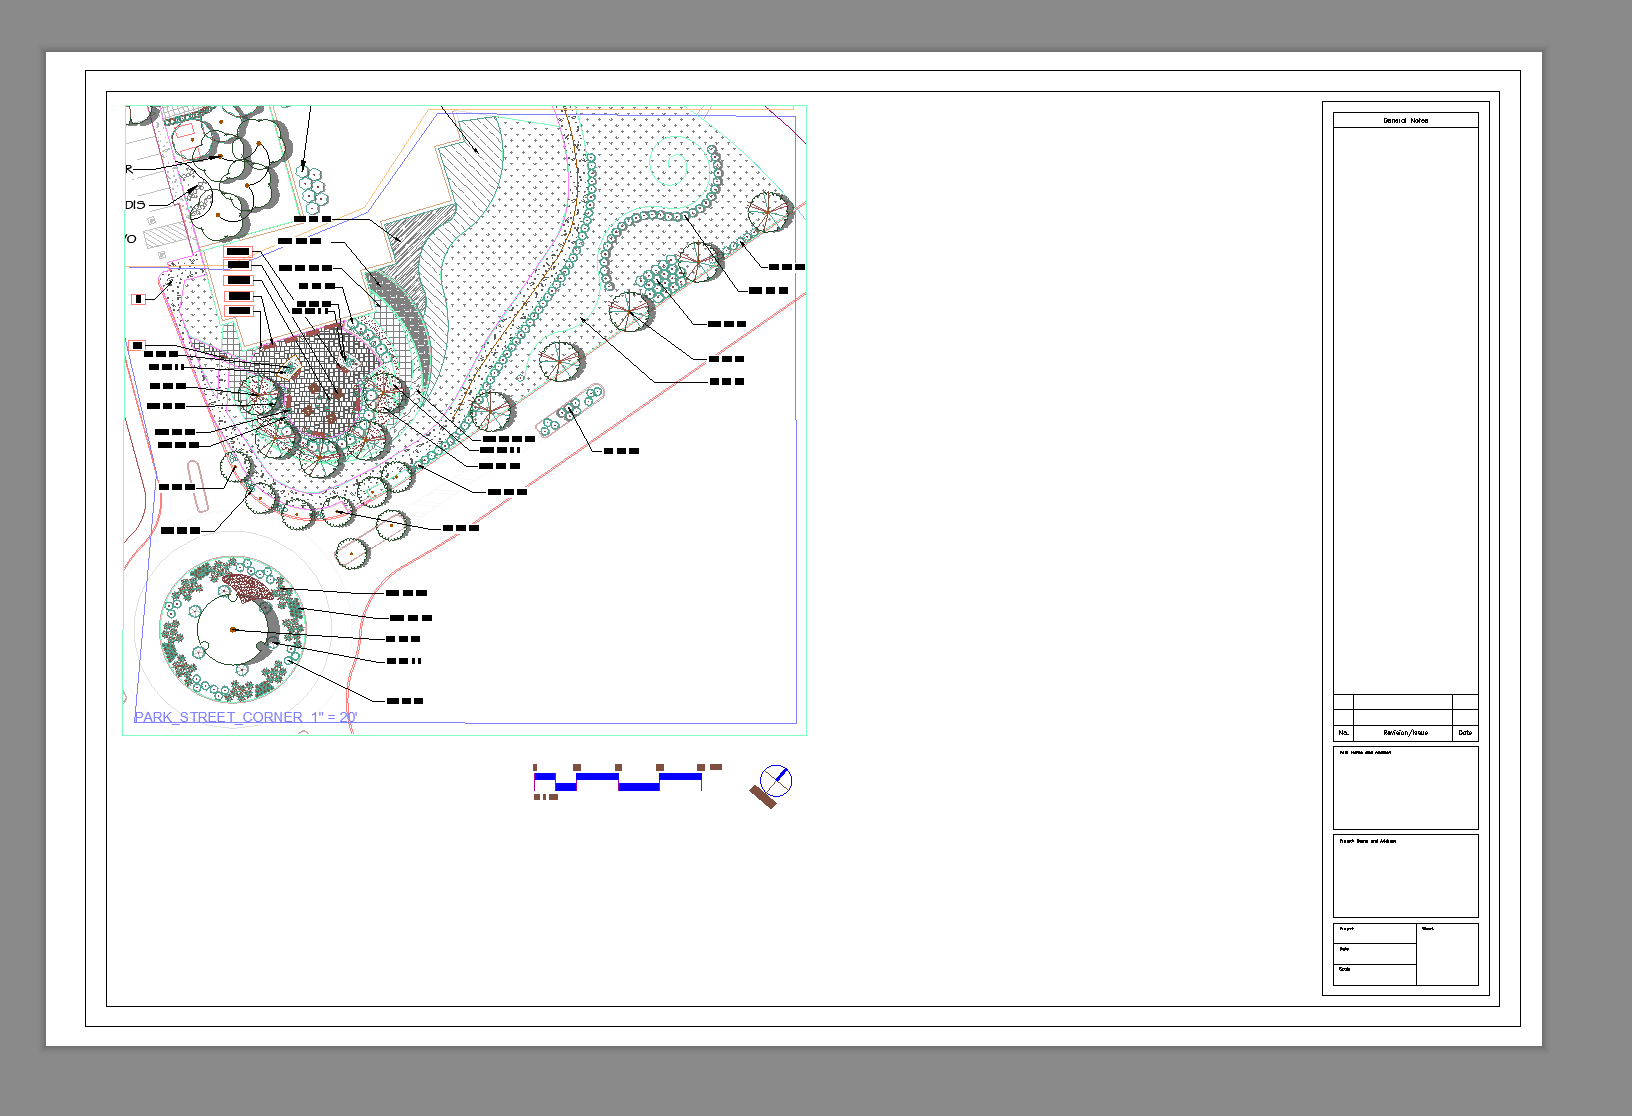
If you've completed these steps and the title block or contents within Paper Space are still not aligned with the paper, you may need to re-confirm that the 0,0 point is indeed at the corner of the paper, which would mean someone may have manually moved the content over to the previously wrong Paper Space location.
To do so, select all objects in your drawing (CTRL + A on a Windows keyboard, or Command + A on a Mac keyboard), then move the contents to 0,0.


