Check and Take Ownership of Files or Folders in Windows
Issue
You need to take ownership of a file or folder on your computer or network.
Solution
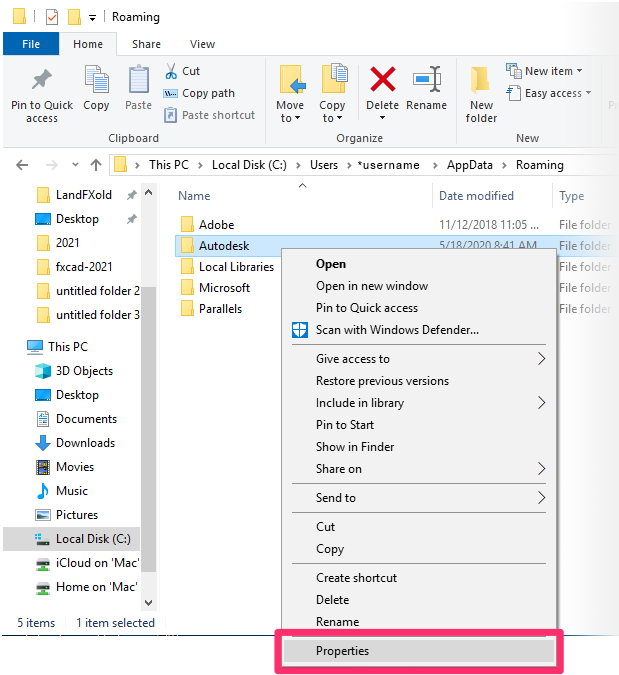
1. Locate the file or folder whose permissions you want to change.
Right-click that file or folder, and select Properties from the menu that opens.


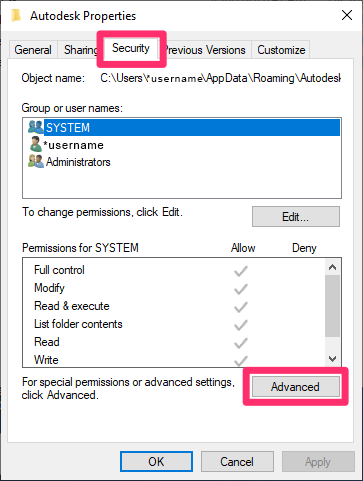
2. Select the Security tab in the Properties dialog box.
Then click Advanced.
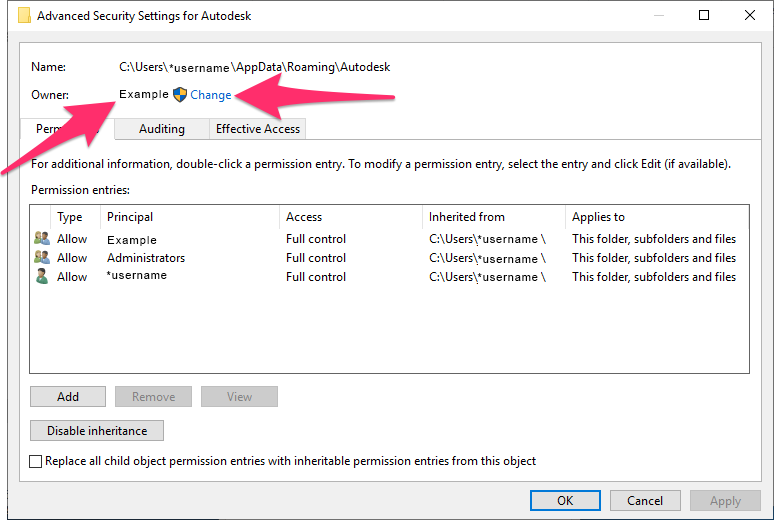
3. In the Advanced Security Settings dialog box, the name of the owner of the selected file or folder will appear to the right of the heading Owner.
To take ownership of the file or folder, click Change.


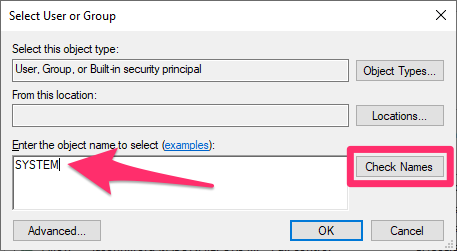
4. Type the name of the entity you'd like to become the owner of the file or folder.
In our example, we're setting the owner of the selected folder as SYSTEM.
Click Check Names to verify that you've entered a valid owner. Click OK to close the dialog box.
After taking ownership of the folder, you'll see an option to Replace owner on subcontainers and objects.
If you need to take ownership of all subfolders and files within this folder, check this box. Not sure? Ask your network administrator.
Click OK to close the dialog box.


