Customizing Text Styles: Font, Size, or Other Settings Coming in Incorrectly
Issue
You attempted to customize one or more of our Text Styles, but your changes didn't take effect or simply didn't work. When you place text in a drawing, it comes in as the wrong font, point size, etc.
Solution
We've compiled a set of troubleshooting steps specific to customizing our Text Styles. If your text styles are coming in incorrectly – especially if they're coming in as the font or point size that previously applied to them before you attempted to make your changes – go through the following steps to ensure your changes are applied successfully to text placed in your drawings.
Step 1: Confirm your text settings
1A. Open a completely blank drawing.
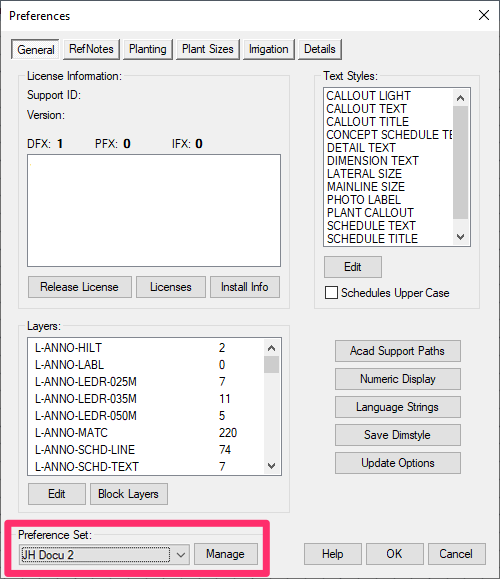
1B. Open any of our Preferences screens, and confirm that the correct Preference Set is active.
Select the correct Preference Set from the menu pictured to the right.
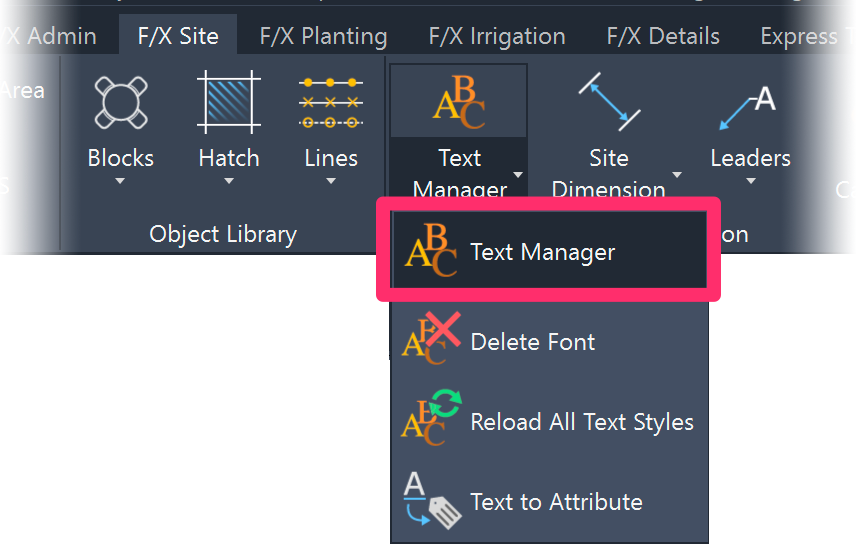
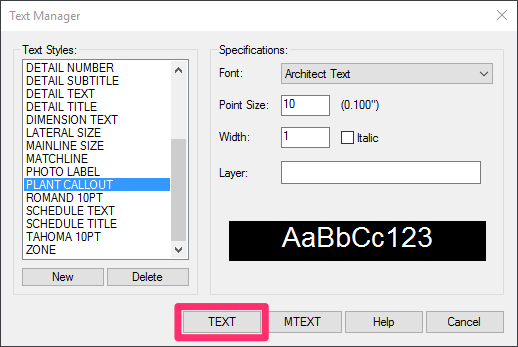
1D. In the Text Manager, select the Text Style (or one of the Text Styles) that is causing the issue (example: PLANT CALLOUT).
Click Text to place text in the blank drawing with the selected Text Style.
To place the text, follow our steps to place a single line of text.
1E. Check whether the text you placed is in the correct font, point size, etc. If the text is appearing correctly, move on to Step 2: Check Your Text Style Within Blocks You've Placed.
Text Style is Still Coming in Incorrectly in the Blank Drawing
If the text you placed in the previously clean drawing is not in the correct font, point size, and/or other settings you've configured, complete the following steps:
- You saw the following error message: Error Creating Text Style: Font File "..." Not Installed. Solution >
- You saw another error message. If so, please note the exact text and search for this error in our documentation. Odds are, we have an article addressing this particular error.
- Your font setting may have the wrong filename, making it a corrupt font. Please see our corrupt fonts documentation section.
Step 2: Check your Text Style within blocks you've placed
2A. Place a block that you know will include the Text Style that is coming in incorrectly. For example, if the Text Style Plant Callout is coming in incorrectly, place a plant label.
Don't know which types of blocks will include the Text Style in question? See our list of Text Styles and their applications.
2B. If the Text Style is not coming in with the correct settings in that block, click the block to highlight it.
Open the Properties panel by typing Prop in the Command line and pressing Enter.

Note the block's filename (Name) in the Misc section of the Properties panel.
Our example shows a plant label file with the name LAFX-PLANT-LABEL13-R.
2C. Locate and delete the block's source file within the folder LandFX\Blocks.
In our example, the file LAFX-PLANT-LABEL13-R.dwg, a plant label source block, is located in the folder LandFX\Blocks\Graphics\Callouts.
Because we're dealing with a plant label in our example, we'll need to delete both the right (R) and left (L) versions of that label file.

2D. Delete all instances of the block from the current drawing. For example, delete all plant labels if you're checking the Plant Callout Text Style).
5. Type PRG in the Command line, and press Enter.
2E. Place the same block again. The latest version of the block will download automatically, and the text within the block should now appear correctly.
If the text within the block does not appear correctly, move on to Step 3: Check the Text Style in the Properties Panel.
Step 3: Check the Text Style in the Properties panel
If the text is still not coming in correctly in the block, the text style may be set incorrectly in the source block file itself. Time to check.
3A. Open the source block file from within the folder LandFX\Blocks. (In our example, we'll open the file LAFX-PLANT-LABEL13-R.
3B. Click one of the text attributes within the block to select it. (For example, click an instance of text within a plant label source block.)
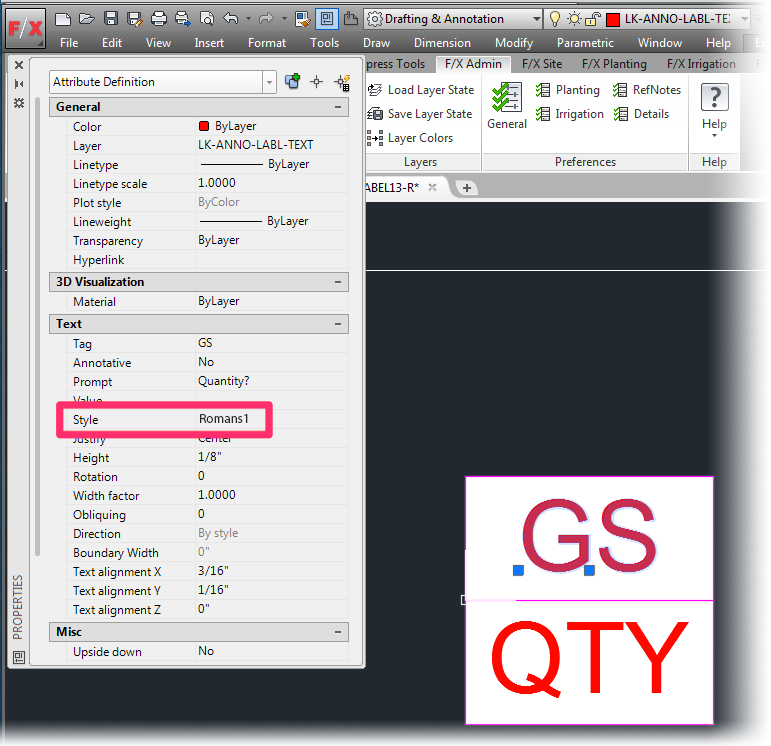
3C. In the Properties panel, verify that the Style entry under Text is set to the correct Text Style for that type of block. (For example, text attributes in plant label source blocks should be set to PLANT CALLOUT.)
In the image below, the Style is set incorrectly to Romans1 rather than PLANT CALLOUT.
If the attribute is not set to the correct Text Style, let us know via a technical support ticket. We'll set it to the correct style.
Outdated Text Styles
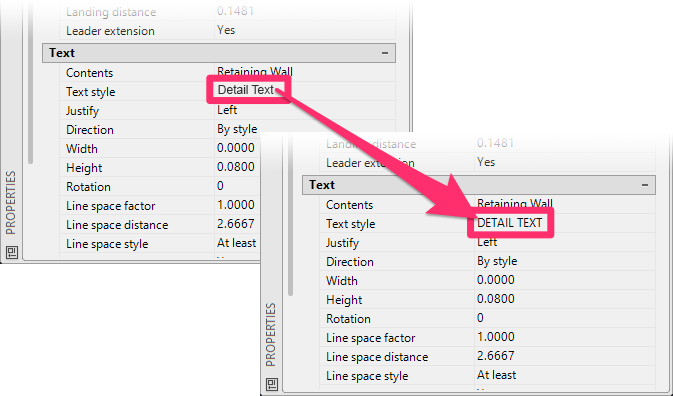
Does the style displayed in the Properties panel have the same name as one of the default Land F/X Text Styles, but only the first letter of each word in the title is capitalized?
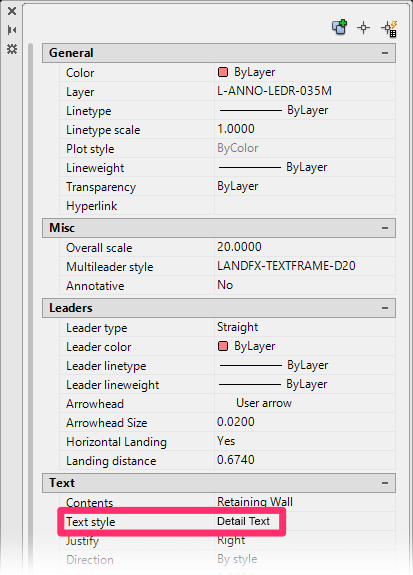
For example, the Text Style might display as Detail Text. We have a default Text Style named DETAIL TEXT – that is, with its name in all caps.
If you see one of the Land F/X Text Styles here, but it's not in all caps, you're likely working with an outdated Text Style. If so, you'll need to follow our steps below to correct an outdated Text Style.
4. If the attribute is set to the incorrect Text Style, you can change it manually.
With the text attribute still selected, type Style in the Command line and press Enter to open the AutoCAD Text Style dialog box. Under Styles, rename that Text Style to the correct one. In our example, we'll change Romans1 to PLANT CALLOUT.
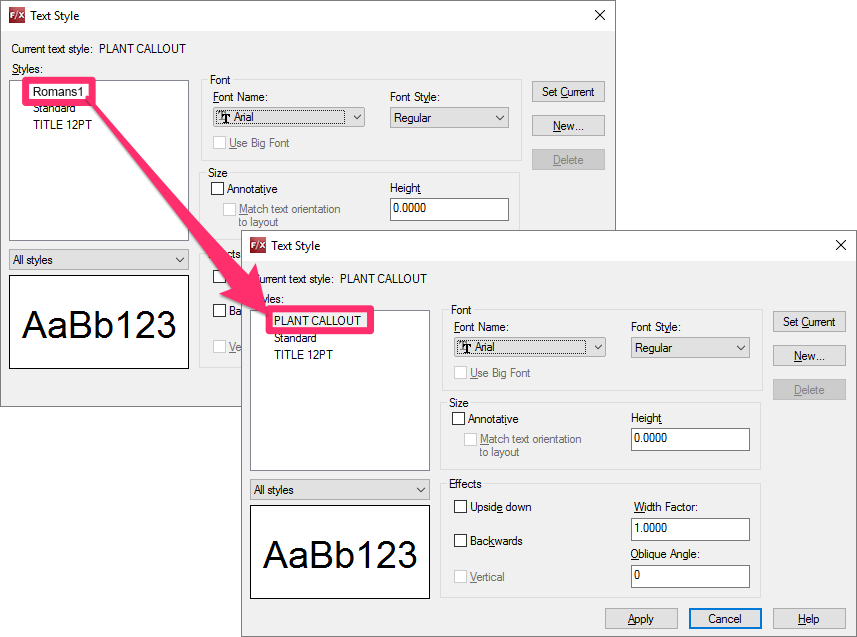
The Text Style should now come in with the correct settings when you place text in that style.
Step 4: Correct Outdated Land F/X Text Styles
As mentioned above, the names of all Land F/X default Text Styles are in all caps (such as DETAIL TEXT, PLANT CALLOUT, etc.).
If you encounter a style with the same name as one of our default styles, but its name is not in all caps (as pictured to the right), you are likely working with an outdated Text Style. If so, the text is coming in incorrectly because it's following the conventions of this outdated style.

First, you'll need to change the name of the outdated style.
Select the problematic text in your drawing. Then open the AutoCAD Text Style Manager:

Manage ribbon Text Style button
type Style in the Command line
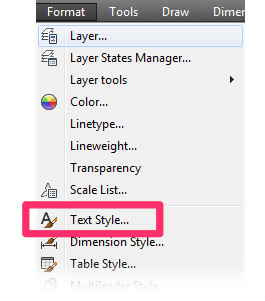
Format menu, Text Style option
Locate the outdated Land F/X Text Style, and give it a name that won't be confused with another style, such as xxxx.
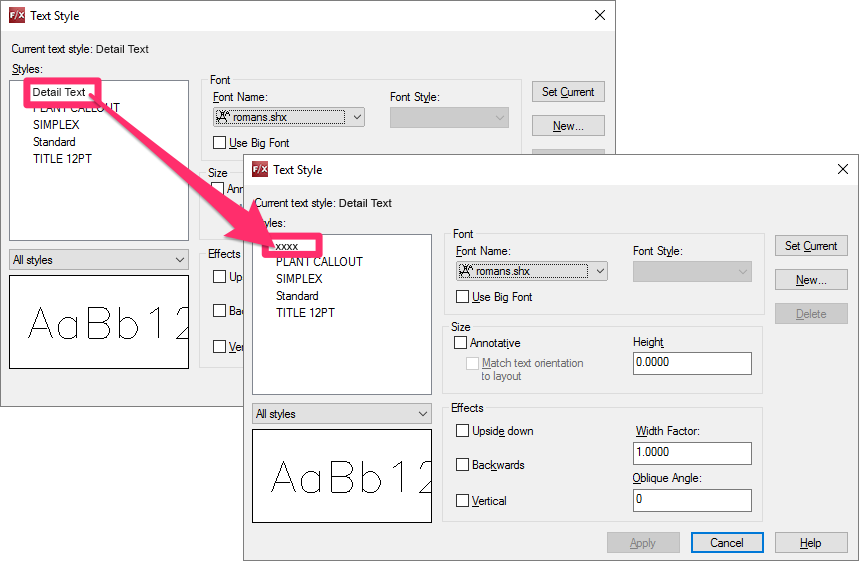
Because the Text Style has already been defined in your drawing, you may also need to change the names of some styles from the AutoCAD Manager that defines that text.
For example, if the problematic text is in a callout that would normally have a Multileader, open the Multileader Style Manager.
You may need to open another text manager such as the AutoCAD Text Style Manager or the Dimension Style Manager, depending on how you've placed the text.
In this example, we'll assume that we're correcting the text in a callout. We'll open the Multileaders Style Manager by clicking the Multileader style button on the Manage ribbon.

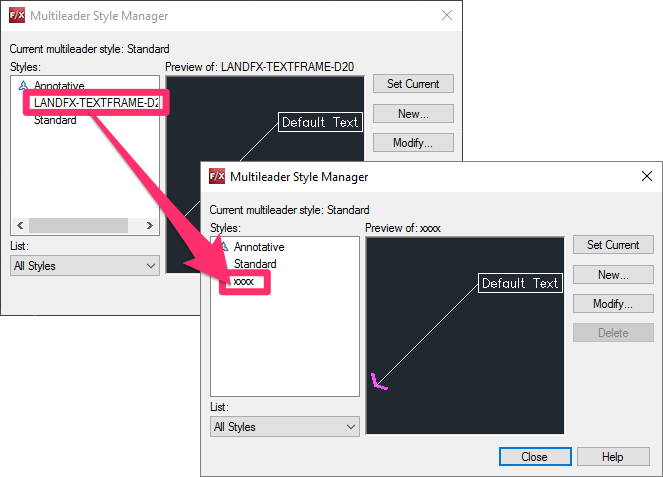
In the manager you opened, locate any text styles that begin with LANDFX, and give them new names (such as xxxx, yyyy, etc.)
This step will allow the text to come in correctly when you place it using the same method.
Remember: You may need to complete this step in another manager, such as the Dimension Style Manager, depending on which type of text you're correcting.
Close the manager, and place the text using the method you'd normally use to place that type of text. For example, if you're correcting the text in a Multileader callout, place another Multileader callout.
If the correct Text Style for that type of text hasn't yet been defined in your drawing, you'll be prompted to select a Text Style (such as DETAIL TEXT).
Click OK when finished, and place the text.

The text should now come in correctly in the Text Style you've selected.
For any other instances of the outdated Text Style in your drawing, select that text, open the Properties panel, and change the style to the correct one (such as DETAIL TEXT).
