Reference Notes Schedule Showing Incorrect Quantities
Issue
Your Reference Notes (RefNotes) Schedule appears to be showing an inaccurate quantity (or area or volume) of objects you've placed using Reference Notes.
Are you using AutoCAD 2018? AutoCAD 2018 has a known bug that blocks data from Xrefs. If you’re trying to count RefNotes from an Xref and have 2018 installed, you can address the issue by installing the latest updates from the Autodesk Desktop App.
Cause
A RefNotes Schedule could be showing the wrong quantities because:
- The units are set incorrectly in the drawing.
- The schedule is not including Reference Notes in an external reference (Xref) – or the schedule is including RefNotes from an Xref but you don't want it to.
- The boundary of a hatch representing an Area/Volume RefNote may have self-intersecting points.
- You may have RefNotes items placed within Work Areas in your drawing, the callouts for those items are placed inside other Work Areas. As a result, the RefNote item(s) may be listed in the wrong Work Area with a blank quantity.
- (If a Length RefNote is not calculating or appearing in the schedule): The Length RefNote's layer name may be interfering with the calculations. Solution >
- If you're using AutoCAD 2018: You may be experiencing the Xref bug mentioned above. Try installing the latest updates from the Autodesk Desktop App.
Solution
Before completing the following steps, check whether only one (or more) of your Length RefNotes is not being calculated. If the problem is isolated to your Length Reference Notes, go through the Length Reference Notes step below first. If that step doesn't solve the issue, proceed with the following steps.
Step 1: Verify That Your Units are Set Correctly
A RefNotes schedule could be showing incorrect amounts if your drawing units have been changed. For example, if the drawing was originally in Decimal Feet but the units have been changed to Architectural Inches for some reason, the schedule will show the wrong quantities.
Compare the quantity in the schedule with what it should be – or what you think it should be.
For example, if an Area quantity appears to be 144 times too large, that should be an immediate red flag that your Units have been mistakenly changed from Inches to Feet. Let's say an area calculated by the schedule is supposed to measure 120.0 by 120.0 inches, at 100 square feet. If the units have been changed to Feet, the area will now measure now 120.0 x 120.0 feet – 14,400 square feet.
In a Metric plan, you might see all Areas as 0 square meters. In fact, they will actually be pided by 1 million, because of the units having changed from Meters to Millimeters.
In either case, if all Area quantities are off by such an exact multiplier, the issue should be obvious immediately: your units have been changed. Open the Land F/X Viewport Scale dialog box and set your units correctly.
Run another Reference Notes schedule. If your drawing does not include Xrefs, or if your quantities seem to be accurate, you're done. If not, move on to Step 2.
Step 2: Include (or Don't Include) RefNotes from Xrefs
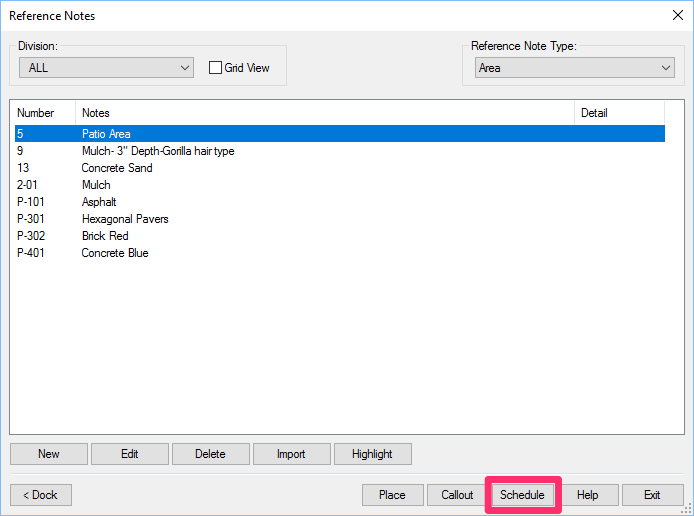
If your schedule is failing to include RefNotes from an Xref, or if it is including them but you don't want it to, you can correct the issue in the Reference Notes dialog box.
In the Reference Notes dialog box, click Schedule to open the Reference Note Schedule dialog box.
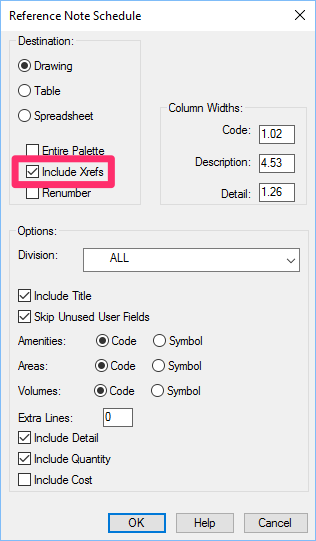
In the Reference Note Schedule dialog box, uncheck or check the Include Xrefs option, depending on whether you want to include the Xrefs.
Click OK to place your schedule.
Your schedule should now include the correct quantities.
Note that you can also use our Highlight Plant tool to help diagnose the issue.
For more information on Reference Notes Schedules, see our Reference Notes Schedule documentation.
Solution 3: Check for Self-Intersecting Points in Any RefNote Hatches
If any of your Area/Volume RefNotes have self-intersecting boundaries, the software won't be able to make accurate calculations of the area or volume within those boundaries.
Step 3A: Locate Any Self-Intersecting Hatch Boundaries
Scan your drawing for RefNote hatches with self-intersecting boundaries.
You can easily test for these self intersections by whether a hatch has an Area entry in the AutoCAD Properties. Open the Properties panel by typing Prop in the Command line and pressing Enter. Click the hatch within a RefNote hatch you want to test.
Make sure you click the hatch – not the polyline boundary.
Now look in the Geometry section of the Properties panel.
A polyline boundary that is drawn correctly and does not include self-intersecting points will have a valuey for Area in the Geometry section.

By contrast, a polyline boundary that includes self-intersecting points will not have an Area value in the Geometry section.
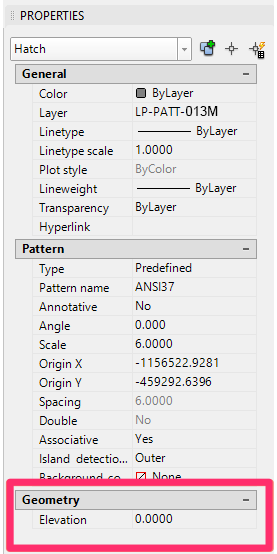
If any of your RefNote hatch boundaries are missing an entry for Area as shown above, you'll need to correct the self-intersecting polylines. We recommend trying to move the polylines to eliminate the self-intersections before resorting to redrawing them completely.
The intersections can sometimes be the result of one of our Line Graphics tools, such as Random Pointy Line.
Step 3B: Attempt to Move the Bounding Polyline so It No Longer Intersects Itself
You may be able to simply move portions of the problematic polyline boundary of a problematic area so it no longer includes self-intersecting lines – especially if you've created your planting boundaries using Random Pointy Line or another of our Line Graphics tools.
In this example, we've zoomed in to a portion of a polyline boundary that includes a self intersection.
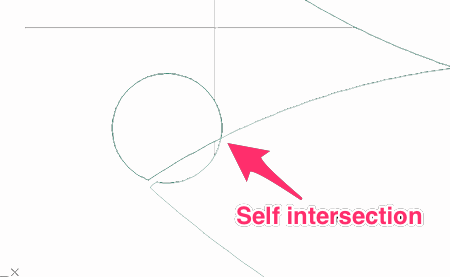
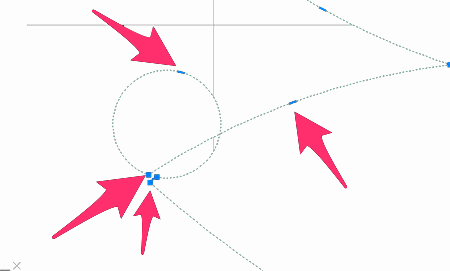
To correct the self intersection, you'll first click the polyline boundary to select it.
Once you've selected the boundary, you'll see several blue points along the polyline. Click any of these points to select it.
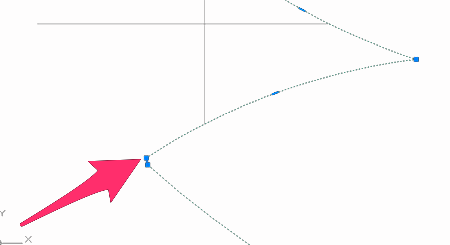
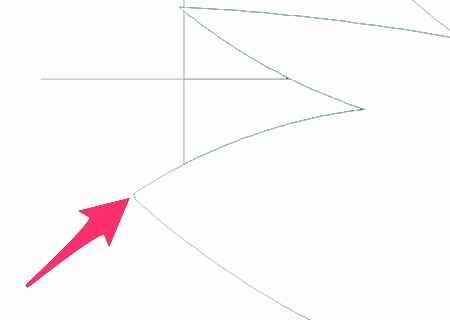
You can then move the polyline by moving the selected point, as in the example to the right.
Step 3C: (If Necessary) Redraw Any Self-Intersecting Polyline Boundaries
If you're unable to correct the issue by moving portions of the polyline boundaries, you'll need to redraw the boundaries that are causing the issue.
The image below shows an example of a RefNote hatch that includes an internal boundary with self intersections.

Move or copy the polyline boundary off to the side.

Delete the hatch from within the polyline boundary. In our example, we can see that the boundary contains several interior objects and includes self-intersecting polylines.

Here's a closer look at the self-intersecting polylines in our RefNote hatch boundary.

To fix the issue, we'll need to redraw our polyline boundary to eliminate the self intersections. In our example, the corrected line may look something like this:

You may be able to re-create your existing polyline boundary more quickly by exploding it, deleting the problematic sections, and using the PEdit command to re-join the segments into a contiguous polyline boundary.
If you've redrawn your polyline boundary off to the side, place it in its original location around your hatch.
Step 3D: Re-Place Your RefNote Hatch
Place RefNote back into the boundary you've re-created.
If you've redrawn an interior boundary to exclude individual objects from the hatch, you use the Multiple option. When placing the hatch, you'll see a prompt to type M for Multiple. Type M, then select the interior boundary or boundaries you'd like to exclude from the hatch.
Step 4: Verify That Your RefNote Callouts Are Not in the Incorrect Work Areas
If you've placed any RefNote items within Work Areas in Model Space, make sure that the callouts for those items are within the same Work Area(s). If you see any RefNote callouts that are outside the Work Area that contains the item they're calling out, move the callouts inside that Work Area.
Step 3E: Check for a Potential Issue With Length Reference Notes
Is one of your Length RefNotes not calculating correctly or appearing in the Reference Notes schedule at all? That RefNote's layer name may be hindering the calculations.
Open the Reference Notes Manager:
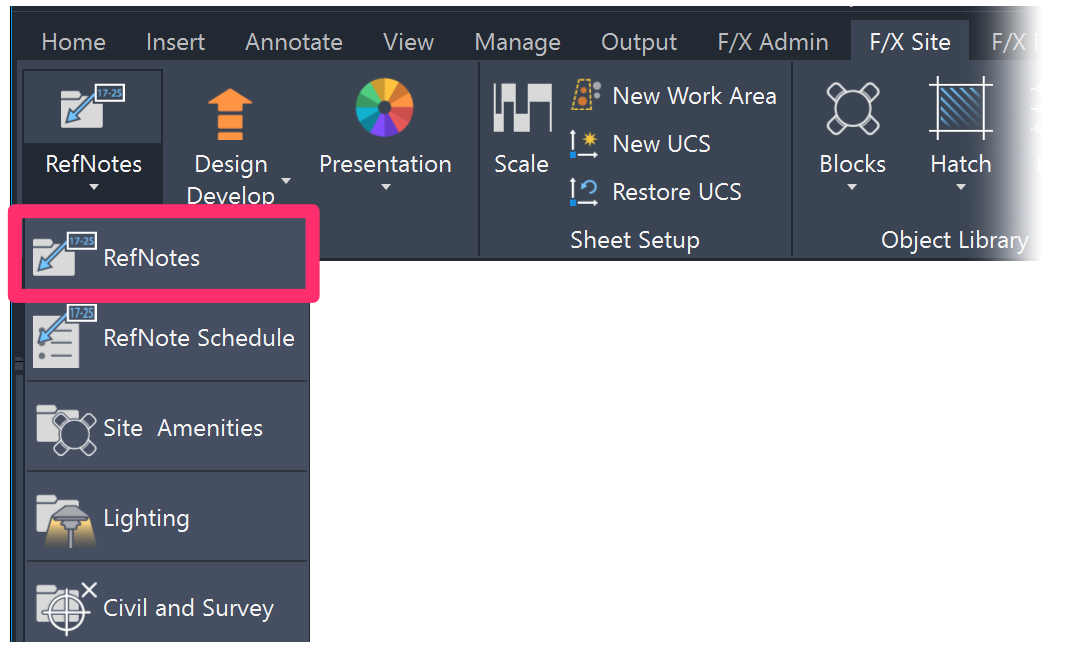
F/X Site ribbon, RefNotes button

F/X Details ribbon, RefNotes button

Graphics RefNotes toolbar
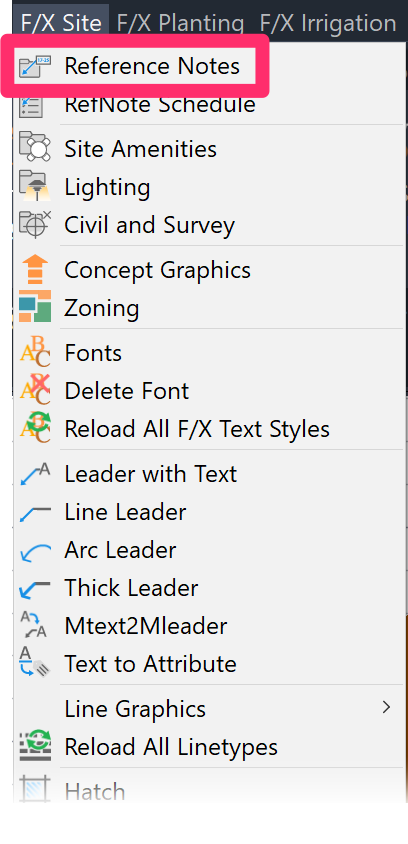
F/X Site pull-down menu

Graphics toolbar
or type RefNotes in the Command line
In the Reference Notes Manager, select the Length option from the Reference Note Type menu. You'll now see a list showing only the Length RefNotes you've added to your project.
Now it's time to start investigating. If you know which Length RefNote isn't being calculated, select it and click Edit. In this example, we'll assume that our Retaining Wall RefNote is not being calculated in the schedule.
You'll be looking for abnormalities in the note's layer name, so you may need to complete the following steps with several Length Reference Notes until you determine that one, all, or some of them have a problematic layer name.
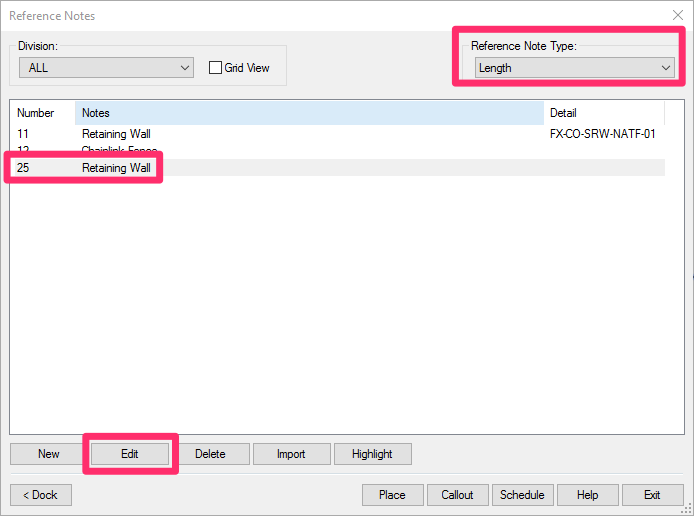
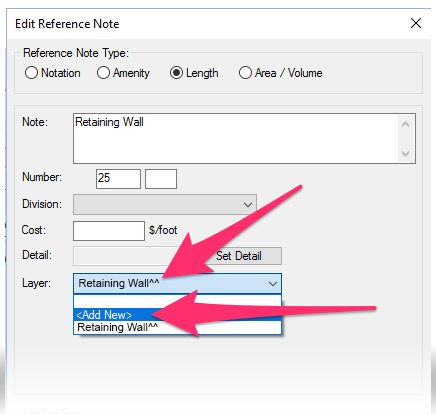
The Edit Reference Note dialog box will open.
Check the selected Length RefNote's layer name, looking for the following problematic items:
- Spaces
- Any special characters besides letters, numbers, or hyphens ("dashes")
If you see a space or a special character in the layer name, you've found the problem. In our example, the problematic RefNote's layer name includes a space, along with two special characters (^^).
To give the layer a new name, select the <Add New> option from the Layer menu.
In the New Layer Name dialog box, type a new name for the layer using CAD conventions – only letters, numbers, or hyphens (sometimes referred to as "dashes"). In our example, we'll give our wall layer the name L-WALL.
Click OK to save the change.
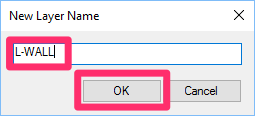

The new layer name should now be selected in the Layer menu in the Edit Reference Note dialog box.
Click OK to save the change.
You may need to repeat these steps for the other Length RefNotes you've added to your project. If you see spaces or special characters in the layer name of any of your other Length RefNotes, you'll also need to rename those layer names according to CAD conventions.
Once you've corrected all problematic layer names for your Length RefNotes, run a new RefNotes Schedule. Your Length RefNotes should now calculate correctly.
Is the schedule still coming in with incorrect calculations? Proceed through the solution steps above starting with Step 3A.


