Self-Intersecting Groundcover or Shrub Area Boundaries
Issue
You suspect that one of your groundcover or Shrub Area hatches has a self-interecting boundary – that is, the hatch border is possibly corring itself.
Self-intersecting hatch boundaries can cause a number of problems in your drawing. For example, these intersections interfere with the system's ability to calculate the quantity or square area of plants properly. Your plant schedule may be calculating plant quantities incorrectly. More information
Solution
Step 1: Locate any self-intersecting planting area boundaries
Scan your drawing for Shrub Areas or groundcovers with self-intersecting boundaries. We recommend starting with any areas where you've used our Exclude Shrubs tool, which can sometimes cause this issue.
You can easily test for these self intersections by whether a planting area has an Area entry in the AutoCAD Properties. Open the Properties panel by typing Prop in the Command line and pressing Enter. Click the hatch within a planting area you want to test.
Make sure you click the hatch – not the polyline boundary.
Now look in the Geometry section of the Properties panel.
A polyline boundary that is drawn correctly and does not include self-intersecting points will have an entry for Area in the Geometry section.

By contrast, a polyline boundary that includes self-intersecting points will not have an Area entry in the Geometry section.
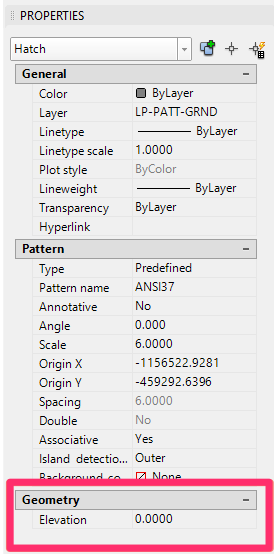
If any of your planting area boundaries are missing an entry for Area as shown above, you'll need to correct the self-intersecting polylines. We recommend trying to move the polylines to eliminate the self-intersections before resorting to redrawing them completely.
The intersections may be in the outer boundary of the planting area, or in an interior boundary that you've either drawn yourself or accidentally created by using the Exclude Shrubs tool. They might also be the result of one of our Line Graphics tools, such as Random Pointy Line.
Step 2: Attempt to move the bounding polyline so it no longer intersects itself
You may be able to simply move portions of the problematic polyline boundary of a problematic area so it no longer includes self-intersecting lines – especially if you've created your planting boundaries using Random Pointy Line or another of our Line Graphics tools.
In this example, we've zoomed in to a portion of a polyline boundary that includes a self intersection.
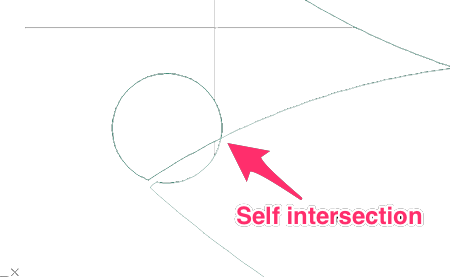
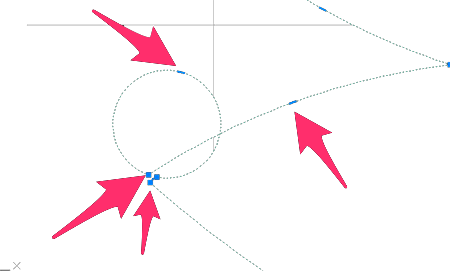
To correct the self intersection, you'll first click the polyline boundary to select it.
Once you've selected the boundary, you'll see several blue points along the polyline. Click any of these points to select it.
You can then move the polyline by moving the selected point, as in the example to the right.
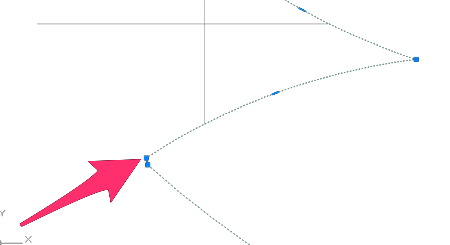
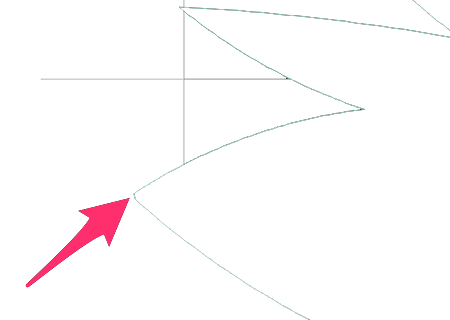
In our example, the polyline boundary is no longer self intersecting, and the planting area should now register correctly in the Plant Schedule.
Step 3: (If necessary) Redraw any self-intersecting polyline boundaries
If you're unable to correct the issue by moving portions of the polyline boundaries, you'll need to redraw the boundaries that are causing the issue.
The image below shows an example of a planting area that includes an internal boundary with self intersections.

Move or copy the polyline boundary off to the side, then delete the hatch from within the polyline boundary. In our example, we can see that the boundary contains several interior objects and self-intersecting polylines.

Here's a closer look at the self-intersecting polylines in our planting area boundary. This type of intersection is a common result of using the Exclude Shrubs tool in areas where the individual shrubs are placed extremely close together.

To fix the issue, we'll need to redraw our polyline boundary to eliminate the self intersections. In our example, the corrected line may look something like this:

You may be able to re-create your existing polyline boundary more quickly by exploding it, deleting the problematic sections, and using the PEdit command to re-join the segments into a contiguous polyline boundary.
If you've redrawn your polyline boundary off to the side, place it in its original location around your shrubs.
Step 4: Re-place the groundcover or Shrub Area hatch
Use the Plant Manager to place the planting hatch back within the planting area boundary you've re-created.
If you've redrawn an interior boundary to exclude individual shrubs from the hatch, you can use the Multiple option. When placing the hatch, you'll see a prompt to type M for Multiple. Type M, then select the interior boundary or boundaries you'd like to exclude from the hatch.


