BatchMan
Quick video
- Important: Read This Section Before Running BatchMan
- When to Use BatchMan: Examples
- BatchMan Overview
- Selecting a File, Folder, or Directory of Folders
- Changing Layer Names & Colors
- Changing Layer Colors
- Purge + Audit
- LISP File
- Save or Preview Your Changes
- Related Webinars
- Troubleshooting
Our BatchMan feature is a batch file processing tool that can help you can maintain drawing standards across your entire library. You can select any number of DWG or DXF files (or even entire folders of files), and use BatchMan to perform any of several common actions on all of them at once. For examples of these common actions, see When to Use BatchMan: Examples below.
BatchMan is lightning fast. It can process about three files per second on a fast machine, and can easily process 1,000 or more files at any one time.
Important: Read This Section Before Running BatchMan
Here are a few important recommendations about BatchMan:
- We recommend running BatchMan from a blank file.
- If you do run BatchMan from a working drawing, it will discard the current file open and not save changes. Make sure you save changes to the file before running BatchMan.
- Once you've configured BatchMan to make a set of changes, don't forget to select one of the Save as options at the bottom of the dialog box before clicking OK – if you want to save your changes.
- You can leave the No Save option selected if you only want to preview the changes, but keep in mind that your changes will not be saved unless you select a version of AutoCAD to use when saving the changes.
When to Use BatchMan: Examples
Possible uses for BatchMan include:
- Cleaning up drawings: Perform actions such as Color by Layer, Linetype by Layer, Purge, and/or Save As.
- Managing layers: Manage the layer names and colors of drawings, change layer names and colors as required for office layer standards.
- Running a script or LISP file: Run an end-user-programmed script or LISP file on each drawing.
- Making a slide: Zoom to extents and shoot a slide for a number of block source files.
- Redefining blocks: Refresh placed blocks to their most current versions.
- Updating Land F/X project association: Change the Land F/X project (project number) associated with multiple DWG drawing files.
BatchMan Overview
Open BatchMan :

F/X Admin ribbon, BatchMan button
or type BatchMan in the Command line
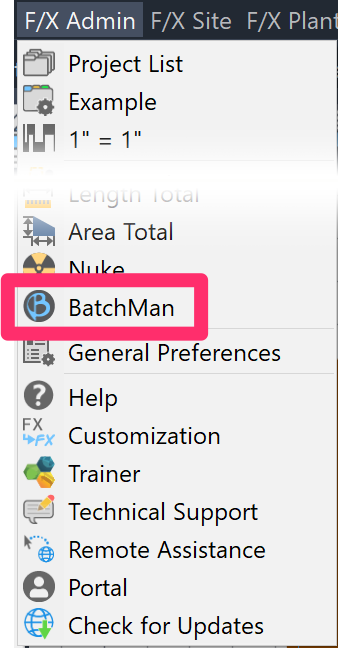
F/X Admin pull-down menu
The BatchMan dialog box will open.

1. Files: The files you select will be listed in this field.
2. Add Files: Add one or more AutoCAD drawings.
3. Add Folder: Add an entire folder of AutoCAD drawings.
4. Add Folder + Subfolders: Add an entire folder of AutoCAD drawings, and include all drawings in all subfolders of the selected folder.
5. Remove: Remove a selected file or folder from the Files list.
6. Remove All: Remove all items from the Files list.
7. LISP File: Select any LISP file. BatchMan will load and run the desired LISP file for each drawing selected.
8. Layer Actions: If you want, check one of the following boxes:
- Layer Names and Colors: Change layer names and/or colors in the selected file(s).
- Layer Colors: Run our Change Line Color tool on the selected file(s).
9. Standard Actions
These checkboxes offer a variety of standard actions used for general file maintenance.
- All ByLayer: Sets all entities to All ByLayer, including linetype, lineweight, and color for all objects, as well as all objects within all blocks.
- Purge+: Purges each drawing of unnecessary and unused lines, fonts, layers, blocks, etc., four times.
- Text Styles: BatchMan will look through all the Land F/X Text Styles in your default Preference Set and redefine the styles in each drawing to match your current settings for those styles using the REAT command.
- Dimstyles: Redefine the dimension styles (DimStyles) in the selected files based on the one saved in the active Preference Set.
- Make Slide: Shoots a slide of each file.
The Text Styles option is also available for a single drawing as our Reload All Text Styles (REAT) tool. When you use this tool, the Text Styles in the current drawing will be updated to match the active Preference Set.
10. Save as:
Here, you can make one of the following selections:
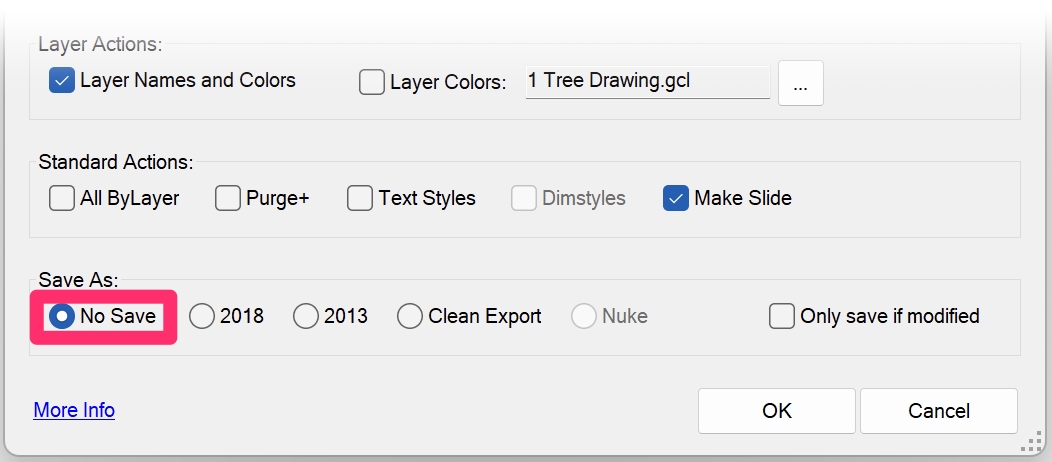
- No Save: Performs the selected operations on the selected files without saving, allowing you to preview your changes without committing to them yet.
- The format or version of AutoCAD to use when saving the changed files.
- Clean Export: Generate a clean copy of your drawing using the AECTOACAD command. More information
- Nuke: Save the selected files using our Nuke tool, with the following actions applied to each file:
- All ByLayer and Purge+ applied
- DGN linetypes converted to Continuous
- Files saved without any Proxy Objects
11. Only save if modified: Select this option if you only want to save a drawing if BatchMan modifies it. This feature can be helpful when you are backing up files based on when they were last changed.
-
In the interest of increasing speed, BatchMan overwrites original files with the revised copies and does not create backups. It is up to you to make a backup copy of files before running BatchMan.
-
The No Save option provides a handy preview of what BatchMan will do to your files – without actually saving over them.
Selecting a File, Folder, or Directory of Folders
The first step in using BatchMan is to select the files (or entire folders of files) that you want to .
Adding a Single Drawing File
To add one DWG drawing file at a time, click Add File.


A file directory explorer will open, allowing you to navigate to your desired file.
Click Open to add the file to the BatchMan file list.
The name of the file you selected will now display in the Files in list in the BatchMan dialog box.
Add as many individual files as you want.

Adding a Folder of Drawing Files

To add a folder of drawing files, click Add Folder and navigate to the folder you want to add.
The Browse for Folder dialog box will open.
Browse to and select the file folder containing the DWG files you want to add to BatchMan.
Click OK to add the folder to the list.


The name of the folder you selected will be added to the Files In: field in the BatchMan dialog box.
Adding a Folder and Subfolders of Drawing Files
A folder and subfolders (aka a recursive directory) will include a folder you select, along with all drawings in subfolders under the selected folder.
To add a folder and subfolders of DWG files, click Add Folder + Subfolders.
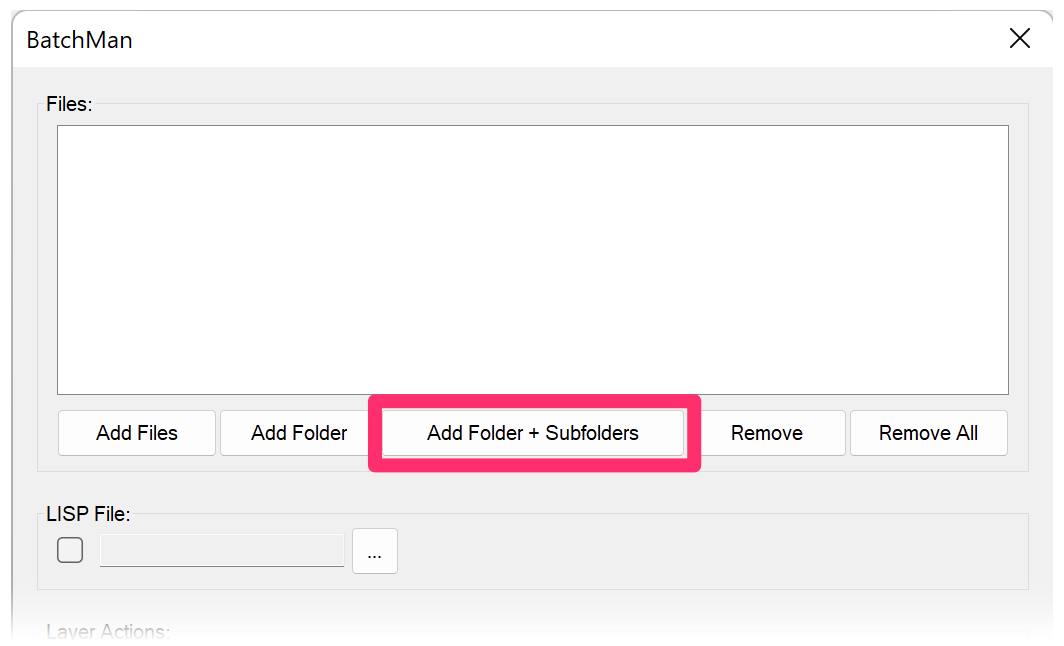

Browse to and select the folder that contains the subfolders with the drawings you want to process.
Click OK to add the folder and its subfolders to BatchMan.
The selected folder and its subfolders will be added to the Files In list in the BatchMan dialog box.

You can remove any highlighted drawing file or directory by highlighting it and clicking Remove. You can remove all files by clicking Remove All.

You can now click any of the BatchMan operations you want performed on the selected files. BatchMan will open each file and perform the batch operation, then save or close the file – all at about three files per second.
Don't forget to select a version of AutoCAD from the Save as section at the bottom of the BatchMan dialog box if you want to save your changes. If you don't, your changes won't be saved.
Changing Layer Names & Colors
BatchMan can run the Change Layer Names and Change Layer Colors processes on the selected drawing files. If you select this option, BatchMan will also process layers within blocks.
Use this option if you need to change the layer colors in several drawings while also changing the names of the layers. For example, you or a client may have a standard that calls for each layer to have a specific name and color. The settings will be stored in an LCF file, which you can easily load back into any drawing(s) to apply the changes. You can save several LCF files – one for each client whose standards call for these layer name and color settings, and one for your own standards. If you only need to change the layer colors and aren't worried about the names of the layers, you can use the Layer Colors option within BatchMan instead.
After selecting the files you want to process, select the Layer Names and Colors option under Change All. Then click the ... button to the right of this option.
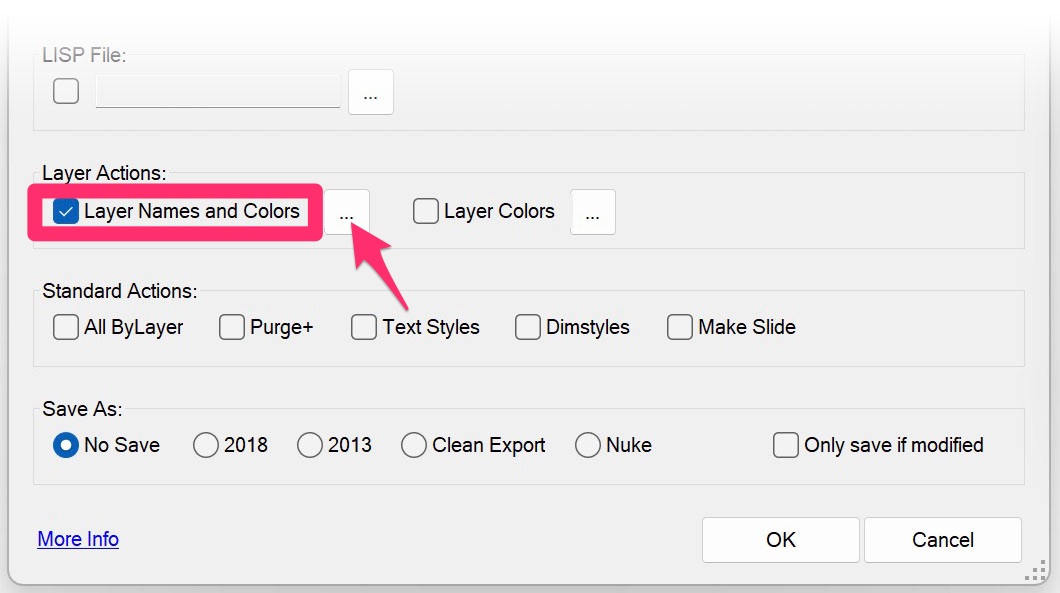
BatchMan will open all selected drawing files.
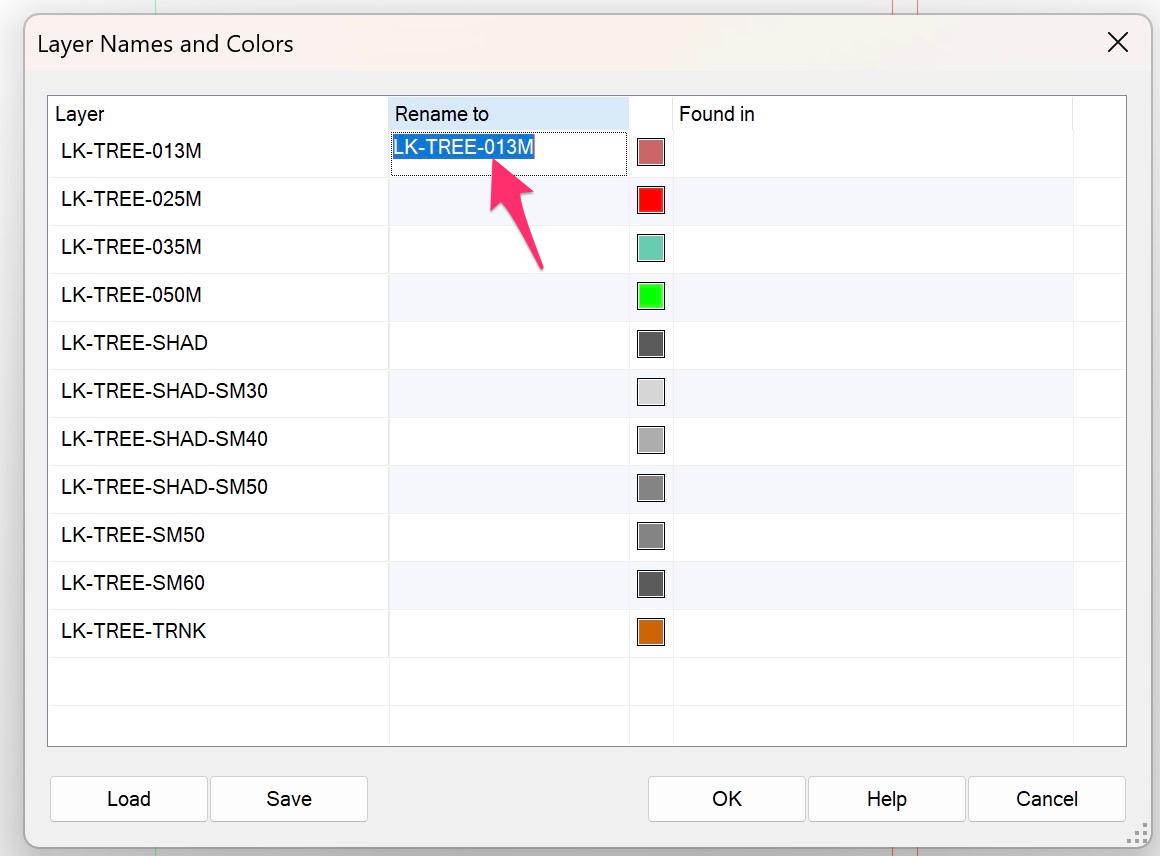
The Layer Names and Colors dialog box will open. You'll see a list of all layers in all selected files by name, along with each layer's corresponding line color.
To rename a layer, click the blank space to the right of that layer's name in the Rename to column. You can then enter the new layer name.
The layer name will change to what you entered.
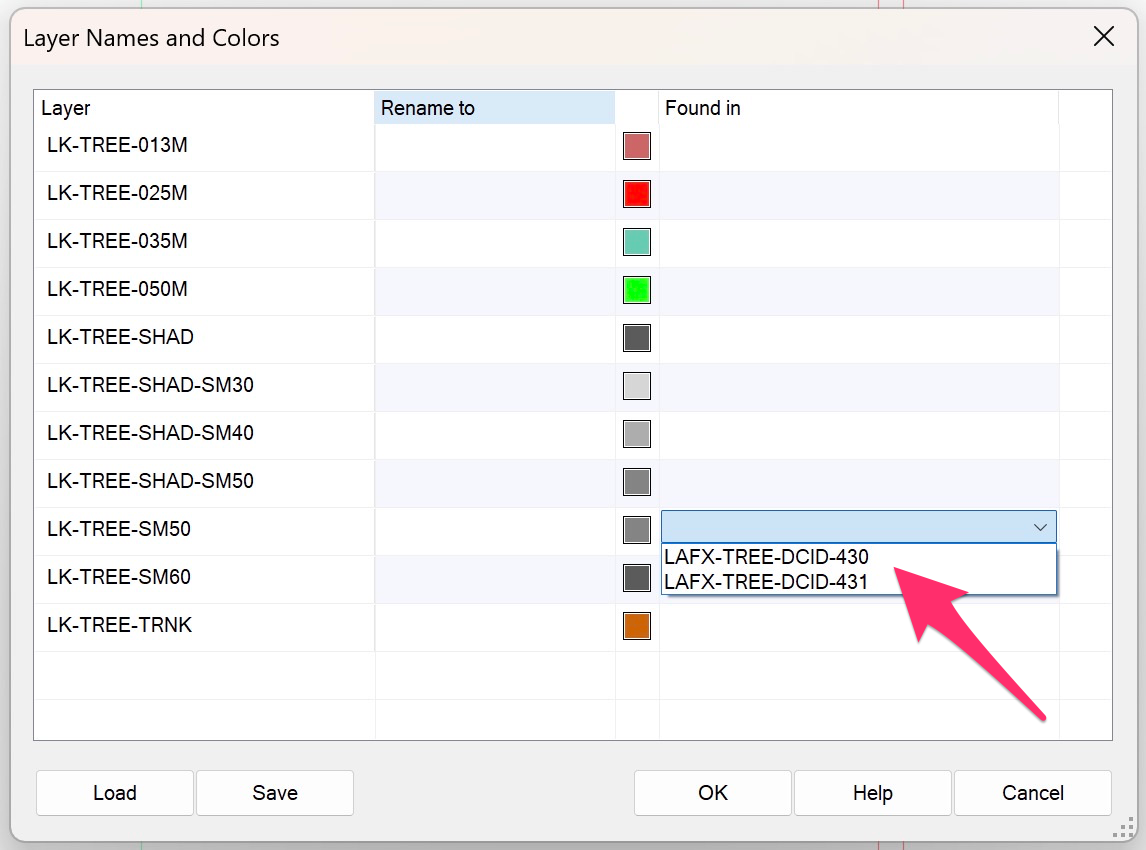
To look up where a layer is currently being used in the selected drawing files, open the menu to the right of the Found in column for that layer.
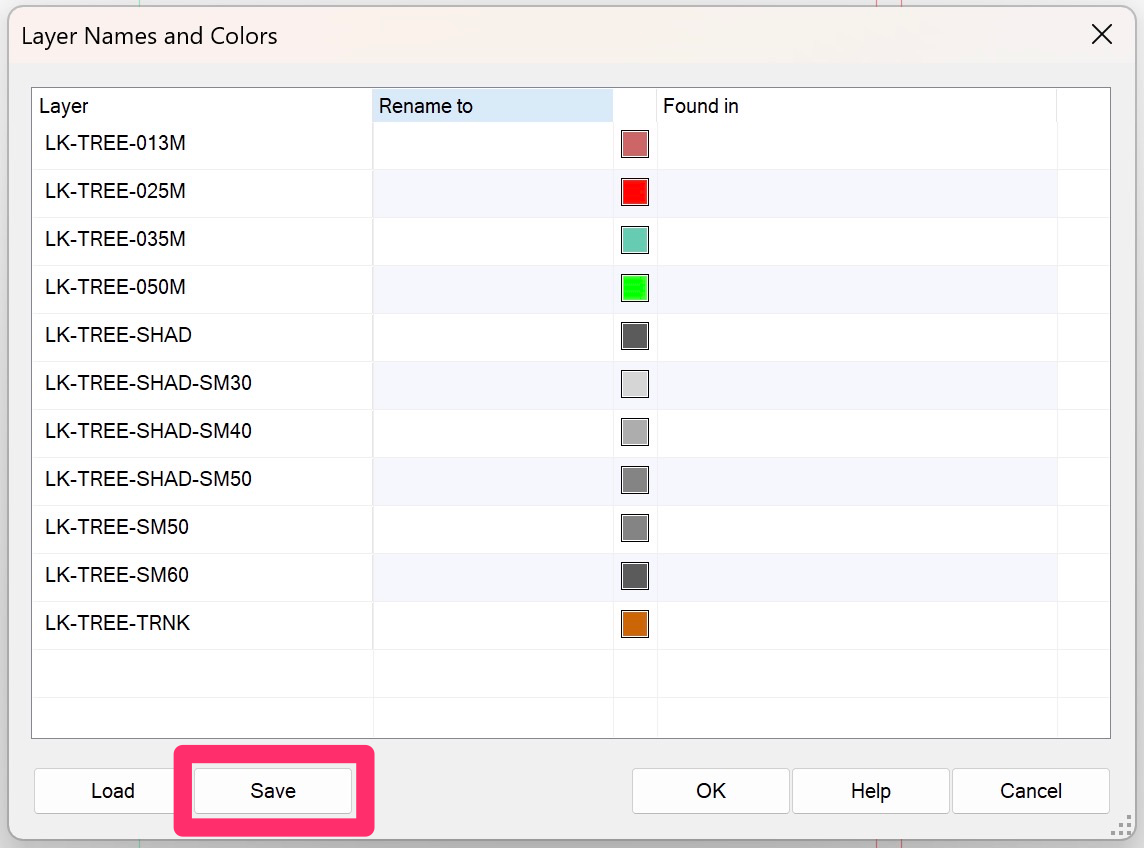
Once you've made extensive changes to a large number of files, it's a good idea to save your changes by clicking Save before beginning the BatchMan process.
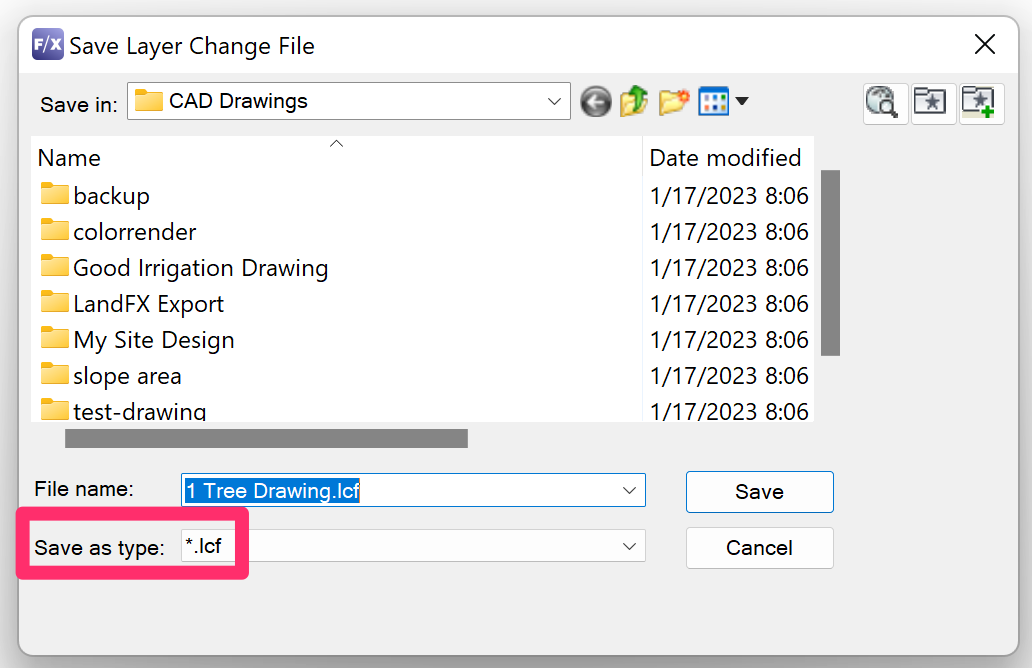
You can now save your changes as an LCF (.lcf) file to the location of your choice.
A drawing can sometimes contain odd corruptions that will stop the BatchMan process. If so, you'll need to run BatchMan again to rename and recolor the files.
LCF Files and Layer Names & Colors
An LCF file stores one version of settings you've configured for the layer names and colors within CAD. It allows you to makes these changes once (or once for each client that requires them) and then apply the changes to any drawing (or to multiple drawings at once, if you use BatchMan) with a single click.
If you've saved an LCF file and need to apply it to one or more drawings, click the Load button in the Change All Layers dialog box.
This feature can be extremely helpful if you frequently receive drawings from a client or consultant, and you want to make the same layer name and color changes each time you get the files.

If you need to rename multiple layers to the same name and color, BatchMan will grab all items on those layers and put them into the desired layer with the desired color. For instance, bad drawing habits might result in a variety of text layer names in much of the drawings, such as TEXT, L-TEXT, TEXT1, A-TEXT, C-TEXT-NOTE, etc., and they have a mix-match of colors. Simply rename each of the layers to the same name, such as L-TEXT, and give each renamed layer the same color. BatchMan will move all items on the renamed layers to the desired layer, and they will all have the same color.
Changing Layer Colors

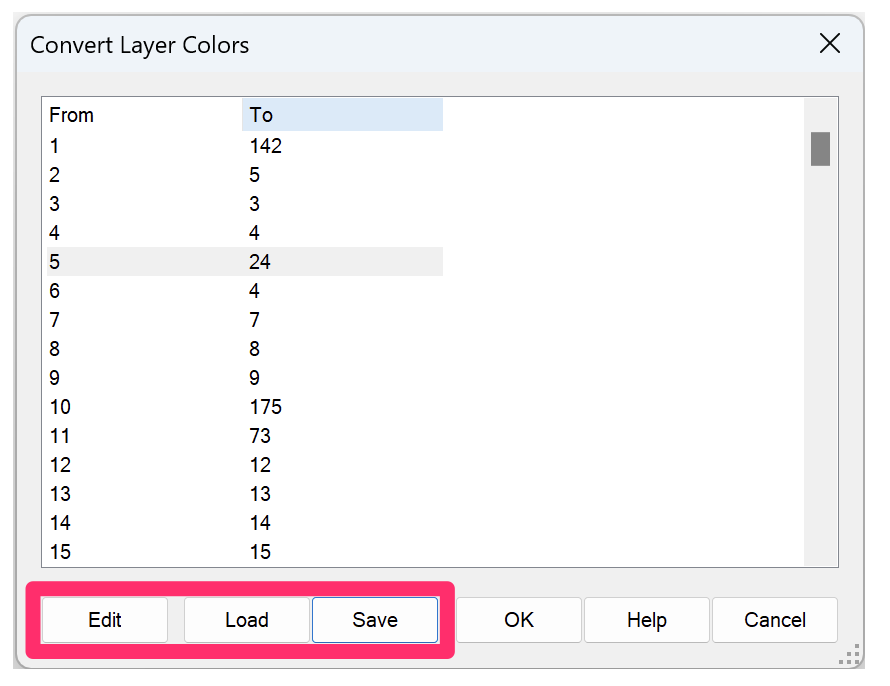
Our Convert Layer Colors tool allows you to set colors to convert to other colors in a single file.
You can apply this process to several files at once by selecting the Layer Colors option in the BatchMan dialog box.
This option can be handy if you need to change the layer colors in several drawings to meet your standards, or change your own drawings to meet the standards of a client or another firm, but you aren't worried about the layer names.
The new color settings will be saved in a GCL (.gcl) file. If you need to change the layers' names as well, use the Layer Names & Colors option instead.
The Convert Layer Colors will open when you select this option. You can now:
- Click Edit to begin making your layer color selections, then click Save to apply these color changes across the selected drawing files, or
- Click Load to browse to an existing GCL file yoou'd like to apply to the selected files. More information
GCL Files and Layer Colors
A saved GCL file is essentially a record of your layer color settings from a single session of using the Layer Colors feature within BatchMan. You can save as many different GCL files as you need – for example, you can save one GCL file for each of your clients whose layer color standards differ from yours, as well as one for your own color standards. With these files in place, you can always work within your own standards and then, when you need to send a drawing to a client, quickly load that client's color standards into the drawing. (BatchMan allows you to make the same changes across multiple drawings at a time.) The layer colors will instantly change to match the client's standards. Then, when you get a drawing back from a client, you can apply your own color standards back to the drawing by loading your own GCL file.
If you're changing your office colors to match a client’s, or a consultant’s colors to match your office standards, you can call up the saved GCL file in future BatchMan routines.
You can even call up the GCL file without BatchMan while a drawing is open, using our Layer Colors tool.

In either case, click Load in the Change All Layers dialog box to load a GCL file of your choice.
Purge + Audit
Drawings can often become clogged with unnecessary junk such as Proxy Objects and RegApps. These items bloat your drawing's file size and cause slowness as well as general performance issues. In most cases, we recommend cleaning your files by either running our Nuke tool or performing a manual cleanup.
If you need to purge multiple drawings of these destructive items, however, you can add them all to the BatchMan and the run the tool with the Purge+ option selected.
First, add your files or folders to BatchMan.
Then select the Purge+ option under Standard Actions.

When you click OK to run BatchMan, the following harmless and recommended cleanup actions will be run on the selected files automatically:
- AUDIT: All errors in the drawing file(s) will be corrected.
-
PURGE: When running the Purge command, BatchMan completes all of the following actions on your drawing:
- Purges all DGN linetypes
- Fires the PURGE ALL command four times
- Purges RegApps with the -PuRGE, R command
- Resets the Scale List with the SCALELISTEDIT command
To ensure that all harmful items are removed, BatchMan runs the PURGE command four times.
LISP File
When you select the LISP File option, BatchMan will load and run the LISP or custom script file of your choice for each drawing selected.


You can now browse to and select your LISP file.
Click Open to select the file of your choice.
Important notes on running Script/LISP files:
- BatchMan will load the LISP file on each selected DWG file, so it should automatically fire whichever code is required. If it defines a function, the code should then call that function at the end of the file.
- Use any code you wish – just never use an exit clause. Good formed code should angle in and in, then out and out (i.e., if this…, if this…, if this…, then if not…, if not… , if not… and then come back out). It should never exit.
Save or Preview Your Changes
The Save as: section at the bottom of the BatchMan dialog box gives you the option to either:
- Preview your changes without committing to saving them yet, or
- Save your changes to the AutoCAD version of your choice
Important: If you want to save your changes, make absolute sure you select one of the AutoCAD versions in this section before clicking OK to run BatchMan. Otherwise, your changes will not be saved.
Preview Your Changes Without Saving
If you want to see what your changes will look like without saving them yet, select No Save.
BatchMan defaults to this option to prevent unwanted saving. Keep in mind that your changes will not hold if you select No Save, which also makes it a good option to use when first testing BatchMan to see how it works.
Save Your Changes

To save the changes you make in BatchMan, select one of the available versions of AutoCAD: 2018 or 2013.
The edited files will be saved in the selected version.
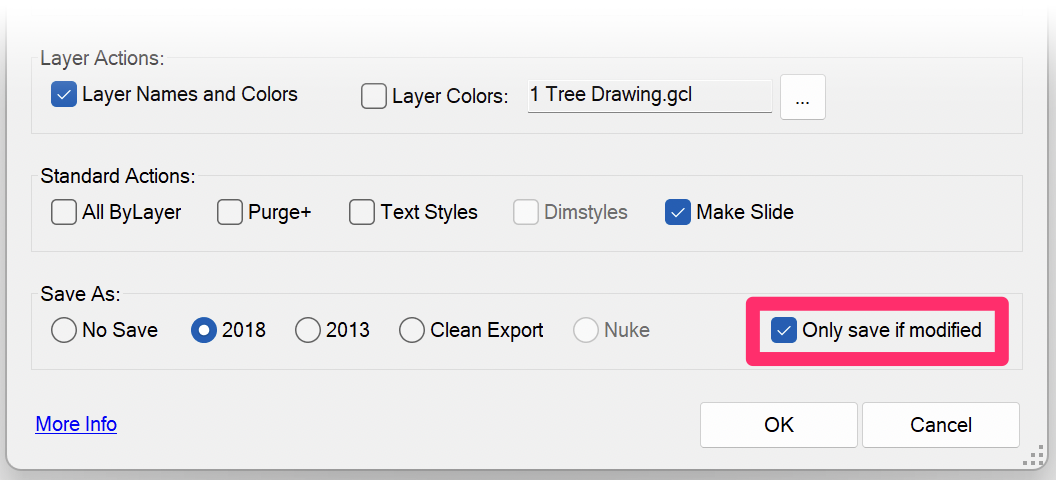
When saving, you can choose to select the Only save if modified ooption.
With this option selected, BatchMan will only save drawings you modufy.
This feature can be helpful when you're backing up files based on when they were last changed.
Clean Export
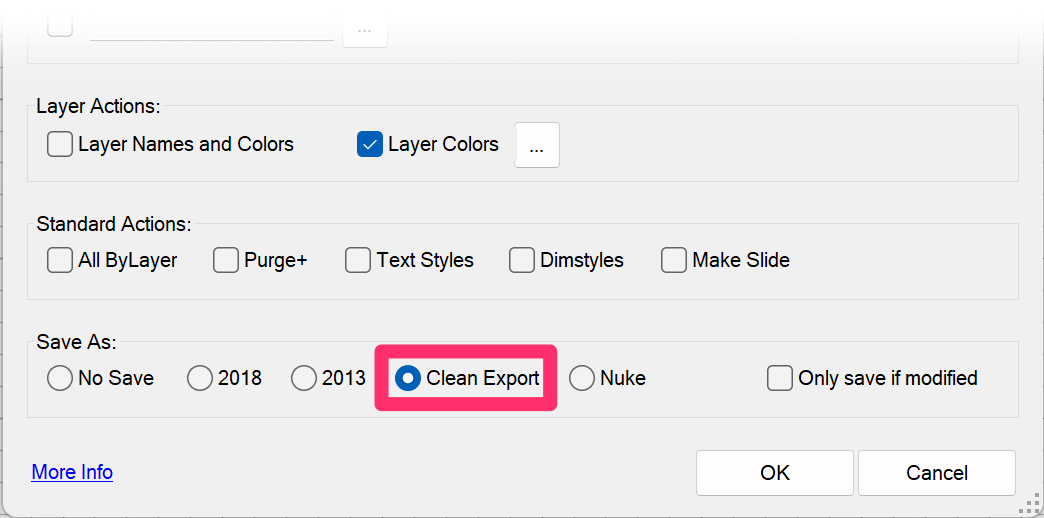
Select the Clean Export option to generate a clean copy of your drawing using the AECTOACAD command – an important step in our recommended manual drawing cleanup process.
Note that the files will first be saved to the Windows temporary files location, and the originals will be sent to the Recycle Bin.
Related Webinars
- Standardizing Your Detail Library: We'll introduce you to some tools and techniques (including the BatchMan tool) that make it incredibly easy to bring your collection of details up to a specific standard for layer names, callout styles, unit settings, and much more. (56 min)
- Making Text Work in CAD: Join us to learn the essentials of how to use letters, numbers, and other characters effectively in CAD, including how to work with Text Styles and the Text Manager. (1 hr 4 min)
Troubleshooting
Issue: When running BatchMan, you received an "Unable to find script file" error message


