Locate Valve
Quick video
- Locate Valve Overview
- Locate Valve and Water Meters & Points of Connection (POCs)
- Reordering the Columns
- Creating a Keyboard Shortcut for Locate Valve
Need to find one of your valves in a hurry? Use our Locate Valve tool to select and zoom in to any of your valves in seconds. Even in a small design, you might have a cluster of valves that makes it difficult to determine which valve is which. With Locate Valve, you'll be sure you're looking at the correct valve – and you'll find it instantly.
You'll find Locate Valve to be highly helpful in addressing the Critical Station, or simply a problematic station, listed in either the Critical Analysis or the Valve Schedule. You may wish to see which valve is causing the issue and investigate further. That's where Locate Valve comes in.
Locate Valve Overview
Locate Valve provides a quick and accurate way to hunt down any valve in even the most extensive system layouts.
Before running Locate Valve, make sure you've sized your lateral pipes, as well as sized your mainline.
Open Locate Valve:
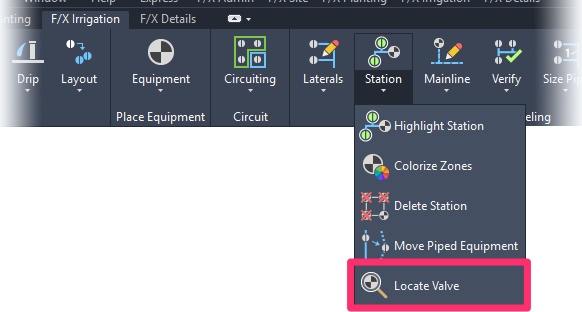
F/X Irrigation ribbon, Locate Valve flyout
or type LOCATEVALVE in the Command line

F/X Irrigation menu, Locate Valve option
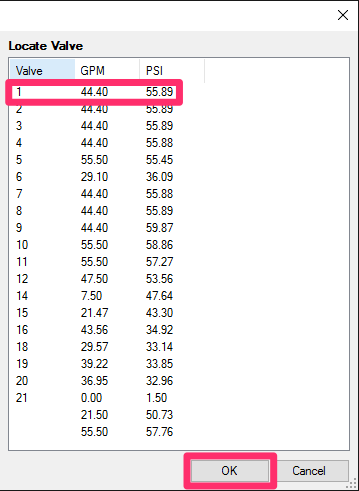
The Locate Valve dialog box will open.
Here, you'll see a list of all valves you've placed in the current drawing, along with each valve's flow and pressure statistics for your reference.
To locate a valve in your drawing, click that valve (example: Valve 1) and click OK.
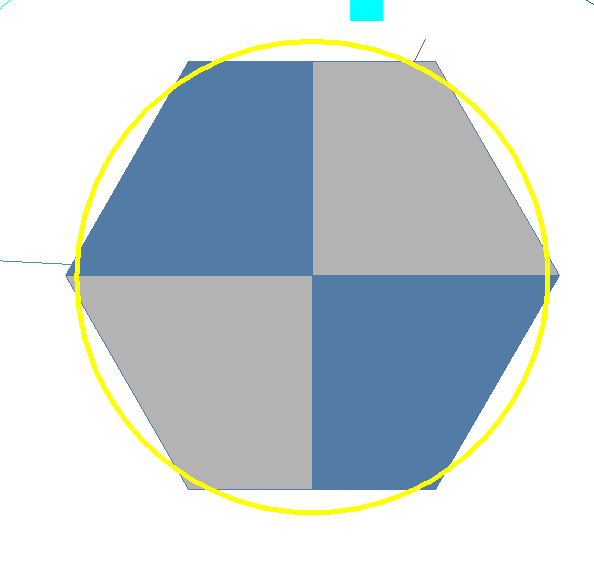
You'll immediately see a close-up view of the selected valve in your drawing, allowing you to make any necessary edits or notes. The valve will also be highlighted.
You can continue to locate additional valves by typing LocateValve, selecting a valve from the list, and clicking OK.
Pressure and Flow Rates All Showing Up as Zeroes
Are you seeing all zeroes in the Locate Valve dialog box?

If so, close the dialog box and follow our steps to size your laterals and size the mainline.
Then run Locate Valve again.
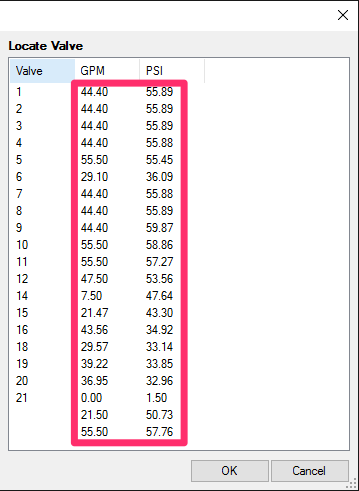
You should now see accurate statistics for your valves.
Locating Valves Without Callouts or Numbers
Even if you haven't numbered or called out a valve, Locate Valve can find it for you.
For example, you might place a Valve Schedule and see an Unknown entry for one or more valves.
In this case, Unknown is an indicator of a valve that you have yet to number or call out.

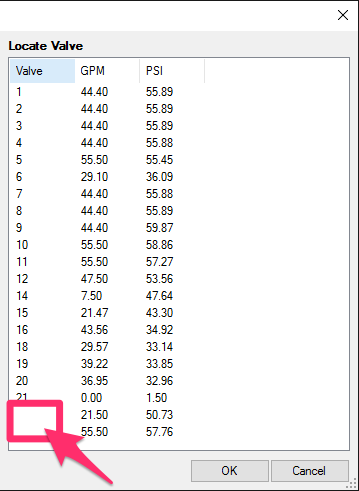
Non-numbered valves will show up in the Locate Valve dialog box with no entry in the Valve column.
However, you can still select one of these non-numbered valves and locate it in your drawing as you would any other valve.
Not sure which valve is which? Just compare the flow and pressure rates of the unknown valve in the Locate Valve dialog box with these same rates for the unknown valves in the Valve Schedule.
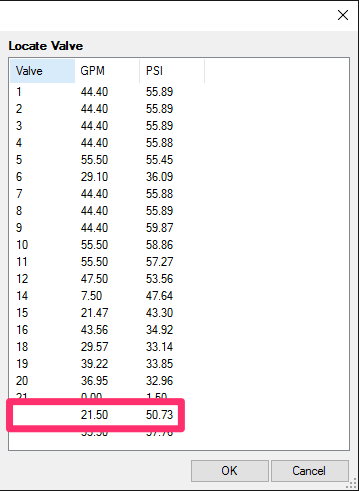
In our example, one of our non-numbered valves has a flow rate (GPM) of 21.50 and a pressure (PSI) of 50.73.
When we run a Valve Schedule, we can see that one of the unknown valves is a shrub rotor with identical rates to those of the unknown valve in the Locate Valve dialog box.
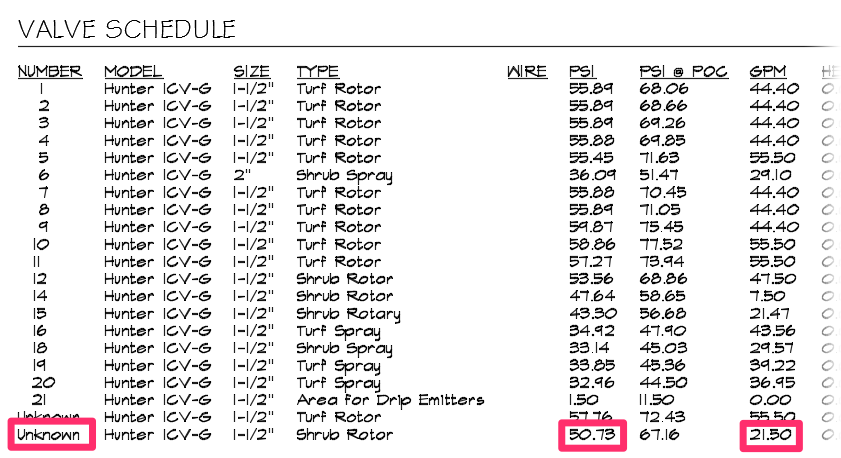
We've identified our unknown valve and can now select it and click OK to locate it. Once you've located the unknown valve, use our Valve Callout tool to call it out and number it.
You can also complete these steps in reverse to identify and locate one of the unknown valves in the Valve Schedule. Check the valve's pressure and flow rates, then check the same rates in the Locate Valve dialog box. Then select the valve with the same rates and click OK to locate it.
For a quick and foolproof way to see which of your valves have yet to be called out, use our Verify Mainline tool. Verify mainline performs several important error-checking steps on your mainline layout, including highlighting which valves still need callouts.
Locate Valve and Water Meters & Points of Connection (POCs)
Locate Valve will now also list water meters and points of connection (POCs) in your drawing.
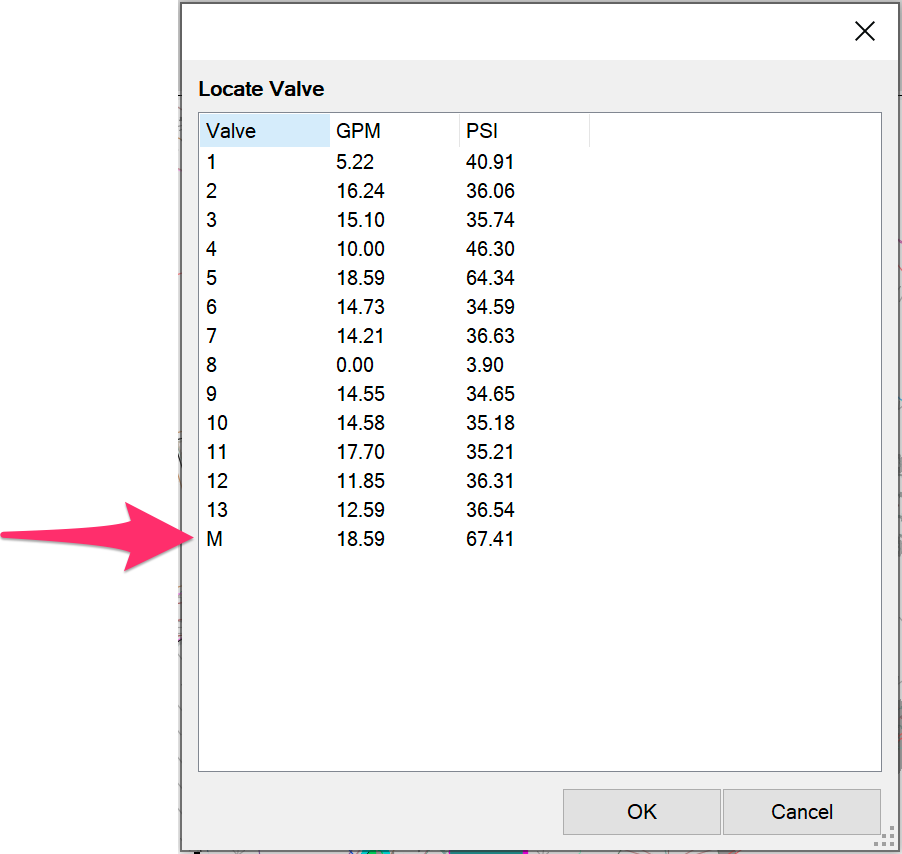
You'll see them at the bottom of the list.
This example shows a water meter, designated by an M.
Sorting the Columns by Value
Locate Valve now allows you to reorder the columns to sort by value. To sort your valves by either flow (GPM) or pressure (PSI), click the header of that column. For example, click the GPM column header to sort your valves by their GPM value.

Creating a Keyboard Shortcut for Locate Valve
We predict you'll use Locate Valve so often that it will merit a keyboard shortcut for even quicker access (like CTRL+C for "Copy" and CTRL+V for "Paste"). We suggest creating the command CTRL+L (for "locate").
Because CTRL+L is already the default shortcut for the Toggle Ortho command, we recommend simply changing this command to Locate Valve in the Customize User Interface (CUI).
If you want to keep CTRL+L as the keyboard shortcut for Toggle Ortho, you can replace any of the other existing commands with a keyboard shortcut by completing the following steps and selecting that command.
You can find all the existing keyboard shortcuts for all tools using the Customize User Interface (CUI) feature.
Open the CUI:

Manage ribbon, User Interface button
or type CUI in the Command line
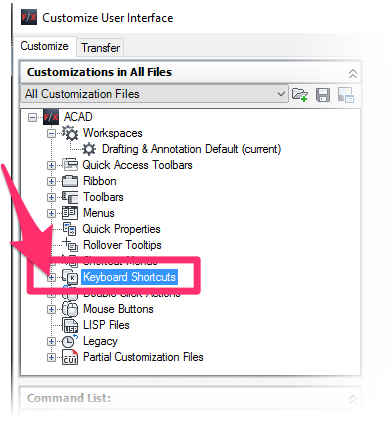
Locate the Keyboard Shortcuts entry in the list in the top left corner of the CUI.
Expand this entry by clicking the plus (+) sign to the left.
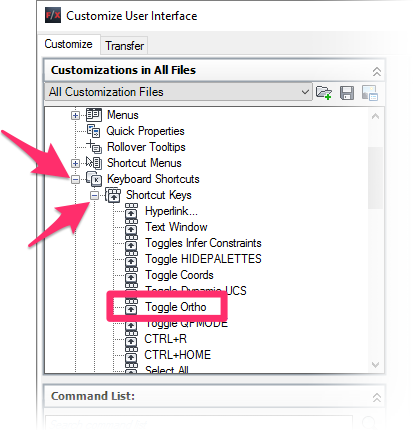
Expand the Shortcut Keys entry in the same way.
Click Toggle Ortho, as pictured to the left.
In the Properties area in the lower right corner of the CUI, note the following entries:
- Name: Toggle Ortho
- Macro: ^O
- Key(s): CTRL+L
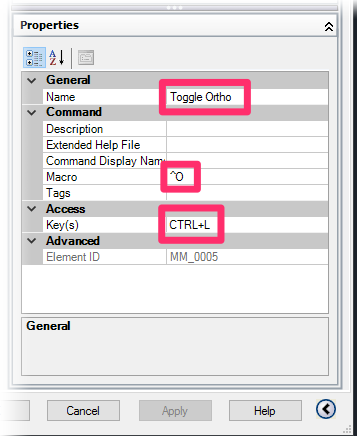
Change the Name entry to Locate Valve, and the Macro entry to LocateValve.
You can leave the Key(s) entry the way it is.
Click Apply to save your changes.
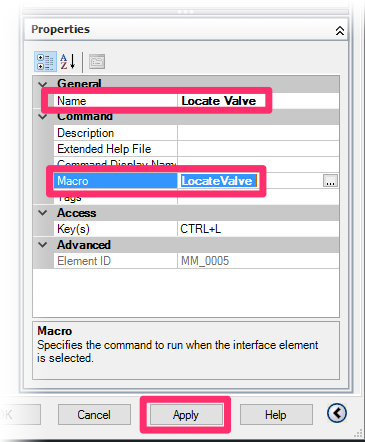
You'll now be able to access the Locate Valve command by simply pressing the CTRL + L keys.


