Using Multiple Pipe Classes in One Irrigation System Design
Quick video
- How It Used to Work: Combination Classes
- How Multiple Pipe Classes Work Now: Automatic Toggling
- A Note About the Pipe Data Defaults (Irrigation Preferences)
Irrigation designers commonly need to use multiple pipe classes in their systems. Different pipe classes have different pressure ratings, so based on the available pressure and design put together, the need may arise for multiple pipe classes. For example, you might want to use PVC schedule 40 for the smaller pipes and polyethylene or other (class 200) pipe for the bigger ones. You might might also like using different pipe classes for the different types of zones."
Our Pipe Data tool gives you the capability to spec multiple pipe classes and assign them to specific sizes of pipes. Then, when you size the mainline and lateral pipes in your drawings, these pipe classes will be applied automatically to the corresponding pipe sizes you've assigned to them.
How It Used to Work: Combination Classes
In past versions of Land F/X, our Pipe Data tool offered the ability to specify "combination" pipe classes. For example, if you wanted to use two different types of PVC pipe in your project, you could specify a "combination class" that incorporated those two pipe types.
This capability created a number of problems because it was virtually impossible to manage. Different users have different preferences for which pipe classes they use, which meant an all but infinite number of possible combinations. These combiantion classes also made it impossible to produce a quantity of pipe for each size. To give you full flexibility, we built in the capability for you to set up your classes the way you want them, and the correct class will be assigned to each pipe size automatically as soon as you size your pipes.
What If You Still Have the Old "Combination Classes" in Your Project?
The old classes will remain in your past projects only until you open Pipe Data tool when the project is open. The system will need to validate the pipe types being used and will refresh the pipe lists to what's available in the list of classes.
If the system can't find an exact match in pipe classes (that is, if you were using the combination classes), it will default to the first pipe class in the list. So you'll need to make sure it's properly set to your desired class.
How Multiple Pipe Classes Work Now: Automatic Toggling

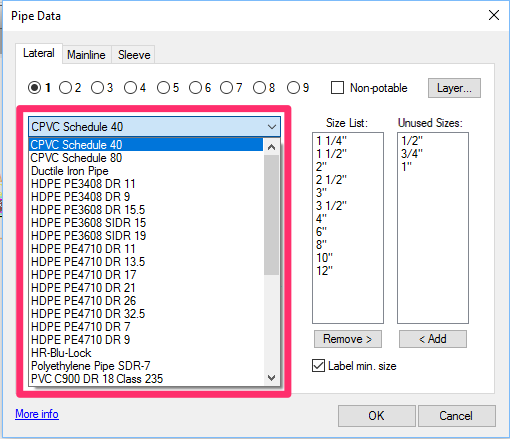
To address some of the issues caused by the old "combination" classes, and to give you more control over your system designs, we've re-engineered the Pipe Data dialog box.
You can now specify several pipe classes for each project – 9 for laterals and 6 for mainline.
The updated Pipe Data tool works by comparing one class of pipe in your project with the previous class – for example, Class 2 in comparison with Class 1 (or Class 3 with Class 2, etc.). The system will check whether:
- The two classes are assigned compatible pipe types, including:
- Compatible materials (i.e., both are plastic or metal, so they can be connected upon installation).
- Both are meant to carry either potable or non-potable water.
- The pipe sizes assigned to the higher-numbered class (say, Class 2) are all larger than the sizes assigned to the previous class (say, Class 1).
As long as two or more consecutive pipe classes for either lateral or mainline meet these criteria, the system will assign each class to the correct size and connect them.
How to Set Up Multiple Pipe Classes
To access the Pipe Data tool, first open the Irrigation Manager:

F/X Irrigation ribbon, Irrigation button
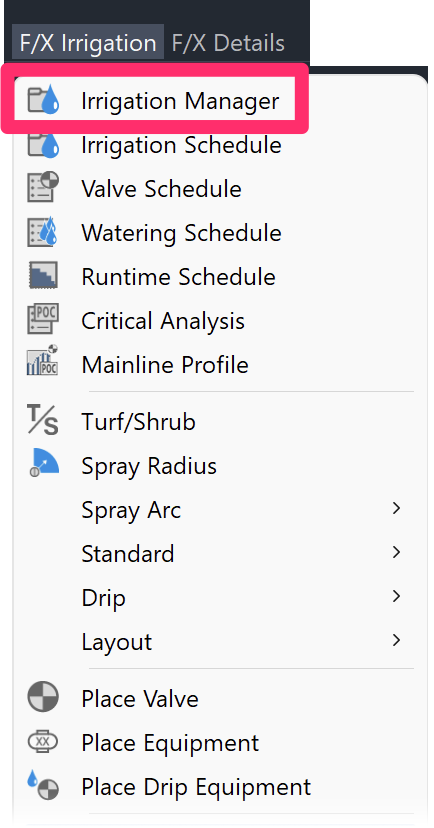
F/X Irrigation menu, Irrigation Manager option
or type ProjectIrrigation in the Command line

Open our Pipe Data tool from the Irrigation Manager.
Then follow our steps to set up your Pipe Data for lateral pipe or mainline pipe.
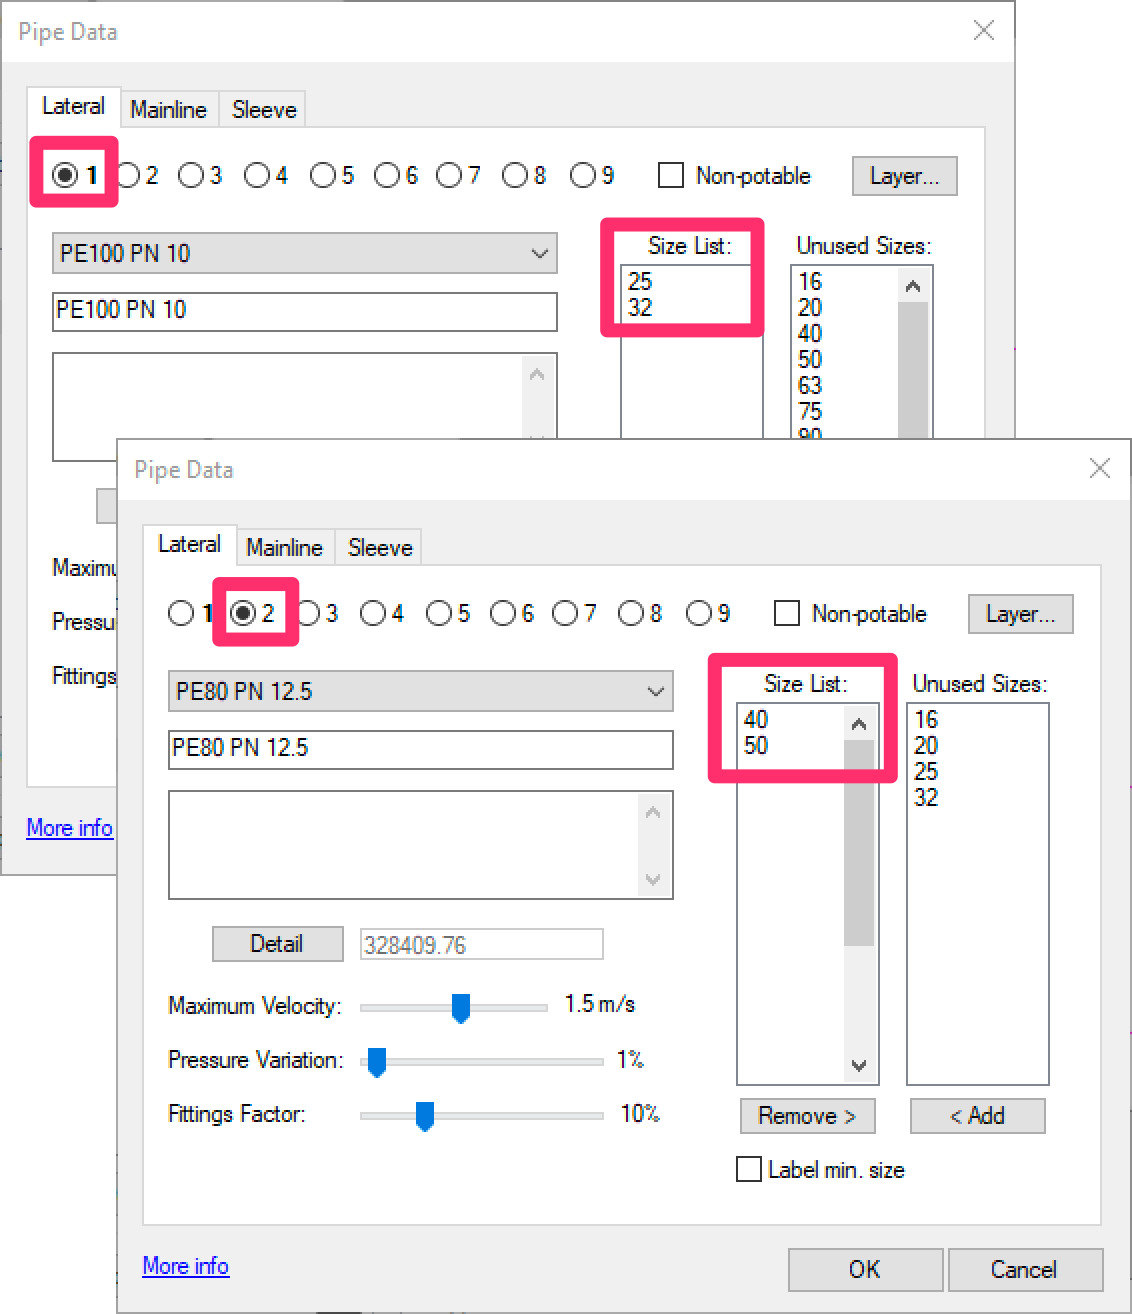
This setup meets all the requirements for the system to assign your pipe classes automatically:
Compatible pipe classes:
- Both classes are PE (i.e., plastic).
- Both classes are for potable water (that is, the Non-potable option is unchecked in both.
All sizes assigned to Class 2 are larger than all sizes assigned to Class 1.
Once you've set up all your pipe classes and drawn your pipe, the system will assign the correct class to each pipe size when you size your laterals and size your mainline.
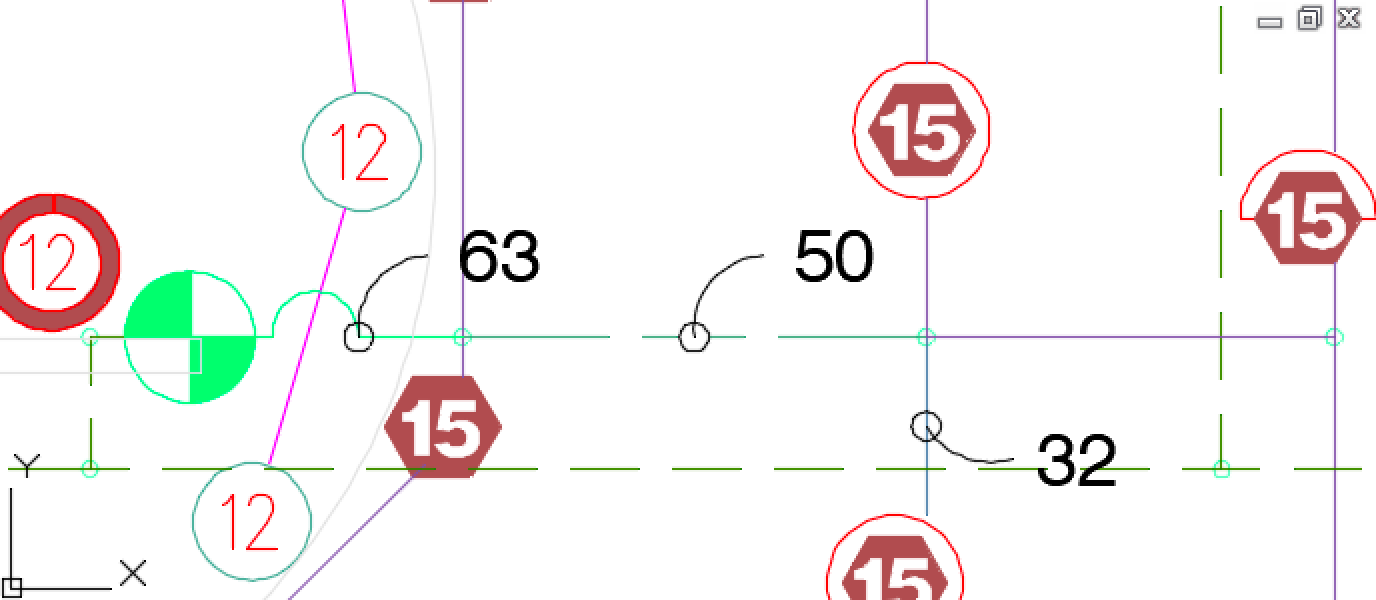
In addition, each pipe class will be assigned its own unique linetype, as shown to the left.
A Note About the Pipe Data Defaults (Irrigation Preferences)
The instructions on this page show how to configure multiple pipe classes for one specific project.
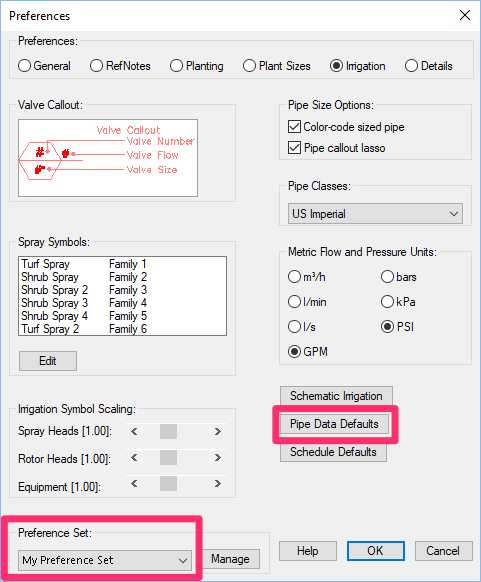
The Irrigation Preferences screen includes an option for Pipe Data defaults. This setting applies the current Pipe Data settings to the current Preference Set.
In this example, clicking Pipe Data Defaults would apply our multiple class settings to the Preference Set named My Preference Set.
Once you start new projects with this Preference Set active will include these default pipe class settings automatically. If you don't do it this way, you'll need to set your pipe classes for each project.
What If You Don't Want Your Classes to Switch Automatically?
If you don't want to use this feature, all you need to do is ensure that consecutive pipe classes aren't compatible. You have a few options:
Option 1: Leave an empty class between two classes you actually want to use.
In this example, we've left Class 2 completely blank.
We can then set up Class 3 exactly how we want it. Because Class 2 completely lacks settings, it will be incompatible with classes 1 and 3.

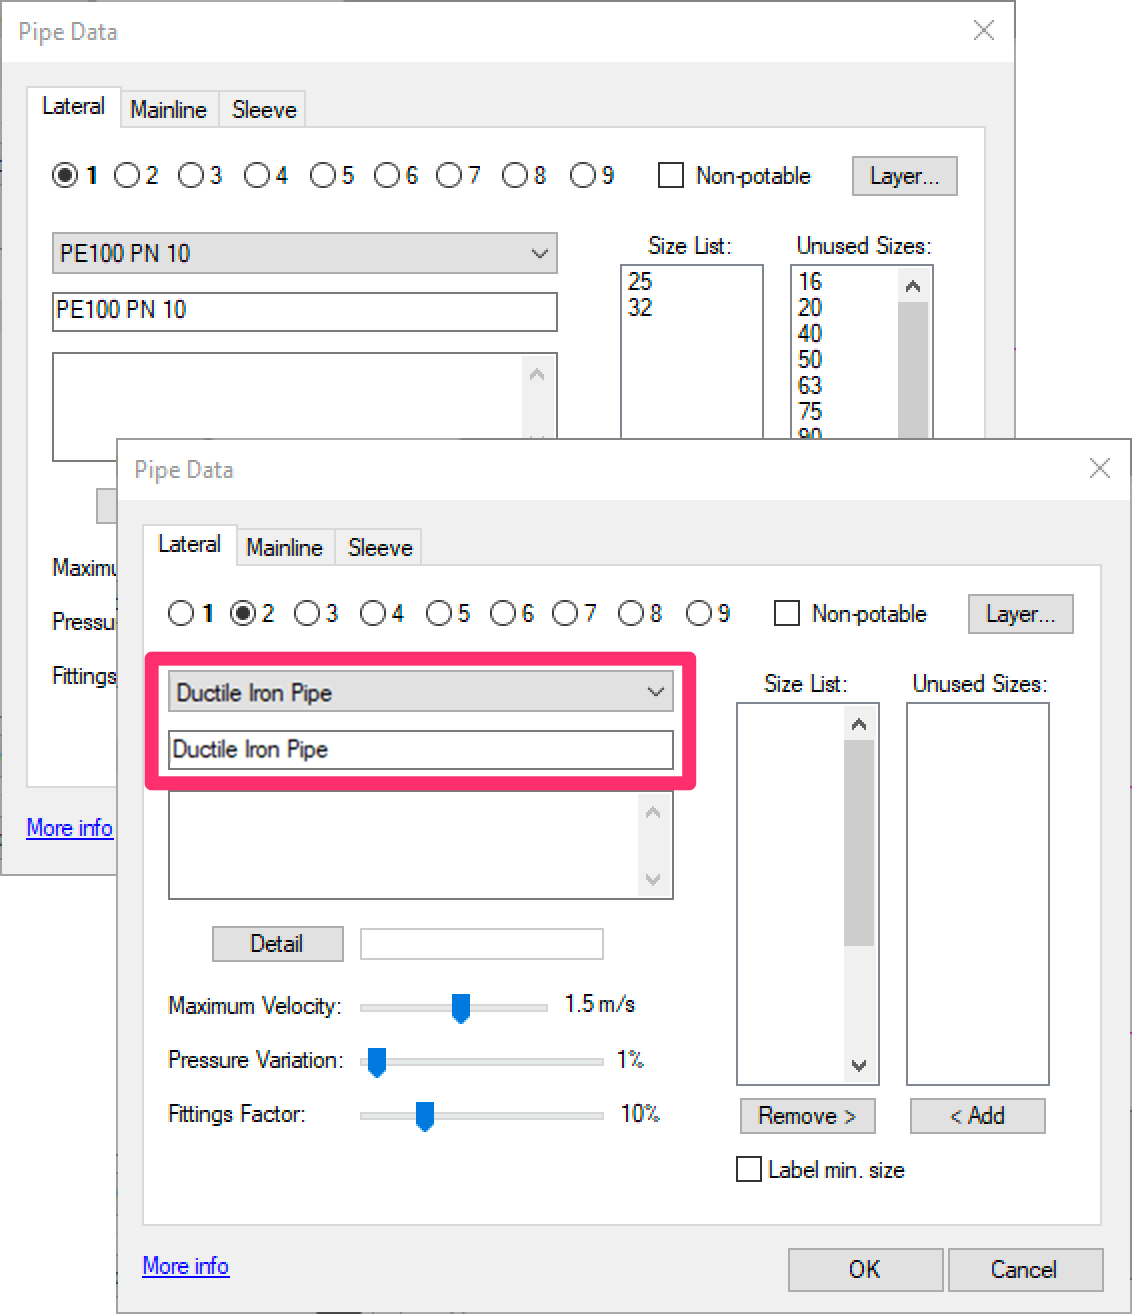
Option 2: Ensure that consecutive pipe classes consist of incompatible materials.
In this example, we've specified ductile iron pipe (metal pipe) for Class 2, when Class 1 is PE (plastic pipe).
The system will not switch between or join these incompatible materials.
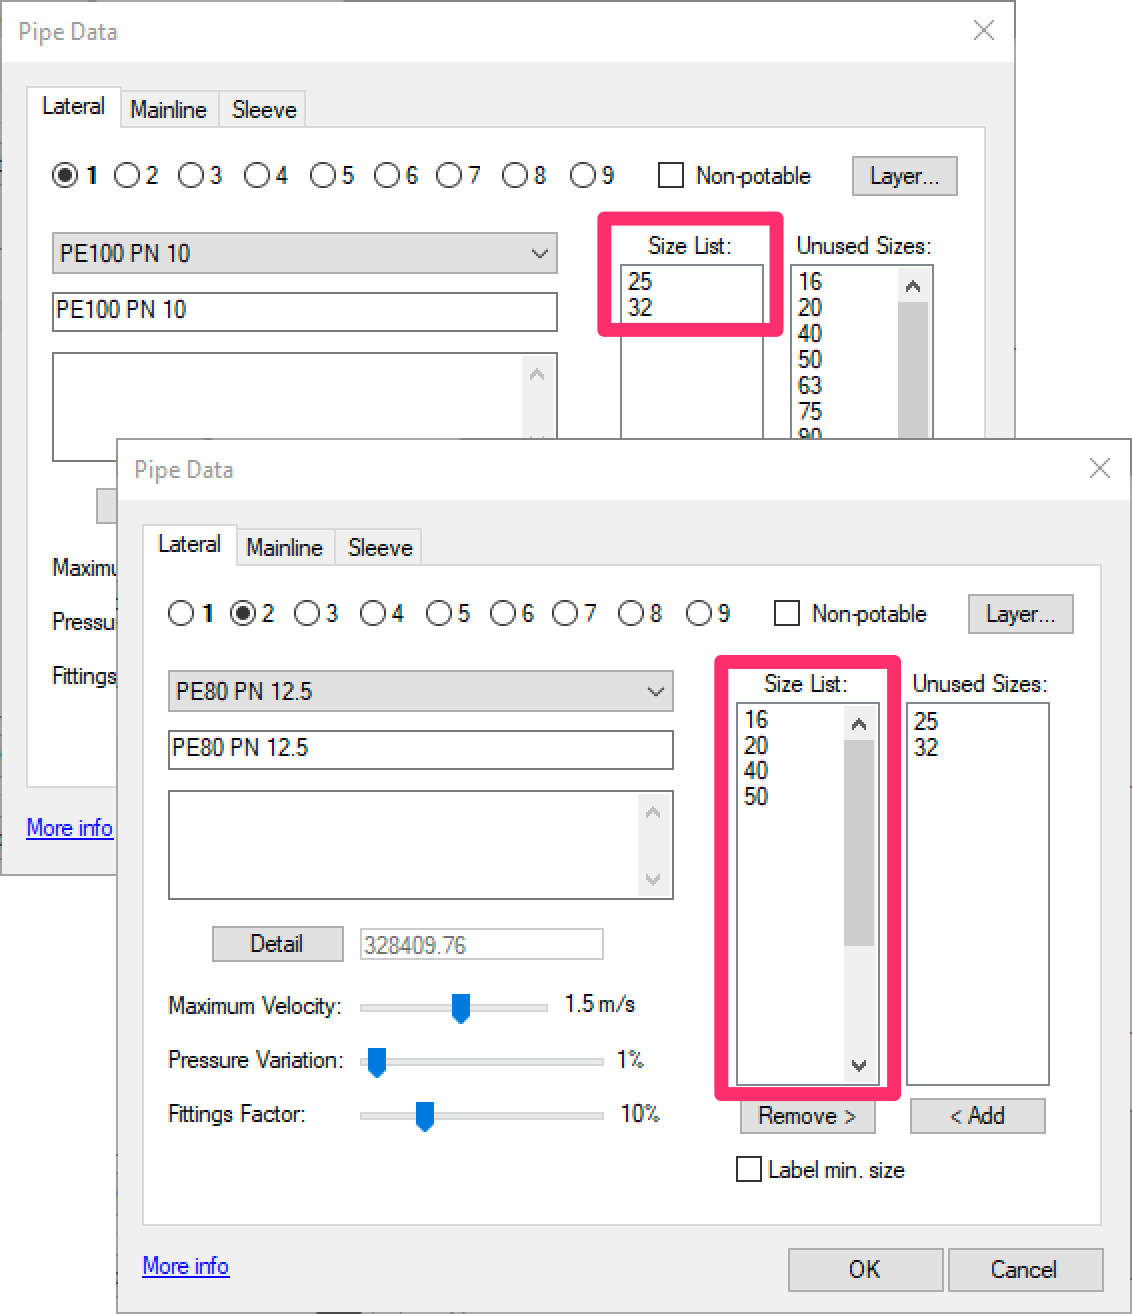
Option 3: Ensure that a class immediately following another one includes pipe sizes that are within the size range of the first class.
In this example, we've added the 16 and 20 sizes back to the Size List of Class 2.
Because both of these sizes are smaller than the largest size in Class 1 (32), the system won't switch between these classes automatically.
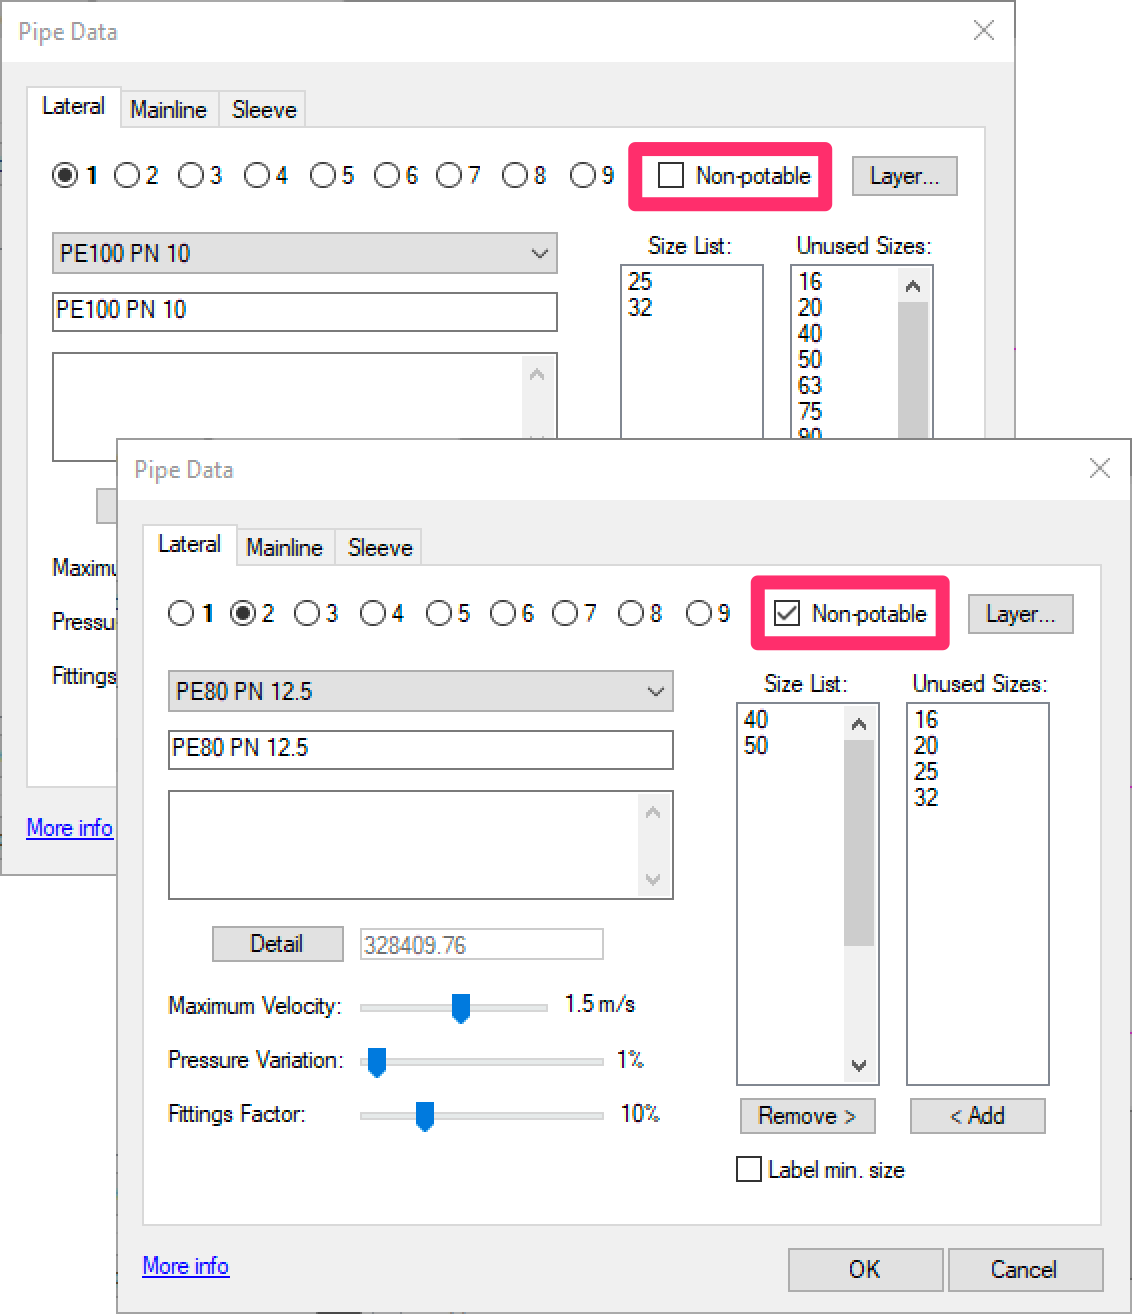
Option 4: Select the Non-potable option in one of two consecutive classes.
In this example, we've left Class 2 exactly how it was, but selected the Non-potable option, making the classes incompatible.
You should obviously only use this option if you actually intend to use non-potable water in the affected class.


