Planting Preferences: Planting F/X for Revit® Plugin
Quick video
- Do You Work in an Office With Multiple Land F/X Users? Read This First!
- Accessing the Preferences Screen
- Planting Preferences: Overview
- Plant Code
- Plant Groups (Subcategories)
- Schedule Defaults
- Customizing Plant Labels
- Saving Your Preferences in a Preference Set
- Other Preferences Categories
- Related Webinars
Our Preferences settings allow you to configure our software quickly to work closer to the way you work. Although we recommend reviewing the Preferences early in the process of using our software, you can make changes to the Preferences at any time.
The Planting Preferences screen includes settings for plant codes, groups, and labels.
Changing a setting in the Preferences does not affect any existing projects. We engineered this preventive measure to keep users from altering the contents of current projects unintentionally. If you make a change in your Preferences and want to apply it to an existing drawing, you'll need to delete and purge any items that would be affected by the new Preferences settings. When you place these items back in the drawing, the new Preferences will be applied.
Do You Work in an Office With Multiple Land F/X Users? Read This First!
Preferences are saved in what's known as a Preference Set. If you work in an office where multiple people access your installation of our software using an office server or shared online folder, it's extremely important to realize that your office's Preference Sets are shared by everyone. That means if you make changes to an active Preference Set, you're making those changes for everyone who uses that Preference Set. Before delving into changing your Preferences, make sure you have a good understanding of what what Preference Sets are and how they work.
If you're not sure whether you should be making changes to a Preference Set, ask your CAD manager.
Planting Preferences: Overview
To open the Planting Preferences screen, open the Planting flyout from the Planting F/X ribbon in Revit.

Planting F/X ribbon, Planting flyout
The Preferences screen will open. Ensure that the Planting tab is selected.
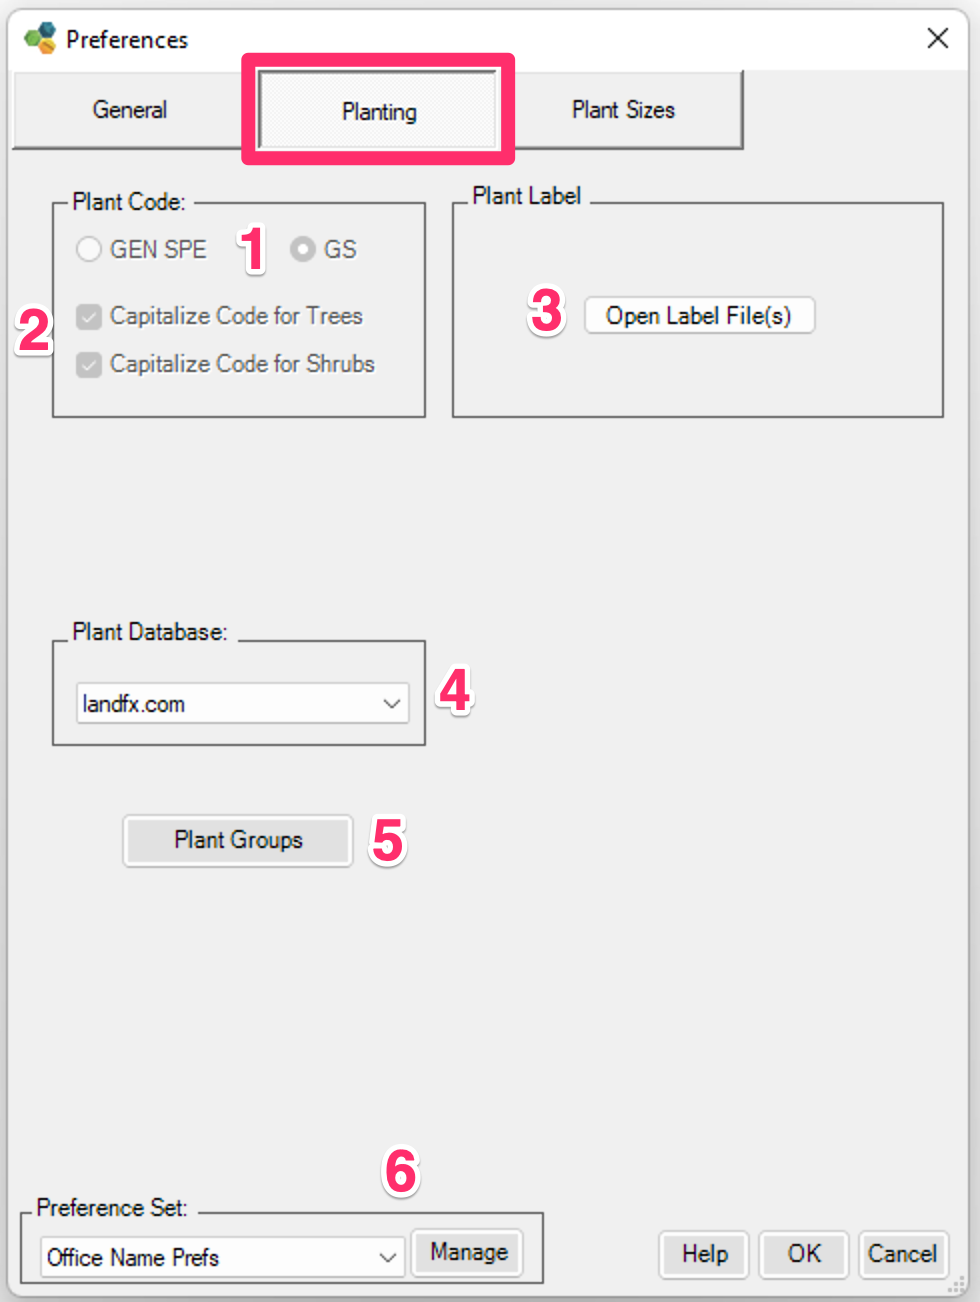
1. Plant Code coming soon: Specify the type of Plant Code to be assigned to each plant when it's added to a project. Note that changing this setting won't change the codes for all the plants in your project, so it's important to make this decision at the beginning of your project.
2. (coming soon) Options to capitalize the Plant Code for trees and/or shrubs.
3. Open Label Files: Click this button to open a file window to open the LAFX_Planting_Tag.rfa to customize it.
4. Select a plant database to use when adding plants to your projects. Currently, only Landfx.com is available in Revit.
5. Manage the Plant Groups (subcategories) available for each plant category in the Plant Manager.
6. Preference Set: Save a specific set of Preferences to apply to a number of drawings. If you want, you can create and save several Preference Sets.
It's a good idea to set the following Planting Preferences early in the design process:
- Plant Code: Do you want it displayed in GEN SPE (the first three letters of the genus and species) or GS (the first letter of the genus and species)? (coming soon)
- Plant Label: Currently a default, able to be customized. Coming soon: 15 default options to start from.
Plant Code
This section provides options for how your plant codes appear in your labels and schedules.
In a multi-user environment, the Plant Code setting is office wide and is not intended to accommodate frequent changes back and forth between two code lengths.
If you change the Plant Code setting, you'll see an option to Change code for all plants in the current project. Use this feature with caution. The drawing with all the plant symbols MUST be open and active if you click Yes, since the system will change the plants in the Plant Manager and the embedded data in the plant symbol. If the drawing is not active and open, the embedded data in the plant symbols won't change and will disconnect from the newly coded plant in the Manager. If you're not able to have a single drawing with all symbols in the project open and active, you should click No and manually edit each plant in the current project to the desired code.
By default, plant codes include abbreviations for the genus and species of the plant.
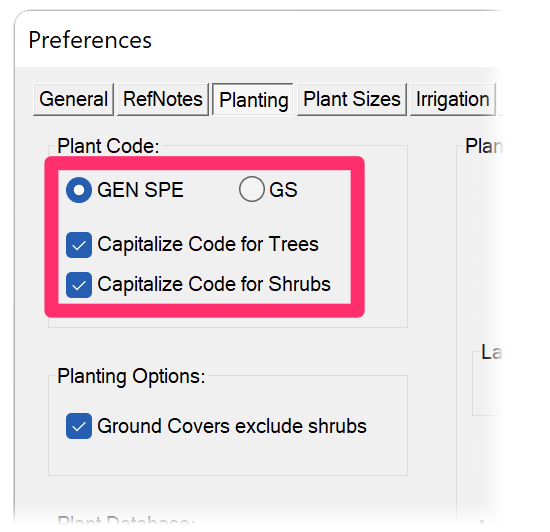
To give your plants three-letter codes for both genus and species in ALL CAPS:
- Select the GEN SPE option and
- Check the Capitalize Code box

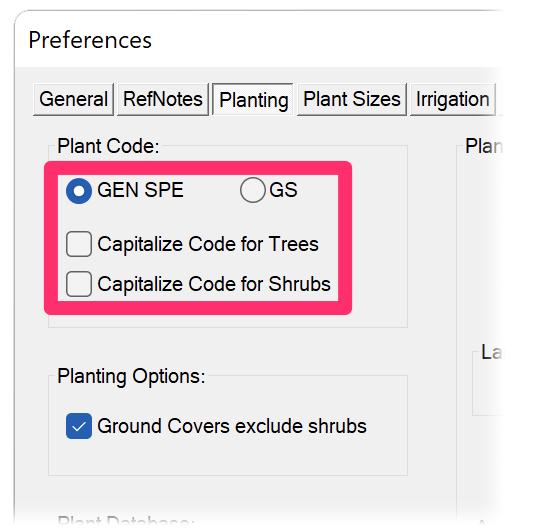
To give your plants three-letter codes for genus and species with initial capital letters followed by lowercase letters:
- Select the GEN SPE option and
- Uncheck the Capitalize Code box

This Plant Code style, generally used in plans that include Alphanumeric plant symbols, requires a few extra steps. For instructions, see our Lowercase Plant Codes page.
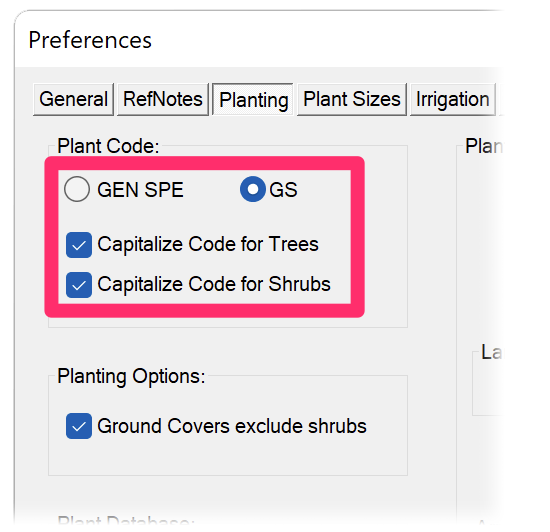
To give your plants two-letter codes in capital letters, select the GS option.

Plant Groups (Subcategories)

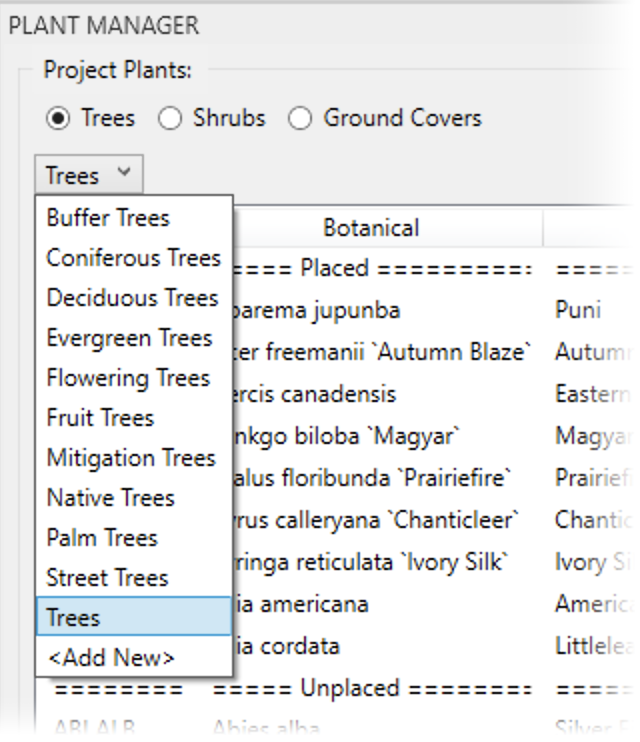
Click the Plant Groups button to manage the list of Plant Groups (aka Subcategories) available within the four plant categories in the Plant Manager, as in the example below.
The Plant Groups dialog box will open.
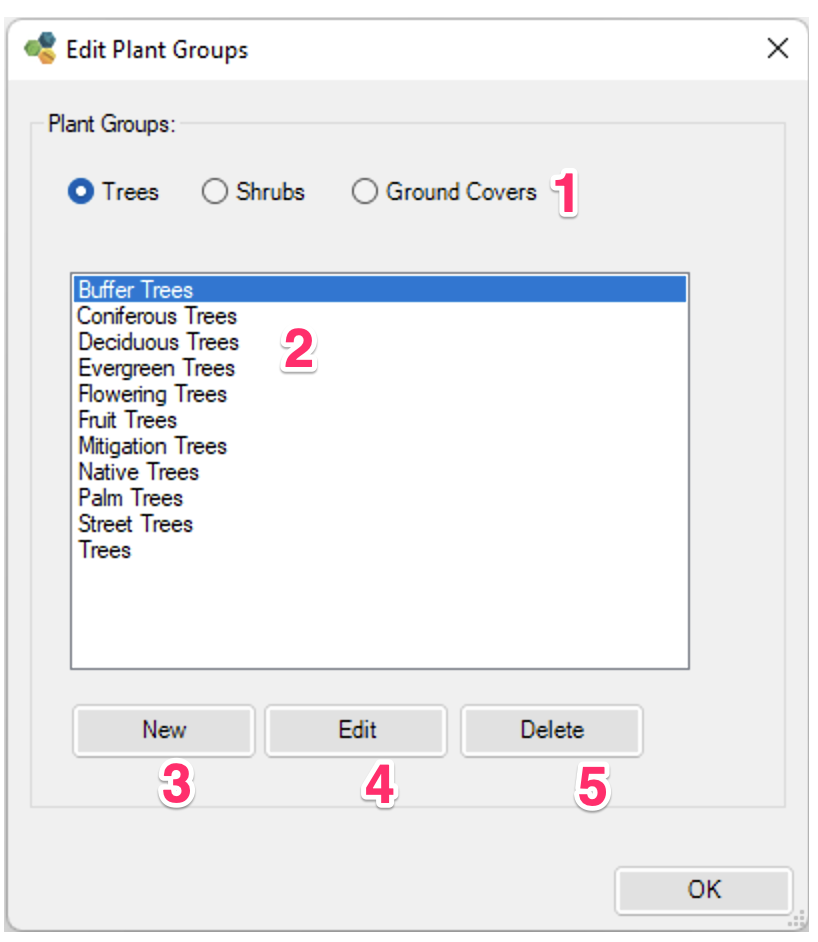
1. Options for each of the three available plant categories (Trees, Shrubs, and Ground Covers. Select one of these options to edit the groups, or subcategories available within that category.
2. The current list of groups within the selected plant category. As you add, edit, and delete subcategories, you'll see your changes in this list.
3. Add a New Plant Group.
4. Edit an existing Plant Group.
5. Delete an existing Plant Group.
(coming soon to Revit) The Plant Groups will soon allow for drag-and-drop reordering. Just drag groups up or down in the list to order it to your liking.
The Plant Groups available in the Edit Plant Groups dialog box (pictured above) correspond with the available groups in the menu for each plant category in the Plant Manager.
When you make changes in the Planting Preferences, you'll see those changes reflected in the Plant Manager when you have the same Preference Set active. If you want, you can create a different list of Plant Groups for each of your Preference Sets.
For information on how plant categories and subcategories work, see the Categories and Subcategories section of our Plant Manager documentation.
Schedule Defaults
(coming soon)
Customizing Plant Labels
Click the Open Label Files button to customize your plant labels.
The source file for the label style you selected will open, and you can make your edits.

Saving Your Preferences in a Preference Set
Preferences control the look and feel of your usage of our software to match your office standards. However, some projects may require different preferences, such as those produced for a client whose requirements differ from your office standard. These projects may require different text styles, or callout looks, or schedule setups, different colors, or any of the various items covered in Preferences.
Once you've configured your Preferences, you can save them as a Preference Set. You can create multiple Preference Sets – one for each client, project type, region ... the choice is yours. When starting a job for a particular client, for example, open the Preference Set you've created for that client. Your standards for that client will be applied automatically as you draft.
Preference Set Options
In all three Preferences screens, the Preference Set options are in the bottom left corner.
For detailed information on creating a Preference Set, see our Preference Sets documentation.

Other Preferences Categories
Our Planting F/X Plugin for Revit also includes the other Preferences categories:
- General: Preferences for Text Styles used by our software (such as for schedules, callouts, titles), as well as license information and several other options, including layer settings and line colors.
- Plant Sizes: Customize the list of plant sizes, default plant size, the number and type of fields in the schedule, and the default cost for each plant in your project.
Related Webinars
- Getting Started with Planting F/X for Revit: Start your journey with Revit and our Planting F/X plugin. We also present our roadmap for future development and show off some new features such as automatic rootball placement and some recent additions to our collections of families and label styles. (1 hr 22 min)
- Intro to Planting F/X for Revit Plugin: As always, our goal with this plugin is to bring the planting design learning curve as low as possible. We cover installation, Planting F/X projects, the Plant Manager, plant placement as families or floors, group labels, Verify Labels, instant schedules, and rendering options with our default family library. (1 hr 12 min)
- Revit for Planting Design: We focus on more tools and show how to tackle more complex workflows in Revit with Planting F/X. We go over customizing the defaults, implementing some labeling strategies, editing floor types, and working with multiple views. We also showcase some new tools and review our most recent development progress. (1 hr 3 min)
Revit® is a restricted trademark of Autodesk®.


