Create Your Own Custom Toolbars
Issue
You want to create your own custom AutoCAD toolbar(s).
Don't see an option for the Land F/X toolbars in the Toolbars menu?
- If you're using F/X CAD or AutoCAD 2020 or newer, use these steps
- If you're using F/X CAD or AutoCAD 2019 or older, use these steps.
Keep in mind that ribbons were introduced in AutoCAD in 2009. Since then, Autodesk has engaged in a transitioning period as toolbars across all CAD platforms have slowly dropped support. (AutoCAD Map completely dropped toolbars in 2018, for example.) We highly recommend familiarizing yourself with the ribbons – they're much easier to use, and they may be your best option in the event that support for toolbars is discontinued in other versions of CAD. This article is intended to help you create an interim toolbar to help transition to using the un-customized Land F/X ribbons and pull-down menus in future versions. More about the AutoCAD and Land F/X ribbons
Want to customize the Quick Access toolbar? Here's how.
Solution
1. Type CUI in the Command line and press Enter.
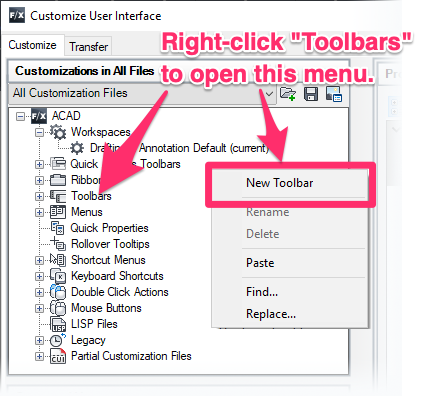
2. In the Customize User Interface dialog box, right-click the Toolbars entry.
Select New Toolbar from the menu that opens.
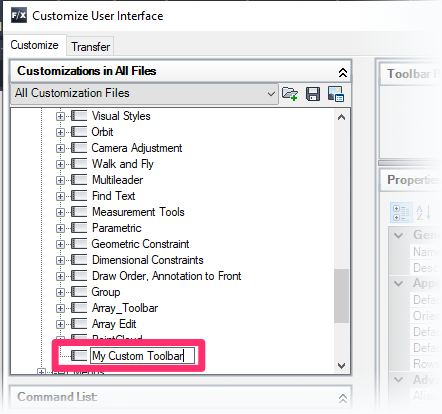
3. You'll be brought to the entry for the new toolbar you've created.
Type a name for the custom toolbar (example: My Custom Toolbar).
4. You can now start adding tools to your toolbar. Scroll to the entry for any existing toolbar that includes tools you want to include. Click the plus (+) sign to the left of the name of the toolbar to expand it and see the available tools.
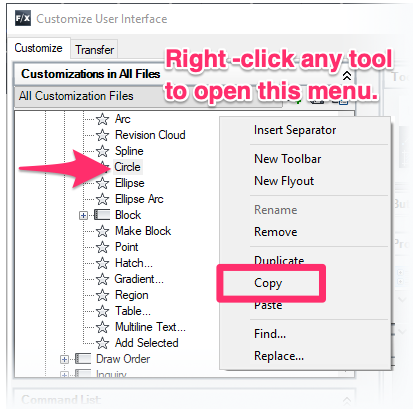
To begin adding a tool to your custom toolbar, right-click it in the list and select Copy from the menu that opens. You can also use the SHIFT or Control/Command keys along with the up and down arrows to select and copy multiple tools at a time.
In this example, we'll copy the Circle tool to add to our custom toolbar.
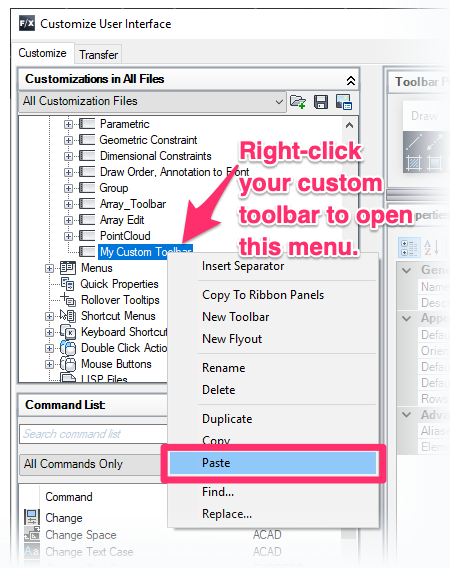
5. Scroll to your custom toolbar. Right-click it, and select Paste from the menu that opens.
The tool(s) you copied will be added to your custom toolbar.
6. Keep copying and pasting tools in this way until you've completed your custom toolbar.
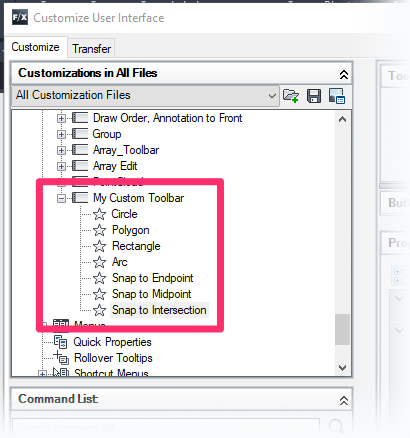

7. Repeat steps 2 through 6 for each new custom toolbar you want to create.
When finished, click OK at the bottom of the Customize User Interface dialog box to save your new custom toolbar(s).
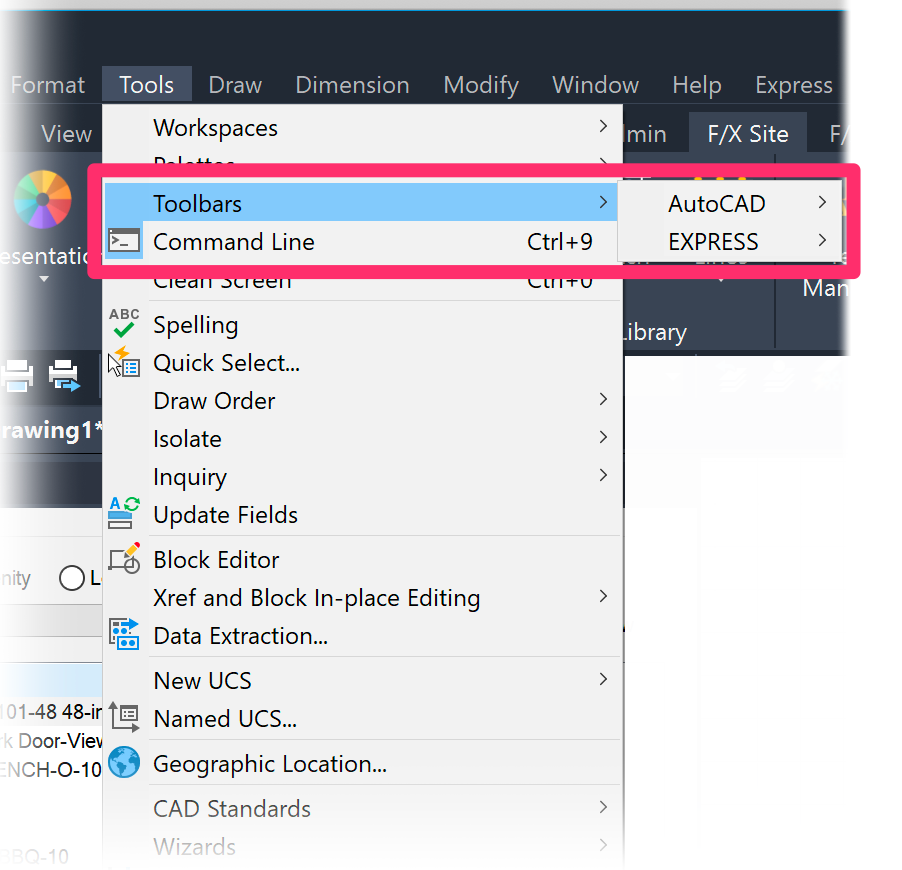
7. To display your custom toolbar, open the Tools menu and hover the cursor on the Toolbars option. Then hover on the AutoCAD option to open the list of AutoCAD toolbars. Select your toolbar from the list. Repeat this step for any other custom toolbars you've created.
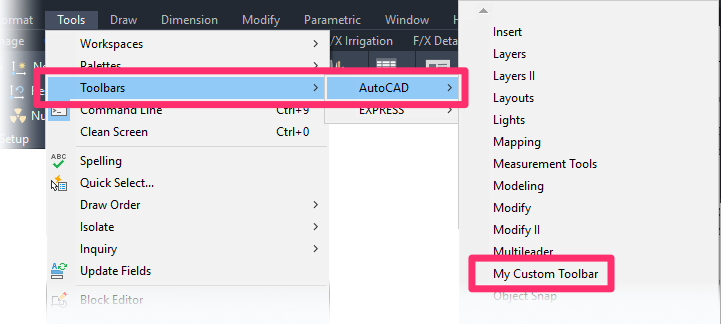
You'll now be able to see your custom toolbar within your AutoCAD interface. You can move it to the location of your choice.


