Change Several Single-User Land F/X Installations to a Multi-User Installation (Local Data, No Office Server)
Your office currently has several computers with single-user installations of Planting F/X, Irrigation F/X, and/or Design F/X. You want to share data (such as symbols, preferences, and projects) between these installations and turn one of these computers into a de facto "server" for the other installations.
An Example
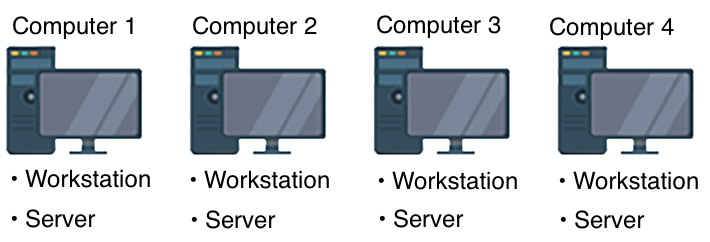
Let's say you currently have four computers in your office, all with single-user installations of our software. Because they are single-user installations, each of these computers currently functions as both a server and workstation in terms of our software. As a result, the computers cannot share Land F/X data directly with each other.

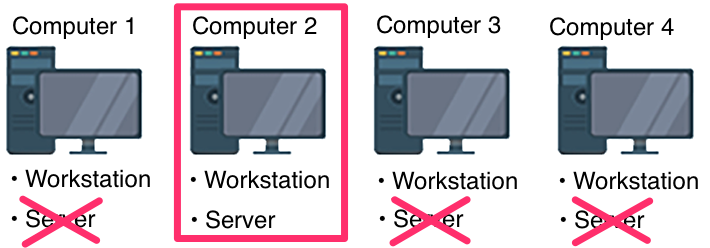
You want to share your Land F/X data between the four computers, with one computer functioning as the de facto "server" – for example, Computer 2.

In this scenario, Computer 2 will become the "server" for the four computers, while also remaining a workstation. The other three computers will become solely workstations and will pull their data from Computer 2.
Although this setup is possible, we generally recommend hosting your Land F/X data on an actual file server if possible. A traditional office server is a superior option – both for backup purposes and ease of use. For more information, please see our article on changing multiple single-user installs to a server setup.
- Step 1: Set up one of your computers to act as the "server"
- Step 2: Back up all Land F/X data on all computers
- Step 3: Uninstall Land F/X software on the workstations (the other computers besides the "server")
- Step 4: Reinstall Land F/X software on each workstation
Step 1: Set up one of your computers to act as the "server"
1. Decide which of your computers will become your de facto "server." This computer will act as your file server and will host all Land F/X projects and data in your office.
This computer does not need to be a file server in the typical sense. It can be just one of your office computers that is connected to your office network (such as Computer 2 in the example shown above).
2. From the computer that will become the "server," follow our steps to share the C:\LandFX folder with full access on your office network.
At this point, you may need to confirm port 3306 is unblocked. This will allow the workstations (the other computers in your office) to connect to the computer that is becoming the "server."
Step 2: Back up all Land F/X data on all computers
Follow our steps to back up Land F/X data from all computers in your office that are currently running our software.
In general, it's always a good idea to have good backup plans in place. Because our software stores data in a MySQL database, however, this backup process is different from just copying files to an external hard drive.
Step 3: Uninstall Land F/X software on the workstations (the other computers besides the "server")
1. Follow our steps to uninstall Land F/X software on each of the remaining computers in your office – not on the "server" computer. Make sure you uninstall the following files:
- F/X Server
- F/X Workstation
- MySQL Server (If you find two or three MySQL files, uninstall all of them)
2. Rename the C:\LandFX folder on each of these computers to C:\LandFX-old.
Step 4: Reinstall Land F/X software on each workstation
Complete the following steps from each computer in your office that will function as a Land F/X workstation (not the "server). In the example shown above, you would complete this step on computers 1, 3, and 4.
1. Follow our steps to map a network drive to the LandFX folder on the "server."
2. Make sure all Land F/X users have full read/write access to this folder.
3. Follow our steps to install the Land F/X Workstation, making sure to run the Workstation installer (setup_FXWorkstation) from within the LandFX folder on the "server" computer. (In our example, you would navigate to the LandFX folder on Computer 2 from each workstation, and run the Workstation installer from that location.)
You should now have a networked setup of our software in your office for sharing data.
Step 6 (if applicable): Copy details, blocks, and other custom content to the workstation that is hosting your shared data
If your office has created custom blocks, details, hatches, or other content, you'll want to copy that content onto the LandFX folder on the workstation that will become your de facto server. Navigate to the apppropriate folders on the LandFX folder on a workstation where you have this content saved. Then copy the appropriate folders into the LandFX folder on the workstation where you've moved your Land F/X data, replacing the existing folders of the same names.
For example, if you have custom details, copy the folder LandFX/details from the workstation into the LandFX folder on the workatation that will host Land F/X for your office, replacing rhe details folder that's already there. Repeat this step with the appropriate folders for any other custom content. Blocks are stored in the folder LandFX/Blocks hatches in the folder LandFX/Hatches, etc.


