Migrate Land F/X (Cloud Data) to a New Computer (Single User)
The steps on this page will show you how to migrate your existing Land F/X data and content from an existing Single-User installation to another Single-User installation on a new computer using Cloud Data.
To complete these steps, you'll need to be using Cloud Data already. Not on Cloud Data yet? Here's how to switch over >
Step 1: Prerequisites
Before completing these steps, make sure that:
You have an existing Single-User installation of Land F/X software on a computer that is not accessing your LandFX folder from a central office server or shared online location.
Does your office have multiple people who are accessing our software using a central office server or shared online folder? If so, please use our Multi-User migration steps for Cloud Data users.
You have Cloud Data – not Local Data.
You currently have Internet access and Admin permissions on both your old computer and your new computer.
You have Admin Permissions on both your old server and your new server.
You have a USB drive handy, or have access to a shared online folder service such as Dropbox or Google Drive.
Step 2: Make sure you're on Cloud Data
Open the General Preferences screen from the F/X Admin ribbon.
Click the Install Info button.
In the dialog box that opens, verify the following in the Project Data area:
- The Use cloud data box is checked, and
- A geographic server location (Example: US-West California: A1), which represents our closest available data server to your location, is listed
If so, you're on Cloud Data.
Important: If you don't see a geographic server location in this area (for example, if you see your computer or an office server), follow our steps to switch to Cloud Data.
Once you've confirmed you're on Cloud Data, you can move on to Step 3: Install Land F/X software on your new computer.
Step 3: Migrate your data to the new computer & install Land F/X and CAD (if necessary).

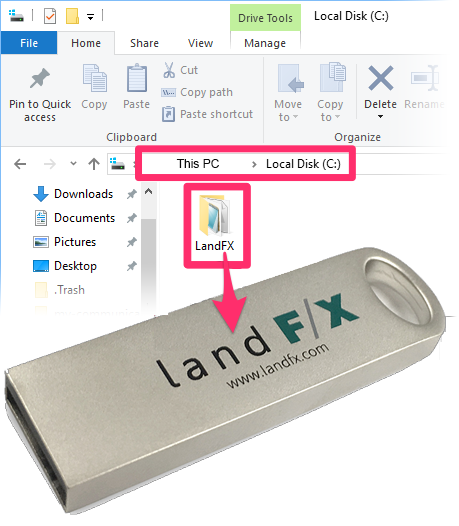
3A. On the old computer, copy the LandFX folder (C:\LandFX\) to a USB drive or shared online location.
3B. On the new computer, follow the appropriate steps to install our software:
- If your new computer already has CAD installed, follow our steps to install Land F/X with Cloud Data.
-
If your computer does not have CAD installed, complete one of the following sets of steps, depending on your planned CAD setup:
- Planning to use AutoCAD (not F/X CAD)? Install AutoCAD on your new computer, then follow our steps to install Land F/X with Cloud Data.
- Planning to use F/X CAD? Install your year version of Single-User F/X CAD on your computer.
Remember: To use Land F/X on your new computer, you'll also need to have either AutoCAD or F/X CAD installed on that computer.
This step will set up a "fresh" installation of Land F/X on your new computer.
Step 4: Verify your Detail Library
Complete this step on your new computer.
4A. Locate the folder that contains your details. If you previously stored your details within the LandFX folder on your old computer, that folder will likely be located at LandFX/Details on your new computer. (You copied it over with the rest of the contents of your LandFX folder in Step 3 above.)
4B. Open CAD on your new computer. Open the Details Preferences from the F/X Details ribbon.
Click the ... button to the right of the Detail Library location.

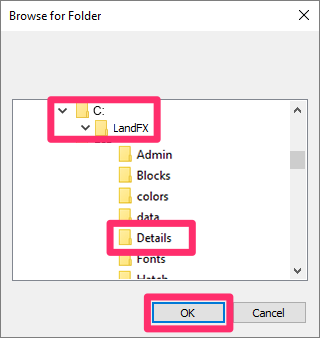
4B. Navigate to the C: drive on your new computer, and select the folder LandFX/Details. Click OK.
4C. You'll be asked, Do you wish to move your entire detail library to the new destination, overwriting what is there?
Click No.

Your office's shared details will now be stored in a folder named ;Details in the LandFX folder on the C: drive of your new computer.
Congratulations!
Once you've moved your data, installed Land F/X software, and set your detail library to the correct location on your new computer, you've completed your Single-User migration.


