Site Color
Quick video
- Site Color Overview
- Our Default Color Wheels
- Accessing Our Default Color Wheels When Placing a True Color Hatch
- Adding Gradients
- Reverting Back to Our Default Color Wheels After Customizing
- AutoCAD Color Books
- Selecting and Placing a Site Color
- Site Color and Layers
- Adding Your Own Color Wheels
- What If You've Created Several Custom True Colors or Wheels Using the Previous System?
- Editing a Color on an Existing Wheel
- Coloring Blocks
- Adding Color to Reference Note (RefNote) Hatches
- Related Webinars
- Troubleshooting
Looking to spice up your site design a bit for a presentation? Our Site Color tool provides a quick and simple method of adding color to your site hatches.
Site Color is only a presentation tool and is not engineered to maintain Land F/X data in a hatched area. Therefore, you should only use this tool to color generic site areas (such as a paving area you'd like to include in your presentation but not calculate its materials). In fact, Site Color will delete any data associated with a hatched area in your drawing if you select that area to color.
Site Color Overview
Open the Site Color tool:
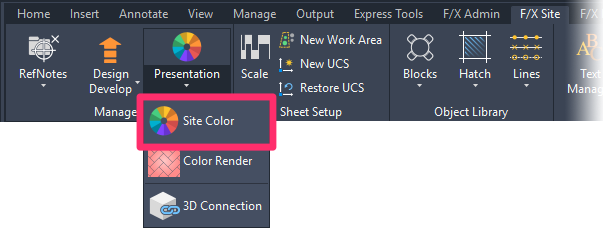
F/X Site ribbon, Site Color flyout

F/X Site menu, Site Color option
or type SiteColor in the Command line
The Site Color Manager will open.
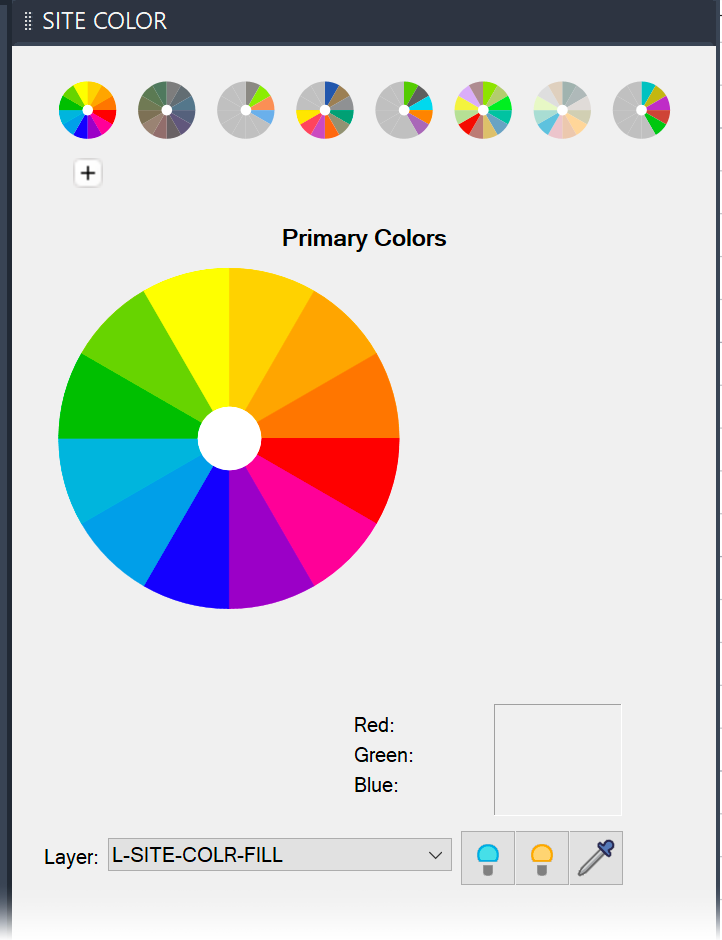
Our Default Color Wheels
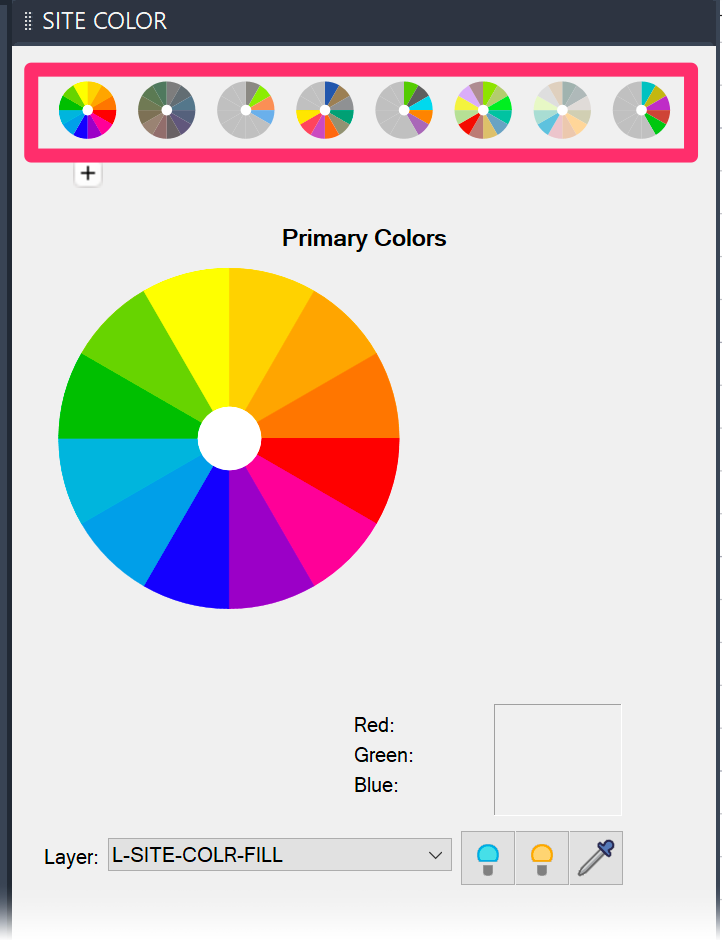
We've created 8 standard Land F/X color wheels, which represent all True Color uses throughout the software. From left to right, those wheels are:
- Primary Colors
- Gray Tones
- APA Land Use: Applies to our Zoning tool
- Irrigation
- Concept: Applies to our Concept Graphics tool
- Planting Areas: For use with our Color Render tool
- RefNote Areas: Applies to Area/Volume Reference Notes (RefNotes)
- Work Areas: Applies to Work Areas, Slope Areas, and Irrigation Circuit Zones
Quick video
When you create an enclosed area using a tool that corresponds to one of the ribbons, that area will take on the first color in the ribbon, the next area you create with that tool will take on the next color in the ribbin, and so on. For example, if you create a Work Area, it will be assigned the first color in the Work Area ribbon, and subsequent Work Areas will increment through the wheel.
You may prefer colors or sequences that work better for your preference of background color, and you're welcome to edit any of the default wheels and add your own color wheels.
Accessing Our Default Color Wheels When Placing a True Color Hatch
Our default color wheels are represented in dialog box form, available from our Hatch tool, which is now pulling from the same data as our Site Color tool for True Color hatches.
When you select the Truecolor tab in the Hatch dialog box, you'll see an option that corresponds with each of our eight default color wheels.
Click the button for the color wheel you want to use for the hatch you're placing, then select the color you want to use.
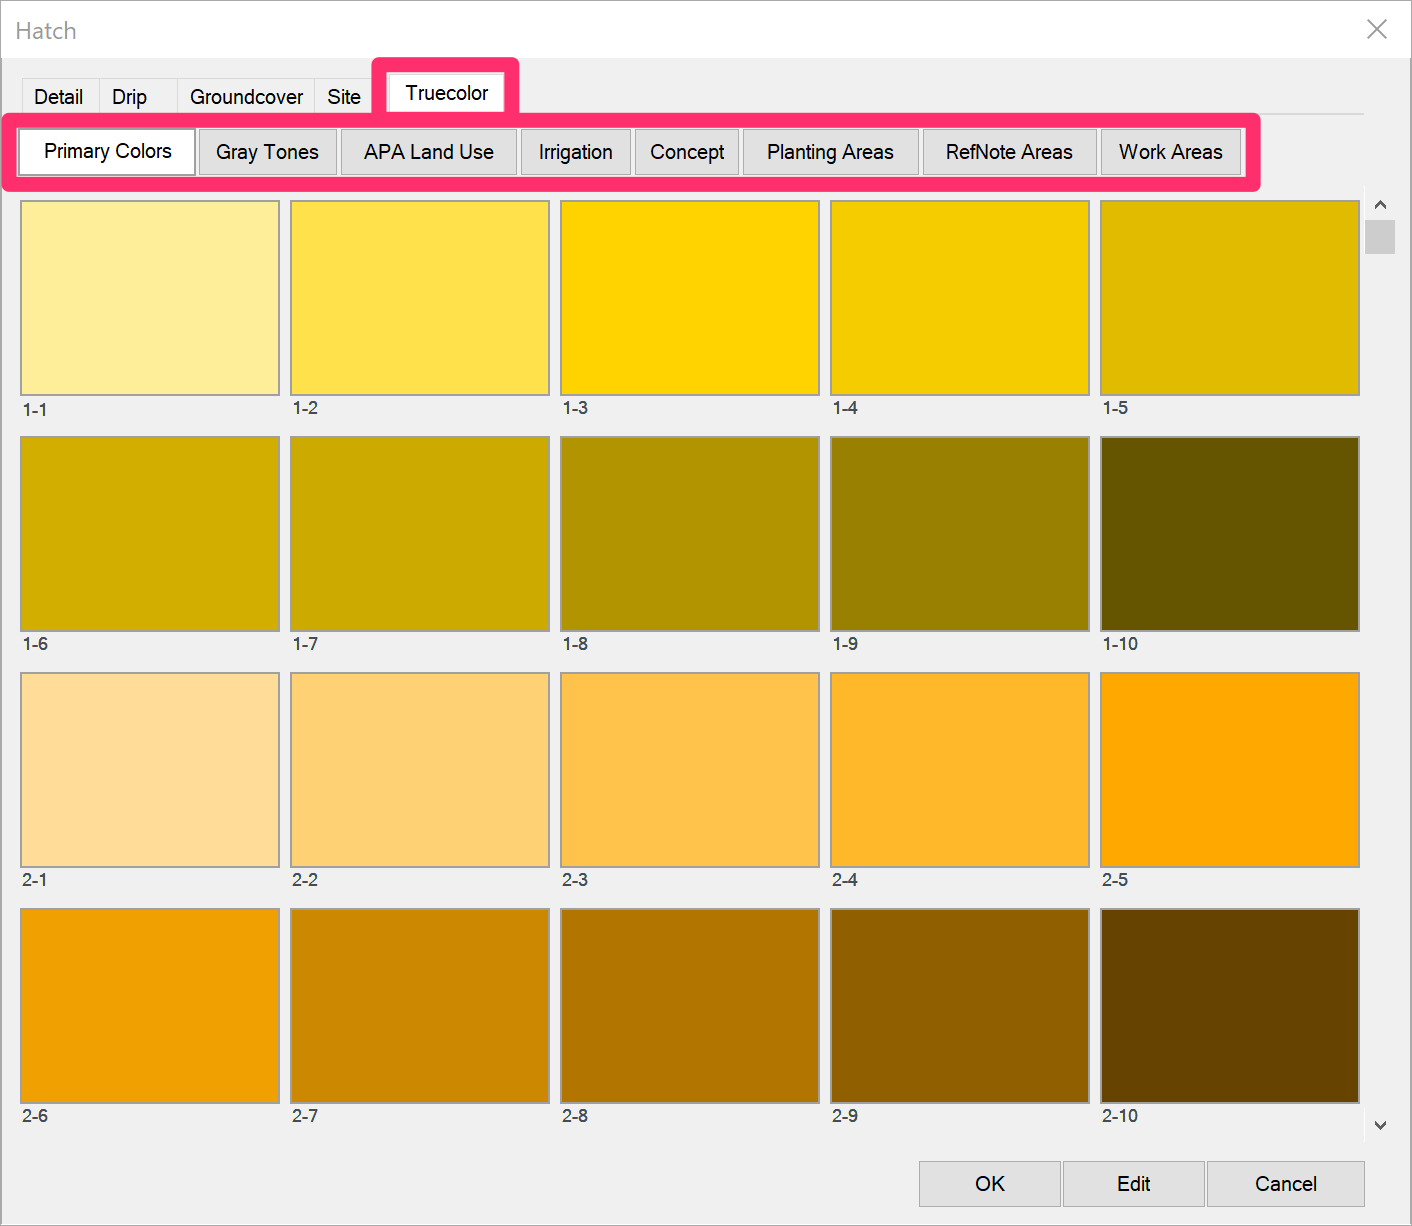
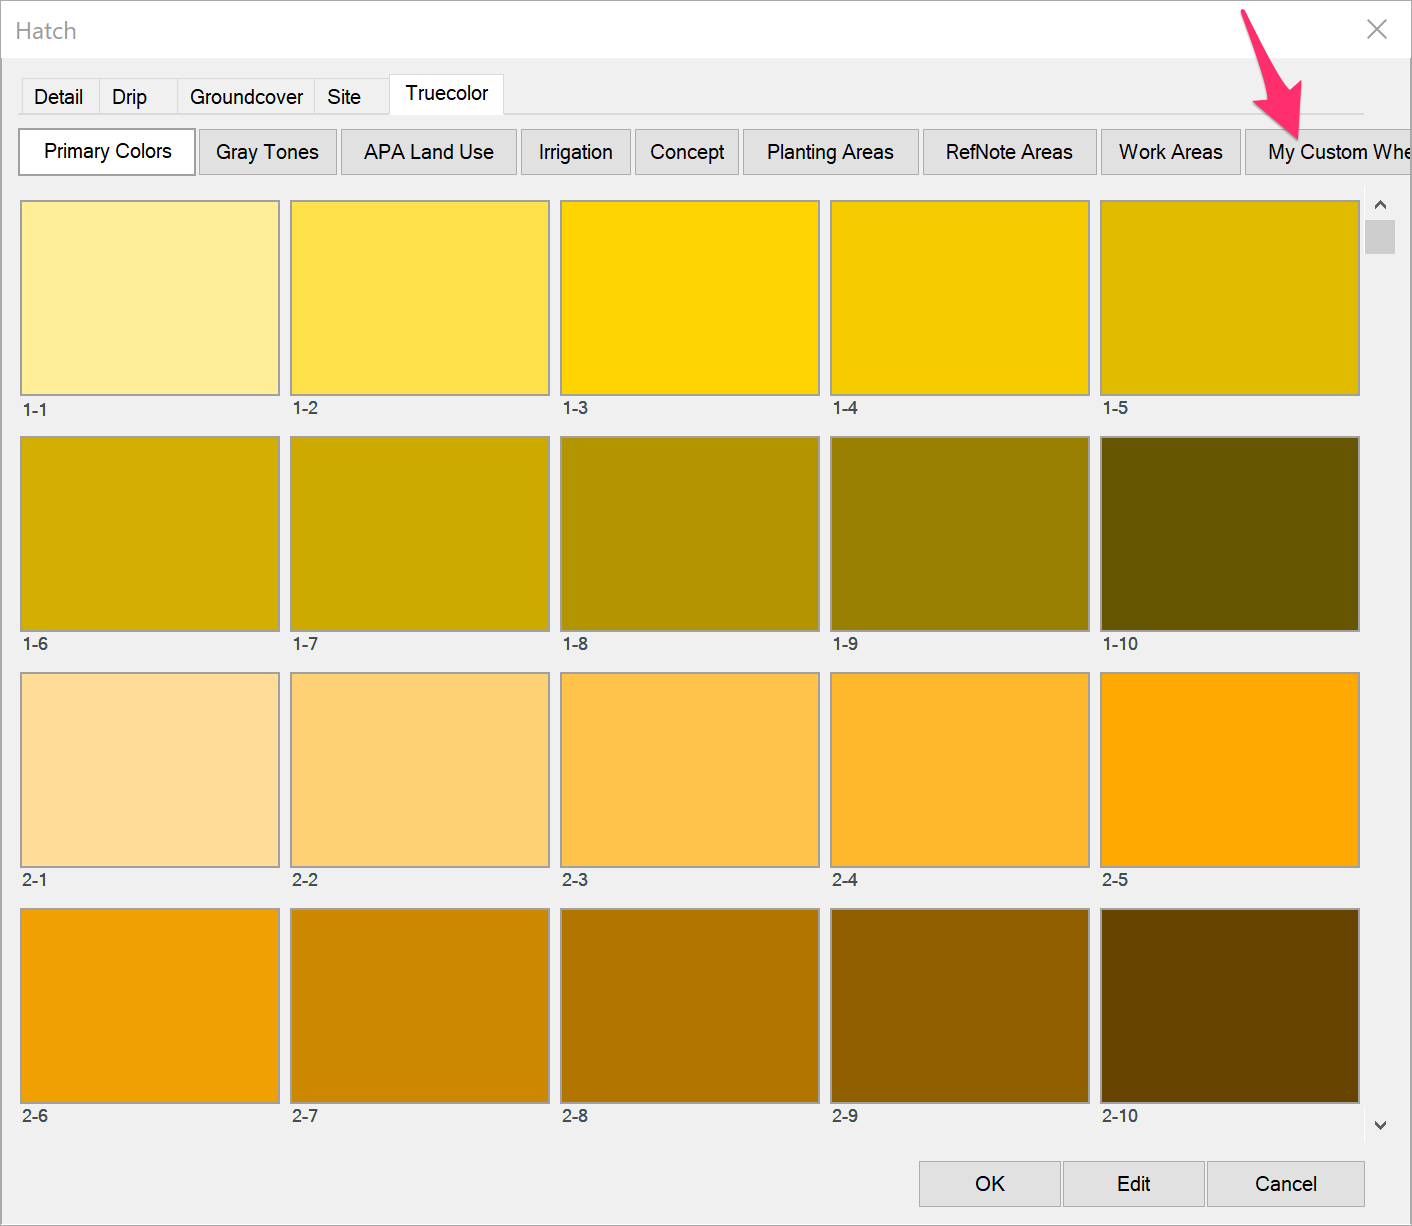
Note that if you add your own custom color wheels each of your custom palettes will also be represented by a button in the Hatch dialog box.
Adding Gradients
You can now add gradients to any of the hues within any color on any color wheel.
Right-click on the rectangle representing the hue you want to turn into a gradient, then select Make Gradient from the menu that opens.
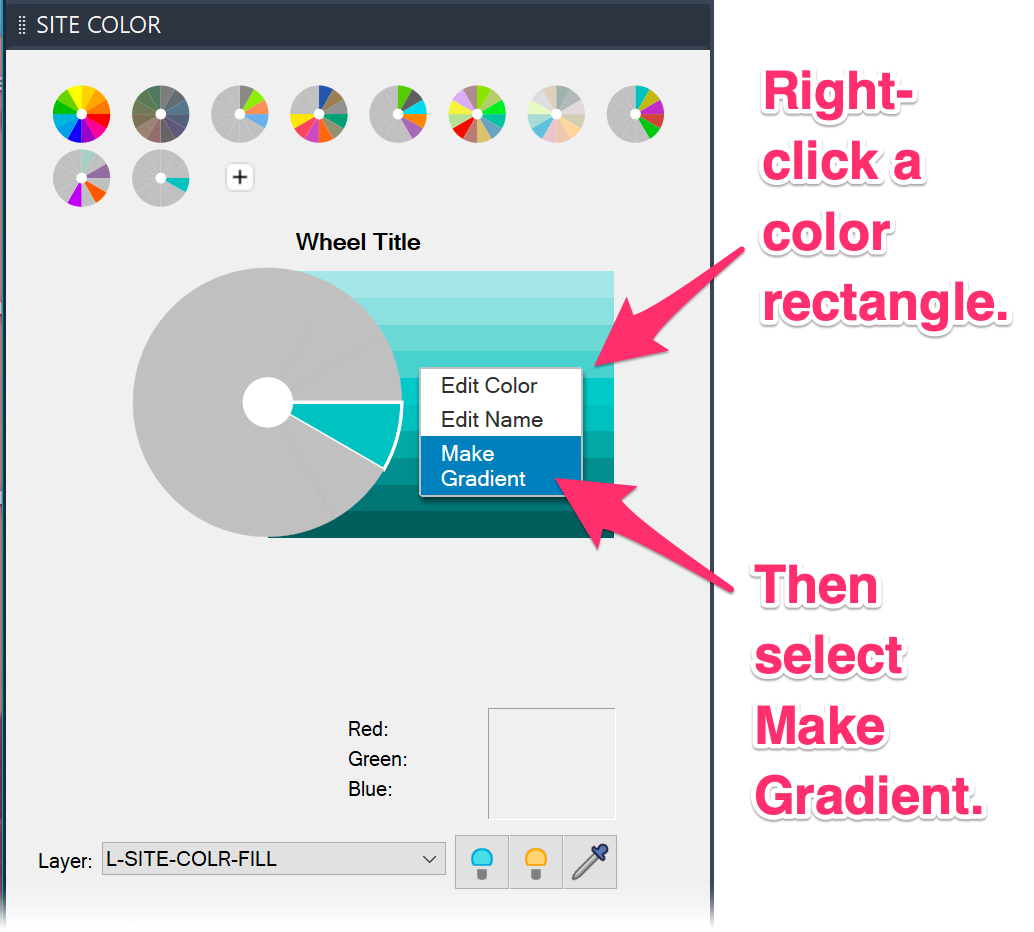
That hue will now be transformed into a gradient.
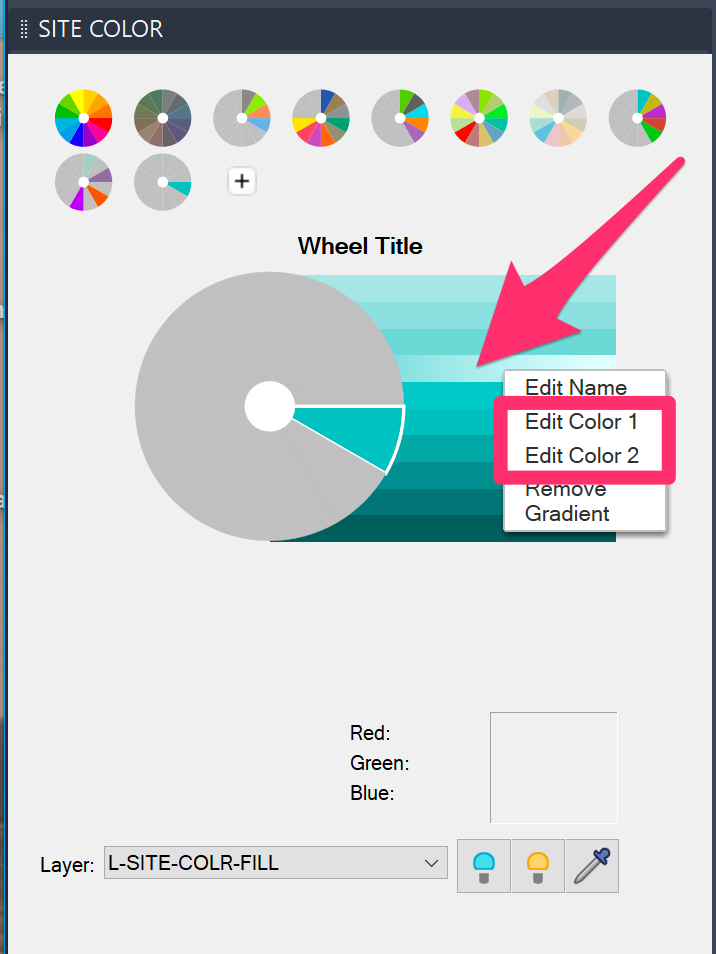
If you want, you can right-click the same hue rectangle and edit the first and second colors in the gradient.
Select Edit Color 1 or Edit Color 2 to edit the first or second color in the gradient.
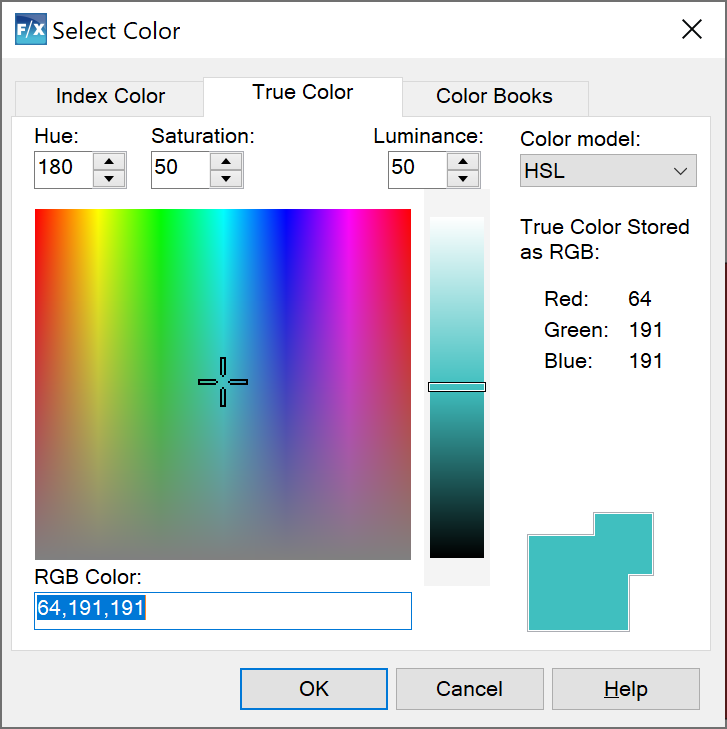
If you select either of these options, the Select Color dialog box will open and you can select the exact hue you want to assign to Color 1 or Color 2 in the gradient.
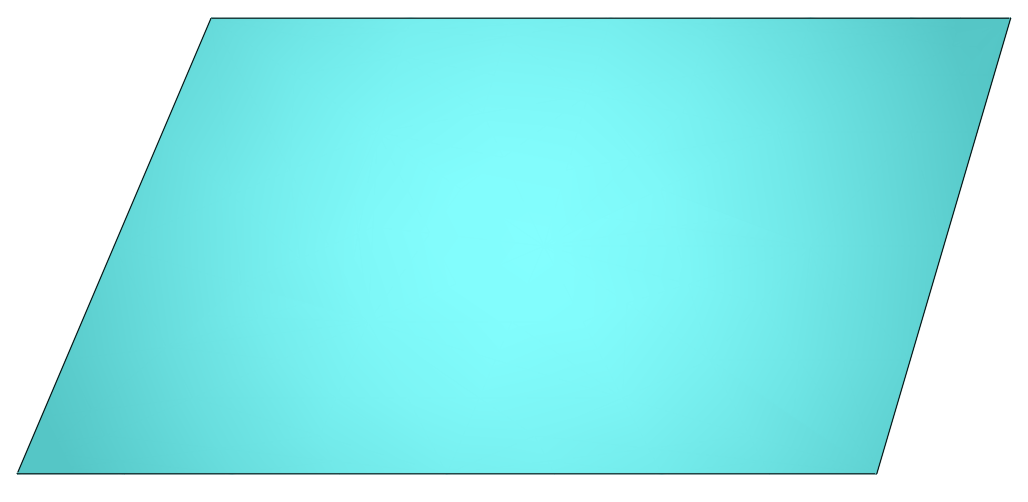
Here is an example of a gradient placed within a closed polyline.
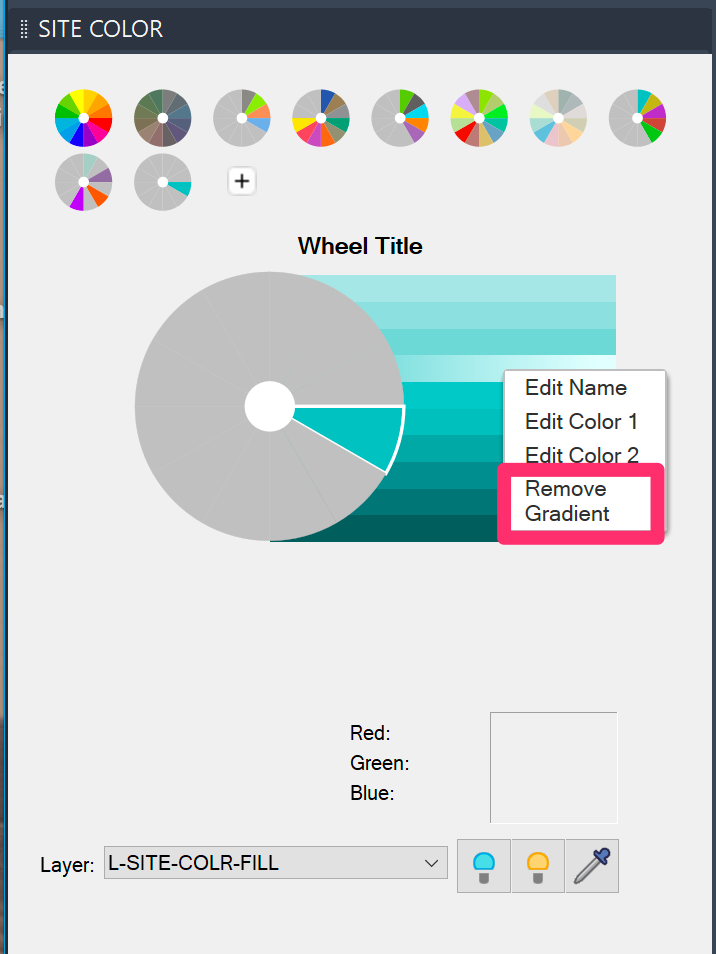
To remove a gradient from a hue, right-click the rectangle representing that hue and select Remove Gradient from the menu.
The gradient will be removed.
Reverting Back to Our Default Color Wheels After Customizing
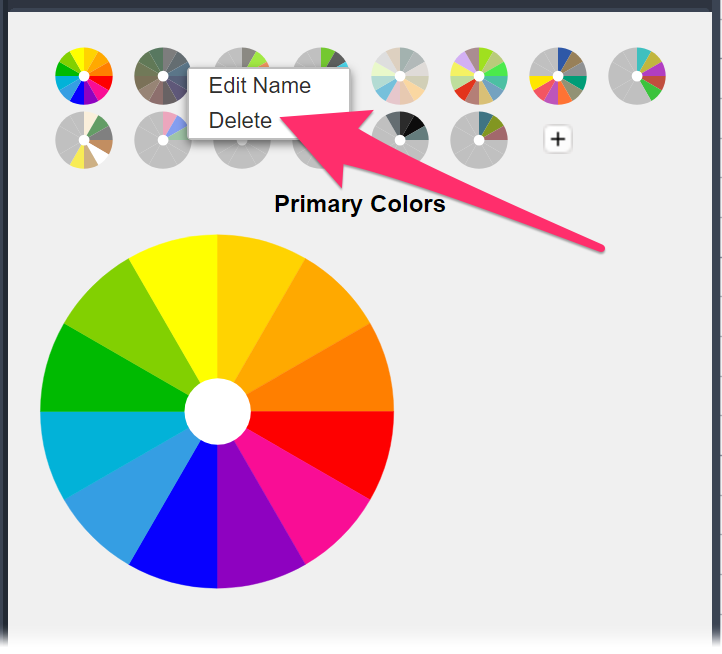
The top 8 wheels are our default color wheels. If you customize any of these wheels and want to revert back to the default color settings, right-click on that wheel and select Delete from the menu that opens.
The default wheel will regenerate automatically, overwriting any changes to that wheel.
Note that you can only revert our default wheels. The system is unable to regenerate regenerate any of your own custom wheels.
AutoCAD Color Books
Each color wheel is exported automatically as an AutoCAD Color Book.
From the Truecolor tab in the Hatch dialog box – accessed from either our Hatch tool or when selecting an area color for Schematic Irrigation, Zoning, or Concept Graphics areas – the local color book will be updated at most once per session of CAD.
Each time you start a color wheel palette, the Site Color tool will check all eight color books and refresh them as necessary.
You can access those Color Books from the standard AutoCAD color picker. For example, when selecting a color for a Layer, select the Color Book tab. From there, you'll see the eight Land F/X color books. (Each book's name will start with LAFX).
Note that AutoCAD only checks Color Books once when first loading, so you may need to restart CAD for the Color Books to be listed.
If you edit a color wheel, you might add several color wedges and change a number of colors. As you make changes in the palette, the local Color Book will be updated with each update, but you'll need to restart CAD to see those changes reflected in the Color Book.
If you choose a color for a Concept Node or Concept Line using our Concept Graphics tool, note that the tool will still default to the basic CAD True Color dialog. You're welcome to click over to the Color Book tab if you prefer.
Selecting and Placing a Site Color
Selecting a Wheel, Color, and Hue
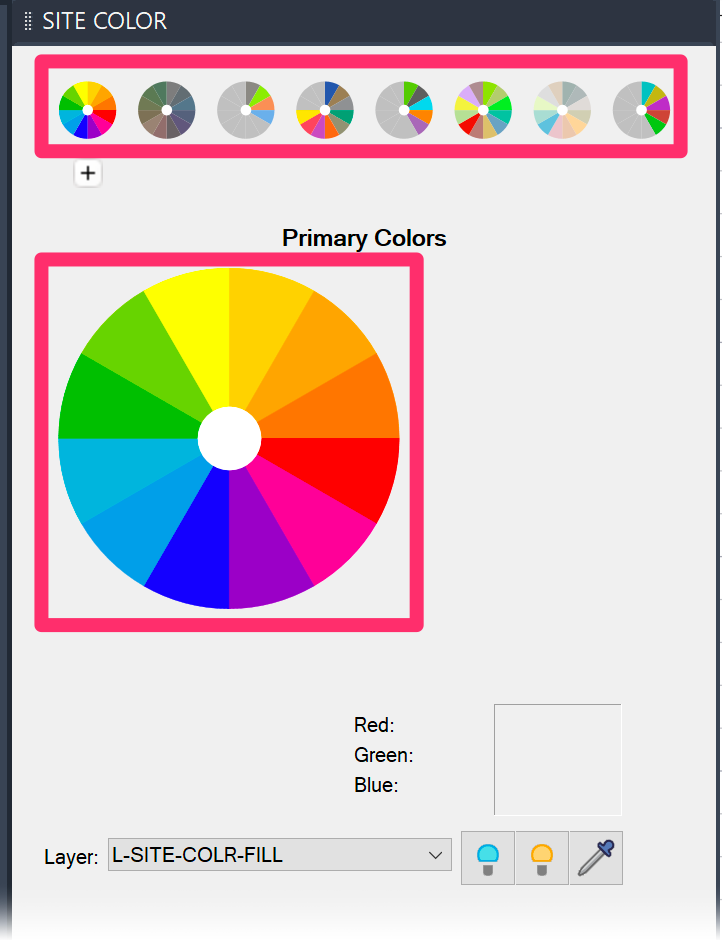
The small color wheels at the top of the Manager are the available color wheels.
The larger color wheel is the currently selected wheel. Click one of the smaller wheels to select it.
To select a range of colors to place, click a color on the color wheel (example: red).


You'll now see a range of hues of that color.
Select a hue to place it.
The Site Color palette also lists the numeric color value of the selected hue.
Placing a Site Color
Remember: Site Color is designed as a presentation tool for your generic hatches. It's not designed to coexist with areas that contain data (such as Area/Volume RefNotes, groundcovers, etc.). If you place a Site Color in an area that contains data, you'll delete that data from your drawing.
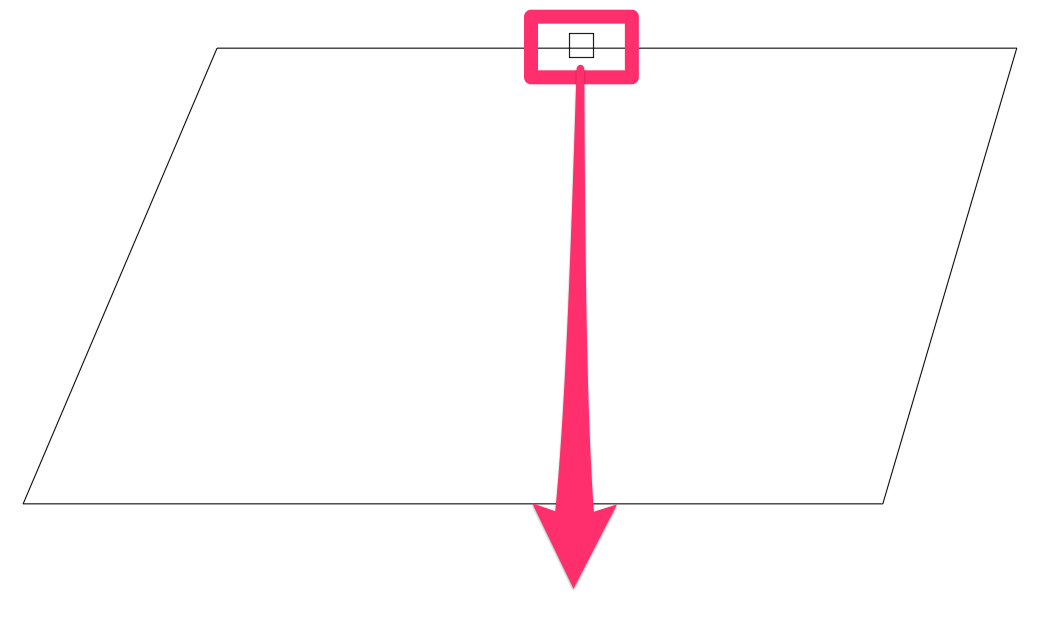
When you select a hue, the cursor will turn into a pickbox, and the Command line will prompt you to Select polyline or interior point to hatch, [Draw].
Use the pickbox to click a closed polyline area in your drawing.
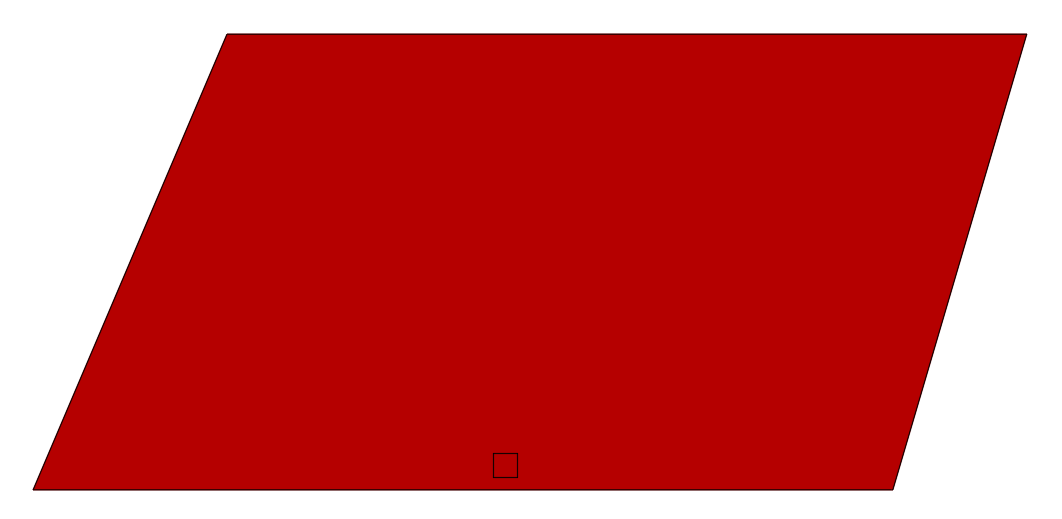
The area will now be shaded with the hue you selected.
As with our other hatches, you can also type D with Site Color active to draw a new closed polyline area to color.
Site Color and Layers
Site Color works by layer, meaning the colors it places will exist in your drawing on set layers.

The Site Color Manager includes a Layer menu that lists the currently selected layer of your drawing where the selected color will be placed.
The default Site Color layer is named L-SITE-COLOR-FILL.
If you place a color in your drawing with this layer selected, that color will exist in the drawing on the layer L-SITE-COLR-FILL.
Adding Your Own Site Color Layers
It's a good idea to add a new layer for each Site Color you want to place in your drawing. Adding your own layers will allow you greater freedom in adding and removing various colors in your drawing.
To add a layer, select New from the Layer menu.

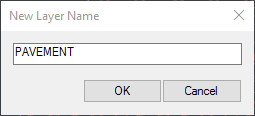
The New Layer Name dialog box will open.
Type a name for your layer (example: PAVEMENT). Then click OK.
You'll now see your layer name in the Layer menu.
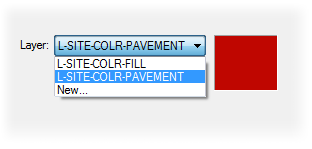
To place a color on your new layer, select that layer from the menu. Then select and place a color.
You can continue to add new layers as needed for different site areas you want to color.
Turning Color Layer(s) On and Off
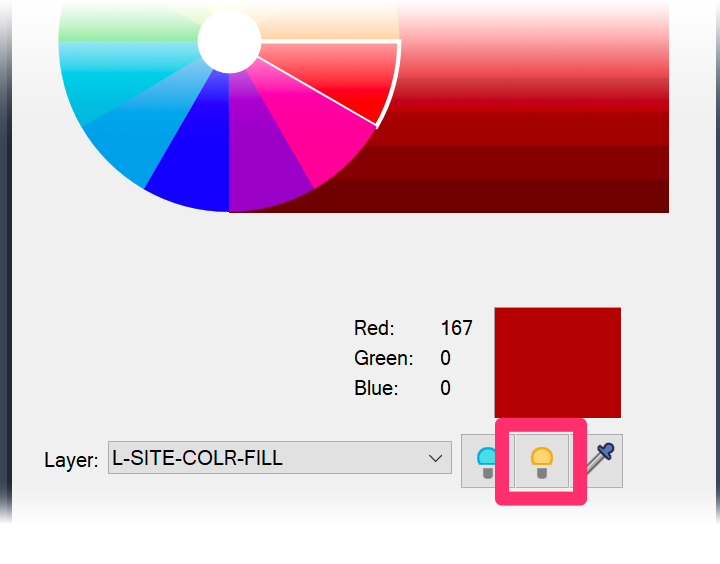
We've updated the Site Color tool to include buttons that turn color layers on and off. These quick settings can come in handy when you need to transition from presentation to construction documents, or back into presentation mode.
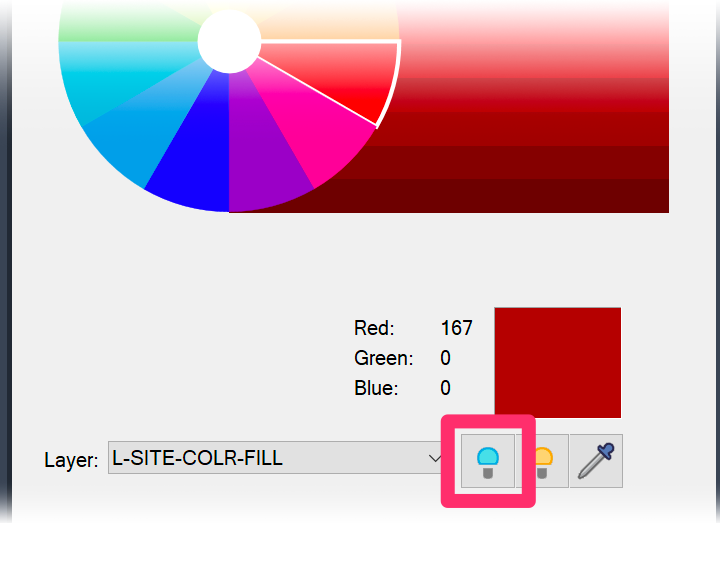
To turn your Site Color layer(s) off, select the layer in the Layer menu and click the dark ("off") lightbulb button.
The color fills on the selected layer will be turned off, as shown below.
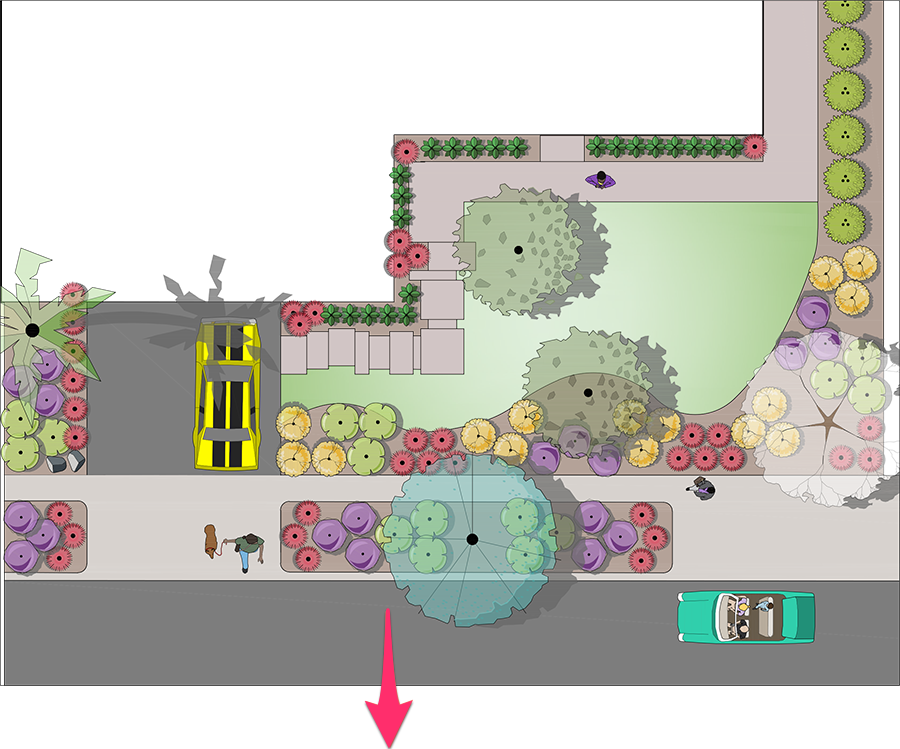
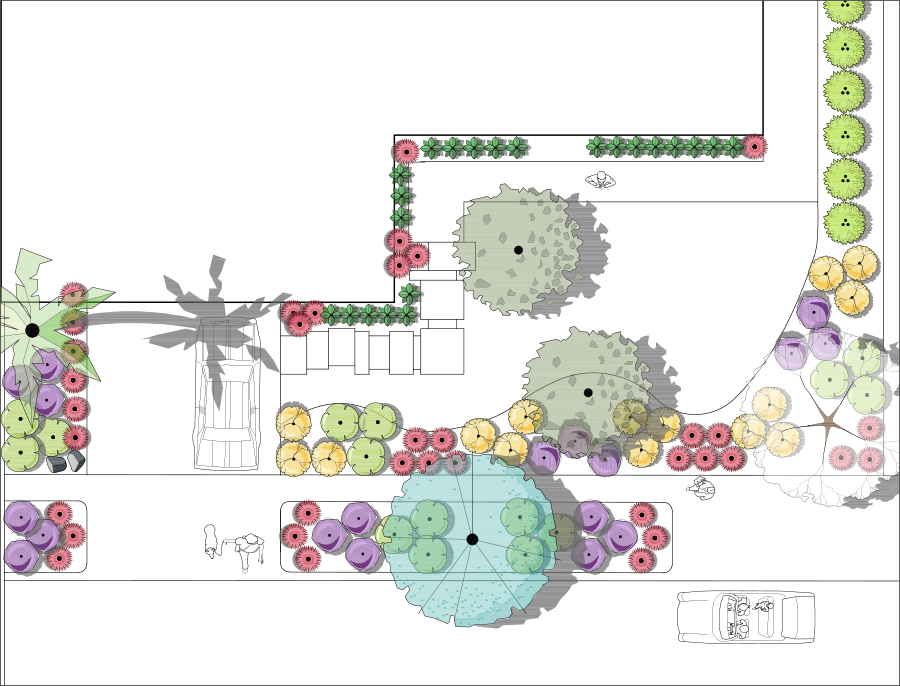
To turn your color layer(s) back on, select the layer and click the yellow ("on") lightbulb button.
Adding Your Own Color Wheels
The default color wheel in the Site Color Manager is a basic wheel containing (roughly) all the colors in the prism range. You can easily create your own custom color palettes by adding your own color wheels.

To add a new color wheel, click the plus (+) sign at the top of the Site Color Manager.
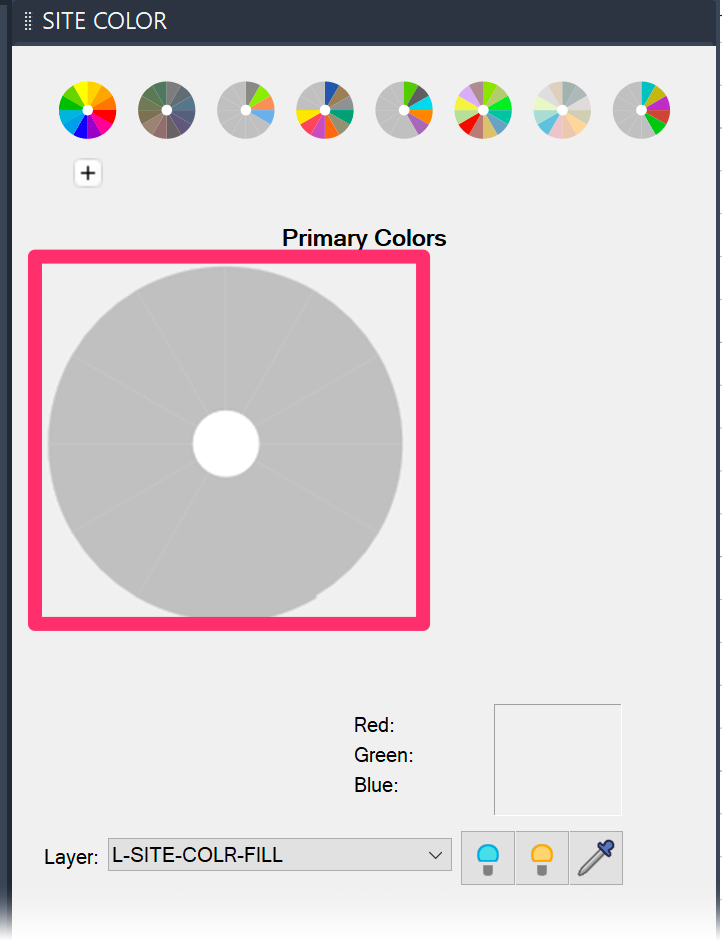
You'll now see a blank gray wheel in the Site Color Manager. Give your new wheel a new name and click Save to save it under that name.
Click the wheel to start selecting colors to add to it.

The Select Color dialog box will open. Click within the prism to select a color. You can refine your color using the various menus, which offer options such as Hue, Saturation, and Luminance.
You can also select a Color Model or type an RGB color value. Click OK to add the selected color to your custom wheel.
For additional information on selecting a color, see our Selecting Colors documentation.
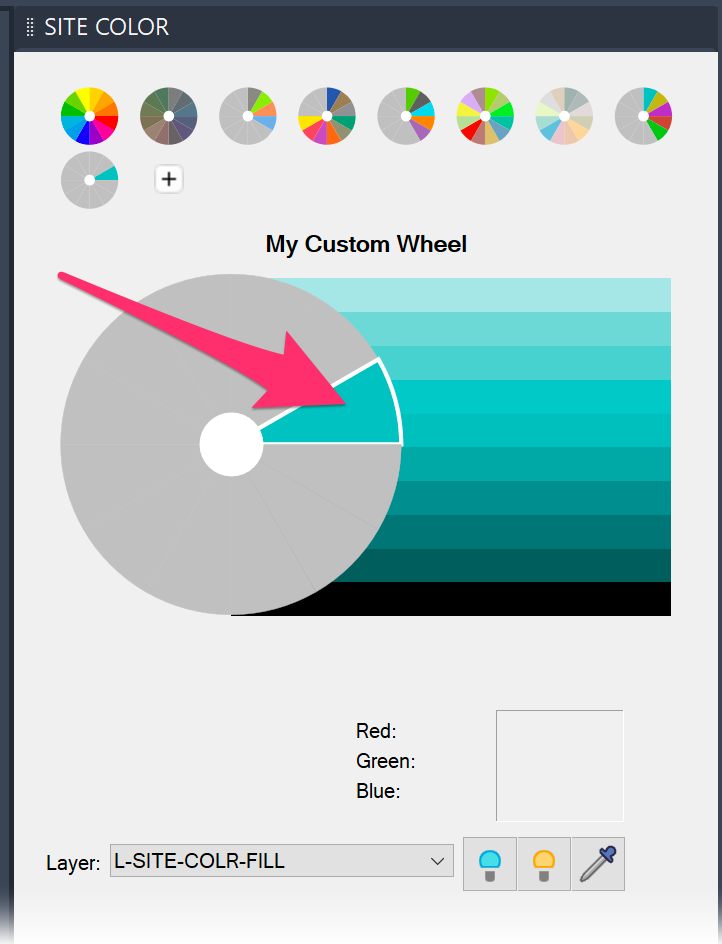
You'll now see a section of the wheel in the color you selected.
When you select that color, you'll see the range of available hues.
You can continue to add colors to complete your custom wheel.
Matching Specific Color Palettes
Need to match a specific color palette? Use the following links:
- Pantone: Browse the Pantone Color Books.
- Chartpak: Browse 47 Chartpak markers and their RGB values. (Mike Lin Palette)
What If You've Created Several Custom True Colors or Wheels Using the Previous System?
If you've created color wheels or added your own True Colors prior to this update, you'll need to take a few extra steps.
If you edited the previous default color wheels, you will not be upgraded to the new ones, where each color is assigned 10 hues (rectangles) instead of 5.
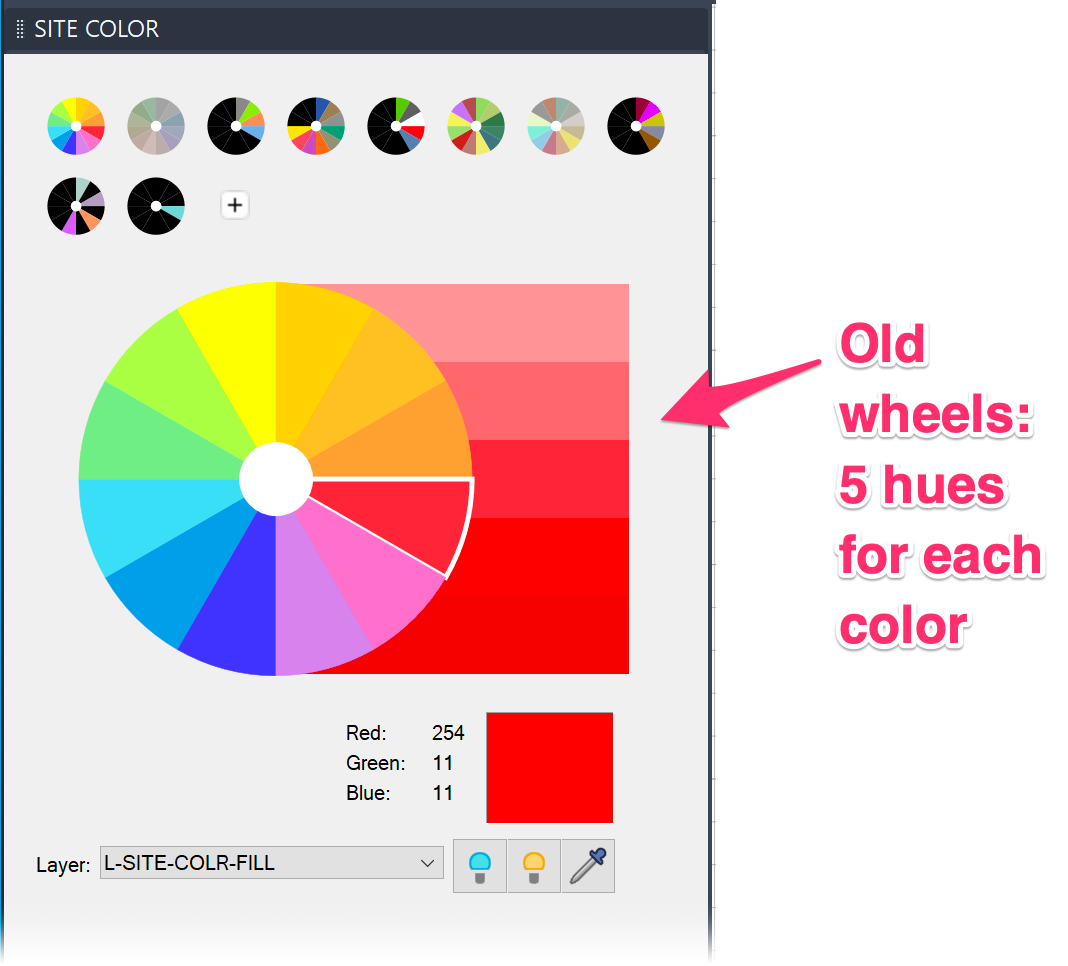
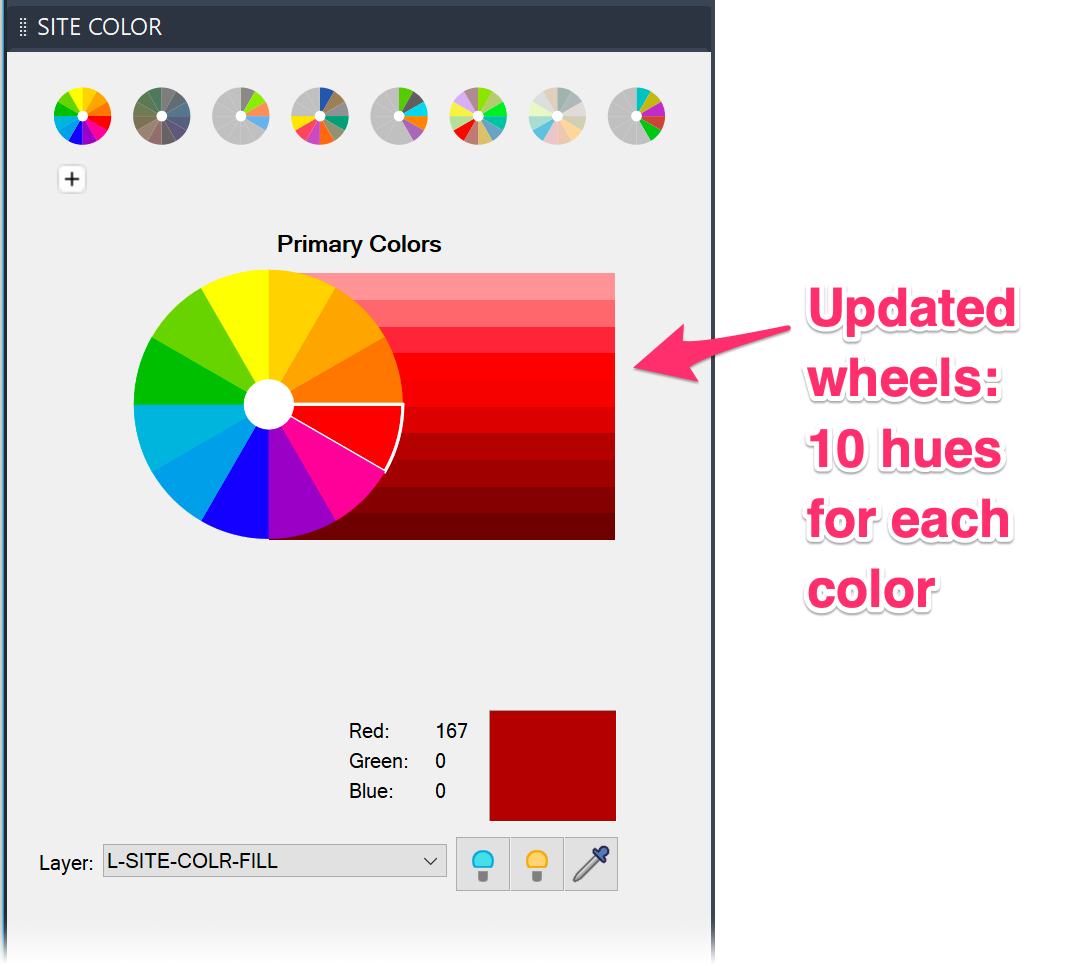
If you're willing to start fresh with the new defaults, you can delete any of those default 8 color wheels and the system will re-populate it with the current defaults.
To delete a wheel, right-click it and select Delete from the menu.

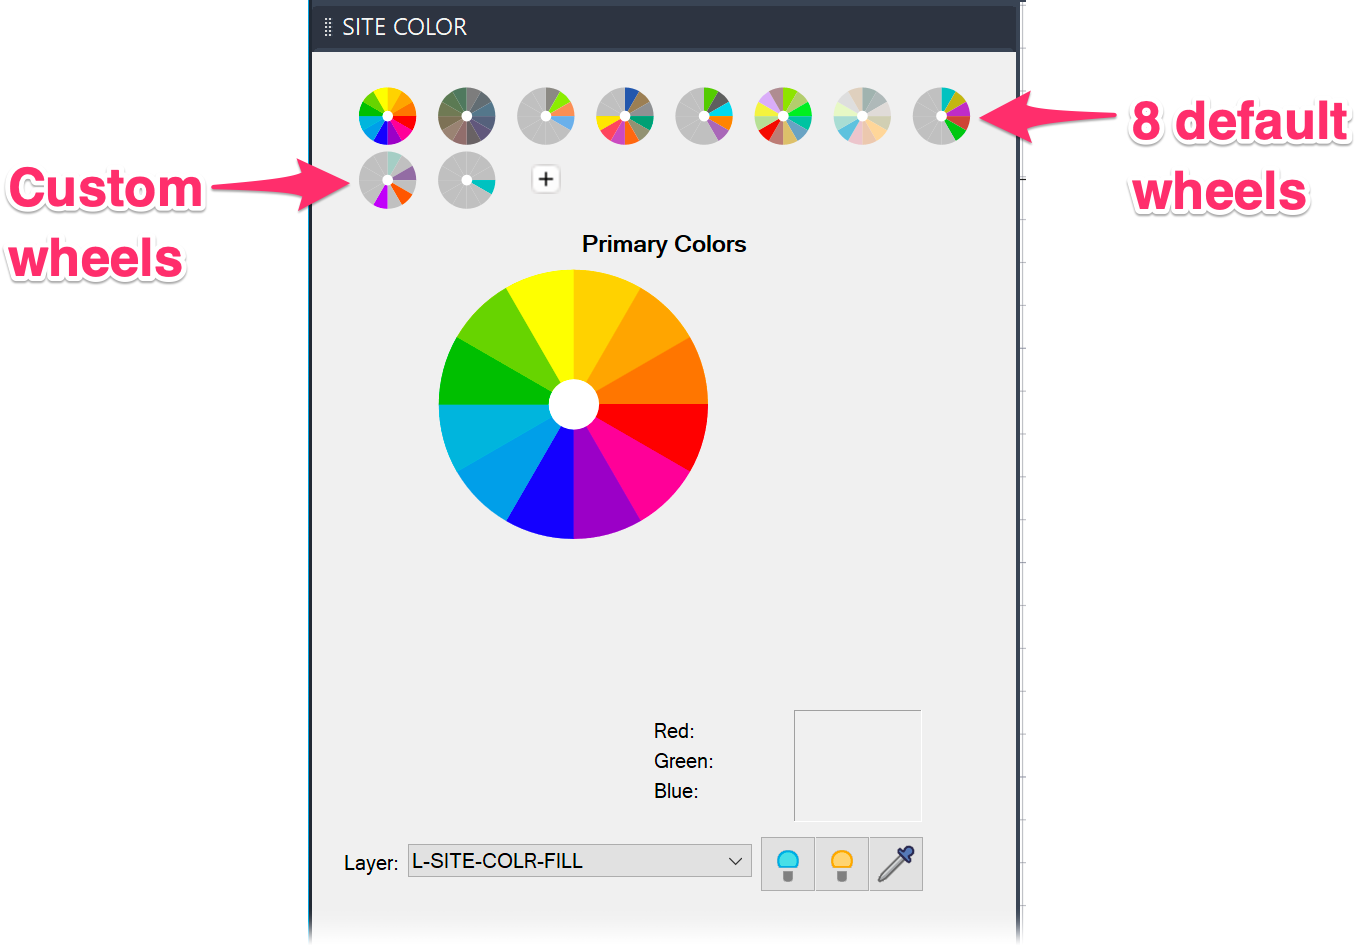
Any custom wheels you've created should be visible beneath the 8 defaults.
These wheels will have the all the same color wedges as your original wheels but will now have 10 slices for each wedge, plus the ability to change them to Gradients.
What to Do If You've Created Custom True Colors in the Hatch Dialog Box for Land F/X Tools
Previously, when you a used Land F/X tool that accesses True Color hatches, you were able to click an empty thumbnail and specify a new color. This feature was previously available with several of our tools, including:
If you've edited one of these True Colors, this update did not apply your edits automatically.
For example, you may have edited several of the Irrigation colors also added some Zoning colors, but you won't see your edited colors in the dialog box anymore.
If you've added True Colors in this way, here's what to do to get them back.
Editing a Color on an Existing Wheel
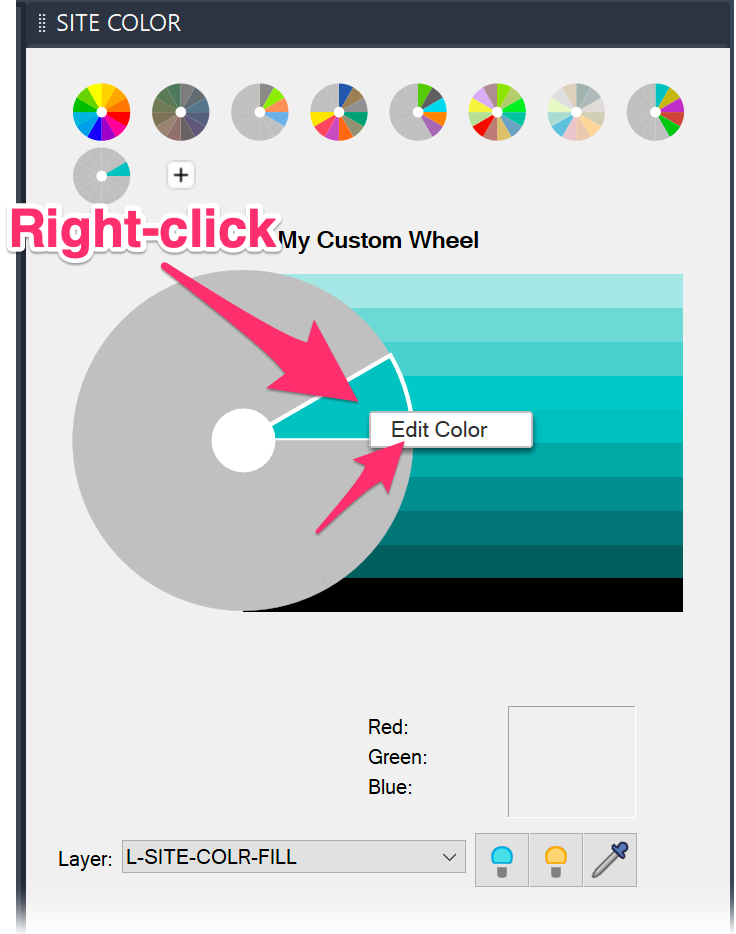
To edit a color on an existing wheel – including wheels you've created – right-click that color on the wheel to open the Edit button.
Click Edit to edit any of your colors.
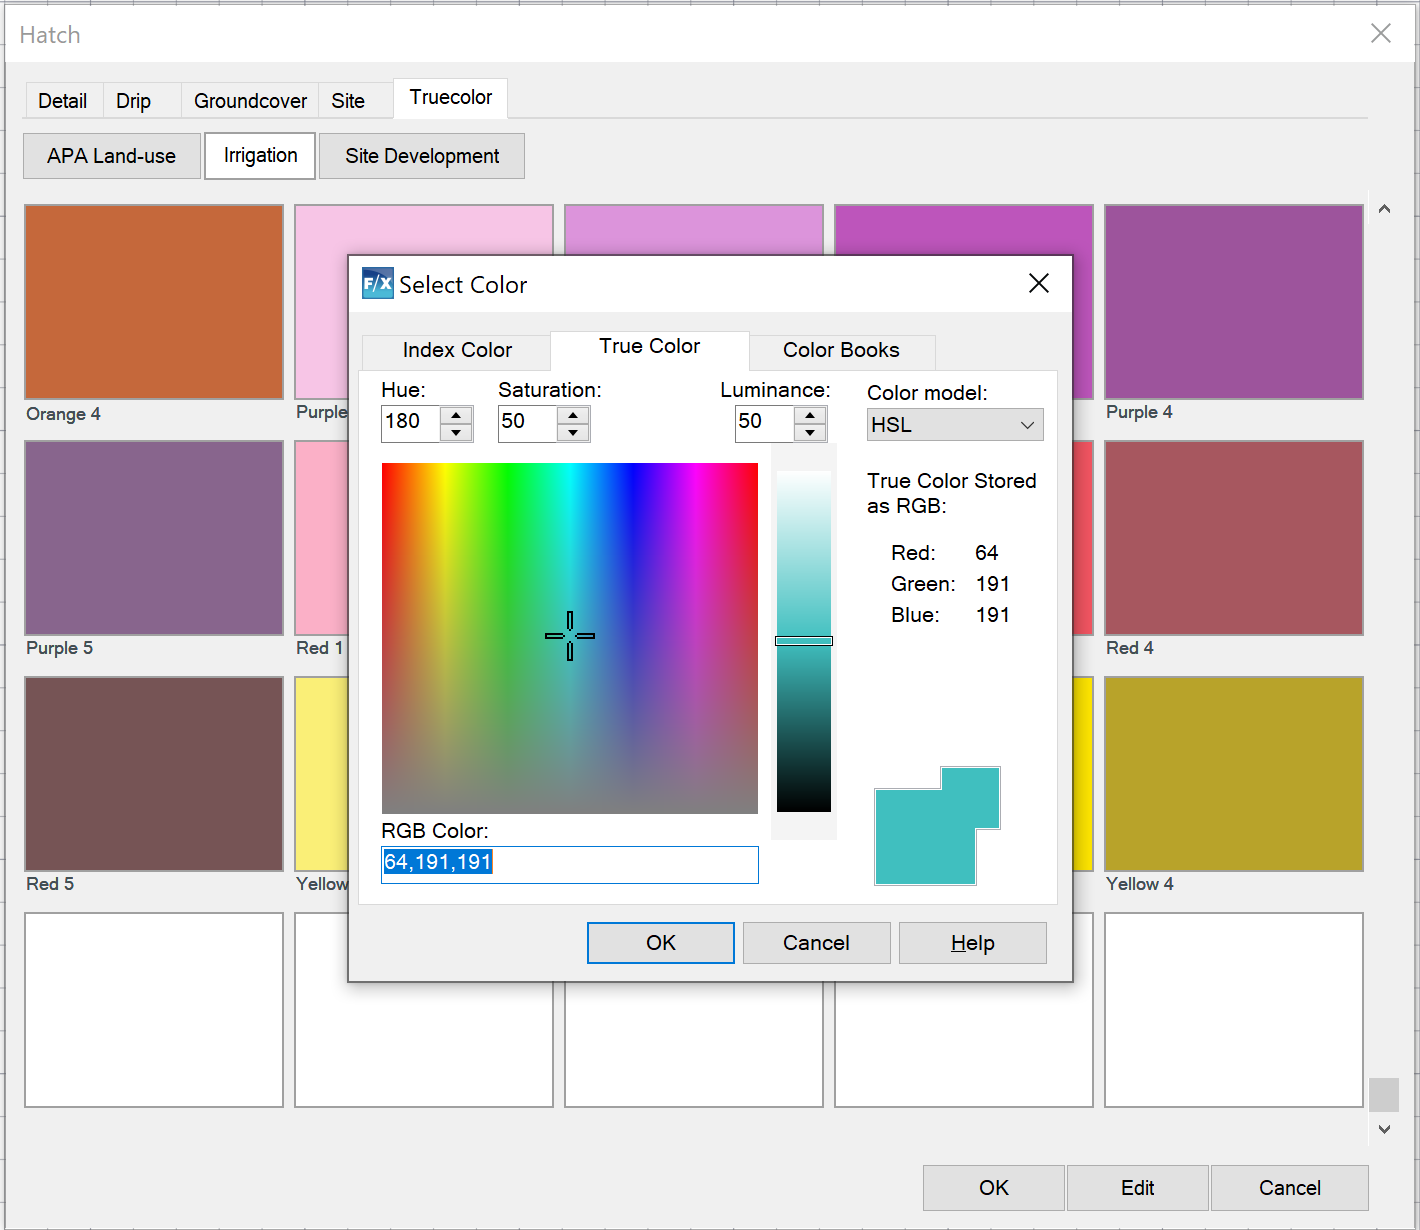
In the Select a Color dialog box, you can refine your color by clicking within the prism as well as using the various menus and fields.
You can also edit any hue of a color on an existing wheel using this same method. However, we recommend editing on the color level rather than on the hue level. Editing hues creates a few complications that make it not worthwhile unless you're extremely particular about the hue you want to place in your drawing. Even then, the dialog box shown above allows remarkable precision in refining your colors and, consequently, their hues.

Coloring Blocks
We've begun adding color fills to many of our blocks in the Plan Graphics and Elevation Graphics libraries. The Site Color tool also allows you to add your own color fills to our blocks, as well as your own. For more information, see our Colorizing Site & Hardscape Blocks documentation.
Adding Color to Reference Note (RefNote) Hatches
We've engineered our Color Render tool to work with Reference Notes (RefNote) hatches that you've placed using our Area/Volume RefNote tool. Color Render now colorizes these areas in the same way it colorizes a groundcover or Shrub Area hatch, retaining the hatch pattern and associated data. For further information and instructions, see our Add Color to RefNote Hatches documentation.
Related Webinars
- True Color in CAD: The color wheels available within our Site Color tool are now tied to color books, allowing you to customize palettes for RefNotes, site development, land use regions, and other color areas. Take a full-color tour of the updated features. (52 min)
- Using PResentation Graphics: Get some "from-the-basics" looks at some of our presentation graphics tools, such as Plant Color Render, Site Color, and SketchUp Connection. Along the way, we'll also give you some more advanced tips for developing a great presentation. (58 min)
Troubleshooting
Issue: Unable to see hatches or colorized plants in a 3D model (AutoCAD or Civil 3D)
Issue: Colors are displaying incorrectly in Model Space

Our software tailors AutoCAD®, Revit®, and SketchUp® to the needs of landscape architects, irrigation designers, and other professionals. We automate your most tedious tasks and ensure accuracy, giving you more time to design.


