Creating New Details
Quick video
- Initial Detail Layout
- Drafting Your Detail
- Inserting a Detail Template & Detail Scaling
- Using External References (Xrefs) in Details
- Saving Your Detail
- Adding a PDF as a Detail
- Related Webinars
- Troubleshooting
When you first create a detail, you're initially laying it out at full scale. Once you've initially laid out your detail configuration, you can finish it with items that do require scale, such as:
- Dimensions (not for the length of the dimension, but for the text size and arrow size of the dimension)
- Hatch patterns
- Text
When you reach a point where you need scale to finish your detail, you'll need to insert a Detail Template to define the boundary of the detail and to determine the appropriate scale to establish this boundary.
We offer a number of Detail tools to help you build your detail, as well as our Detail Template tool to help you define the boundary, scope, and scale of your detail.
Initial Detail Layout
You can start your detail from a fresh CAD drawing with nothing in it. Before drafting your detail, take a few seconds to put some important settings in place.
Units Setting
Check that your units are formatted correctly by typing Units in the Command line and pressing Enter.
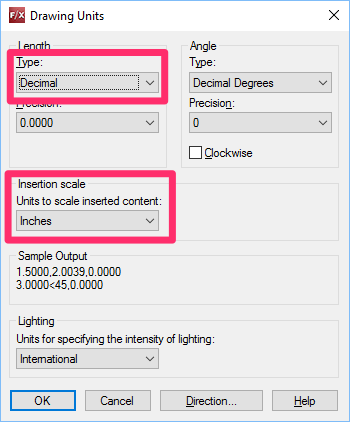
In the Units dialog box, verify that your units are set correctly for how you plan to create your detail.
For example, if you want to use decimal units and design the detail in the Imperial system of measurement:
- Select Decimal from the Type menu, and
- Select Inches from the Units to scale inserted content menu.
Scale
We recommend drawing your details at 1:1 scale. Once you place a Detail Template tool around your detail drawing, the template itself will control the detail's scaling. Therefore, you don't need to set your scale at all. In fact, make sure you haven't set a scale in the blank drawing where you're about to create your detail.
Layer State
A Layer State is a saved set of layer properties that determine the colors and lineweights of objects placed on specific layers. We recommend having a Layer State in place that will apply to the layers in all details you create. It's a quick and easy way of standardizing your details.
If you have a detail Layer State in place already, you can use our Load Layer State tool to apply it to your detail drawing. If not, we recommend following our steps to create and save a Layer State. You can then use Load Layer State to apply it to your detail.
Drafting Your Detail
Quick video
You can begin drawing objects in your detail with appropriate layers active, and you can place blocks of “components,” or pieces of objects that make up a detail. These items are available from our Detail Blocks tool, described below. This tool also allows you to save blocks into the detail folder structure of your choice.
Although you're free to draft your details from scratch, we offer several options for developing details that won't require you to "reinvent the wheel." Here are a few:
Use Our Default Blocks & Hatches to Create Your Detail
In addition (or instead of) your own linework and blocks, you're free to use any of our default blocks (included in your installation) in creating your details.

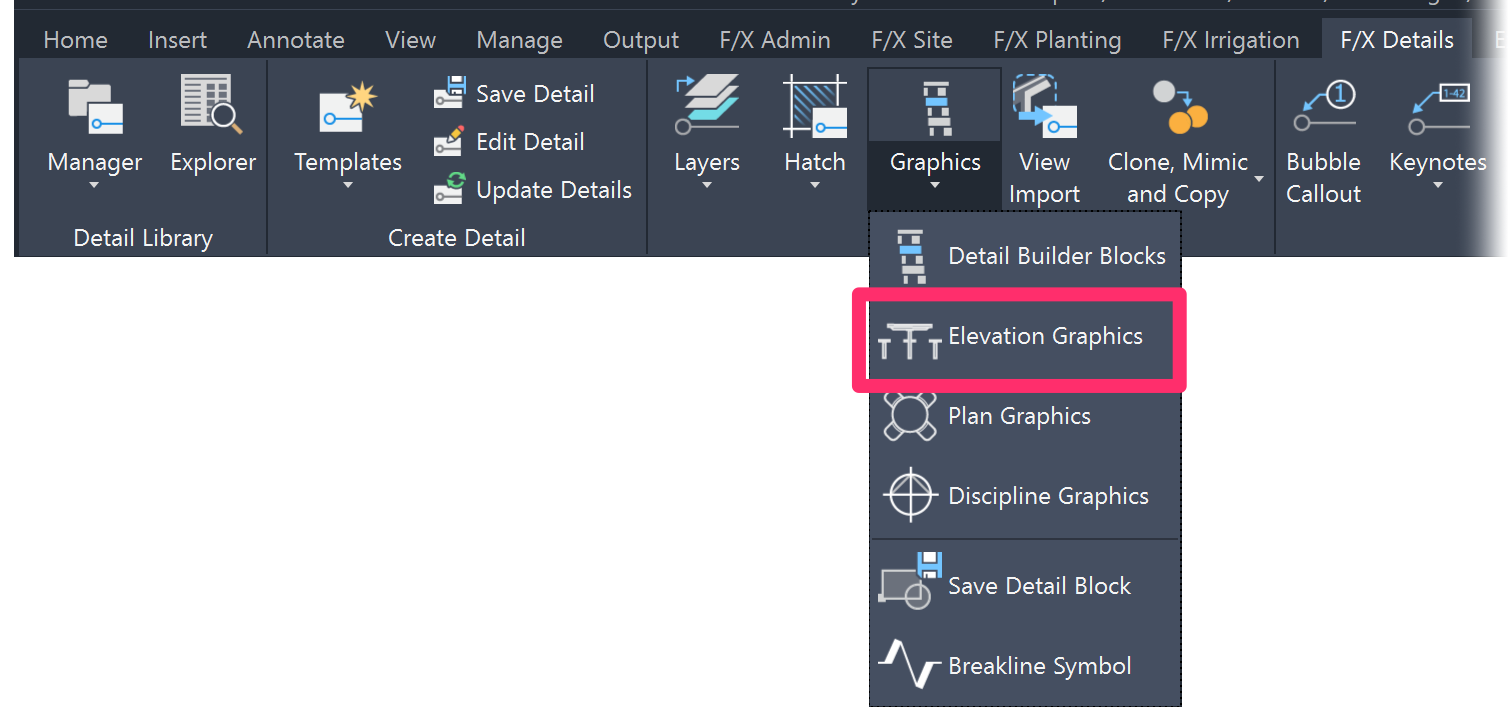
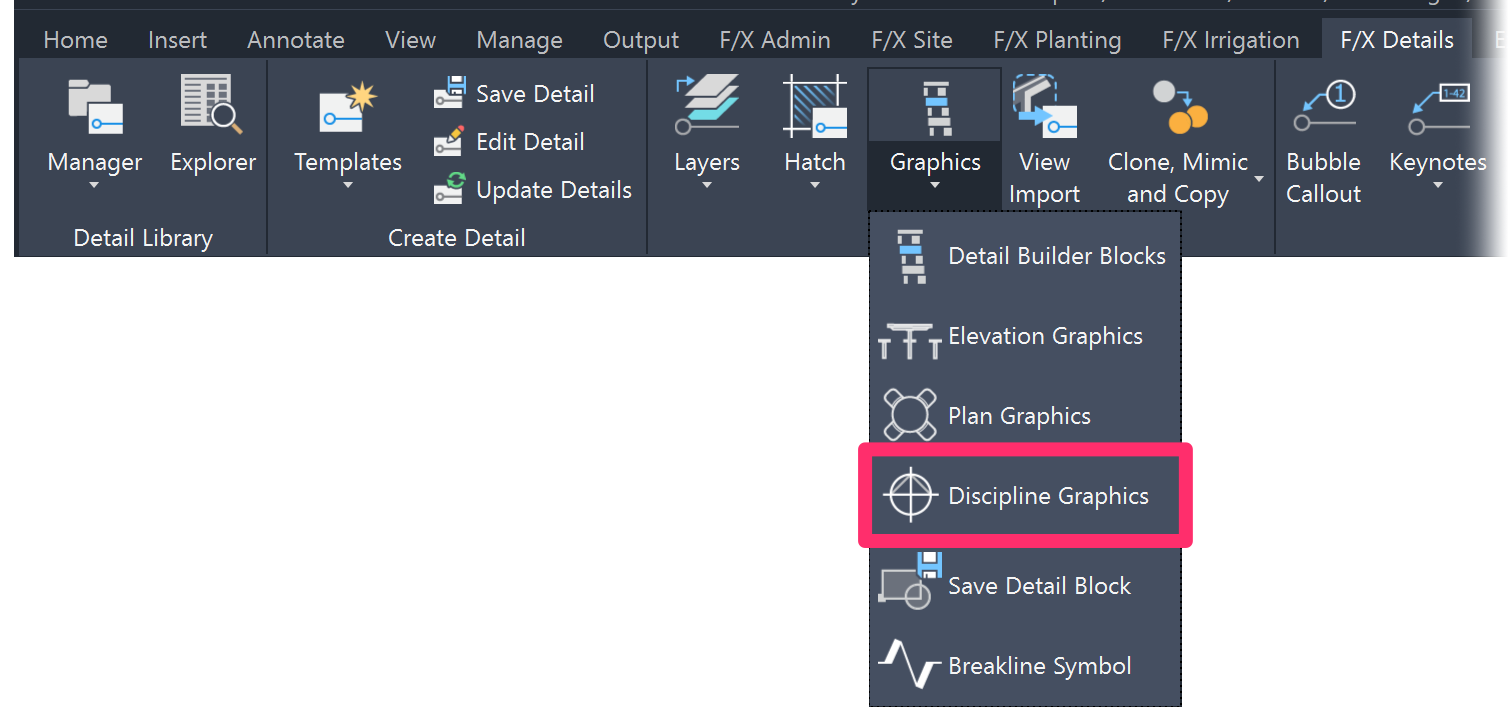
The Graphics flyout on the F/X Details ribbon provides access to several of our block libraries, described below.
To place one of these blocks in your detail drawing, just select the appropriate library and select the block you want to place.
Detail Blocks
Our Detail Builder Blocks library includes a number of fully and partially built components that may come in handy in building your details.
Our Detail Builder Blocks tool brings you to this library, allowing you to use the block(s) of your choice when building your detail.
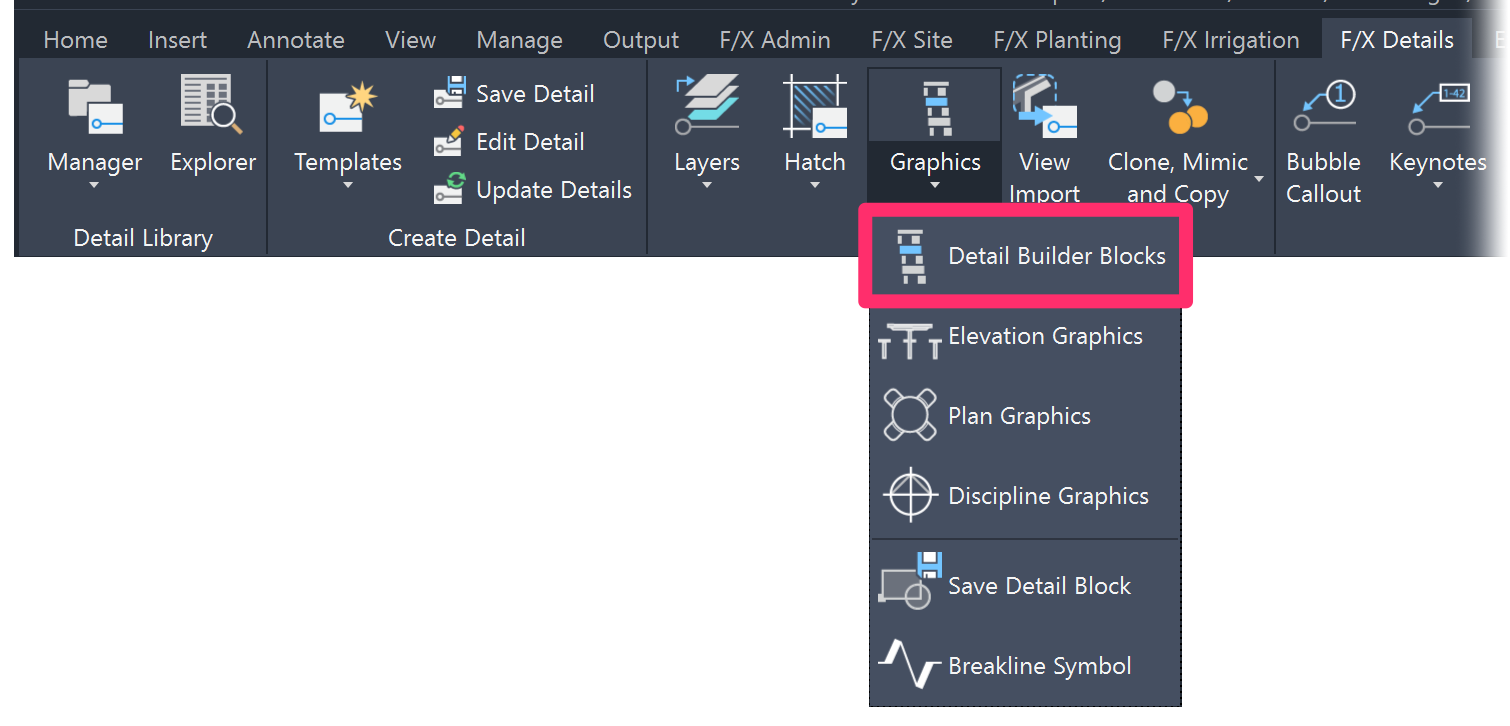
For example, the Fasteners library includes a number of blocks depicting bolts in elevation view (Bolt Elevation).
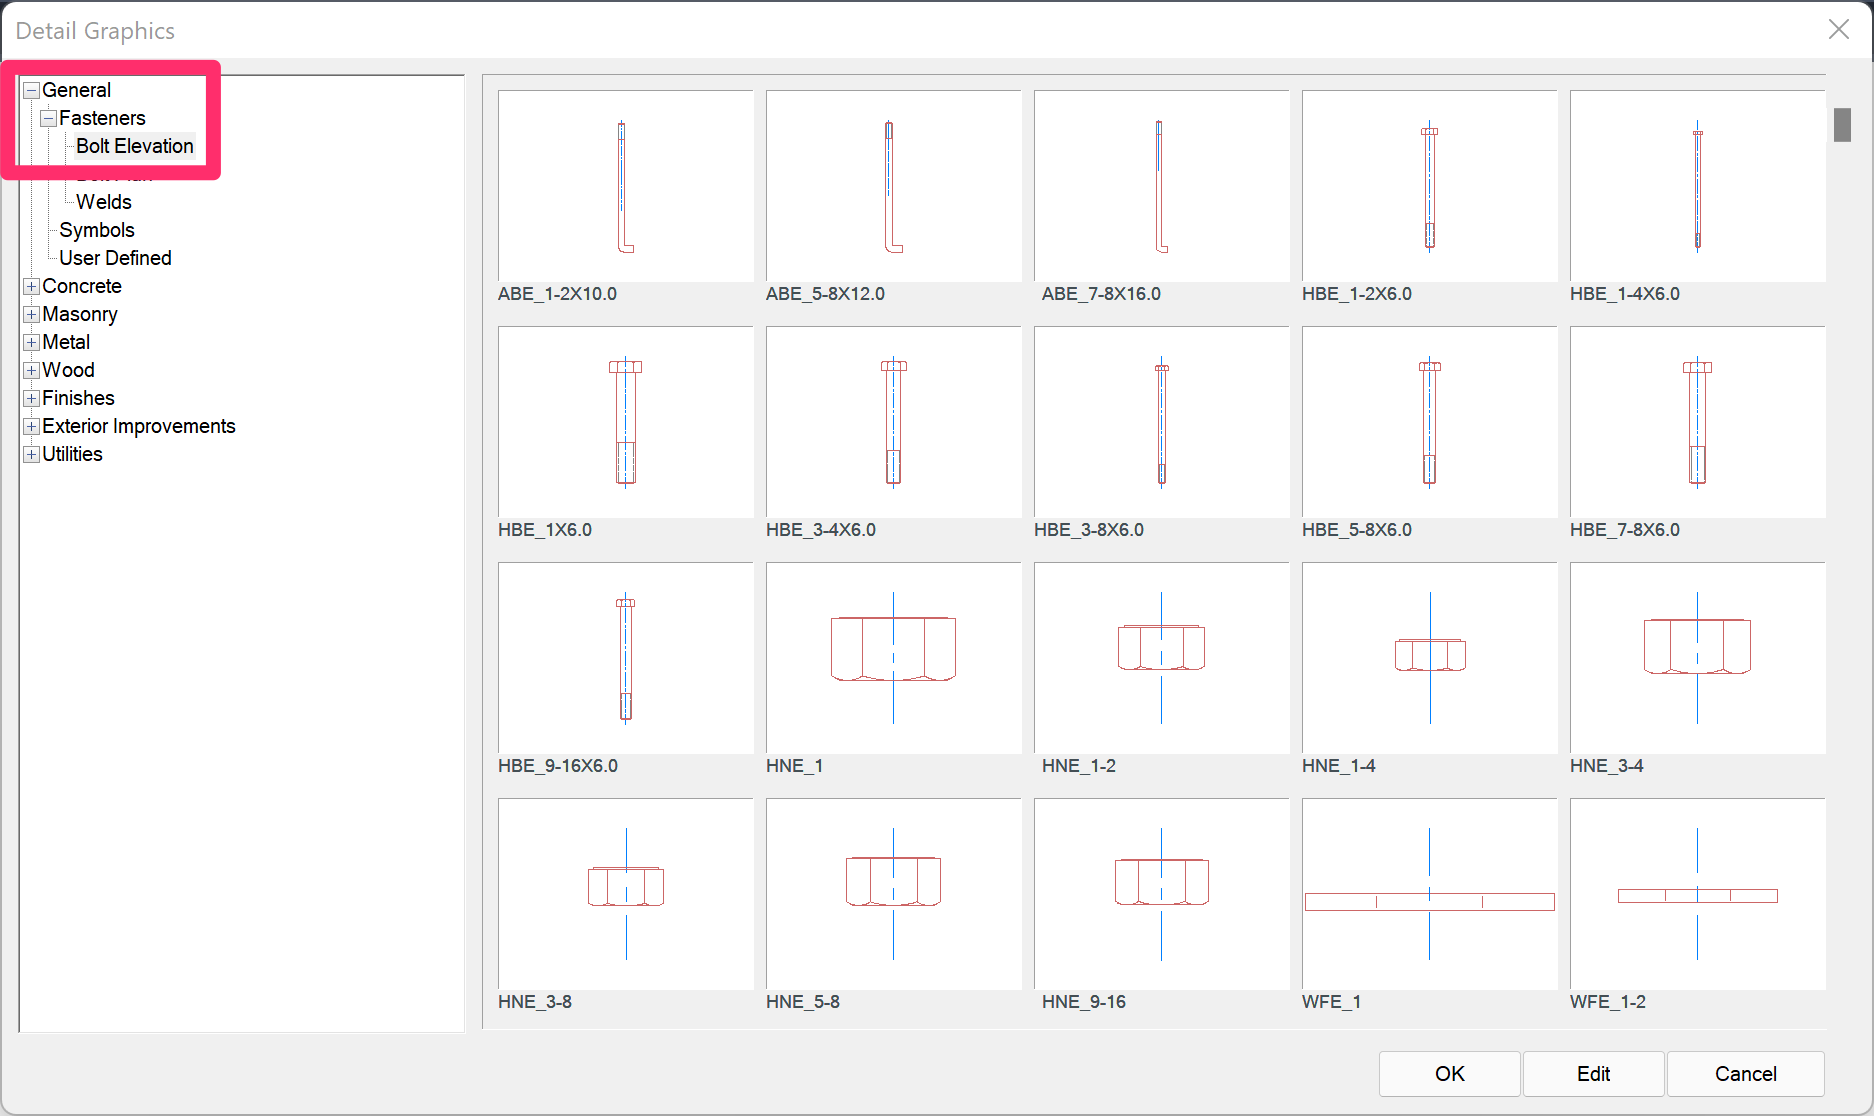
For detailed information and instructions, see our Detail Builder Blocks documentation page.
Elevation Graphics
Our Elevation Graphics tool brings you to the Elevation Graphics library, which contains several categories of blocks at side, or elevation, view.
For more information and instructions, see our Elevation Graphics documentation page.
Plan Graphics
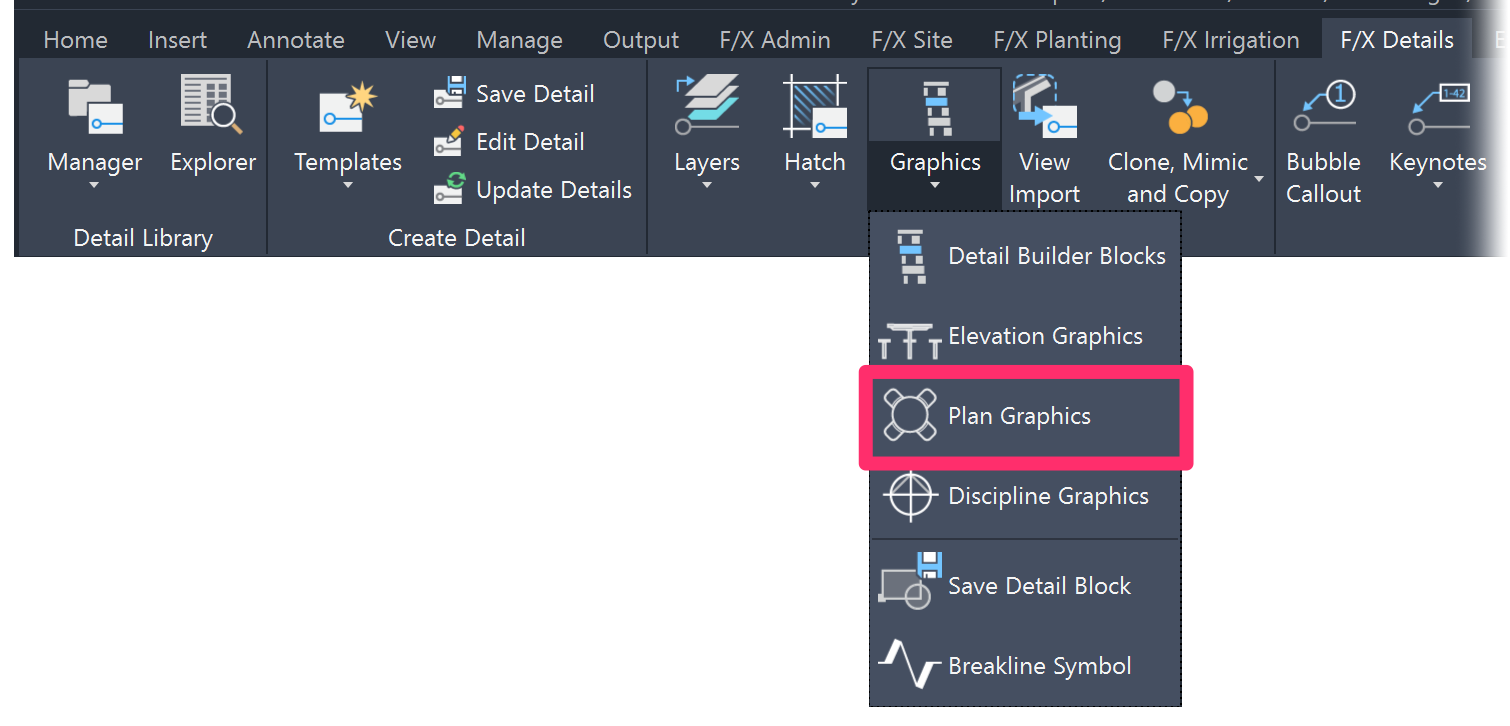
Although details are generally drafted in elevation view, you might need to add some objects at a bird's-eye, or plan, view. That's where our Plan Graphics tool comes in handy.
For more information and instructions, see our Plan Graphics page.
Discipline Graphics
Discipline Graphics include a number of callouts, as well as standard graphics used by specific disciplines such as civil engineering and electrical.
For more information and instructions, see our Discipline Graphics documentation page.
Detail Hatches
Our Detail Hatch tool gives you access to several hatch patterns depicting objects and surfaces that are typically used in details.
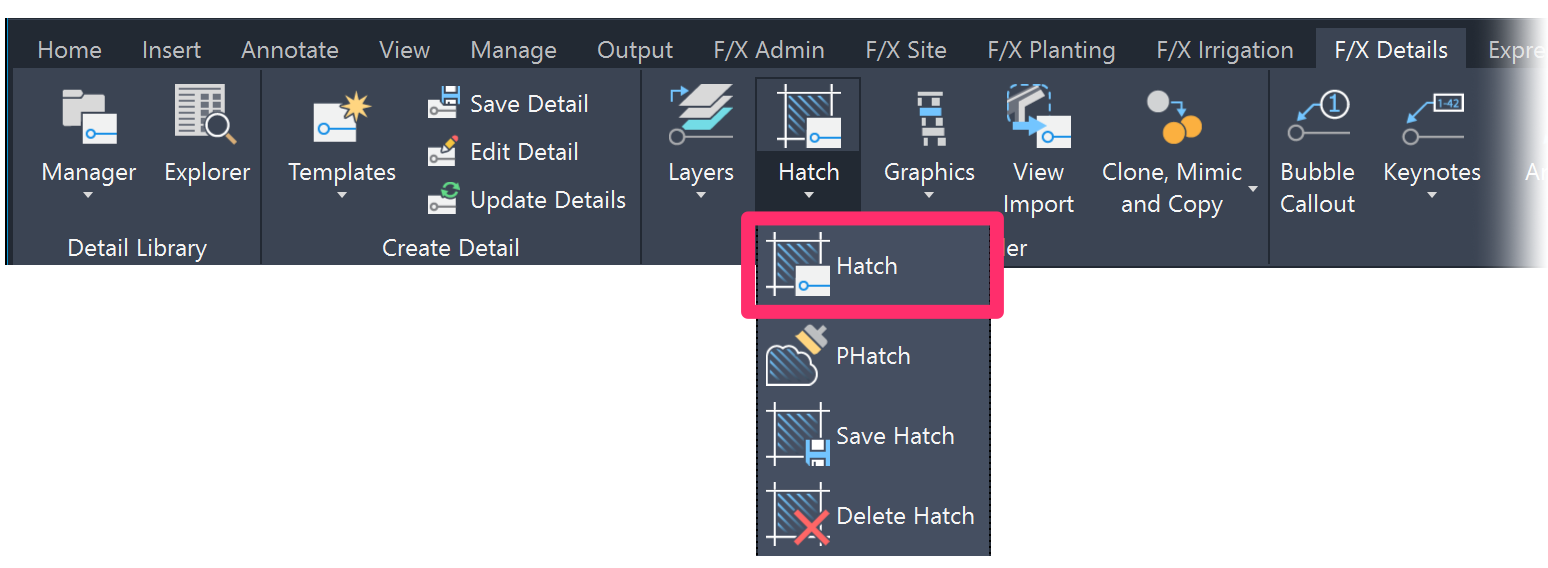

When you use one of these hatches (or any of our other hatches) in a detail, the hatch density will remain constant across different scales.
Although the Detail tab will be active by default, you're free to use hatches from any of our other hatch libraries, as well as custom hatches you've saved into our system, in your details.
Detail Based on an Existing Detail
You may have loaded up one or more previously saved details to use them as a basis for a detail you plan to create. You may still need to use our Layer States tool to load in all the necessary layers for your detail. You may also need to use the Detail Blocks tool to load in component pieces, or even entire prototypes, to help build your detail.
When you're working from one or more existing details, you'll already have some scale established when those details were created. If they're all in one specific scale, you'll most likely want to use that same scale on your detail. If your details have multiple scales, you'll need to create your new detail fresh from scale requirements until you put in a Detail Template to establish the scale of your detail(s). Items that require scale include:
- Text
- Hatch patterns
- Dimensions (not for the length of the dimension, but the text size and arrow size of the dimension).
Inserting a Detail Template & Detail Scaling
Once you've drafted your detail to a point where you need to develop its scope and scale, you can insert a Detail Template. Inserting a Detail Template will determine the boundary of the detail, based on what will “fit” into the detail module system, and what the detail's scale should be.
In this example, we'll start with this gazebo block from our Elevation Graphics library.


Once you've sketched out your detail in the basic size you think it will be, it's time to place a template around it using our Detail Template tool.
You may need to try out a few template sizes before finding the one that best fits your detail. We'll select size 1A for now.
Then select a scale at which you want your detail to be scaled. We'll select 1/4" = 1'-0". Click OK to place the template.
For detailed instructions on working with Detail Templates, see our Placing Detail Templates documentation page.
Place the template around the region in your drawing that you want to include in your detail.
In our example, the template size we've placed is a great fit for the detail we want to create.
As mentioned above, you may need to try this step with a few different template sizes before you find the one that's the best fit for your detail.


In our example, we've left ample room for placing a couple of enlargement sections, for example. To learn how to create an enlargement section, see our Detail Enlargements documentation page.
You can also add any other necessary annotation and callouts using our Detail Annotation tools.
Some Important Notes on Detail Scaling
Build your detail as much as you can until you need scale. You don’t need scale to draw an object or to place a component. Objects such as a 2×4 board or a footing drawn to a specific size will retain their respective sizes relative to the drawing as a whole. You'll only need scale when you add text, hatch patterns, dimensions (the dimension itself does not require scale, but the text font and arrow size does), or a symbol, such as a detail callout symbol.
Therefore, you don’t need scale until you are essentially putting the finishing touches on a detail, such as text and leaders describing the detail, or hatch patterns to help graphically define it.
When you place a Detail Template around a detail you've built, you're really deciding how this detail will fit into your modular Detail Template sizes. A detail template can start at the basic template size of 1A. If your detail is quite large, you'll probably want to choose one of the larger template sizes – wider, taller, or wider and taller. It just depends on the detail you're drawing. For most of your details, the basic 1A Detail Module size should work. Some details, by their nature, will simply be bigger.
When placing a Detail Template, remember to allow for ample room around the detail itself to apply the required text and dimensions, along with the edge distance you want to leave between the outer border line of the Detail Template and the detail itself.
When you select a Detail Template, you'll also select a scale. You may just experiment with different scales for a given Detain Template in order to determine how different scales affect the size of a given template. You may experiment with different template sizes as well as different scales.
You might even pick a scale with the knowledge that you haven't necessarily created your finished detail for any specific scale. For instance, the detail is a drawing with no real scale; it just represents your intent. You may need to pick a particular scale of a template so it “fits" around your detail appropriately. Or you may place a 1:1 Detail Template (no scale) off to the side and manually scale all your details down to fit properly into this template.
After placing the template around the object, edit the scale selection to, for instance, N.T.S., for "not to scale." Then save the detail as desired. The detail will display properly when placed into a drawing, but the scale will be identified as N.T.S.
Using External References (Xrefs) in Details
Quick video
If you need to use another file in your detail, such as a DWG or a PDF or other image file, you can easily bring it in as an external reference (Xref). For more information, see our Using Xrefs in Details Power Tip, linked to the right.
Saving Your Detail
Once you've created your detail to your liking, it's time to save it into our detail system. This step will allow you to access your detail directly from CAD in order to add it to a Land F/X project and place it in a drawing using the Detail Manager.
For instructions on how to save a detail into our system, see our Save Details documentation.
Adding a PDF as a Detail
We offer a couple of options for adding (saving) a PDF as a detail in our detail system.
Related Webinars
- Saving your Detail Library to Land F/X: We'll go over the best practices for saving your firm's standard details into our system. This webinar will help you make decisions that will save time and money in the long run. (1 hr)
- Details for Beginners: Take a full tour of our detail system, where you’ll learn how to navigate our detail library, find the details you need, and use them in your drawing set. (1 hr 1 min)
- Detail Tips And Tricks: Learn some advanced techniques and best practices to create details that communicate your design intent clearly, including how to batch save details. (59 min)
- Design F/X Setup: Join us for a complete demonstration on how our software helps you manage and use construction details. We’ll provide an overview of our entire system, from creating your detail drawings to compiling your detail library. (53 min)
- Creating a Detail from Scratch: Land F/X provides all the tools you need to draft your own details quickly and efficiently. Learn how our details tools will help turn you into a detail virtuoso. You’ll also pick up some recommended techniques for drawing up a detail from the ground up. (1 hr)
- Getting Started with the Detail Tools: We'll show you the basic tools you need to familiarize yourself with on the F/X Details ribbon, including setting your Details Preferences. (58 min)
- Detail Tips And Tricks: Learn some advanced techniques and best practices to create details that communicate your design intent clearly, including how to load a layer state, save a custom detail block, and place a detail template. (59 min)
- Details and Specifications: Tyson Carroll of Urban Tree Foundation queried industry leaders in the creation of landscape architectural details and specifications that satisfy the best possible construction documentation standards. Join us for an exciting look at his project. (46 min)
Troubleshooting
Issue: You want to create a mulitline detail title (a detail title with two or more lines)


