Detail Manager
Quick video
- Detail Manager Overview
- Replacing a Detail
- Generating a Detail Report
- Assigning a Photo to a Detail
- Renumbering Details
- Deleting Details from a Project
- Troubleshooting
The Detail Manager is your control center for details you add to Land F/X projects. From the Detail Manager, you can add details to your project, view each detail and find out its number, and see which details you've placed in your drawing. You can also open any detail for editing, delete or replace details, place details into the drawing set, or even enter a detail callout for a detail.
Detail Manager Overview
Open the Detail Manager:
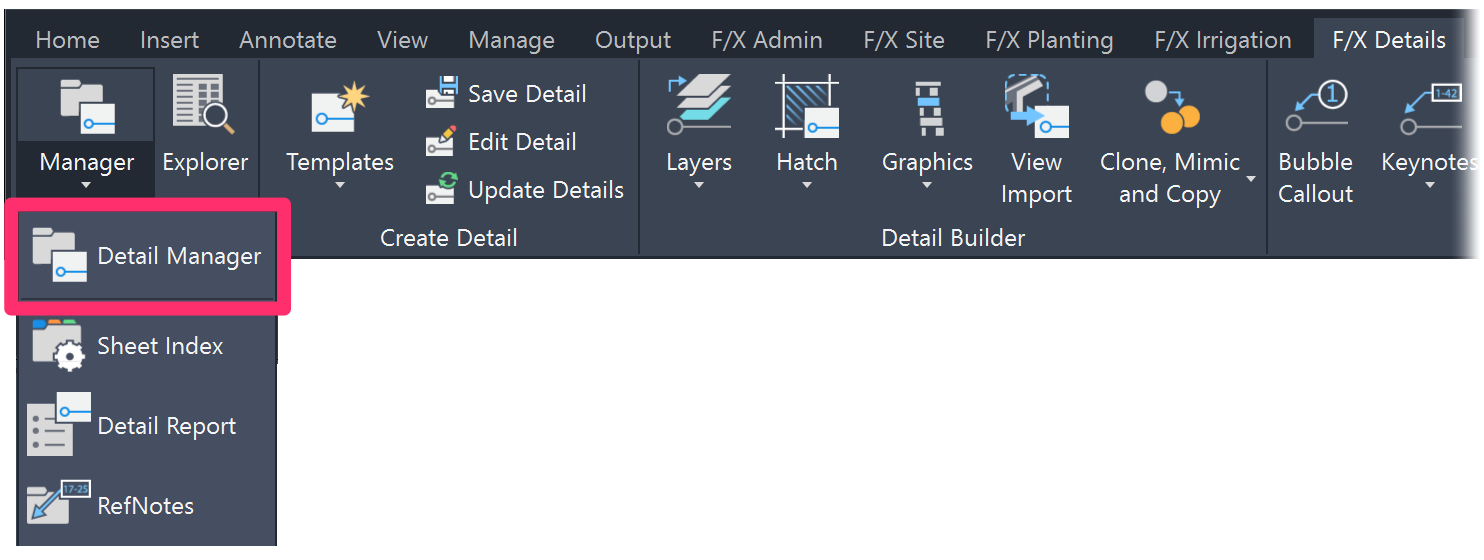
F/X Details ribbon, Detail Manager flyout
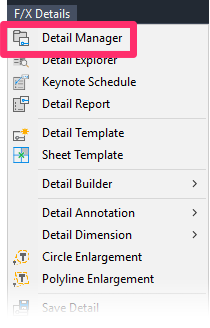
F/X Details menu, Detail Manager option
Or type FX_DetailManager in the Command line
The Detail Manager will open. Here, you can complete a variety of actions pertaining to your details.
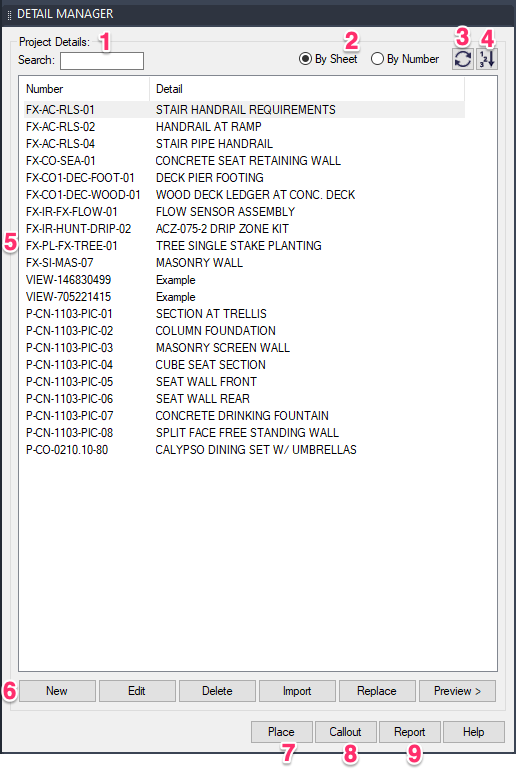
1. Search for a detail you've added to your project.
2. Options to list your details By Sheet or By Number.
3. Refresh button to update your list of details to reflect changes you've just made, such as placing details.
4. Click this button to renumber your details.
5. This pane lists the details you've added to you project, organized by detail sheet (pictured) or detail number. When you have By Sheet selected, details you have yet to place in a drawing appear at the top of the list (above the title =======PlacedDetails======). The current sheet will appear at the top of the list.
6. Administrative functions where you can:
- Add a New detail to your project.
- Edit a highlighted detail.
- Delete a detail from this project (not from the main database).
- Import a detail from a template or project.
- Replace a highlighted detail with another option. This would also replace the detail if it's been placed in the drawing.
- Option to view a Preview of the selected detail.
7. Place a selected detail into a sheet in your drawing. See our Placing Details documentation for more information and instructions.
8. Insert a detail Callout for a highlighted detail. This is the same feature as our Insert Detail Callout tool; we've just provided it here for convenience.
9. Generate a Report of all details relating to this project and the locations where they've been placed in the drawing.
Replacing a Detail
Quick video
Our Replace tool makes it easy to replace a detail in your drawing with another detail, or with a newly edited or renumbered version of the same detail.
In the Detail Manager, highlight the detail you want to replace.
Then click Replace.

Navigate to the detail you want to replace the other one, or to the newly edited version of the existing detail. Click OK to replace the original.

The detail in your drawing will be replaced with the new version with the new detail number.
Generating a Detail Report
Need an account of all details relating to this project and the locations where they've been placed in the drawing? Create a detail report.
To create a detail report, click Report in the Detail Manager.
For further information and instructions, see our Detail Report documentation.

Assigning a Photo to a Detail
Quick video
We've added the capability of assigning a photo to a detail when adding it to a project from the Detail Manager or editing a detail.
After clicking New to add a detail to a project, click the Preview button.
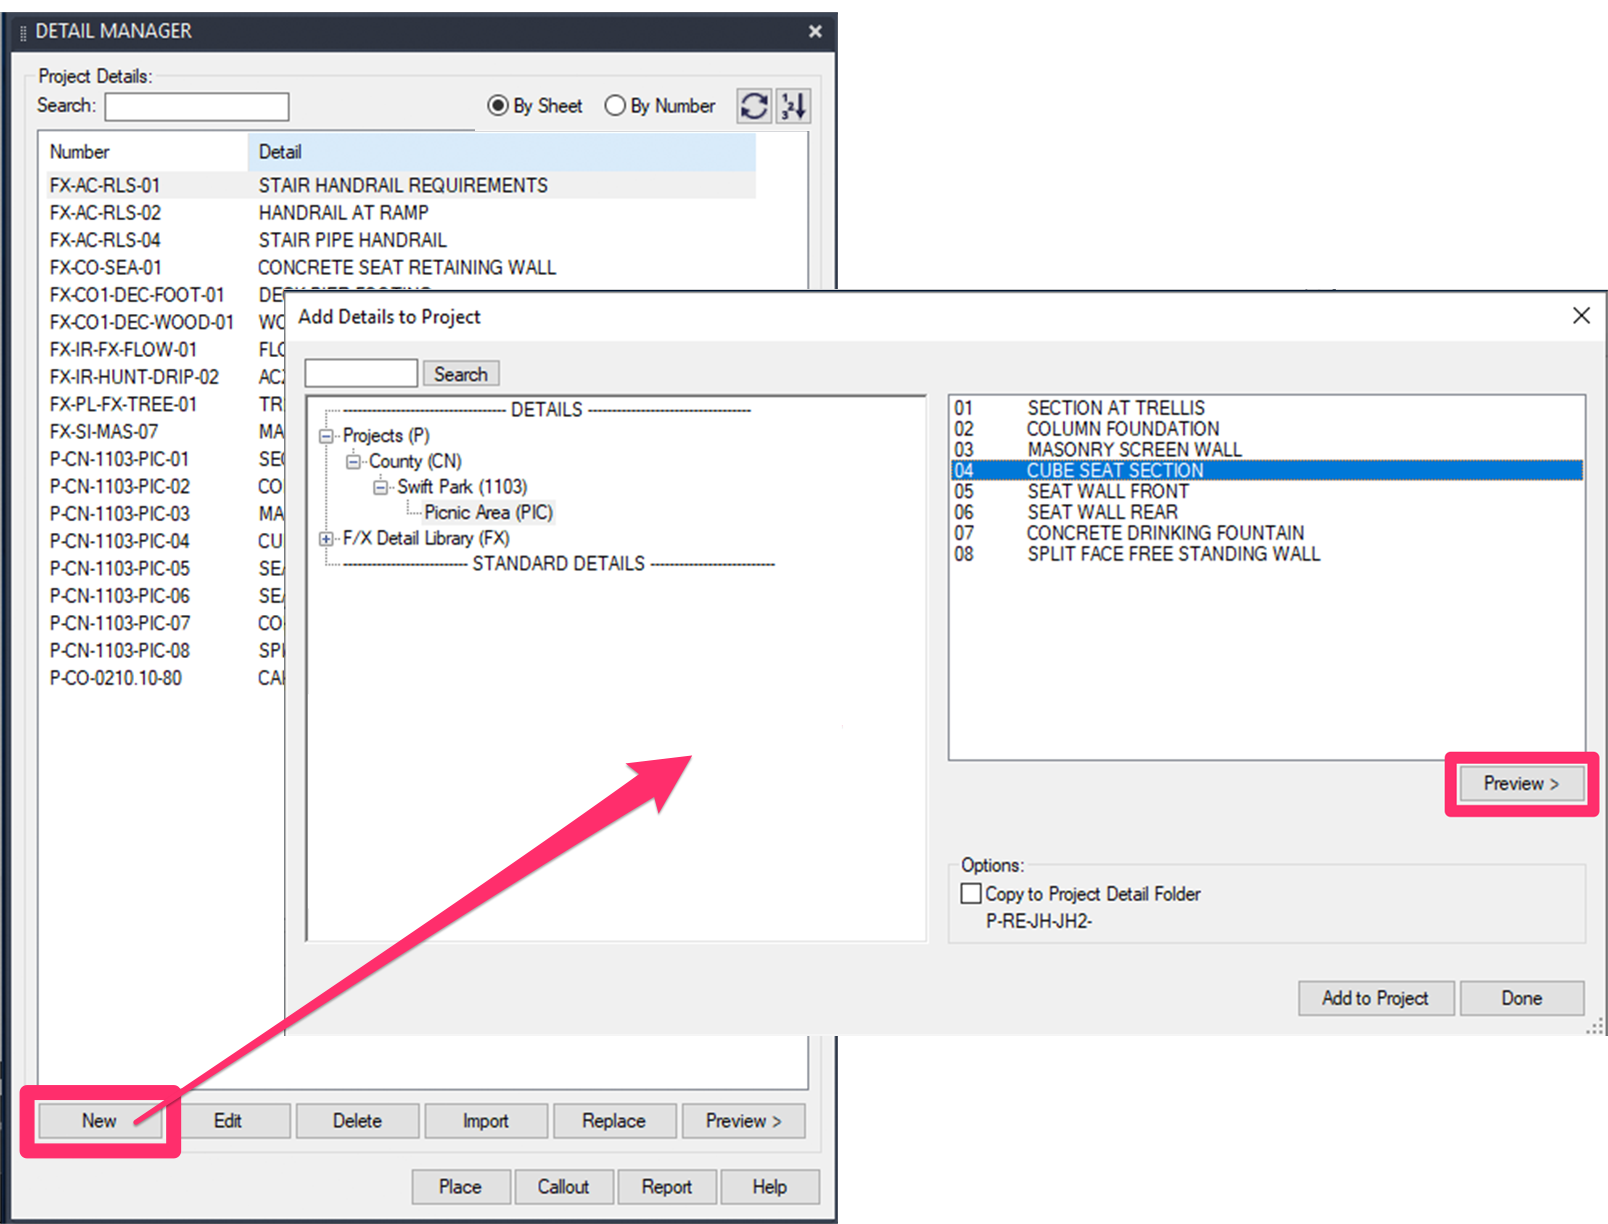
You'll now see a preview of the selected detail in a separate window. Click the + (plus) button in the top right corner of the expanded Detail Manager to begin assigning the photo.
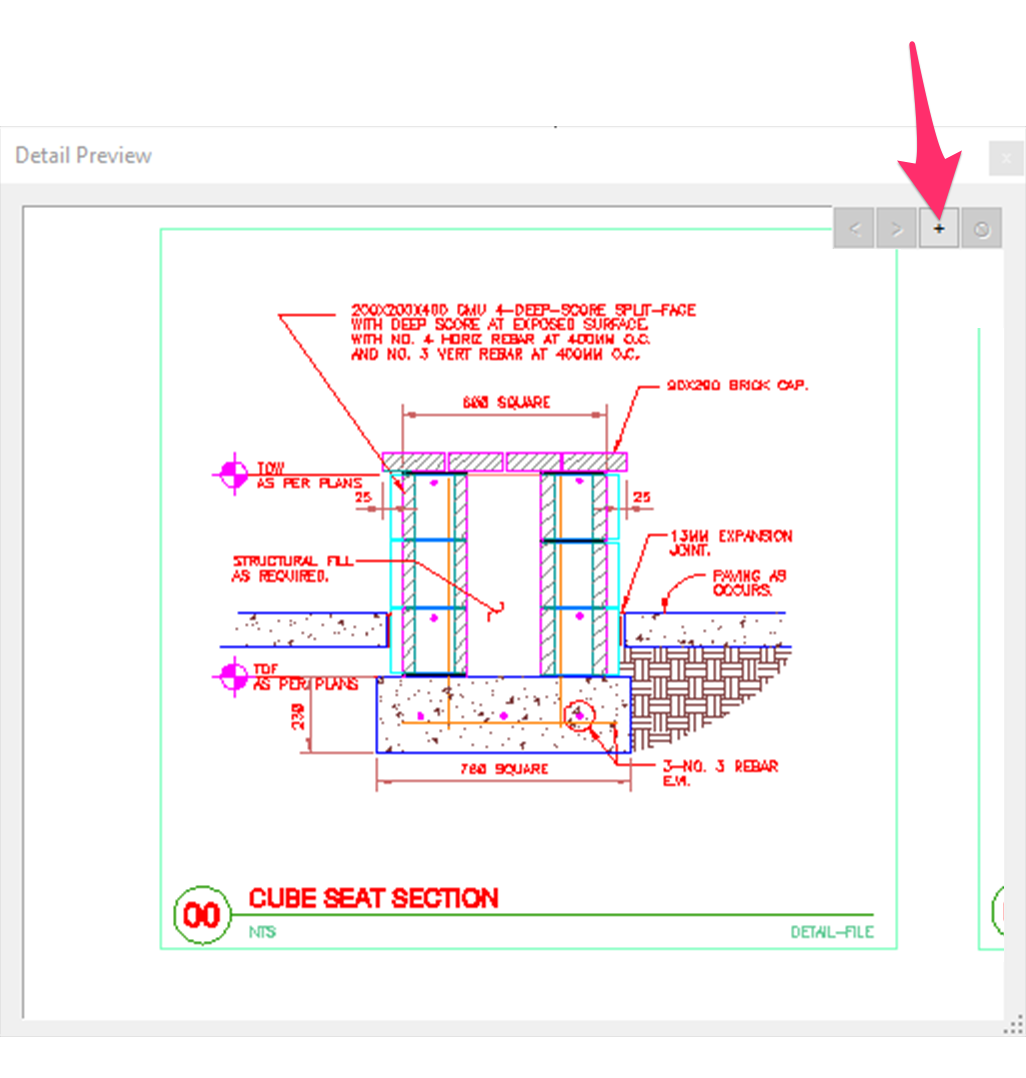
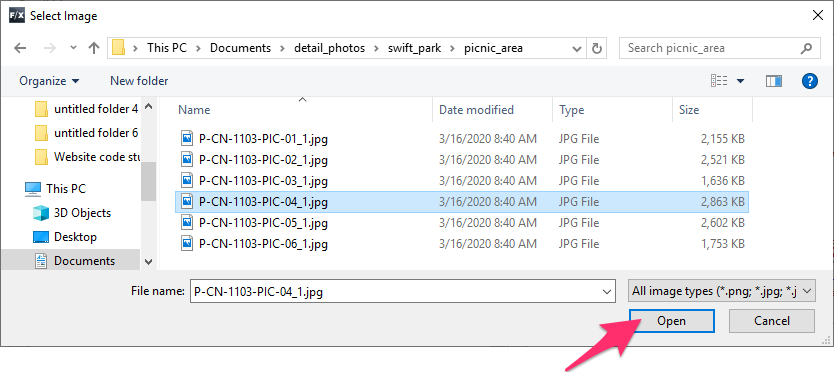
You'll be brought to a dialog box where you can choose a photo to assign to the detail.
Browse to and select a photo, then click Open.
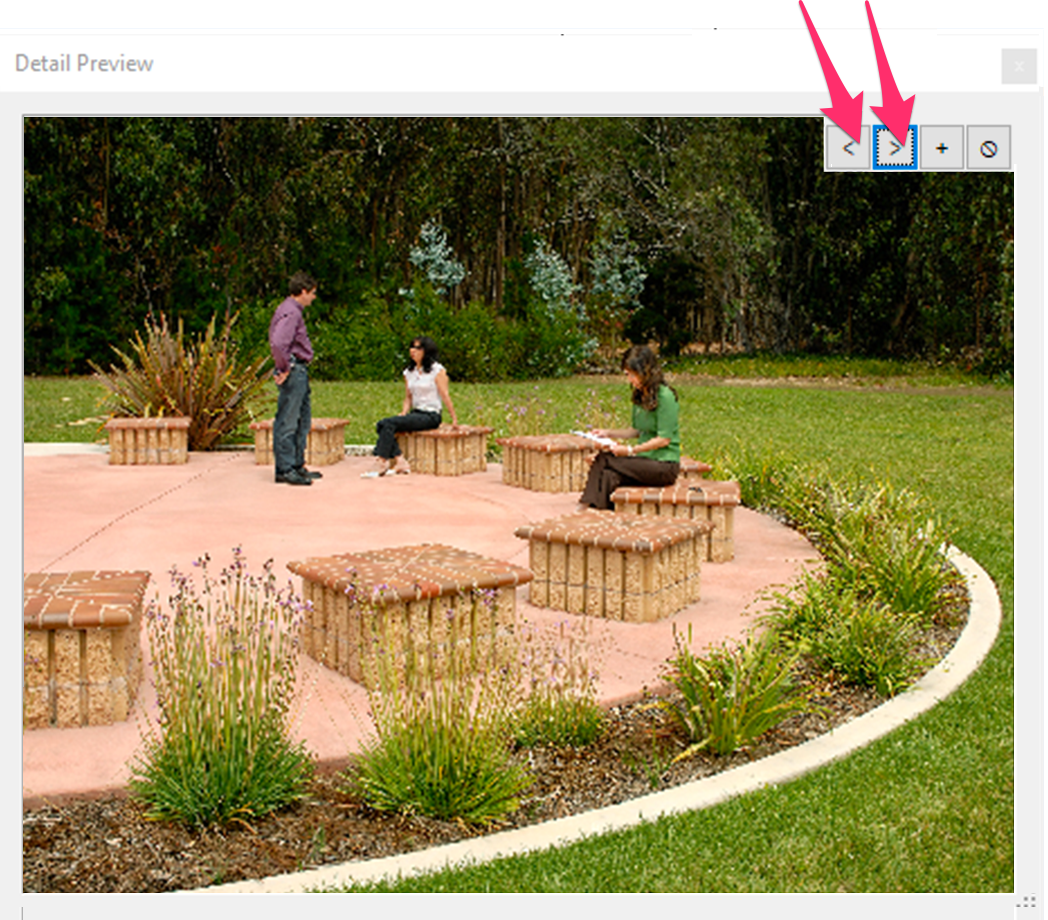
The photo will now appear in the preview window for the selected detail.
If you want, you can click the + (plus) button again and repeat these steps to assign an additional photo to the detail.
You can also use the left and right arrow buttons (see mage below) to toggle between viewing a preview of the detail and the photo(s) you've assigned to that detail.
Renumbering Details
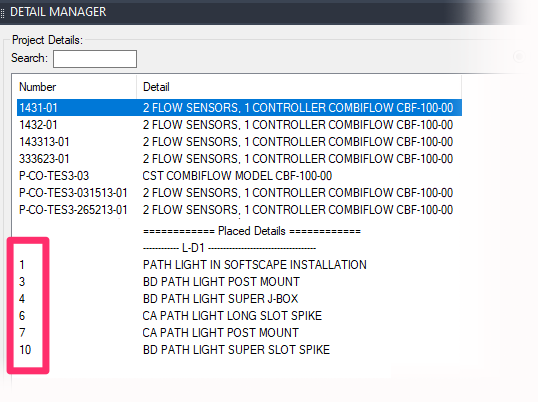
You may find yourself needing to renumber details you've placed on a sheet. For example, you may have skipped a detail number when placing the details, or you've skipped a few numbers when numbering the details on that sheet.
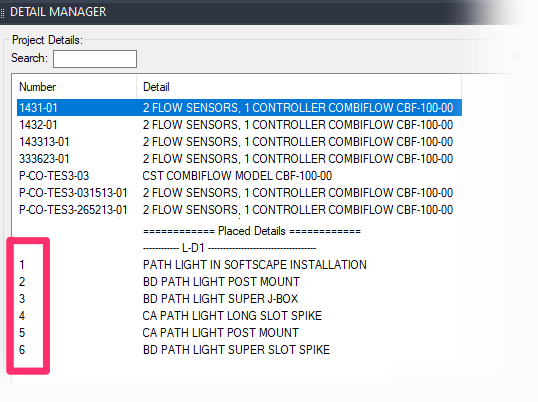
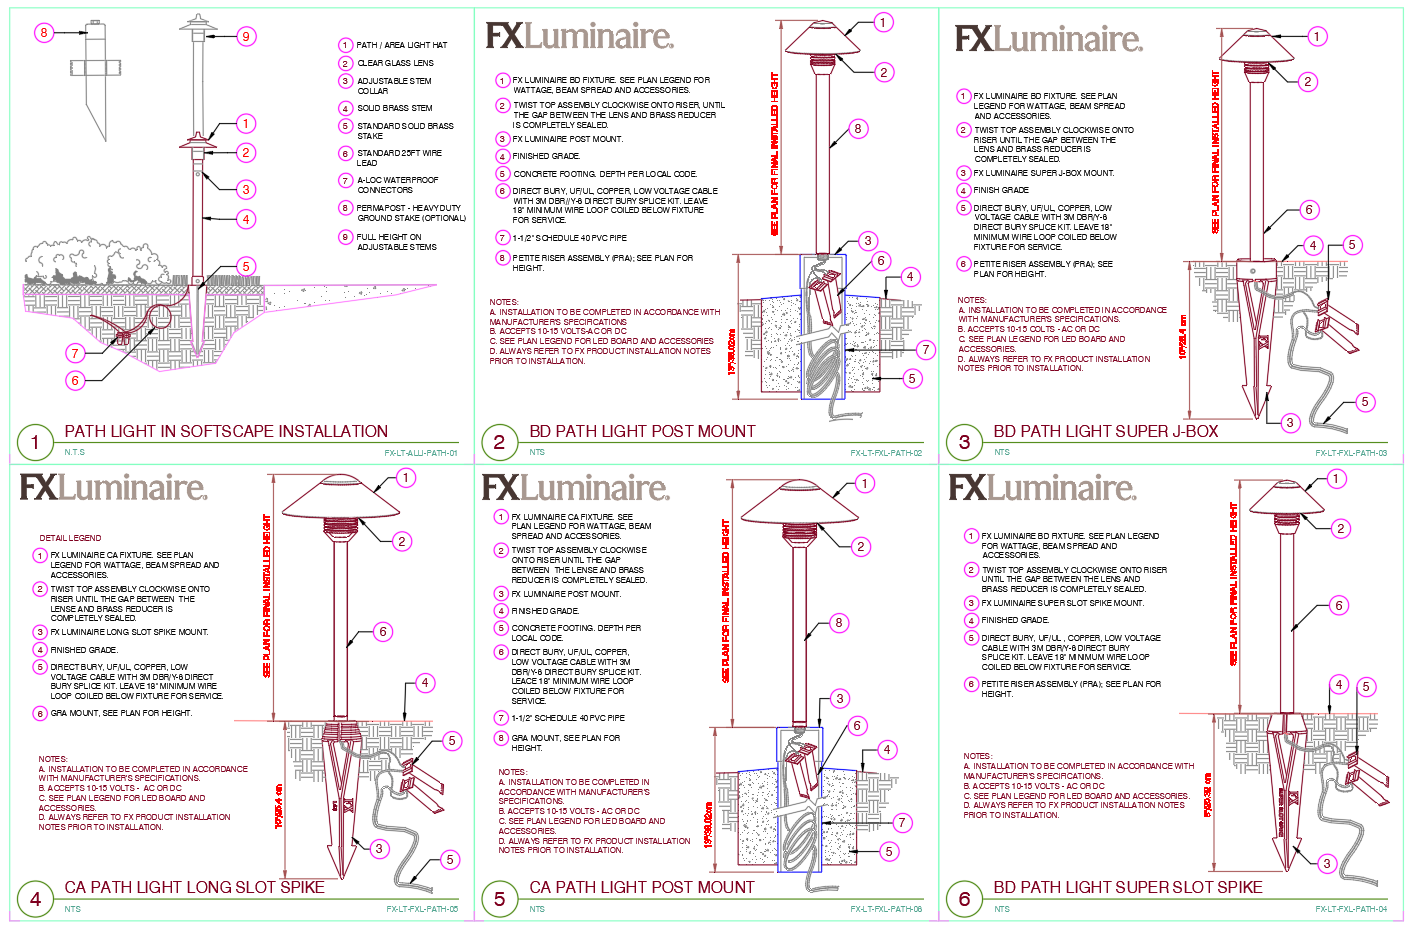
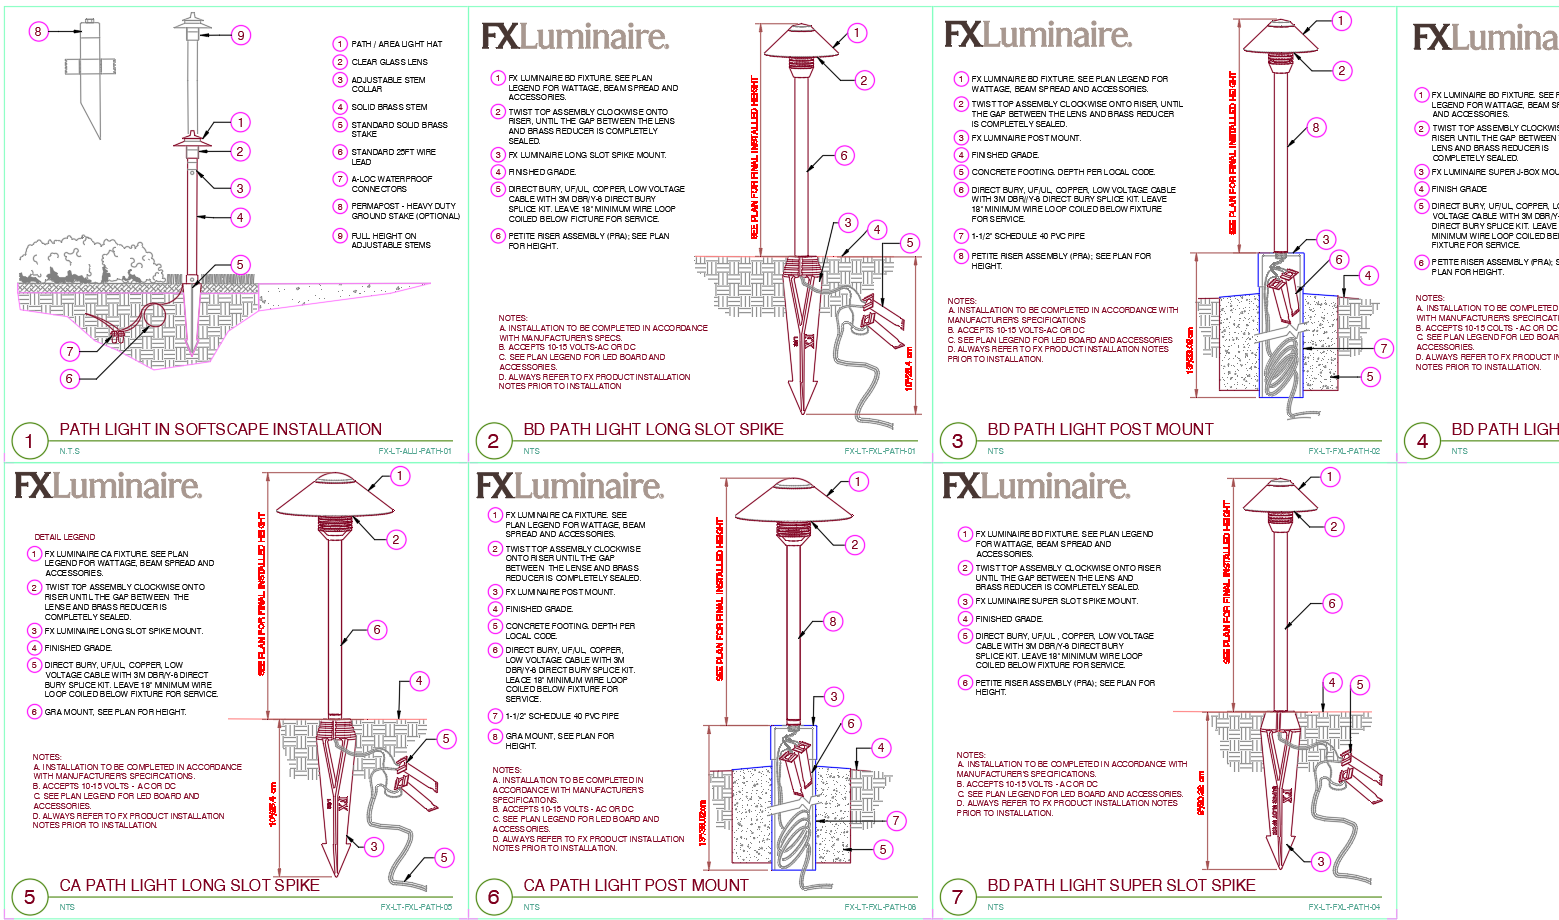
In this example, we'll renumber the details listed in the Details Manager to the left and pictured on the sheet below, which are numbered 1, 3, 4, 6, 7, 10.
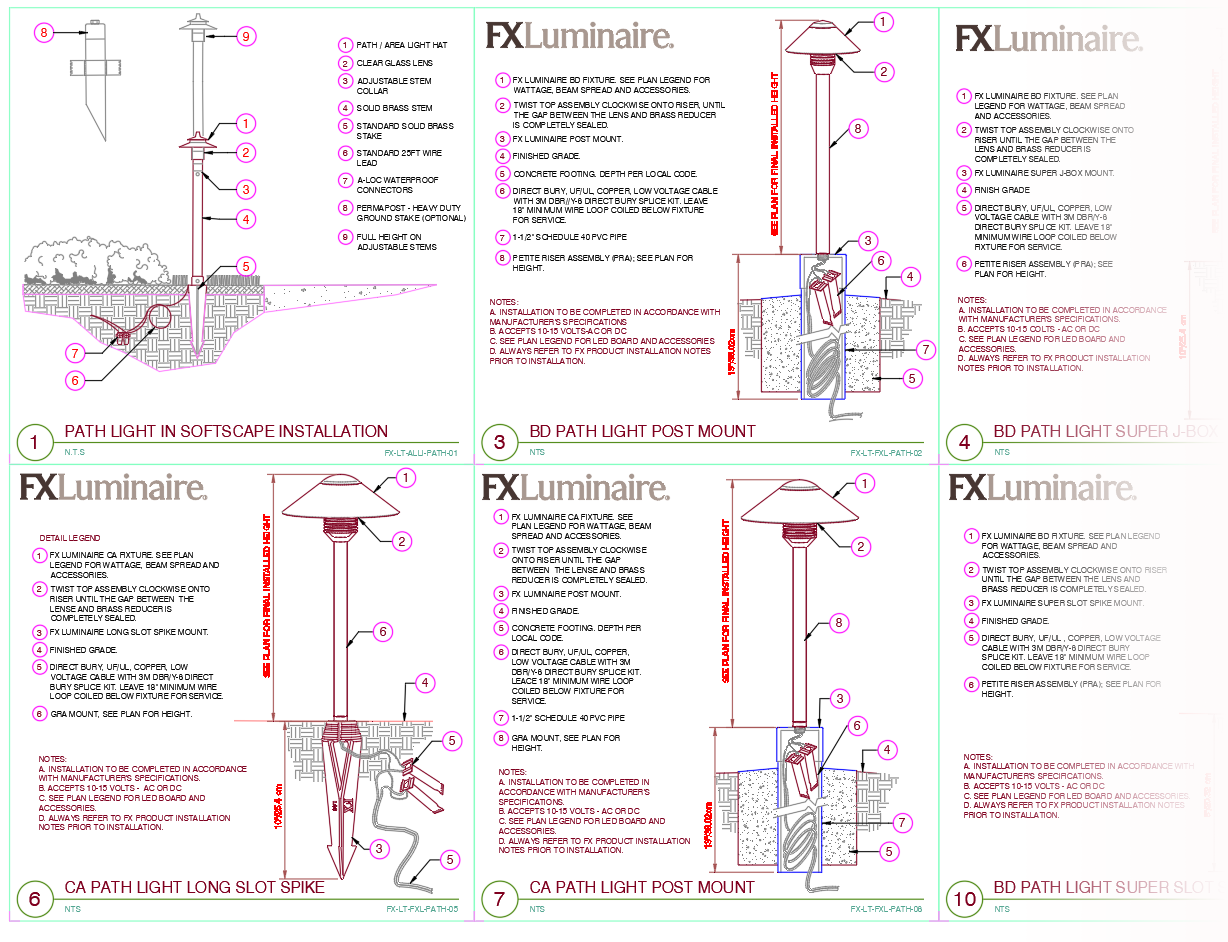
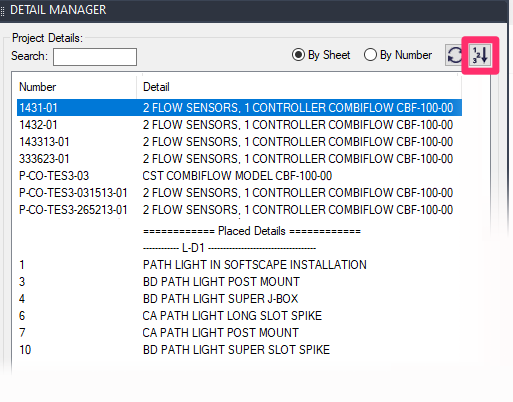
To renumber the details on a sheet, open the Paper Space Layout tab that includes the placed details. Click the Renumber button in the top right corner of the Detail Manager to renumber the details.
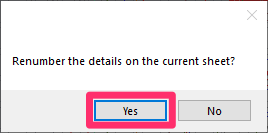
You'll be asked whether you want to renumber the details on the current sheet.
Click Yes to renumber the details.
The sequence of the details will be corrected on the sheet and in the Detail Manager.
In our example, those details will now be sequenced correctly at 1, 2, 3, 4, 5, 6.
Correcting Issues that Result from Renumbering
The Renumber feature can also correct issues that come up after you initially renumber.
We'll continue with the example shown above, where we renumbered the sheet of details sequenced 1, 3, 4, 6, 7, 10 so they're now numbered correctly as 1, 2, 3, 4, 5, 6.
Let's say we need to insert a detail on the sheet between what are now details 1 and 2. So we first move the details to create a space between those two details:
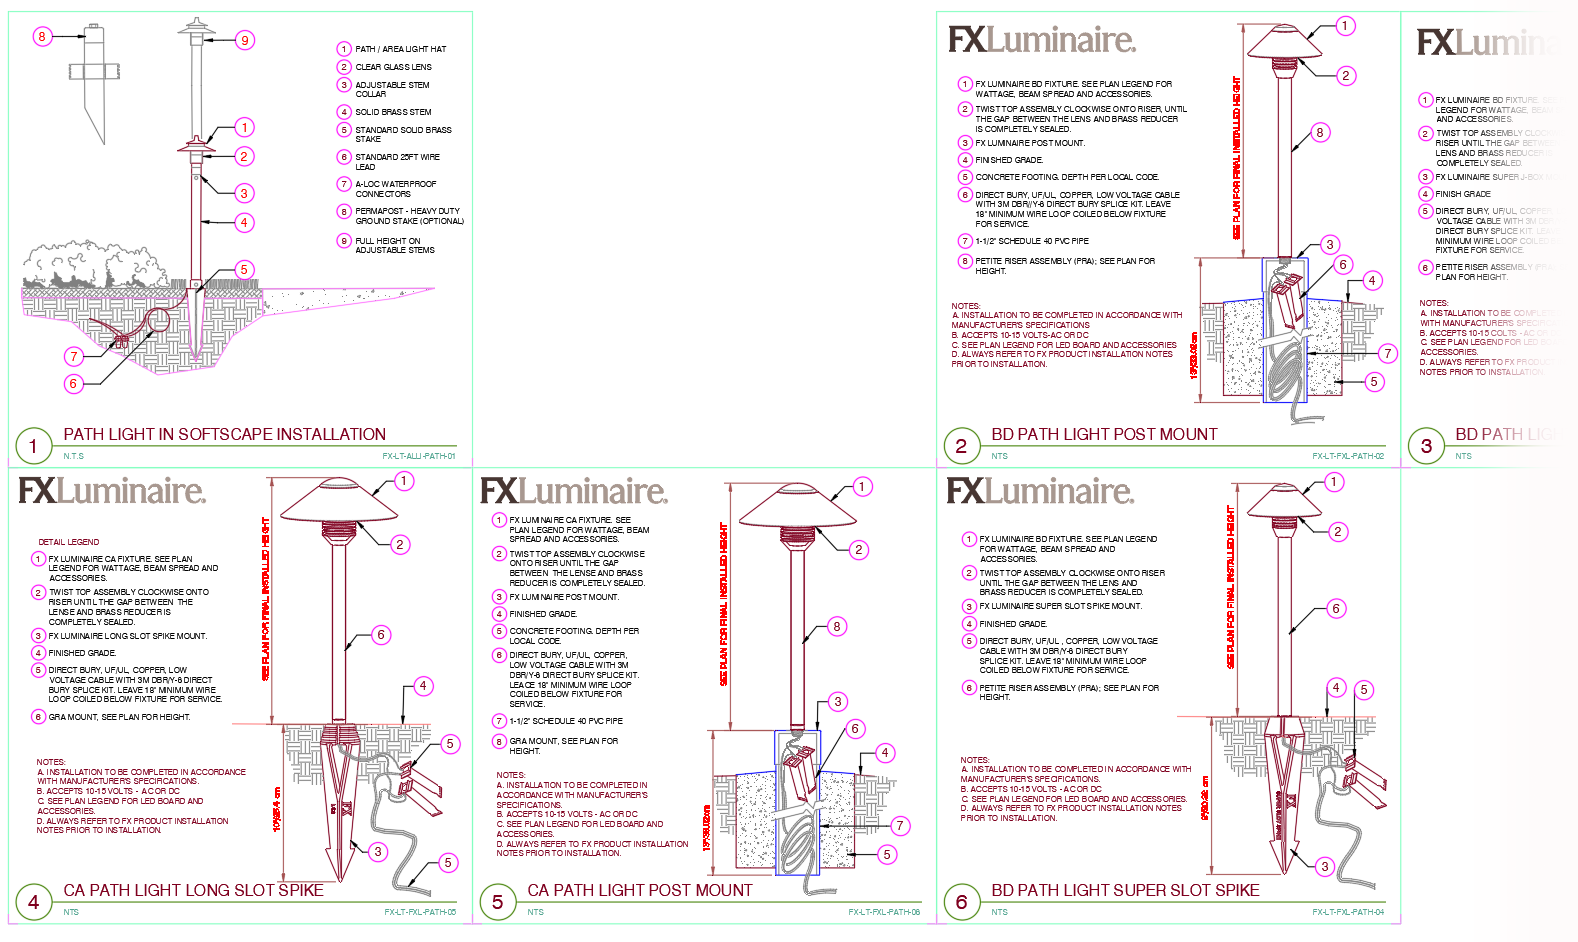
And then we attempt to place another detail between details 1 and 2, which we'd logically like to be numbered 2.
At this point, if we try to select the number 2 for the detail, we'll receive a message that the detail is already in use. We'll then be forced to use the number 7 (or greater) instead.

So we now have a detail number 7 between details 1 and 2.
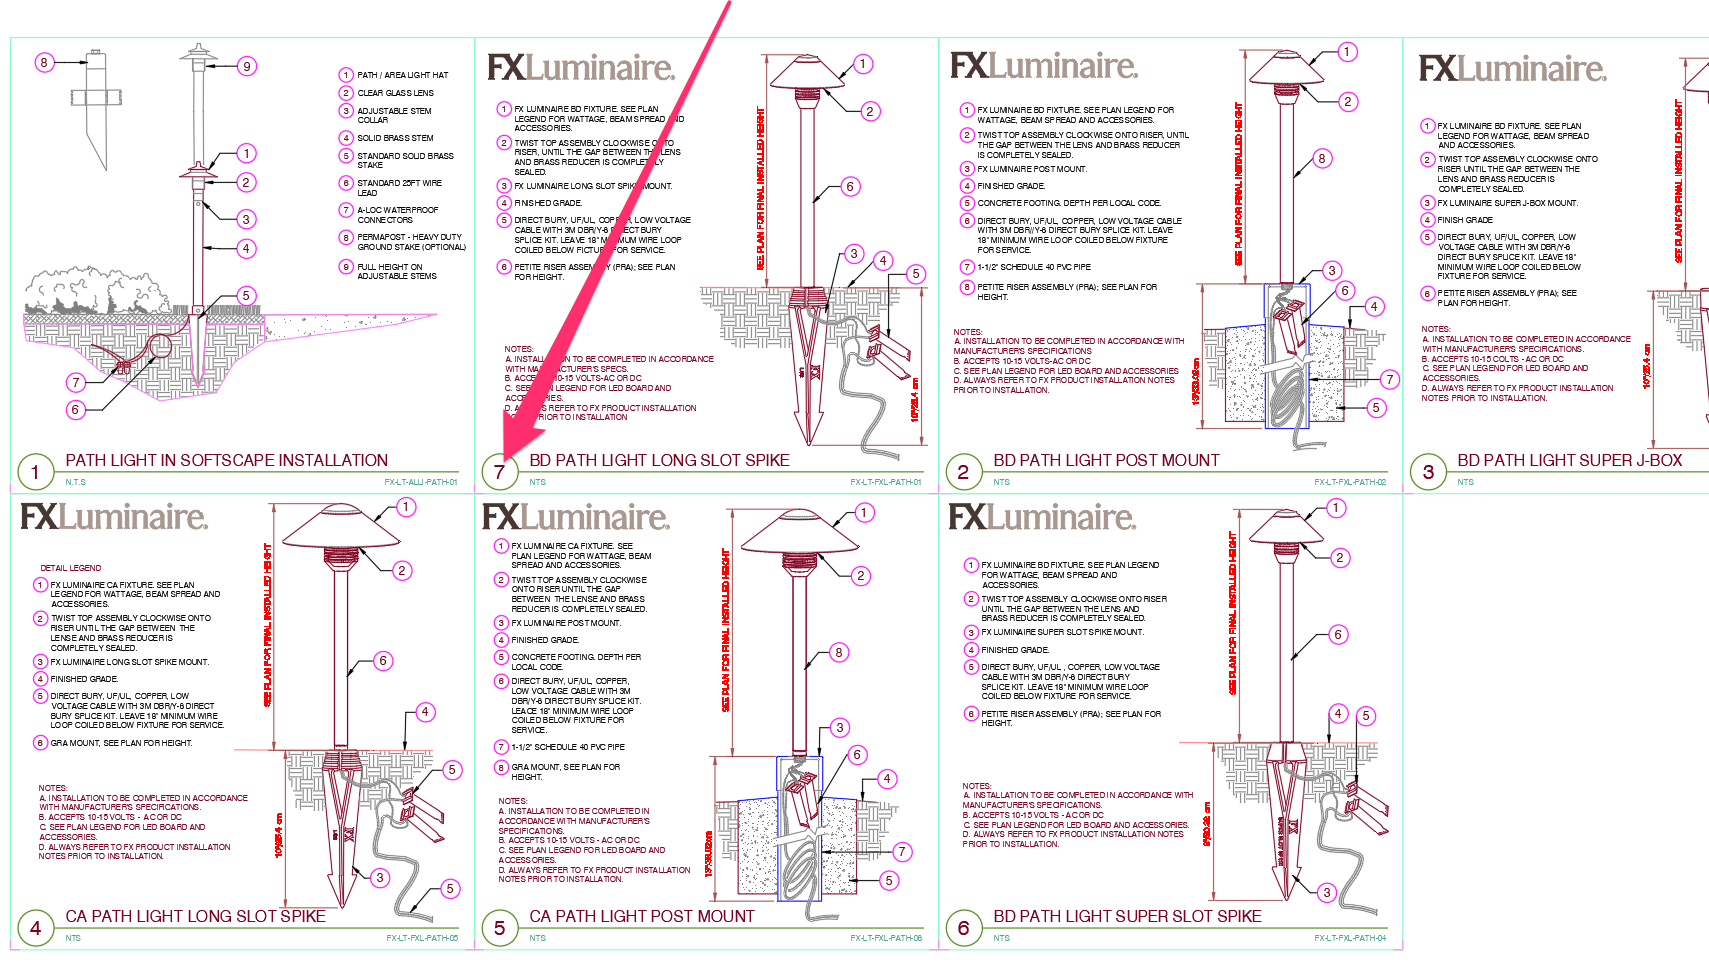
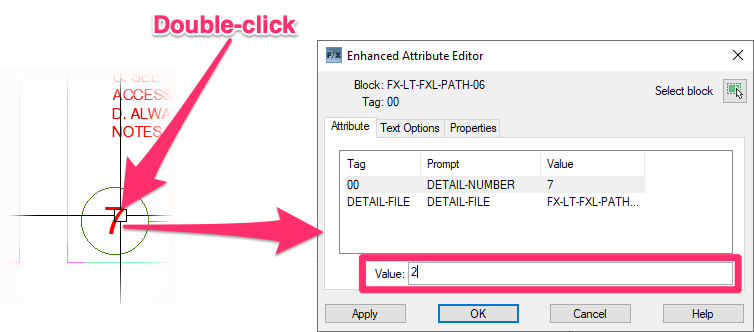
To correct the number of that detail, double-click its number on the sheet to open the Enhanced Attribute Manager.
You can then change the number attribute in the Value field to your desired number. Click OK to save the change.
The detail's number will change on the sheet. But now you'll have two details on the sheet with the same number. In our example, we'll end up with two details numbered 2.
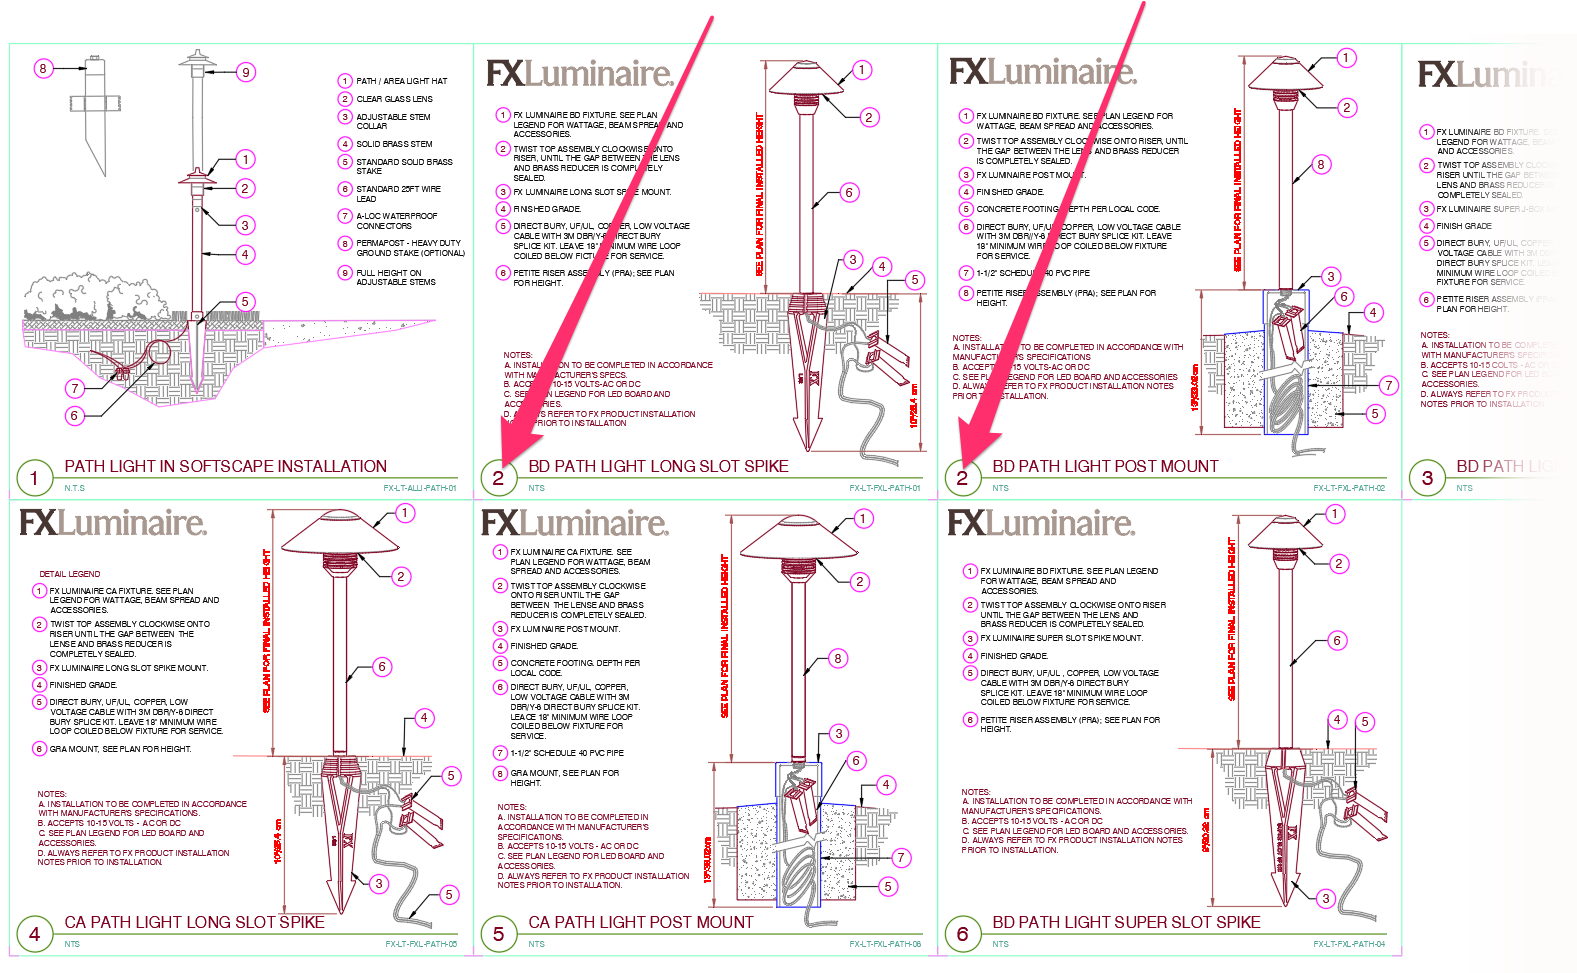
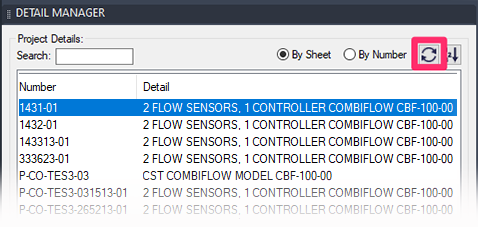
Click the Refresh button in the Detail Manager.
The sheet will now include two #2 details. Click the Renumber button again.

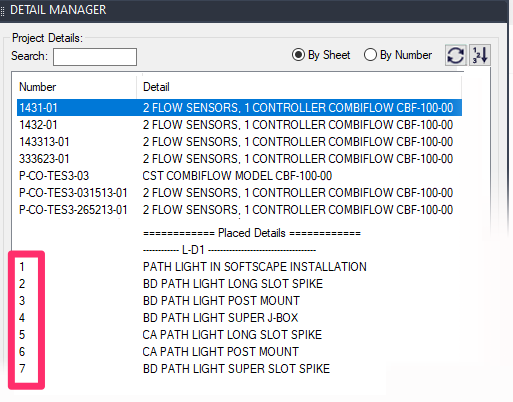
All details on the sheet will be correctly renumbered 1, 2, 3, 4, 5, 6, 7.
Deleting Details from a Project
Deleting Unplaced Details
To delete one or more details that you have not placed in a drawing, first select the detail(s) in the Detail Manager.
You can select multiple details at a time by pressing the CTRL and SHIFT keys while selecting the details.
Once you've selected all the unplaced details you want to delete, click Delete.
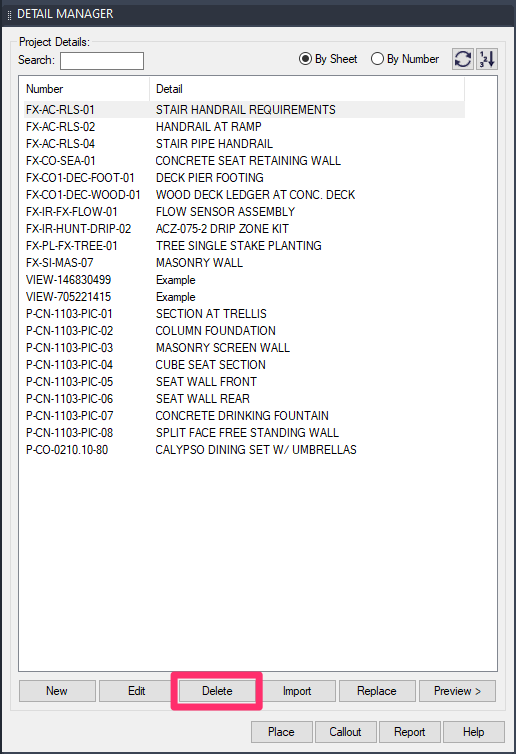

You'll be asked, Are you sure you wish to remove these detail(s) from the project?
Click Yes to delete the detail(s) from the current project. Click No to leave the detail(s) in the project.
Even if you select details you've placed in your drawing and click Delete, only the unplaced details will be deleted. If you delete placed details from the Detail Manager, they will be deleted from the current project but will remain placed on the sheet. They just won't be linked to the actual detail files once you've deleted them from the Detail Manager.
After you delete one or more details from a project, the Command history will display which detail(s) you just deleted. For example, if you delete detail # S-102, the Command history will have an entry for "S-102."
This way, you can make sure any affected sheets and other settings are updated. (Even if the detail was unplaced, it may have been called out on many sheets, referenced by other items, etc.).
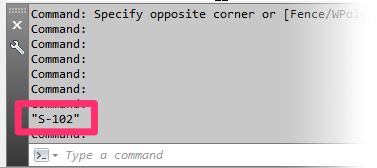
You can open the Command history by pressing the F2 key, or you can simply grab the top of the Command line and drag it upward to expand it.
Deleting Placed Details
If you've already placed a detail in your drawing and you no longer want to use that detail in your project, you'll first need to delete that detail from the drawing. You can then highlight the detail(s) in the Detail Manager and delete it from your project.
Deleting an Entire Sheet of Details
In some cases, you may need to delete a whole sheet of details on a layout tab.
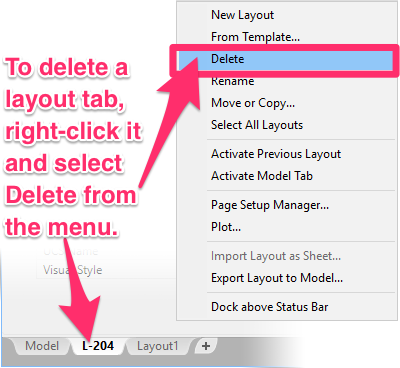
If you want to delete the layout tab that contains the detail sheet, right-click the tab and select Delete from the menu that opens.
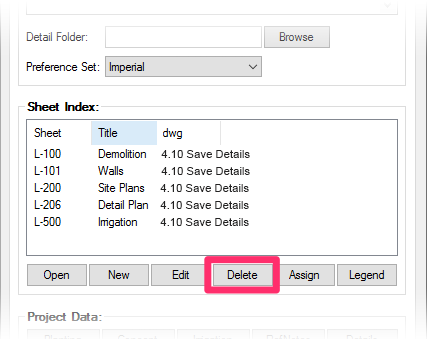
You can also use our Sheet Index tool to delete the sheet.
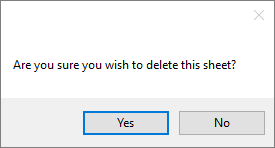
Select the sheet in the Sheet Index and click Delete. If you're sure you want to delete the sheet, click Yes.
Whether you've deleted the layout tab or the sheet containing your details, those details will now be marked as unplaced in the Detail Manager.
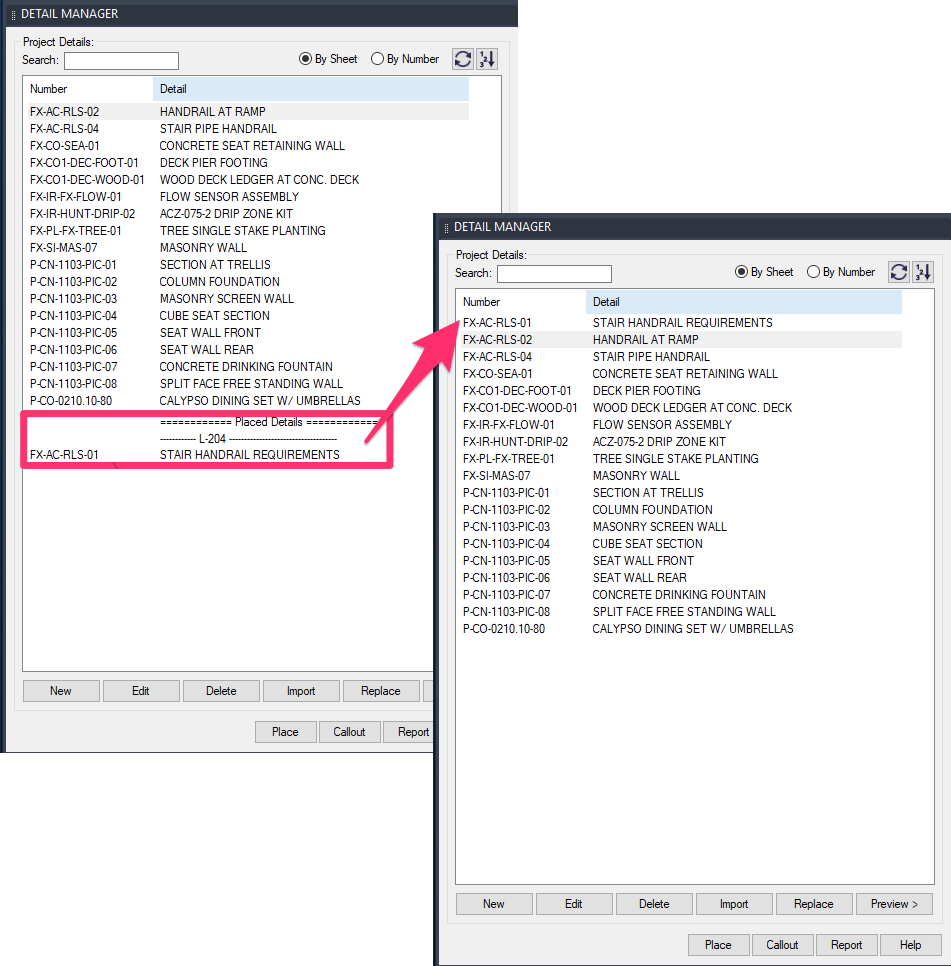

You can now choose to delete those details from your project, or keep them in the Detail Manager in case you want to use them later.
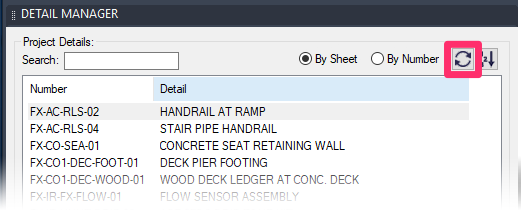
You may need to click the Refresh button to see the details as unplaced. Make sure the Detail Manager is docked, then click the Refresh button.
Related Webinars
- Details for Beginners: Take a full tour of our detail system, where you’ll learn how to navigate our detail library, find the details you need, and use them in your drawing set. (1 hr 1 min)
- Ask us Anything: Spotlight on Details: We show off some recently added features and lay out our ambitious plans for the future of details in AutoCAD and Revit. (1 hr 1 min)
- Design F/X Setup: Join us for a complete demonstration on how our software helps you manage and use construction details. We’ll provide an overview of our entire system, including instructions for placing a detail. (53 min)
- Getting Started with the Detail Tools: We'll show you the basic tools you need to familiarize yourself with on the F/X Details ribbon, including our tools for placing details on your drawings. (58 min)
- Detail Tips And Tricks: Learn some advanced techniques and best practices to create details that communicate your design intent clearly, including how to place a detail template. (59 min)
Troubleshooting
Issue: Details are missing from the detail manager but are visible in Detail Explorer
Issue: You are experiencing a significant delay when attempting to add or place details
Issue: You want to add (save) a PDF as a detail in our detail system
Issue: You placed a detail on a sheet in your drawing, and it came in with the number 00
Issue: Several buttons in the Detail Manager are grayed out and inaccessible
Issue: You are unable to create a project-specific folder when adding a detail
Issue: You want to advance a project into a new phase (e.g., permitting to construction)
Issue: Remove or unassign a detail from irrigation equipment
Issue: You selected a detail, and it doesn't have a title, scale, or number (no title block)
Issue: You placed a detail in Paper Space, and its title appeared twice
Issue: All default Land F/X details don't have a title, scale, or number (no title block)


