Print Details
Quick video
- Print Details From the Detail Explorer
- Print Details Directly from Model Space
- Printing and Saving Details as PDFs
- Set Up Your Printer
- Example of a Printed Detail
- Related Webinars
With details, organization is key. The details used by a single office can number into the hundreds. That's why it's a good idea to create and maintain a detail binder. Keeping hard copies of all your details in one organized document can help you scan your details quickly and make assessments of:
- Which, and how many, details and detail categories you have
- When each detail was created or last modified
- Which details require updating
- Which detail categories are well represented, and which categories need expansion
With several options for printing your details, we make it easy for you to maintain your detail binder. You can print your details from the Detail Explorer or directly from your drawing.
Print Details From the Detail Explorer
Open the Detail Explorer:

F/X Details ribbon, Explorer button
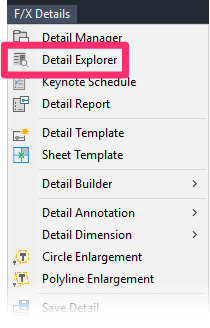
F/X Details menu, Detail Explorer option
or type DetailExplorer in the Command line
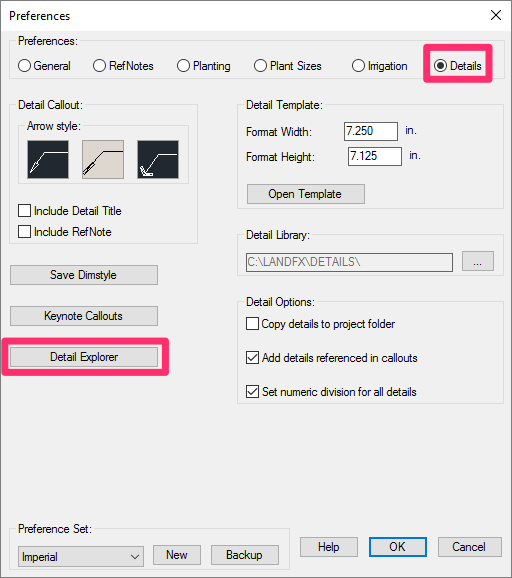
Details Preferences, Detail Explorer button
The Detail Explorer will open when you select any of these options.
To print details from the category list, select a category (example: Site Improvements) and click Print.
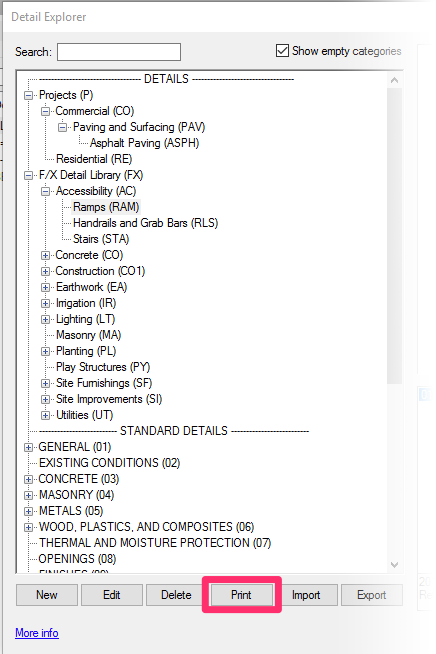
You'll be presented with a few options that are optimized to help you organize your detail binder.

Print a List of All Detail Categories
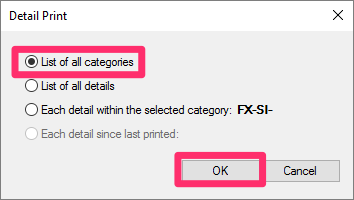
The resulting spreadsheet provides a handy overview of your hierarchy of details. It can serve as a helpful table of contents for your detail binder.

Print a List of All Details

To print a list of all your details, select the List of all details option, and click OK.
The resulting spreadsheet lists all your details, divided into categories.
You can print this spreadsheet and use it as either an index or table of contents for your detail binder.
You can quickly scan the detail titles in each category and determine which details you have – and still need – in that category.

Print Each Detail Within the Selected Category
Important note:
These steps assume that you have downloaded all the Land F/X details you want to print.
Not all the DWG and XML files for the LandFX/Details folder download automatically when you install Land F/X. The DWG and XML files for the details in this folder only download from landfx.com if you add them to a project or edit them from the Detail Explorer.
The option to print each detail within the selected category will ONLY print details that currently have a DWG in the selected folder. So in the case of a default FX detail folder, 125 details may show in the Detail Explorer, but you may have only actually used/downloaded 8 so far. In this case, only 8 details will print – not 125.
The fastest way to print a folder of Land F/X details is to download and print the latest version of our Land F/X Blocks and Graphics Binder.
Otherwise, you can also create a dummy project and then add all the details you’d like to print to that project. Because adding a detail to a project will download that detail's DWG file automatically, you'll then have all those details in their appropriate folders (according to our detail folder organization) and will be able to print them.
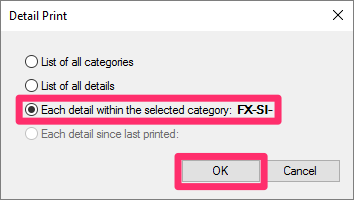
To print each detail in the selected category, select the Each detail within the selected category option, and click OK.
You'll be directed to the most recently opened Layout tab, and you'll see the following message:
To print details, the contents of this layout tab will be erased. Continue?
To overwrite the contents of the layout tab and place the detail in that tab, click Yes.

Examine your drawing carefully before clicking Yes. If the layout tab contains linework or text that you want to keep, click No. You may then want to open a new layout tab, or even a fresh drawing, where you can place your details without the danger of erasing important materials.
The Page Setup Manager may open at this point.
To configure your printer settings, click Modify.
If you don't see the Page Setup Manager, you can type PageSetup in the Command line and press Enter to open the Page Setup Manager and configure your printer.
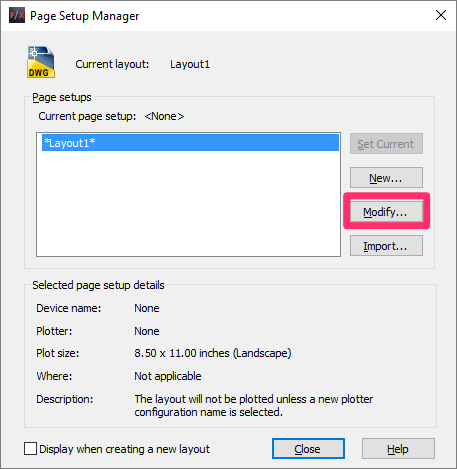
For information on configuring your printer settings to print a detail, see Set Up Your Printer below.
Once you've configured your printer settings, your detail(s) will print from the selected printer. Your detail(s) will also be placed on the Layout tab according to the current printer configuration settings.
You'll also see a Batch Process dialog box that will allow you to print the remaining details in the selected category.

In this example, we've chosen to print the details in a category containing 9 details. The Files Remaining pane shows the number of details left to print.
Click Next 1 to print the next detail in the category. Click Next 5 to print the next 5 details in the category.
In categories containing 100 or fewer details, the third button allows you to print the remainder of the details (in our case, Next 8, for 8 details). In categories containing 101 or more details, this button will be named Next 100 and will allow you to print the next 100 details in the category.
Print a Single Detail
To print a single detail from the Detail Explorer, find that detail in its category on the list to the left. When you select a detail category, the details in that category will be listed to the right. To print one of those details, right-click it.
Right-clicking a detail in this list will pull up the menu shown below. Select Print from this menu to print the detail.

The selected detail will now appear in both Paper and Model Space in the current drawing and be ready to print.
Print Details Directly from Model Space
Our software also allows you to print individual details directly from Model Space. You can do this by typing PrintDetail in the Command line.

Once you've configured your printer settings correctly as described below, click Close in the Page Setup Manager to print your detail.
Printing and Saving Details as PDFs
If you print your details as PDFs, they'll be saved in a folder on your desktop named LandFX Output. You can then save those PDFs to the location of your choice or print them on paper as needed.
Set Up Your Printer
When printing a detail, you will often need to configure your printer settings in the Page Setup dialog box.
To open this dialog box, type PAGESETUP in the Command line and press Enter.
Click Modify in the Page Setup Manager.

The Page Setup dialog box will open.

The Page Setup dialog box offers a number of important printer settings. A few common settings include:
- Printer/plotter: Select a printer or plotter for printing the detail.
- Plot style table (pen assignments): Select a preset plotter style, such as a CTB, or color-dependent style. For more information, see our CTB Plot Styles page.
- Paper size: Select a paper size for the detail depending on the paper you use in your detail binder, or need to use for the particular task at hand.
- Drawing orientation: Toggle between Portrait and Landscape, depending on the profile of the detail.
Click OK to save your settings.
Example of a Printed Detail
When you print a detail, it's sized and scaled meticulously according to the settings you've configured in the Page Setup dialog box.

Related Webinars
- Design F/X Setup: Join us for a complete demonstration on how our software helps you manage and use construction details. We’ll provide an overview of our entire system, including a look at our detail library system. (53 min)
- Getting Started with the Detail Tools: We'll show you the basic tools you need to familiarize yourself with on the F/X Details ribbon, including organizing your details. (58 min)
- Saving your Detail Library to Land F/X: We'll go over the best practices for saving your firm's standard details into our system. This webinar will help you make decisions that will save time and money in the long run. (1 hr)
- Detail Tips And Tricks: Learn some advanced techniques and best practices to create details that communicate your design intent clearly, including how to batch save details (59 min)


