Table Style Schedules (Non-Plot or Plotting Gridlines)
- How to Create a "Drawing"-Style Schedule with the Updated Options
- How to Create a "Table"-Style Schedule with the Updated Options
- Why Did We Create This Update?
- Editing Table Schedules After Placing Them
- Troubleshooting
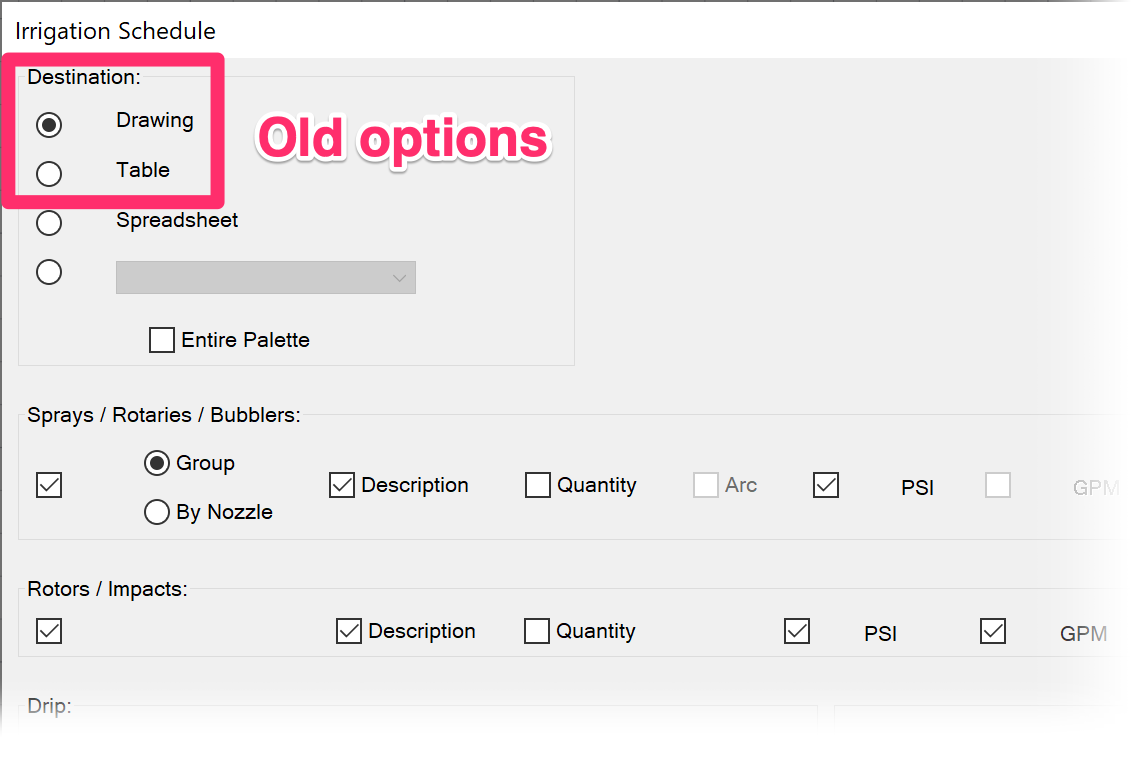
You may have noticed that our Irrigation Schedule now has updated options for the schedule Destination – that is, how and where you place or send your schedule. In the old options, you could select Drawing to place your schedule in your drawing without gridlines separating the rows and columns, or Table to place your schedule as a table, complete with gridlines forming table cells that were visible both in your drawing and when plotted.
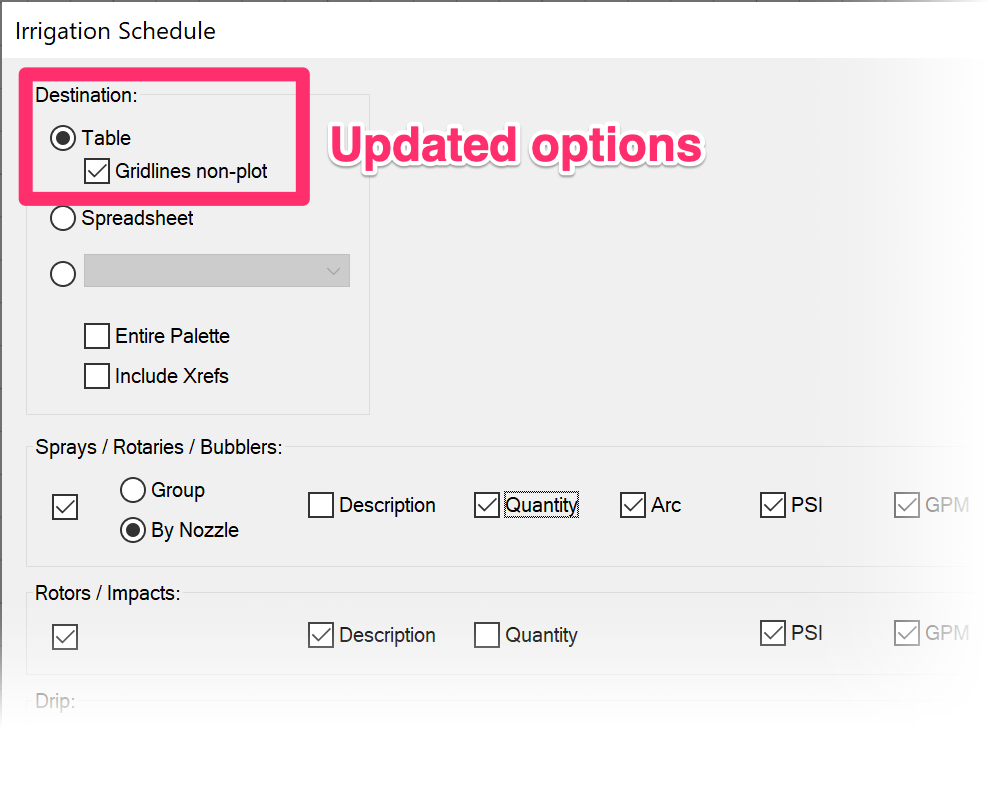
The updated schedule dialog box only includes a Table option with a Gridlines non-plot sub-option, along with the existing options to send the schedule to a Spreadsheet or directly to a service provider More information on these options

Updated Destination options

Old Destination options (with Drawing option)
You might be here because you're wondering:
- How to navigate these new options
- How to achieve the same schedule style without gridlines that was previously achieved with the Drawing option
- Why we updated the schedule destination style in this way
How to Create a "Drawing"-Style Schedule with the Updated Options

The now-discontinued Drawing schedule style was essentially a table without visible lines. You can achieve this same schedule style for plotting purposes by selecting both the Table option and the Gridlines non-plot sub-option.
The schedule will place in your drawing with visible lines, but these lines will not be visible when you plot your plan, just like the Drawing style schedules.
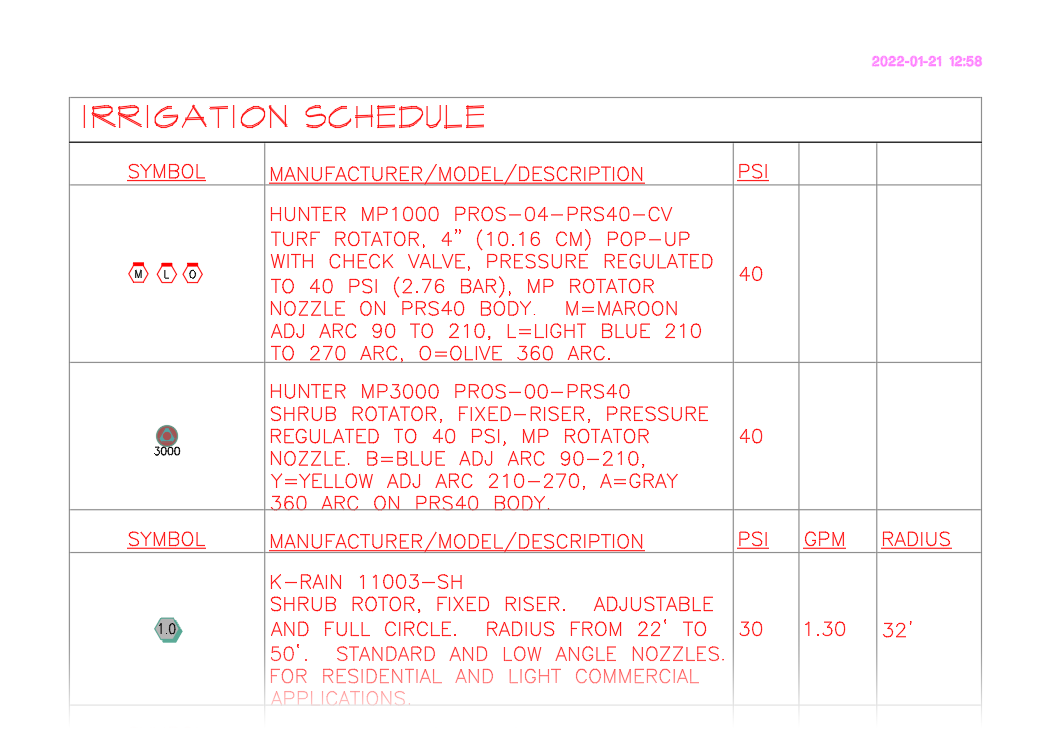
Here's an example of a schedule placed with both the Table option and the Gridlines non-plot sub-option selected.
Note that although the resulting schedule has visible gridlines, they won't plot.
Note that these gridlines are set to No Border, which puts them at color 8 on the Defpoints layer. If you don't want to see the gridlines in your drawing, you can simply turn off or freeze the Defpoints layer.

How to Create a "Table"-Style Schedule with the Updated Options

To place a Table style schedule with visible and plotting gridlines, select the Table option and deselect the Gridlines non-plot sub-option.
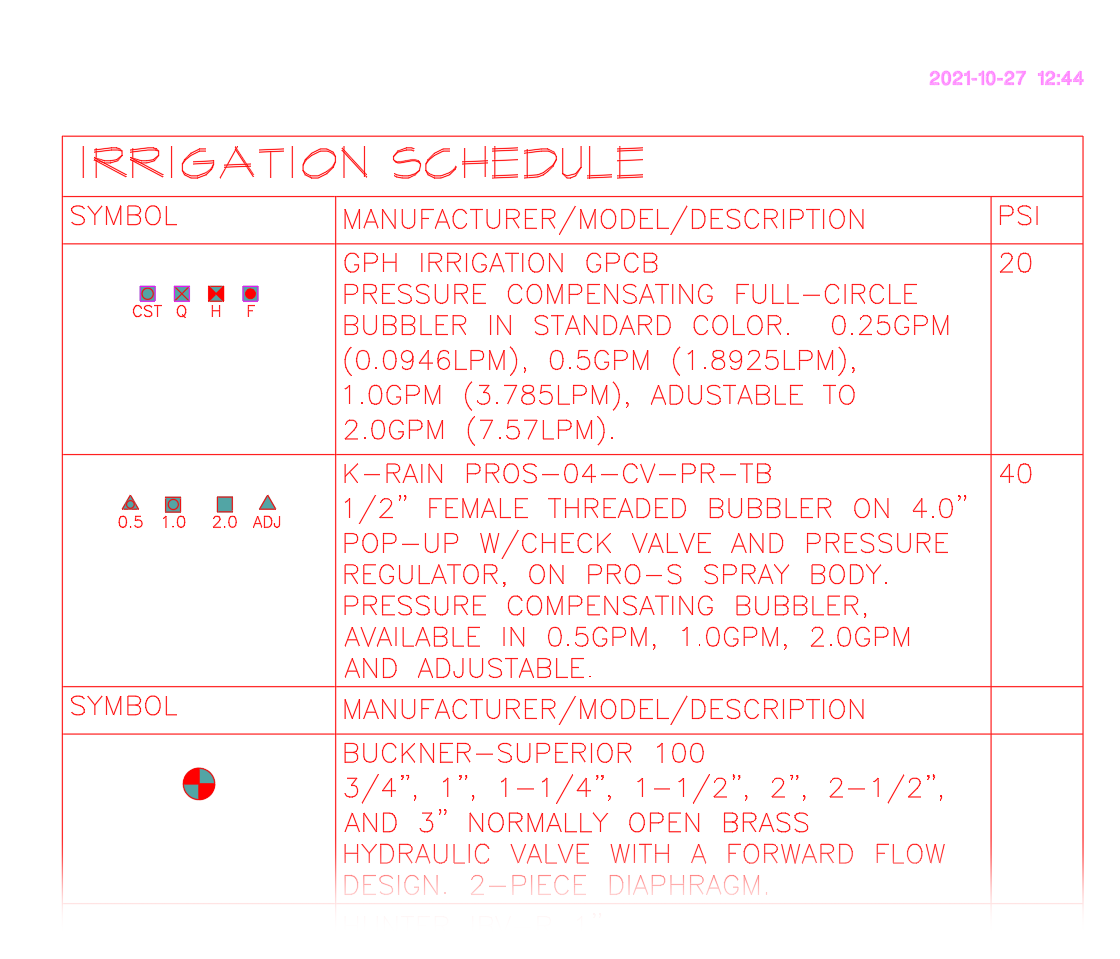
Here's an example of a schedule placed with the Table option selected and the Gridlines plot sub-option not selected.
This style is identical to the former Table style schedule option, with visible gridlines in a color that will plot.

Why Did We Create This Update?
As schedules literally are tables regardless of whether or not their gridlines are visible, they will function better, and give us much more capability in terms of rows and columns, when expressed as tables in CAD. Advantages include:
- Schedule text styles: We can have actual table styles for the schedule header, data, and title.
- Sharing and editing schedules: A table format with rows and columns is more understandable to others who need to look at or edit the schedule.
- Integration with other platforms: In the future, Land F/X will integrate increasingly more with platforms such as Revit, where all schedules are tables. Outputting your schedules as tables will make them more consistent across platforms.
- Cleaner code (which means quicker development): Outputting all schedules as tables also cleans up our code quite a bit because it means less code for us to manage and fewer schedule options to test. As a result, we'll be faster at developing new schedule features, as well as troubleshooting and diagnosinge problems.
These updated schedule output options actually date back to the 1990s, when Land F/X was invented. Table objects didn't exist yet, so we created our schedules as MText. We then added tables as an option in the early 2000s when they became available. This update is the next evolution in the software, as it's essentially become time to discontinue that old way we found to create a schedule, with the more proper and recognized output of it being a table.
Editing Table Schedules After Placing Them
If you're used to the old Drawing option and you need to edit a schedule after placing it, you might notice that editing a table is slightly trickier than editing MText. Just note that tables are still superior. For example, if you need to add a large amount of text into a cell, the row will grow automatically as necessary because the schedule is appropriately a table, instead of MText with tab-stops faking a table.
Are you accustomed to making manual edits to your schedules after placing them using the old Drawing option, and now you're having difficulties making those edits? See our article on considerations for editing the updated table style schedules.
Troubleshooting


