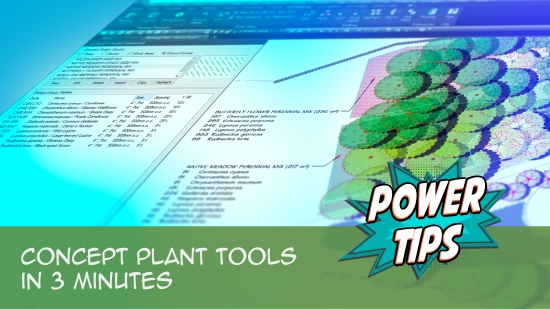
Concept Plant Manager
Quick video
- Concept Manager Overview
- Edit a Concept Plant
- Creating a Mix of Seeds or Plant Species
- Using Concept Plants to Represent Existing Plants on Your Site
- Labeling Concept Plants
- Importing Concept Plants & Design Groups
- Create a Modular Planting Mix
- Related Webinars
- Troubleshooting
Concept Plants allow you to create a more generalized version of a planting plan while expressing the conceptual intent of the design and plant palette. In using Concept Plants, you'll work with planting groups rather than individual plants.
Producting Concept Plants is a quick process. Any data you enter into a project for the conceptual work will be directly available for input into the planting plan construction documents.
The Concept Manager is essentially the control panel for a project’s Concept Plan. It allows you to add plants to the plant palette, edit the names of the plants, and associate plants and assign symbols for plant Design Groups.
We made some major updates to the functionality of Concept Plants in 2018. The crux of the update was to engineer an option to include Concept Plants in the regular Plant Schedule. You can now drag and drop plants into the Concept Palette from the Plant Manager to build your palette. You can also move between a Concept Schedule and a regular Plant Schedule with a few clicks, showing all individual plants, configured perfectly with your assigned percentages – plus it even auto-assigns percentages if you didn’t. This is wildly awesome capability, all driven by numerous amazing wishlist requests over the years.
Generic Plants vs. Concept Plants vs. Project Plants
We offer three basic ways of placing plants in your drawings, each with its own specific purpose in the design phase:
- Generic Plants are “dumb” plant blocks (that is, they have no data attached to them). Designing with Generic Plants is like designing the old way – just putting plant symbols in your drawing without assigning them to plants from a database. Essentially, they serve as placeholders until you’re ready to replace them with actual plants from our database using our Match Properties tool.
- You can use Concept Plants to complete a high-level conversation plan with the client before locking into your final plants. You can replace them with actual plants from our database when ready.
- The Plant Manager is for when you know the exact plants you want to use.
Concept Manager Overview
The Concept Manager allows you to create and organize Design Groups. These groups represent general categories of plant types that apply to the project. Examples of plant Design Groups might include:
- Evergreen Street Tree, Deciduous Street Tree
- Lawn Tree, Flowering Accent Tree, Conifer Background Tree, Windbreak Tree
- Large Shrubs, Medium Shrubs, Low Shrub Mass
- Shade Tolerant Shrubs
- Large Accent Shrubs, Small Accent Shrubs
- Low Ground Cover, Turf
The list of possible plant Design Groups is endless. With each Design Group, you'll assign a symbol to represent that group on the plan. You'll then add a plant palette to the Design Group. The plant palette may consist of only one plant if you prefer. However, you may find that including several plants that fulfill the intent of the Design Group offers more flexibility.
Open the Concept Manager:

F/X Planting ribbon, Concept Plant Manager flyout
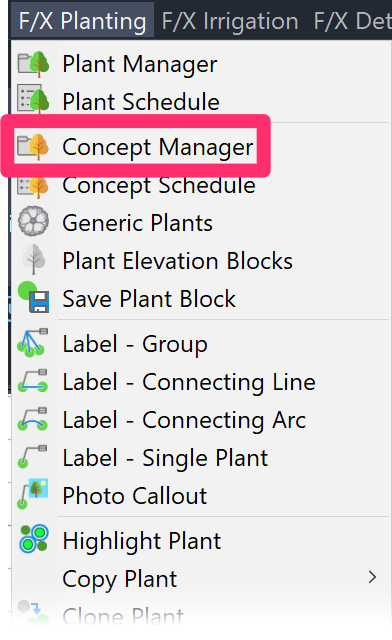
F/X Planting menu, Concept Manager option
or type ConceptPlants in the Command line
The Concept Manager for your project will open.
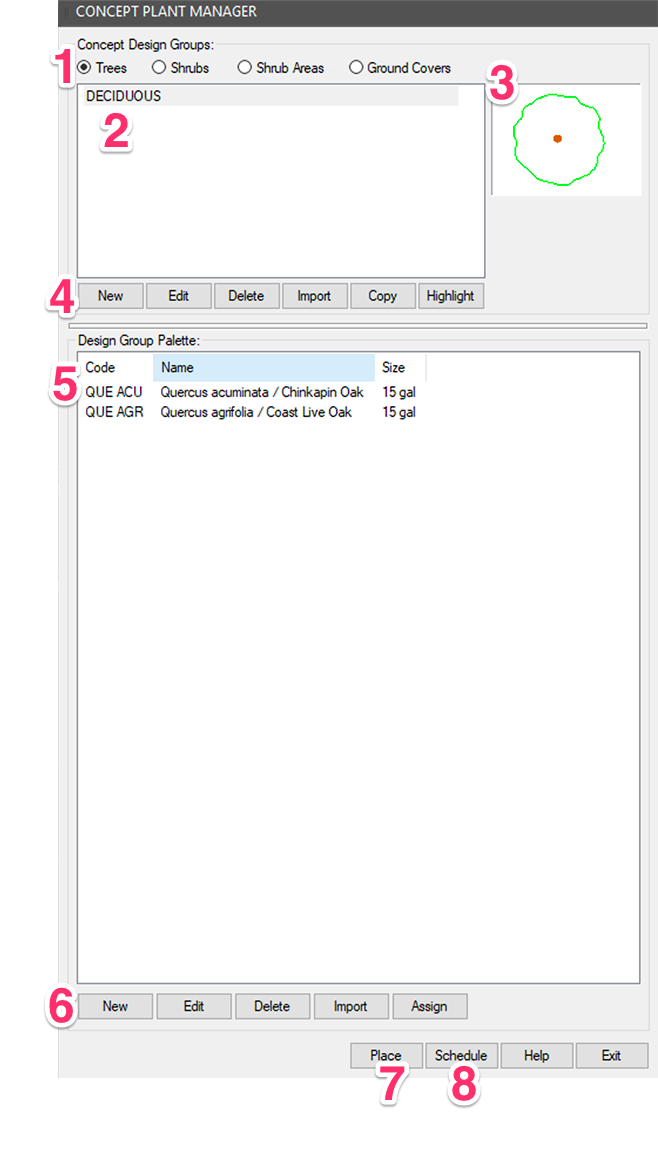
1. Plant Design Groups: Trees, Shrubs, Shrub Areas, Groundcovers
2. List of plant Design Groups you have added to your project
3. Thumbnail image of the symbol for the selected plant Design Group
Note that you can no longer change ths symbol by clicking it. This change was necessary change for multiple reasons. We've added new functionality that allows you to double-click this image to place the selected Concept Plant. You can use the New or Edit buttons to assign a new symbol.
4. Options to:
- Create a New Design Group.
- Edit an Existing Design Group.
- Delete a Design Group.
- Import a Design Group from a template or project.
- Copy a Design Group.
- Highlight all plants from a Design Group that have been placed in your drawing.
5. Design Group Plant Palette: This field lists the plant palette for the highlighted Design Group.
6. Options to perform the following actions on the highlighted Design Group's plant palette:
- Add a New plant.
- Edit a plant.
- Delete a plant.
- Import a plant into the selected Design Group from a template or project.
7. Click Place to place the selected plant directly into your drawing.
8. Click Schedule to place a schedule of all Concept Plants you've placed in your drawing.
Bonus features:
Our updated Concept Plant Manager allows you to:
- Resize the entire dialog box, which is now a docked palette
- Reorder the plants in a Design Group by dragging and dropping
- Copy an entire Design Group
- Drag plants into a Design Group directly from the Plant Manager
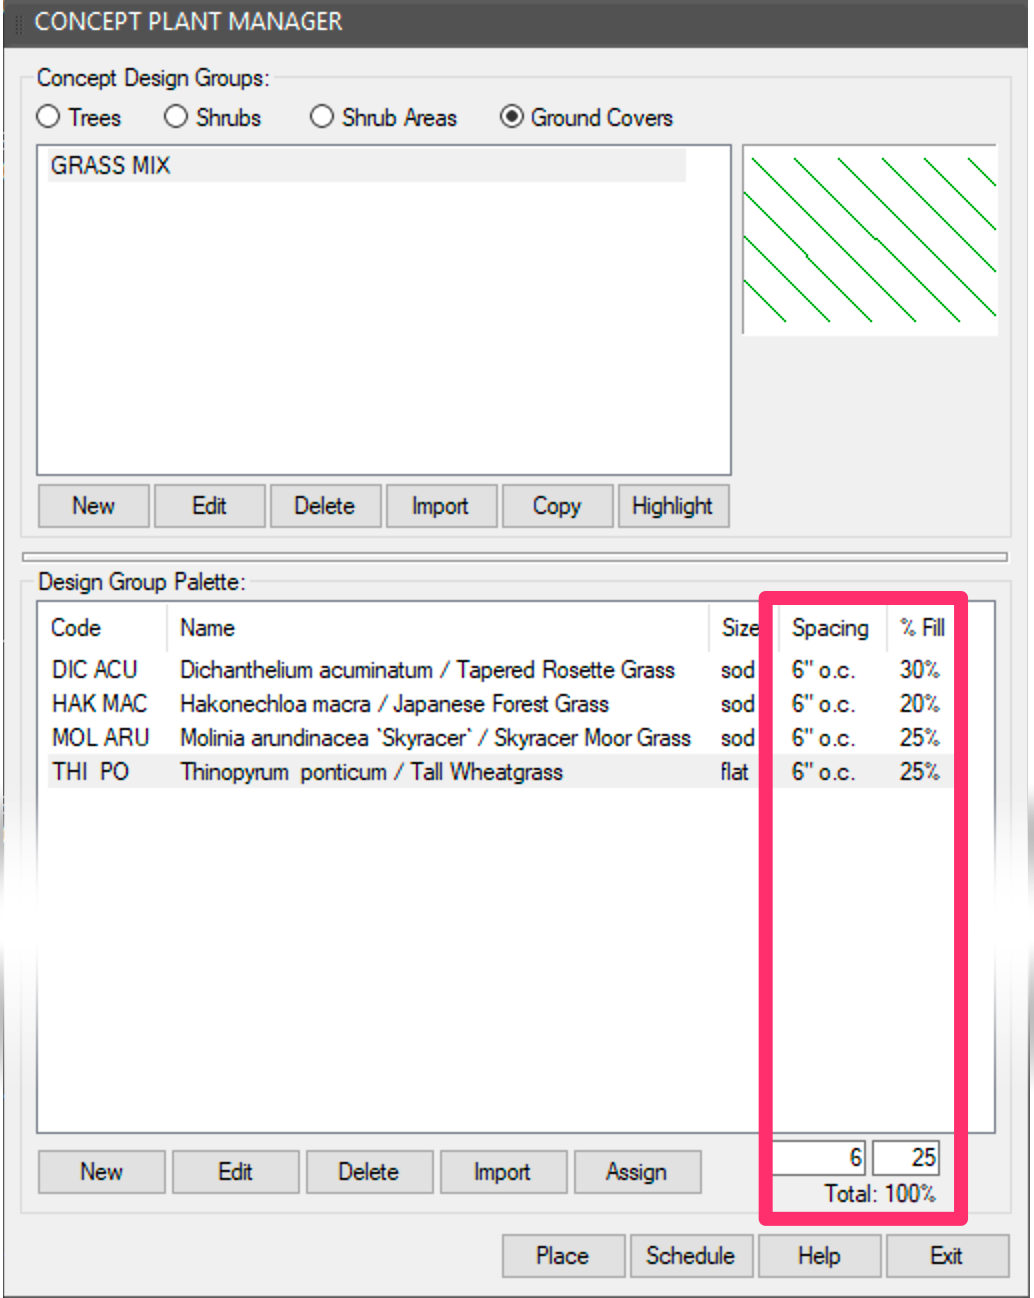
Concept Plants you've added as groundcovers and Shrub Areas will also include fields for Plant Spacing and Percentage Fill.
Converting Concept Plants to Project Plants
When you create a concept plan, the ultimate goal will be to convert your Concept Plants to project plants (that is, actual plants that you've added to your plant palette). In the interest of avoiding confusion, it's a good idea to select new symbols for the project plants when you make the conversion. Thus, we recommend selecting Concept Plant symbols that you will be unlikely to use in your actual planting plan.
Editing a Concept Plant
To make changes to one of your Concept Plants, select it in the Concept Plant Manager and click Edit.
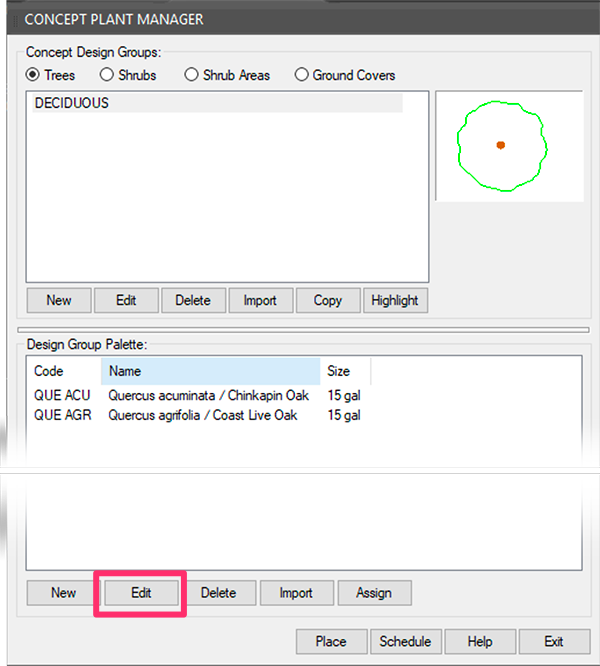
The Plant Info dialog box will open.
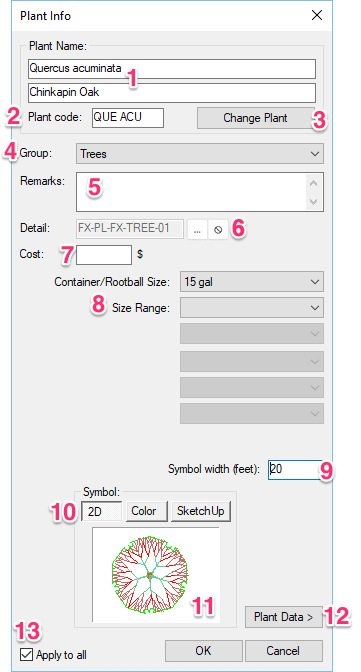
1. Plant Name: The botanical and common names for the selected plant. If you want, you can change this information.
2. The Plant Code assigned to the Concept Plant.
3. Change Plant: Click this button to replace the selected Concept Plant with an entirely different one.
4. The Group, or subcategory category, of the selected Concept Plant. If you haven't set a subcategory, the plant will simply be grouped into its category (example: Trees).
5. Any Remarks, or notes, you want to assign to the Concept Plant – up to 256 characters.
6. Set a detail for the selected Concept Plant, or remove a detail association from the Concept Plant.
7. If you want, set – or edit – a per-unit cost for the plant.
8. The Plant Information Fields, including user definable information fields.
9. The plant's Symbol Width in feet or meters, depending on how you have set your scale.
10. Buttons to toggle between the 2D, Color Render, and SketchUp symbols currently assigned to the selected Concept Plant.
Quick video
11. Thumbnail image of the Concept Plant's Symbol. For trees and individual shrubs, you'll select a symbol block to represent the plant. For groundcovers and Shrub Areas, you'll select a hatch to represent an area that's planted with that groundcover or Shrub Area.
12. Plant Data: Access the wiki-based data associated with this plant.
13. Apply to all: Check this box to apply the edits you make to all instances of the selected plant that you've placed in your drawing.
Plant Spacing & Percentage Fills
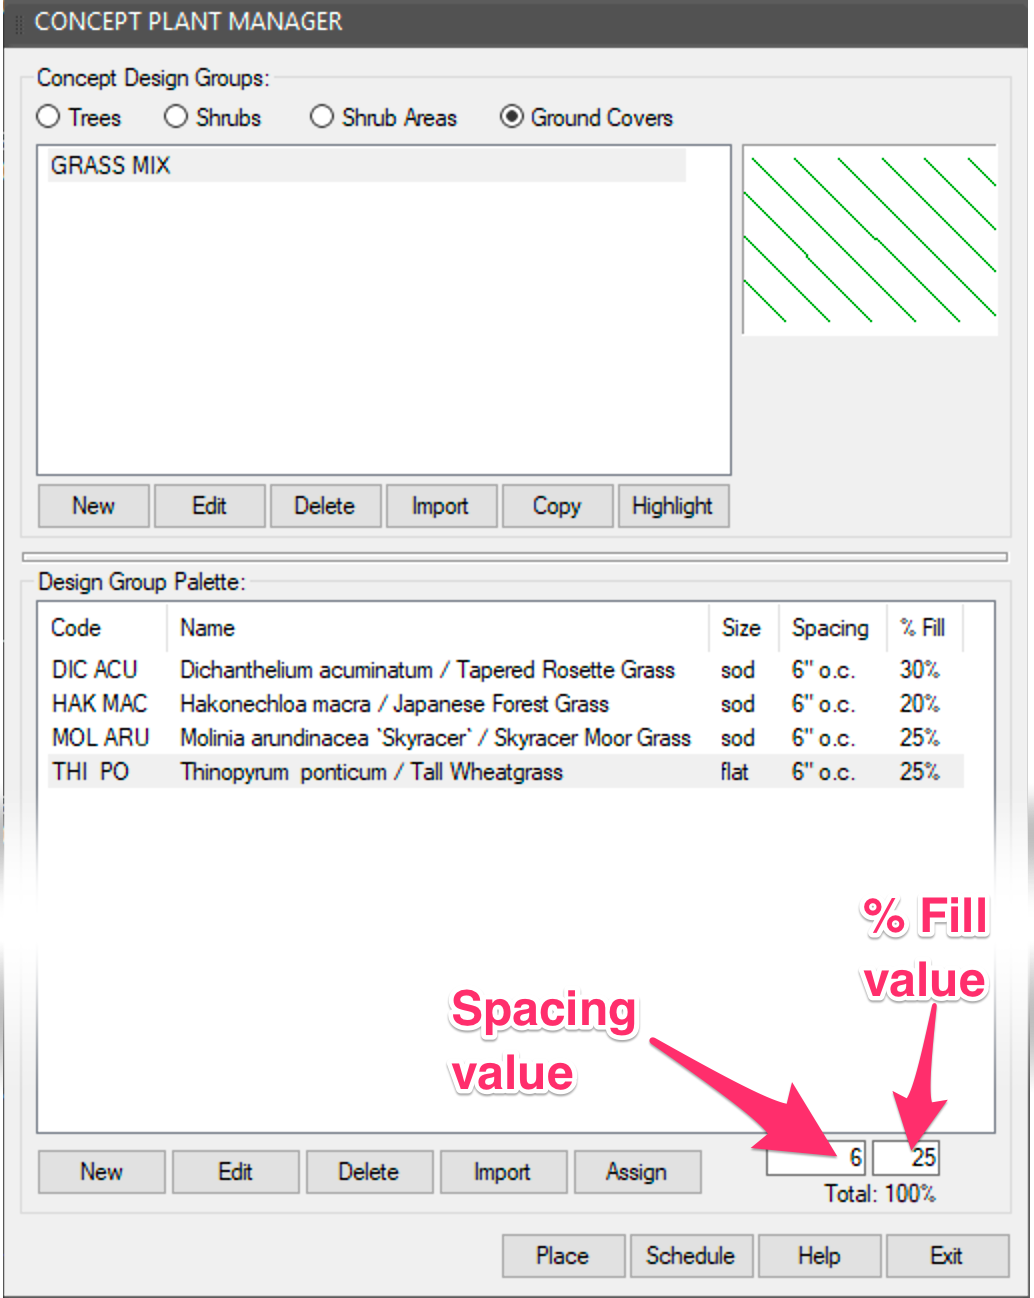
You can enter a Plant Spacing value for plant and seed mixes that you place as Shrub Areas or groundcovers.
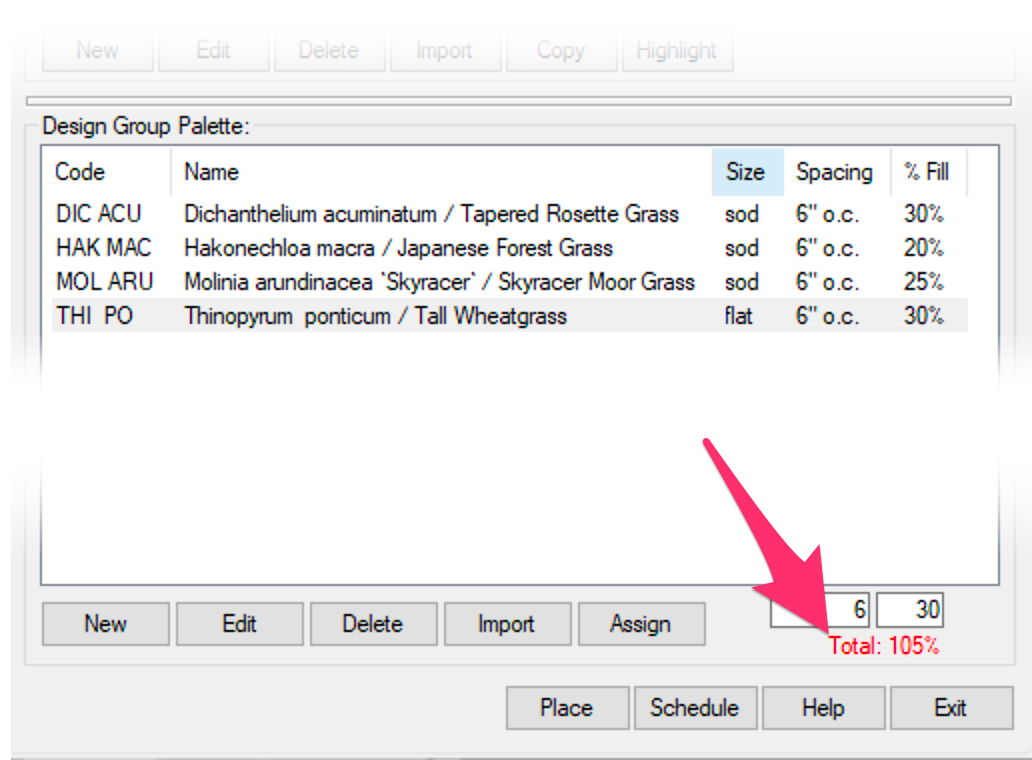
We've moved the spacing and percent displays here to allow you to view them more easily. They update in real time, and the percentage will display in red if the total exceeds 100%, as pictured below.
Notes on percentage fills:
- You can go to as high a total percent fill as you need. This is a great trick if you need to include a complete 100% underseeding along with your mix of plants. The individual plant quantity totals will still calculate correctly if the overall percent fill exceeds 100%.
- Mix percentages now support decimal numbers, allowing you even more precision in creating your fills.
If you group two or more plants or seeds together, you can enter a percentage for each to reach a total of 100 percent.
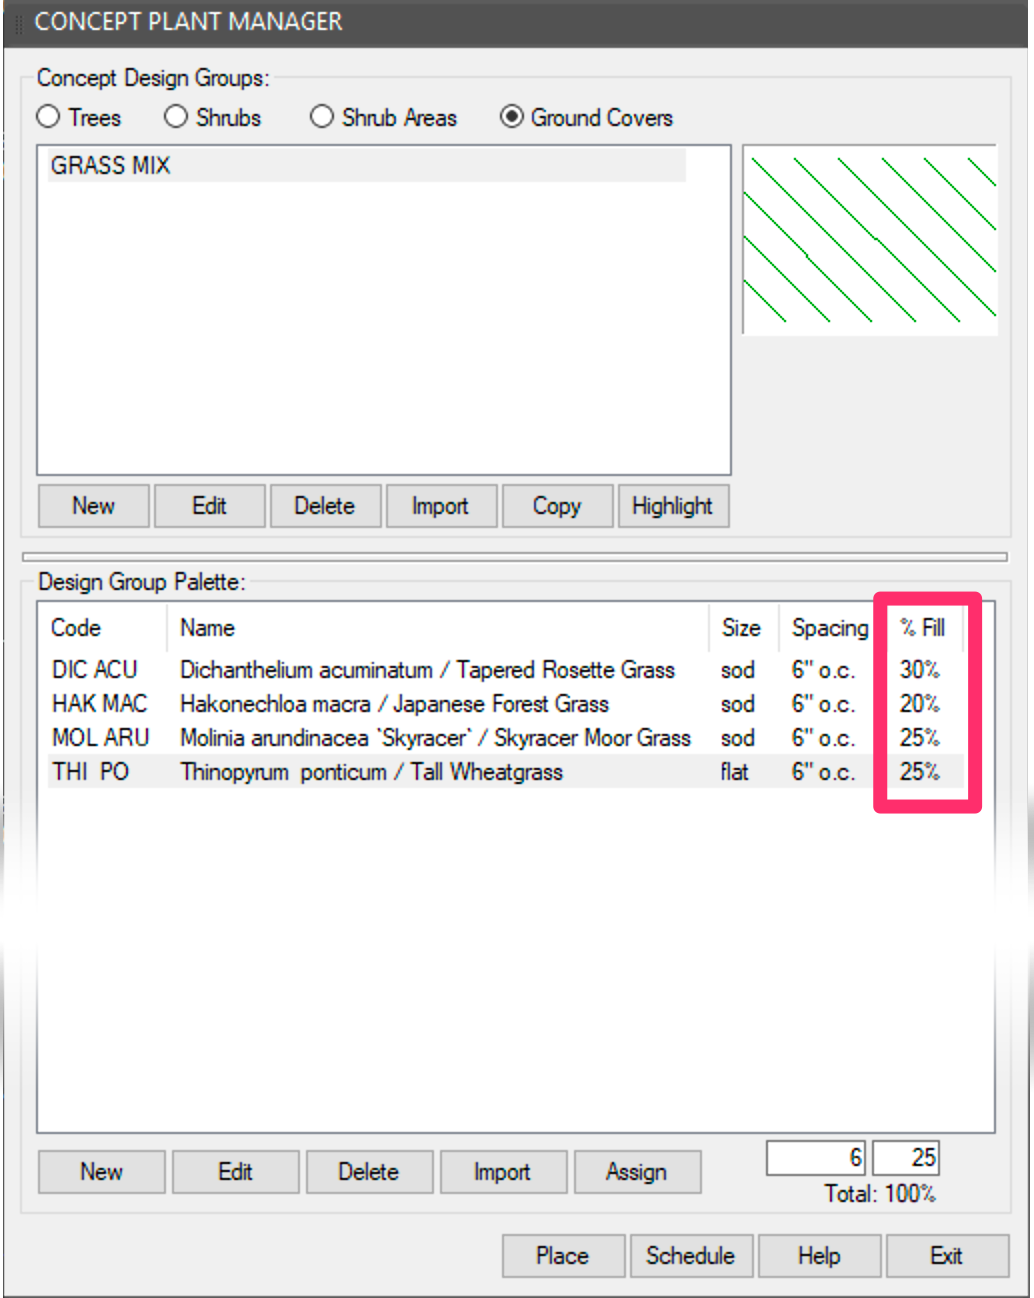
In the example to the left, we've assigned a percentage to each of the four plants making up this Design Group:
- Dichanthelium acuminatum: 30%
- Hakonechloa macra: 20%
- Molinia arundinacea 'Skyracer' 25:%
- Thinopyrum ponticum: 25%
In the example to the right, we've assigned spacing values of 6 inches for each of our four grasses.
For seed mixes, leave the Plant Spacing field blank. The Concept Plant Schedule will calculate your plant in area (such as square footage) rather than plant quantity. For more information, see our Create a Mix of Multiple Seeds or Plant Species page.
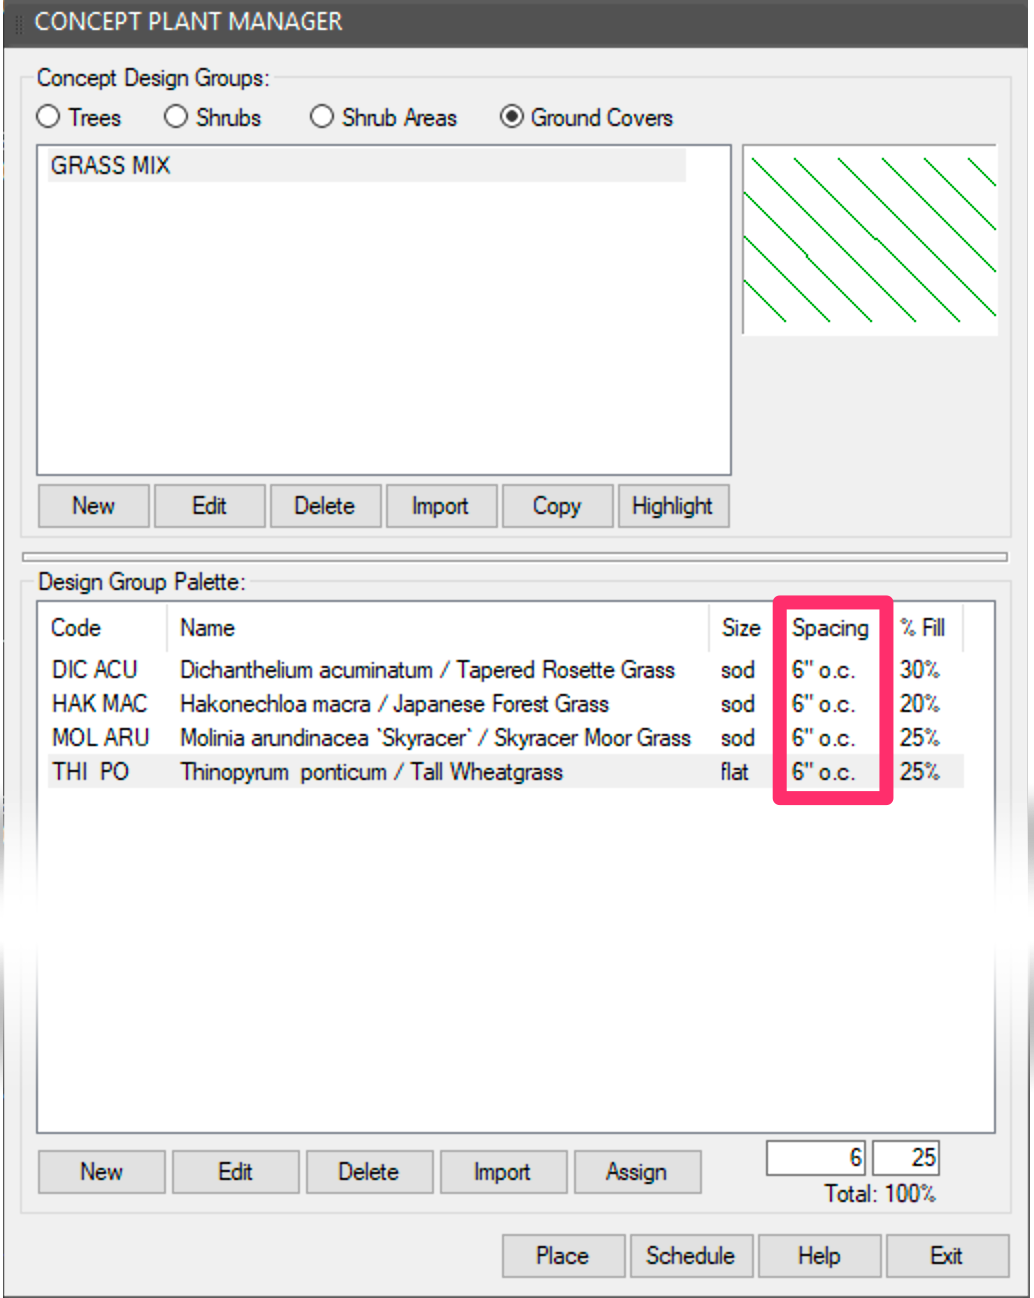
When we place this Concept Plant group in a drawing, the planting area and Concept Plant Schedule will reflect these numbers. Here's an example of a Concept Plant Schedule with these columns filled in:

Creating a Mix of Seeds or Plant Species
Quick video
We make it easy to create your own custom mixes of seeds, sods, grasses, or other plant species. You can do so by creating a Design Group in the Concept Plant Manager.
We offer two basic methods for creating Design Groups. You can use one of these methods or incorporate elements of both.
- Create the Design Groups that seem applicable to the project, and add a plant palette to them.
- Create a list of plants that make logical sense for the project and work well together, or simply plants you like or want to use. Then determine the Design Groups that best categorize your plant palette.
For more information and instructions, see our Create a Mix of Multiple Seeds or Plant Species page. You can also see this feature in action by watching our Grass Mix Power Tip.
Using Concept Plants to Represent Existing Plants on Your Site
Quick video
Quick video
One method for dealing with existing plants on your site is to add them to the Concept Plant Manager as a Design Group. Just create a Design Group called Existing Tree, Existing Shrub or something similar, then place this group in your plan
If you want to call out the species of the existing tree or shrub, just add the plant species to the Design Group palette for that plant.
For more information on dealing with existing plants on your site, including other recommended methods for representing existing plants, see our Accounting for Existing Plants documentation.
We recommend placing the Concept Plants representing existing plants in their own drawing file and then Xrefing this plan into your design drawing file. This practice will keep your existing conditions separate from your design for better organization and easier troubleshooting.
Labeling Concept Plants
Ready to label your concept plan? Follow our instructions for labeling Concept Plants.
Importing Concept Plants & Design Groups from a Template or Project
If you find yourself adding the same Concept Plants and Design Groups to multiple projects, we recommend setting up a project template and then adding your commonly used Design Groups to that template. You can then import them into a new project from that template. With templates, you only need to build your Concept Design Groups once, then import them – along with all plants they include – into the present project. You can also import individual Concept Plants into existing Design Groups.
For further information on, and instructions for, importing Concept Plants and Design Groups from a template, see our Importing Concept Plants documentation.
Templates and Why to Use Them
Our software allows you to add Land F/X objects such as plants and Reference Notes to a project, configure all data for these objects, and then save that project as a template. Once saved, a template becomes a limited database of those items you use the most often, along with the data you've assigned to them. To find out more about why templates are such a good idea, and learn how to set up a template, see our Templates documentation .
Create a Modular Planting Mix
Modular planting design allows designers to apply their knowledge of successful plant communities to their landscape plans, resulting in highly effective designs at a reduced cost. Our Concept Plant mix tools greatly simplify this process. Find out how.
Related Webinars
- Concept Planting Tools: Learn all about this valuable set of tools, which allow you to set up an initial planting plan – even before you’ve built your palette. (1 hr 1 min)
- Planting F/X for Beginners Part 2: In this second installment, we'll dive right into some of the tools you need to know about for the best experience and fastest workflow when starting with Land F/X planting plans, including Concept Plants. (1 hr 3 min)
- Modular Planting Design: If you’re trying to design with plant communities, have you tried using the plant mix tools in our Concept Plant Manager? Tune in to see how these tools simplify this planting design process dramatically – including the details. (1 hr 1 min)
Troubleshooting
Issue: Blocks or hatches are not available when you try to select a symbol
Issue: One or more of your Concept Design Groups are missing from the Concept Plant Manager


