Generic Plant Symbols (Generic Plants)
Quick video
- Generic Plant Symbols Overview
- Placing Generic Trees and Shrubs
- Placing Generic Groundcovers and Shrub Areas
- Editing a Generic Plant Symbol (Editing Plant Symbols)
- Saving a Groundcover or Shrub Area Symbol Using Generic Plants
- Replacing Generic Plants With Project Plants Using the Edit Plant or Match Properties Tool
- Arraying Generic Plants
- Generic Plants and Plant Shadows
- Troubleshooting
Generic plant symbols allow you to place trees, shrubs, and ground covers before you have decided on the specific plants you would like to use in your project. When you place generic plants in your project, they essentially act as placeholders until you have finalized your plant palette.
Ready to replace your generic plant symbols with actual project plants? Our Match Properties tool can convert generic plants with project plants at any time.
Generic Plants vs. Concept Plants vs. Project Plants
We offer three basic ways of placing plants in your drawings, each with its own specific purpose in the design phase:
- Generic Plants are “dumb” plant blocks (that is, they have no data attached to them). Designing with Generic Plants is like designing the old way – just putting plant symbols in your drawing without assigning them to plants from a database. Essentially, they serve as placeholders until you’re ready to replace them with actual plants from our database using our Match Properties tool.
- You can use Concept Plants to complete a high-level conversation plan with the client before locking into your final plants. You can replace them with actual plants from our database when ready.
- The Plant Manager is for when you know the exact plants you want to use.
Generic Plant Symbols Overview
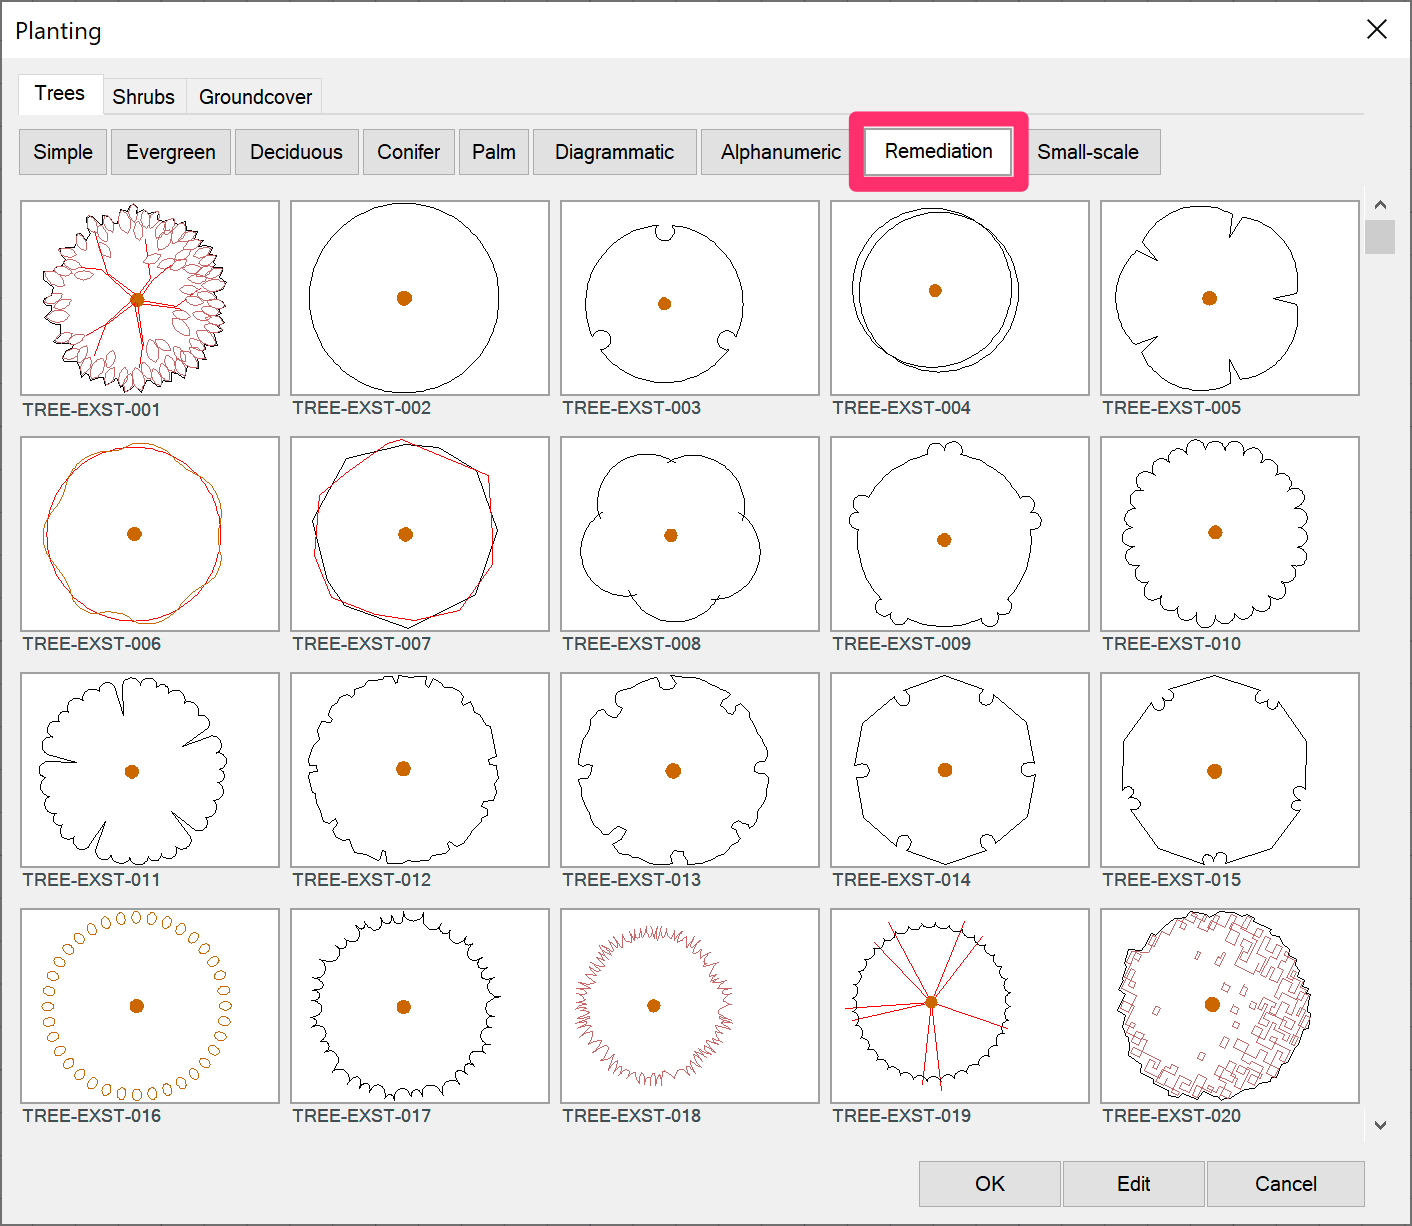
Open our Generic Plants tool:
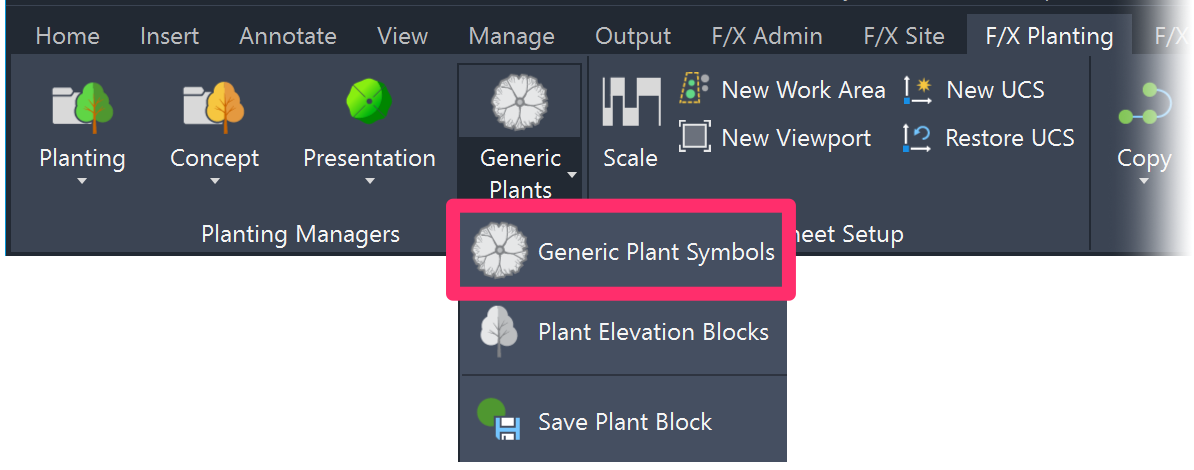
F/X Planting ribbon, Generic Plant Symbols flyout
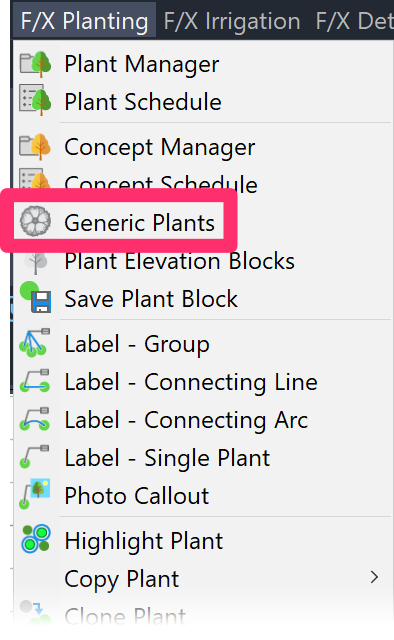
F/X Planting pull-down menu
or type FX_GENERICPLANTS in the Command line
The Planting dialog box will open.

1. Select the plant type (Trees, Shrubs, or Groundcover) you want to place as a generic plant.
2. Select a category for your generic plant symbol. Each category represents generic plants with a distinct appearance.
3. Thumbnail images and names of the generic symbols in the selected category appear in this pane. Scroll up and down to see all symbols in the selected category using the scroll bar to the right.
4. Click Edit to view and change information about the selected Generic Plant symbol.
Placing Generic Plants
Placing Generic Trees and Shrubs
When you select a generic tree or shrub symbol and click OK, the dialog box will close and the AutoCAD Command line will prompt: Position.
Clickwhere you want to place the plant. The generic symbol will appear in that location, and the Command line will prompt: Scale.
Move your mouse toward the center of the symbol to make it smaller, or away from the center to make it larger. When the generic symbol is the right size, click again with your mouse.
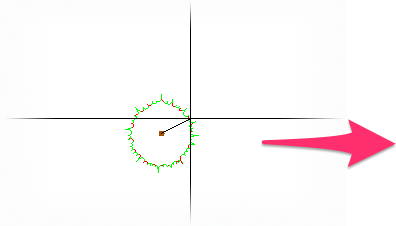
Once you've selected a Generic Plant and placed it in your drawing, you can move your mouse outward to make the plant larger, and inward to make it smaller.
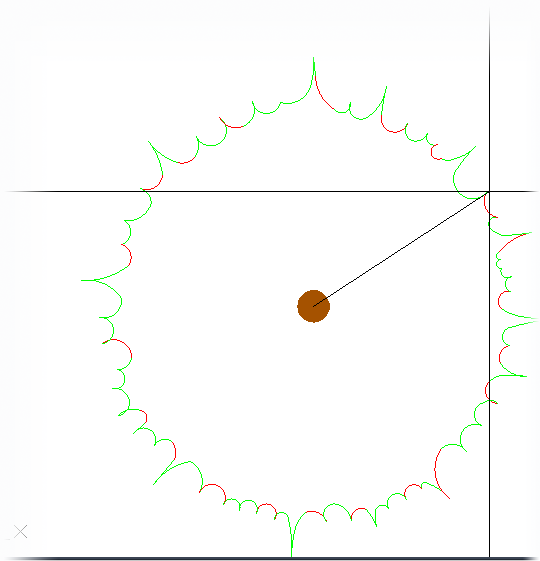
Here's an example of what happens when you move the mouse outward.
Entering a Symbol Width
At this point, you can also choose to type a width for the Generic Plant symbol you're placing, which will be expressed in your chosen drawing units. So, for example, if your drawing is set to Decimal Feet, and you type 10.5 while being prompted to set a scale, the sybbol you're placing will be 10.5 feet wide.
Once you've set a size for a Generic Tree or Shrub, you can continue to place symbols in that same size.
Keyboard Commands for Placing Generic Trees and Shrubs
Quick video
When placing Generic trees or shrubs, you can type K to see the available keyboard commands.
These commands correspond to the keyboard commands available in our Plant Shotgun feature.

Type any of the following commands on your keyboard. (The Keyboard Commands dialog box is only informational – the key buttons won't actually fire the commands.)
- 1–0: Set a number of Generic Plants to place (aka Shotgun Mode).
- Q/E: Toggle to the previous/next available Generic Plant symbol.
- T: Enter Paint Mode, where you can "paint" an area with copies of the selected Generic Plant.
- W/S: If placing multiple Generic Plants, set a wider/smaller spacing for them (aka Shotgun Spacing).
- A/D: Rotate the Generic Plant(s) you are placing to the left/right.
- X: Enable our Xhair Angle tool, which allows you to place Generic Plants at a set angle.
- V: Switch to our Copy along Line tool.
- C: Switch to our Copy along Arc tool.
Placing Generic Groundcovers
Groundcovers are placed as hatches, much like these plant categories when used as normal project plants. As with project plants, you can either select an existing polyline boundary to place one of these planting areas, or draw a polyline boundary on the fly.
Drawing a Hatch Boundary "On the Fly"
If you haven't yet drawn a polyline boundary for a Generic groundcover, you can do so "on the fly" after selecting your hatch pattern.
When you go to place a planting area, the Command line will prompt you to Select polyline or interior point to hatch, [Draw Exclude shrubs Multiple].
Start drawing your closed polyline. Once you close it, the hatched area will appear within the polyline boundary.
In previous versions, drawing your hatch boundary on the fly would require you to first type D for Draw. We've now built in the ability to simply start drawing your closed polyline. As long as the first point you select isn't an existing polyline, the Draw command will be fired automatically.
This feature works with all of our default hatch types, including:
Using Generic Plants to Represent Existing Plants on Your Site
Quick video
Want to place symbols to represent existing plants in a landscape but don't need to call out these plants or count them in your schedule? Just use Generic Plants for this purpose.
When choosing a symbol for existing plants, consider selecting one from the Remediation tab, where we have symbols already set up for existing plants. These symbols include their own unique layers for ease of separating your design plants from the existing conditions on the site.
Other possible methods:
Want to call out existing plants and/or list them in your schedule? You can:
- Add them as Design Groups in the Concept Plant Manager
- Add the plants to your project, then change its name. Instructions
Regardless of which method you use for accounting for existing plants, we recommend placing these plant symbols in their own drawing file and then Xrefing this plan into your design drawing file. This practice will keep your existing conditions separate from your design for better organization and easier troubleshooting.
Editing a Generic Plant Symbol (Editing Plant Symbols)

Editing a Generic Plant symbol is equivalent to editing one of our default plant symbols, all of which are available in the Generic Plants library.
To edit a plant symbol, select it in the Planting dialog box and click Edit.
The following dialog box will open, displaying information about the selected plant.
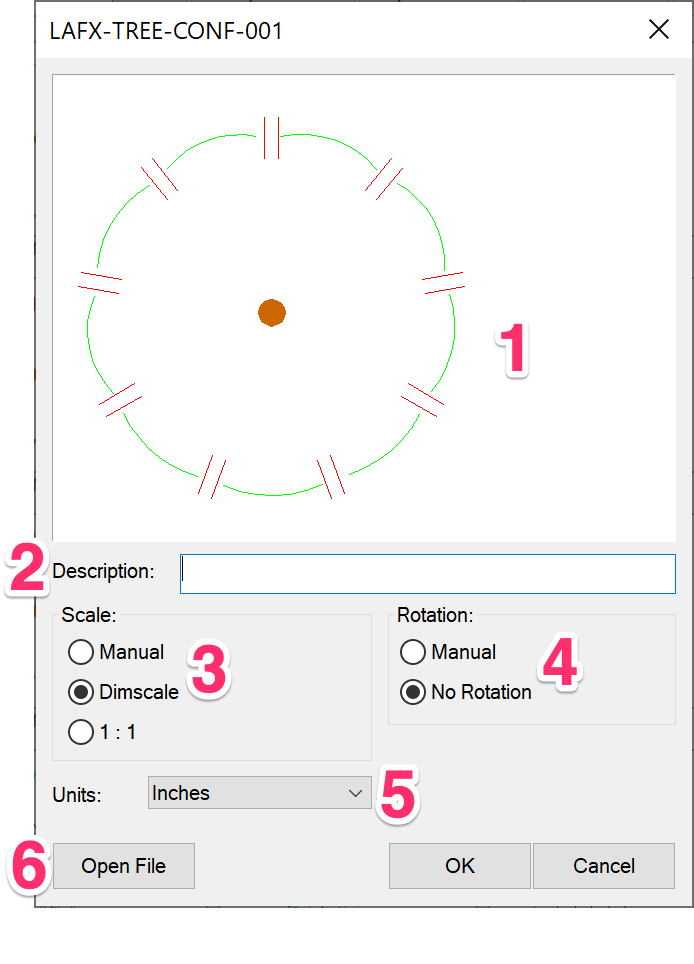
1. This pane displays a larger view of the plant symbol.
2. If you want, type a Description for the Generic Plant.
3. Select one of three options for the Generic Plant's Scale:
- Manual (allows you to scale the plant symbol manually)
- Dimscale
- 1:1
4. Select the Units for your Generic Plant symbol using this menu. Note that this menu is only available if you select either Dimscale or 1:1 from the Scale options.
5. Select a Rotation option for your symbol:
- Manual
- No Rotation (the default option)
6. Click Edit File to open and edit (customize) the source file for the selected plant symbol block.
Note that the Edit File button is not available in this dialog box if you access it when editing a plant from your drawing or the Plant Manager. To open a plant symbol's source file in this way, you'll need to access it using the Generic Plants tool. Otherwise, you can choose to open the symbol's source DWG directly from within the folder LandFX/Blocks/graphics/planting.
Saving a Groundcover or Shrub Area Symbol Using Generic Plants
Groundcovers and Shrub Areas are represented by hatch patterns, but you can add to our library of hatch patterns for these items. The Generic Plants tool offers a quick way to find out which hatch patterns are available for these items. For instructions on saving a ground cover or shrub area using the Generic Plants tool, see our Saving a Groundcover or Shrub Area Symbol documentation.
Replacing Generic Plants With Project Plants Using the Edit Plant or Match Properties Tool
Quick video
Want to convert a Generic Plant symbol into a project plant – that is, a specific plant variety you've added to your project from our database – including all data assigned to that plant?
You can easily do so using our Edit Plant tool. Just open Edit Plant, select the symbol you want to convert into a project plant, then select the plant of your choice. You can select an existing plant you've already added to your project, or add a new plant and assign that plant's data to the Generic Plant symbol. You even have the option to convert all Generic Plant symbols of the same type to the selected project plant. More information and instructions
In addition, we've optimized our Match Properties tool to convert generic plants to project plants. Just open Match Properties and assign the properties of an existing plant in your drawing to the Generic Plant symbol(s) of your choice.
Arraying Generic Plants
Our Triangular Array and Rectangular Array tools now work with generic plants. These tools allow you to copy a plant and arrange the duplicates into a fixed arrayed pattern.
For more information, see our Array Plants documentation.
Generic Plants and Plant Shadows
You can now use our Plant Shadows tool to apply shadows to Generic Plant symbols.
Troubleshooting
Issue: Blocks or hatches are not available when you try to select a symbol
Issue: You are unable to scale Generic Plants when placing them
Issue: Bad DXF group (10) error when placing a Generic Plant
Issue: You are unable to place Generic Plants in an office using Land F/X on a shared online location, and may be seeing gray Xs on the source file icons, cannot open the plant blocks' DWG source files, and may see Invalid block or Missing file errors


