Add Background Fill or Mask to Callout Box or Other Block
Quick video
- Create a Background Mask for a Callout Box or Other Block
- Creating a Dynamic Background Mask for a Callout
- Test the Functionality of an Edited Plant Label Style
- Apply an Edited Plant Label Style to a Previously Labeled Plan
You office standard might call for your blocks to be a certain color. You can easily add color to any block by creating a background mask. The following instructions apply to any block, as well as callout boxes such as:
- Plant labels
- Reference Note callouts
- Irrigation head or valve callouts
- Detail callouts
Our default irrigation symbol blocks and site leaders with text now have background masks. For details, see our documentation on our updated irrigation symbol blocks and site leaders with text.
Looking for a way to create a background fill or mask for your schedules, including the Plant Schedule and Irrigation Schedule? Please see our article on Creating a Background Fill or Mask for Schedules article.
Create a Background Mask for a Callout Box or Other Block
In this example, we'll show how to create a background mask for a callout block. However, these instructions apply to any of our default blocks.
Open the source file for the block you want to edit.
Creating a mask for a callout block? Open both files for the block you'd like to edit (the left and right versions).
Type Layer in the Command line and press Enter to open the Layer Properties Manager.
Click the New Layer button (shown below) to create a new layer. Name the new layer to match the existing layer naming convention in the file.

In our example, the layers are named according to the naming convention LK-ANNO-LABL- ... . We can then give our mask layer a name like LK-ANNO-LABL-MASK.
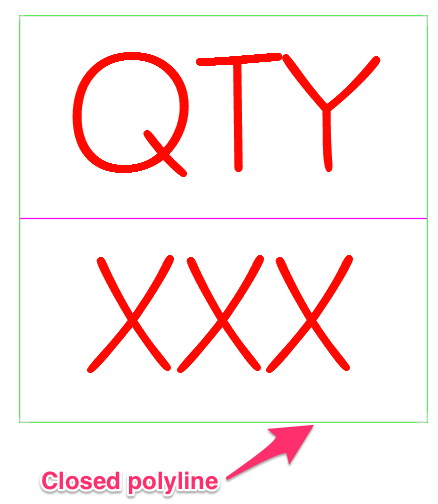
With the new layer active, draw a closed polyline around the boundary of your block.
Click within the closed polyline, then type Hatch and press Enter.
In the Hatch Editor ribbon, select Solid to fill the callout box with a solid color. Then open the color menu. (This menu may be set to ByLayer or ByBlock, or to a specific color.)
Select a color for your mask. Select More Colors from the menu to view all available colors.

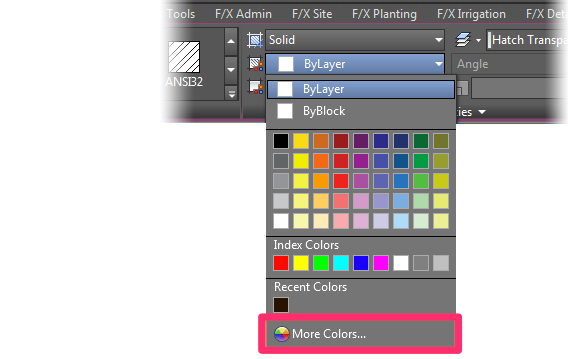
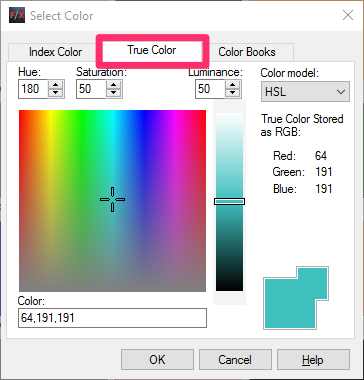
In the Select Color dialog box, select the True Color tab to view all available True Colors. To select a color, type a value in the Color field. You can also click within the color palette to select a range, then find your color using the slide to the right. Click OK when finished.
If you want, select a screen color from our LandFX Pens drawing, linked below.
(Right-click and select "Save As" or "Save Target" from the menu.)
Draw Order
You'll of course want your background mask to appear on the bottom layer of your block. In the case of callout blocks, you'll definitely want it to sit behind the callout text in the draw order. To send the mask behind the text, click within the mask to select it.
Select Draw Order from the menu that opens. Then select Send to Back.
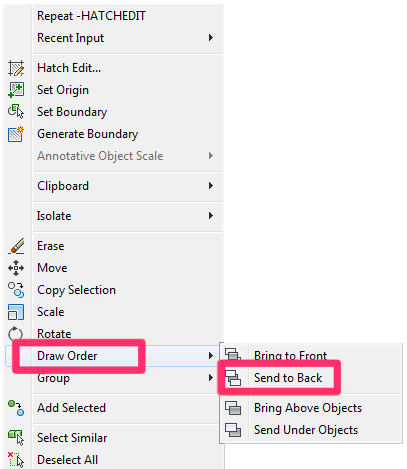
Your mask will be sent to the back of your block, making any text readable.
Creating a Dynamic Background Mask for a Callout
A dynamic background mask will account for a callout, such as a plant label, that needs to expand or contract depending on the content.
1. Open the label's right (R-) source block drawing from the folder LandFX/Blocks/Graphics/Callouts.
In our example, we'll open the right (-R) version of the label LAFX-PLANT-LABEL-12.
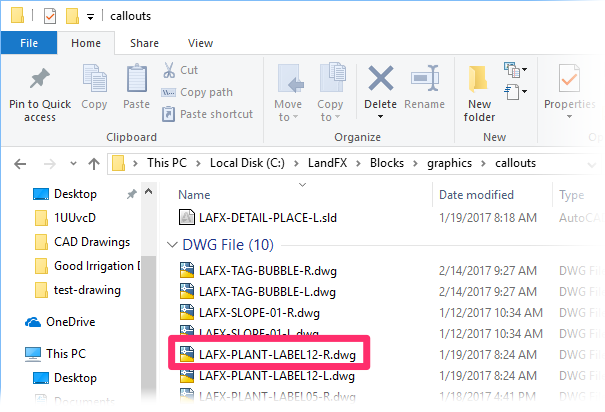

2. Click the callout attribute in the source drawing to select it.
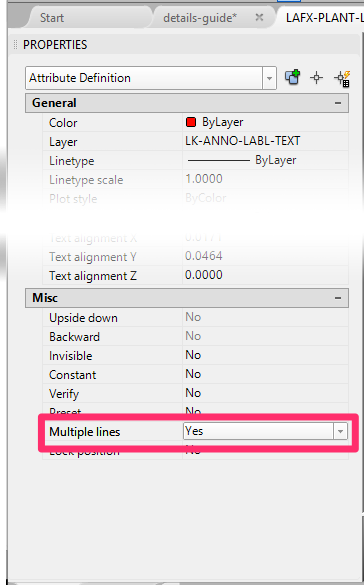
3. Type Prop in the Command line and press Enter. The Properties panel will open.
Under Misc, use the menu to set Multiple Lines to Yes.
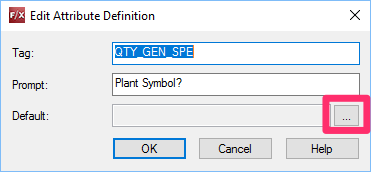
4. Double-click the attribute. The Edit Attribute Definition dialog box will open.
Highlight and copy the text in the Tag field.
You'll see a button with three dots (...) directly above Help. Click that button.
5. Paste the copied text where you want it in your callout. Do not adjust the arrow above the text unless you actually want the text to wrap after a certain distance.
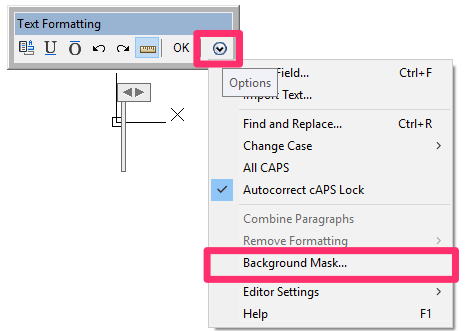
6. You'll now see a Text Formatting box.
Click the down arrow on the right.
Select Background Mask from the menu that opens.
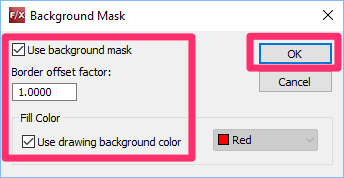
7. Turn on the background mask by clicking Use background mask.
You can adjust the Border offset factor as needed. We recommend 1.0.
Select the option to Use drawing background fill color. Click OK when finished.
If you want more masking around the text, you can increase the Border offset factor to something a bit bigger, such as 1.15 or 1.2. You may have to play with the look to achieve your desired result, but the larger the entry, the larger the mask will show around the text.
8. Click OK in the Text Formatting box.
Then click OK in the Edit Attribute Definition dialog box.

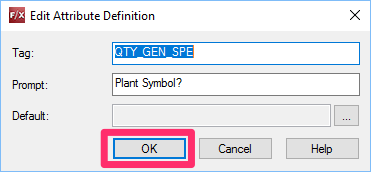
9. Save the file.
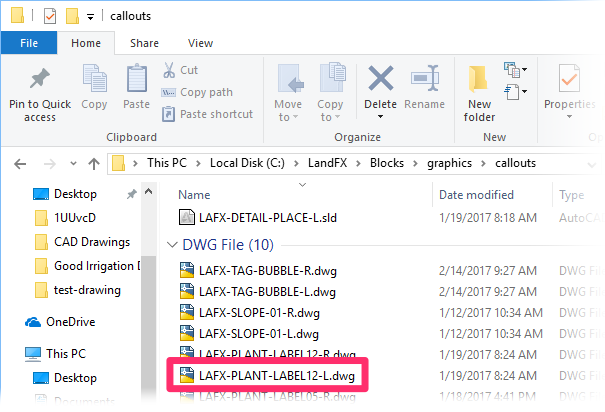
10. Repeat steps 1 through 9 in the (left) -L version of the callout.
11. The callout is now ready to use in a new drawing with a background dynamic mask. If you're trying to update a plan with existing callouts, you'll need to temporarily change your Preference Set to a different callout style in the Planting Preferences, purge the drawing, and then set it back to the updated callout.
Test the Functionality of an Edited Plant Label Style
1. Open blank drawing.
4. Open the Plant Manager, and add any tree to your project. Select any symbol for the tree.
5. Place the tree in the blank drawing.
6. Label the tree on both the left and right sides using our Label Single Plant tool.
7. Confirm that your edits were successfully saved to both label blocks.
Apply an Edited Plant Label Style to a Previously Labeled Plan
If you've already labeled a plan with a completely different label style (that is, not one that you've edited), you can simply open that plan and select your new or edited label style in the Planting Preferences. Your new style will replace the old one throughout the drawing
However, if you've edited one of our label styles and you've already used that style in a plan before making your edits, you'll need to complete the following steps to replace the original style with your edited version.
Why won't your plans update automatically?
If a plan has been previously labeled, the label style that was originally used in the plan will alread be defined in that drawing. Before you can apply the new version to a drawing, you'll need to purge the old version from that drawing.
1. Open the previously labeled drawing file.
2. Open the Planting Preferences, and click the current label style.
Important: Refer to your office CAD manager before continuing with these steps. The next few steps will affect anybody in your office who is currently labeling plants. You also may be locked from editing your office's Preferences.
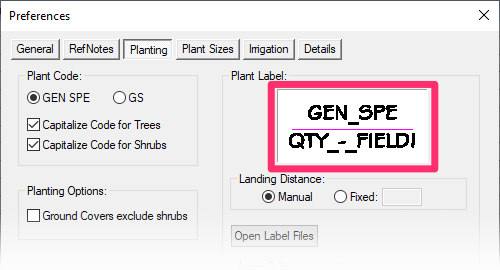

3. Select any other label style in the Callouts dialog box, and click OK.
Click OK in the Planting Preferences.
The labels in your drawing will automatically switch to the style you selected.
Make sure all the labels switch to the new style in your drawing.
4. Type PRG in the Command line and press Enter.
This step will purge out the old version of the label style that now has a mask.
5. Go back to the Planting Preferences and select the label style with the mask. Your labels should now change to the style with the mask in your drawing.


