Limiting Plant Schedules Using Work Areas
Quick video
- Work Areas and Planting Schedules: Overview
- Creating a Plant Schedule for One Or All Work Areas
- Reordering Your Schedule (Column Order)
- Creating a Plant Schedule Organized by Some, but Not All, Work Areas
- Work Areas and Hatches
- Editing Work Area Names to Change Schedule Titles
- Work Areas in Xrefs
- Nested Work Areas (Work Areas Within Work Areas)
- Related Webinars
- Troubleshooting
A Work Area is essentially a "drawing within a drawing" surrounded by a visible border. You can select a Work Area and perform specific functions on only that Work Area, rather than on the entire drawing. This feature can be especially valuable when you generate a Plant Schedule. Work Areas allow you to run separate schedules for:
- A specific portion or phase of the project
- Off-site and on-site improvement
- Scope-of-work requirements (for example, certain areas designated as containing tenant improvements, other areas under a general contract, etc.)
You can also create a Plant Schedule organized by Work Areas in your drawing.
Work Areas are drawn with a non-plot line, and the line color from one to another will vary slightly to distinguish them from one another. For more information on Work Areas and how they function, see our Work Areas documentation.
A Work Area will appear on a single layer of your drawing. Once you are ready to run schedules for your entire site, you can simply Freeze each Work Area's layer. The schedule will not consider the Work Areas you have frozen.
In response to client requests, we've added the ability to create nested Work Areas – that is, Work Areas within Work Areas. Plant Schedules will now recognize objects within these nested Work Areas.
Work Areas and Planting Schedules: Overview
Quick video
You may choose to create Work Areas before you begin designing your site. These Work Areas will provide pre-defined planting sites within your drawing, such as back and front yard areas, or project phases. When you are ready to create your separate Plant Schedules, you can simply select the area or areas to include in the schedule.
Of course, you won't always know which parts of your site design you will need to include in a schedule until after you have started – or even completed – your drawing. In these cases, you can also create a Work Area of an existing portion of your drawing. You can then run a schedule for only items included in that area.
Creating a Plant Schedule for One or All Work Areas
Here's an example of a planting plan with a number of Work Areas:
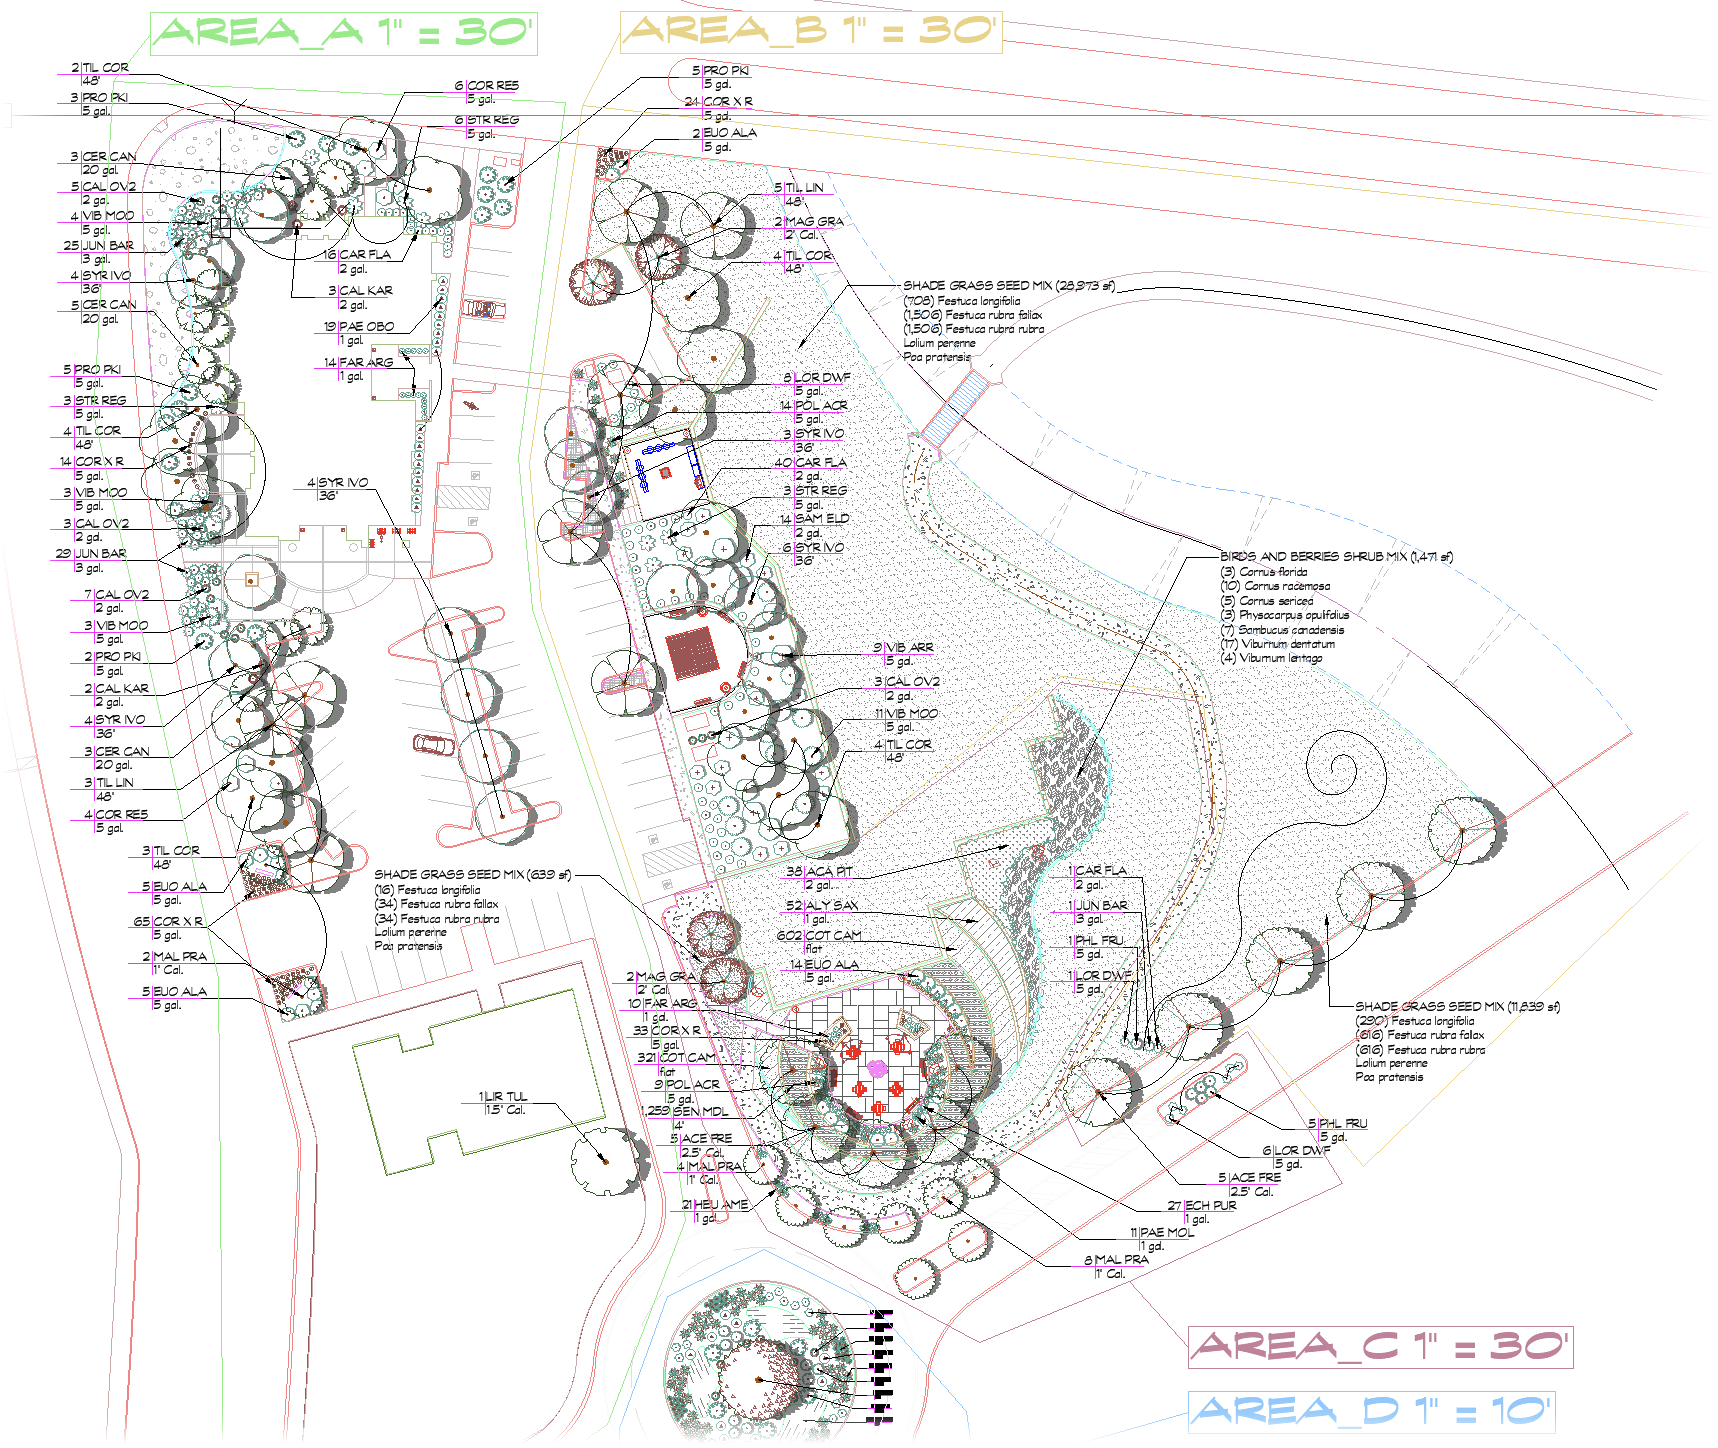
If your drawing includes one or more Work Areas and you place a Plant Schedule, the cursor will turn into a pickbox and the CAD Command line will prompt:
Select Work Area, [All work areas], <Entire drawing>.
You have three choices at this point:
- Select Work Area: Use your pickbox to select one Work Area and, as a result, create a Plant Schedule reflecting only the contents of that Work Area.
- [All work areas]: Type A to produce a Plant Schedule for all Work Areas in the drawing.
- <Entire drawing>: Right-click or press Enter to generate a schedule for the entire drawing.
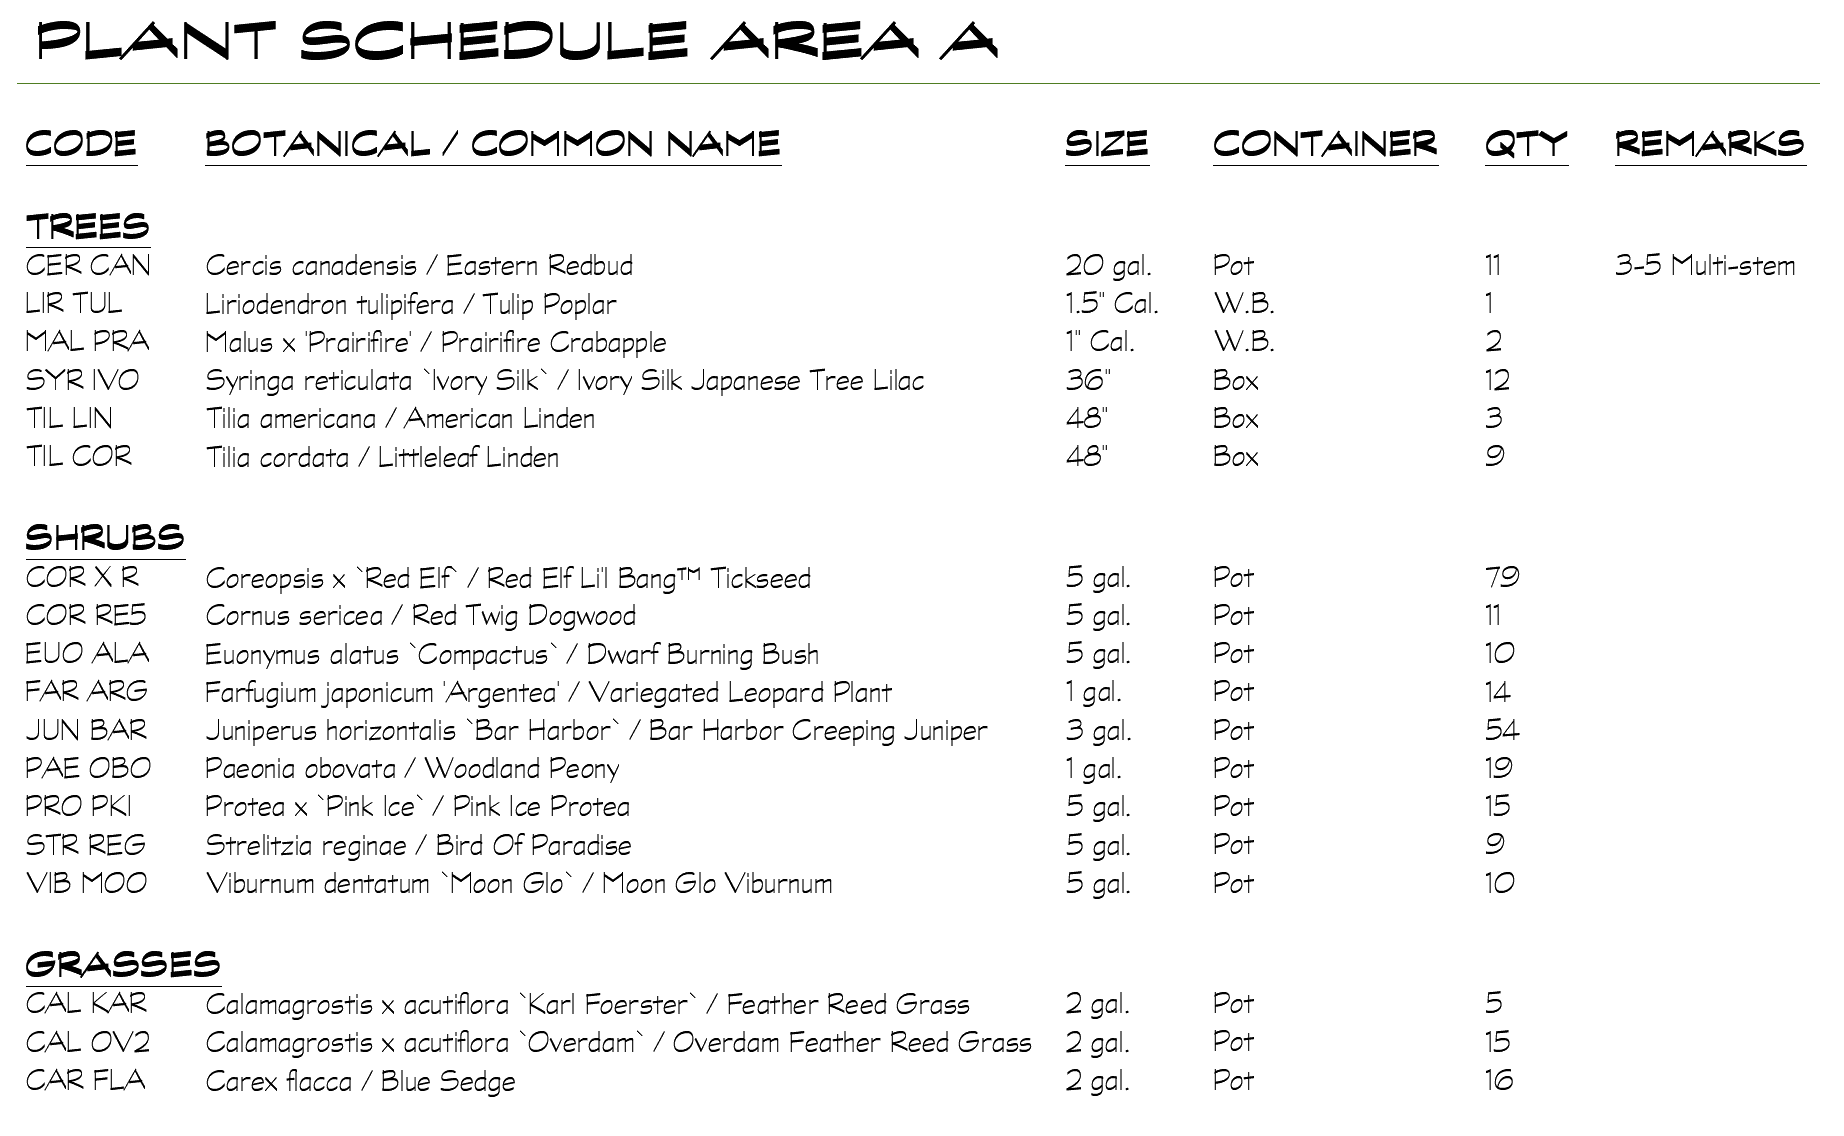
The title of the Plant Schedule for just one Work Area will include the name of that Work Area. For instance, the following Plant Schedule reflects only the contents of a Work Area named Area A and shows the plants contained in that Work Area.
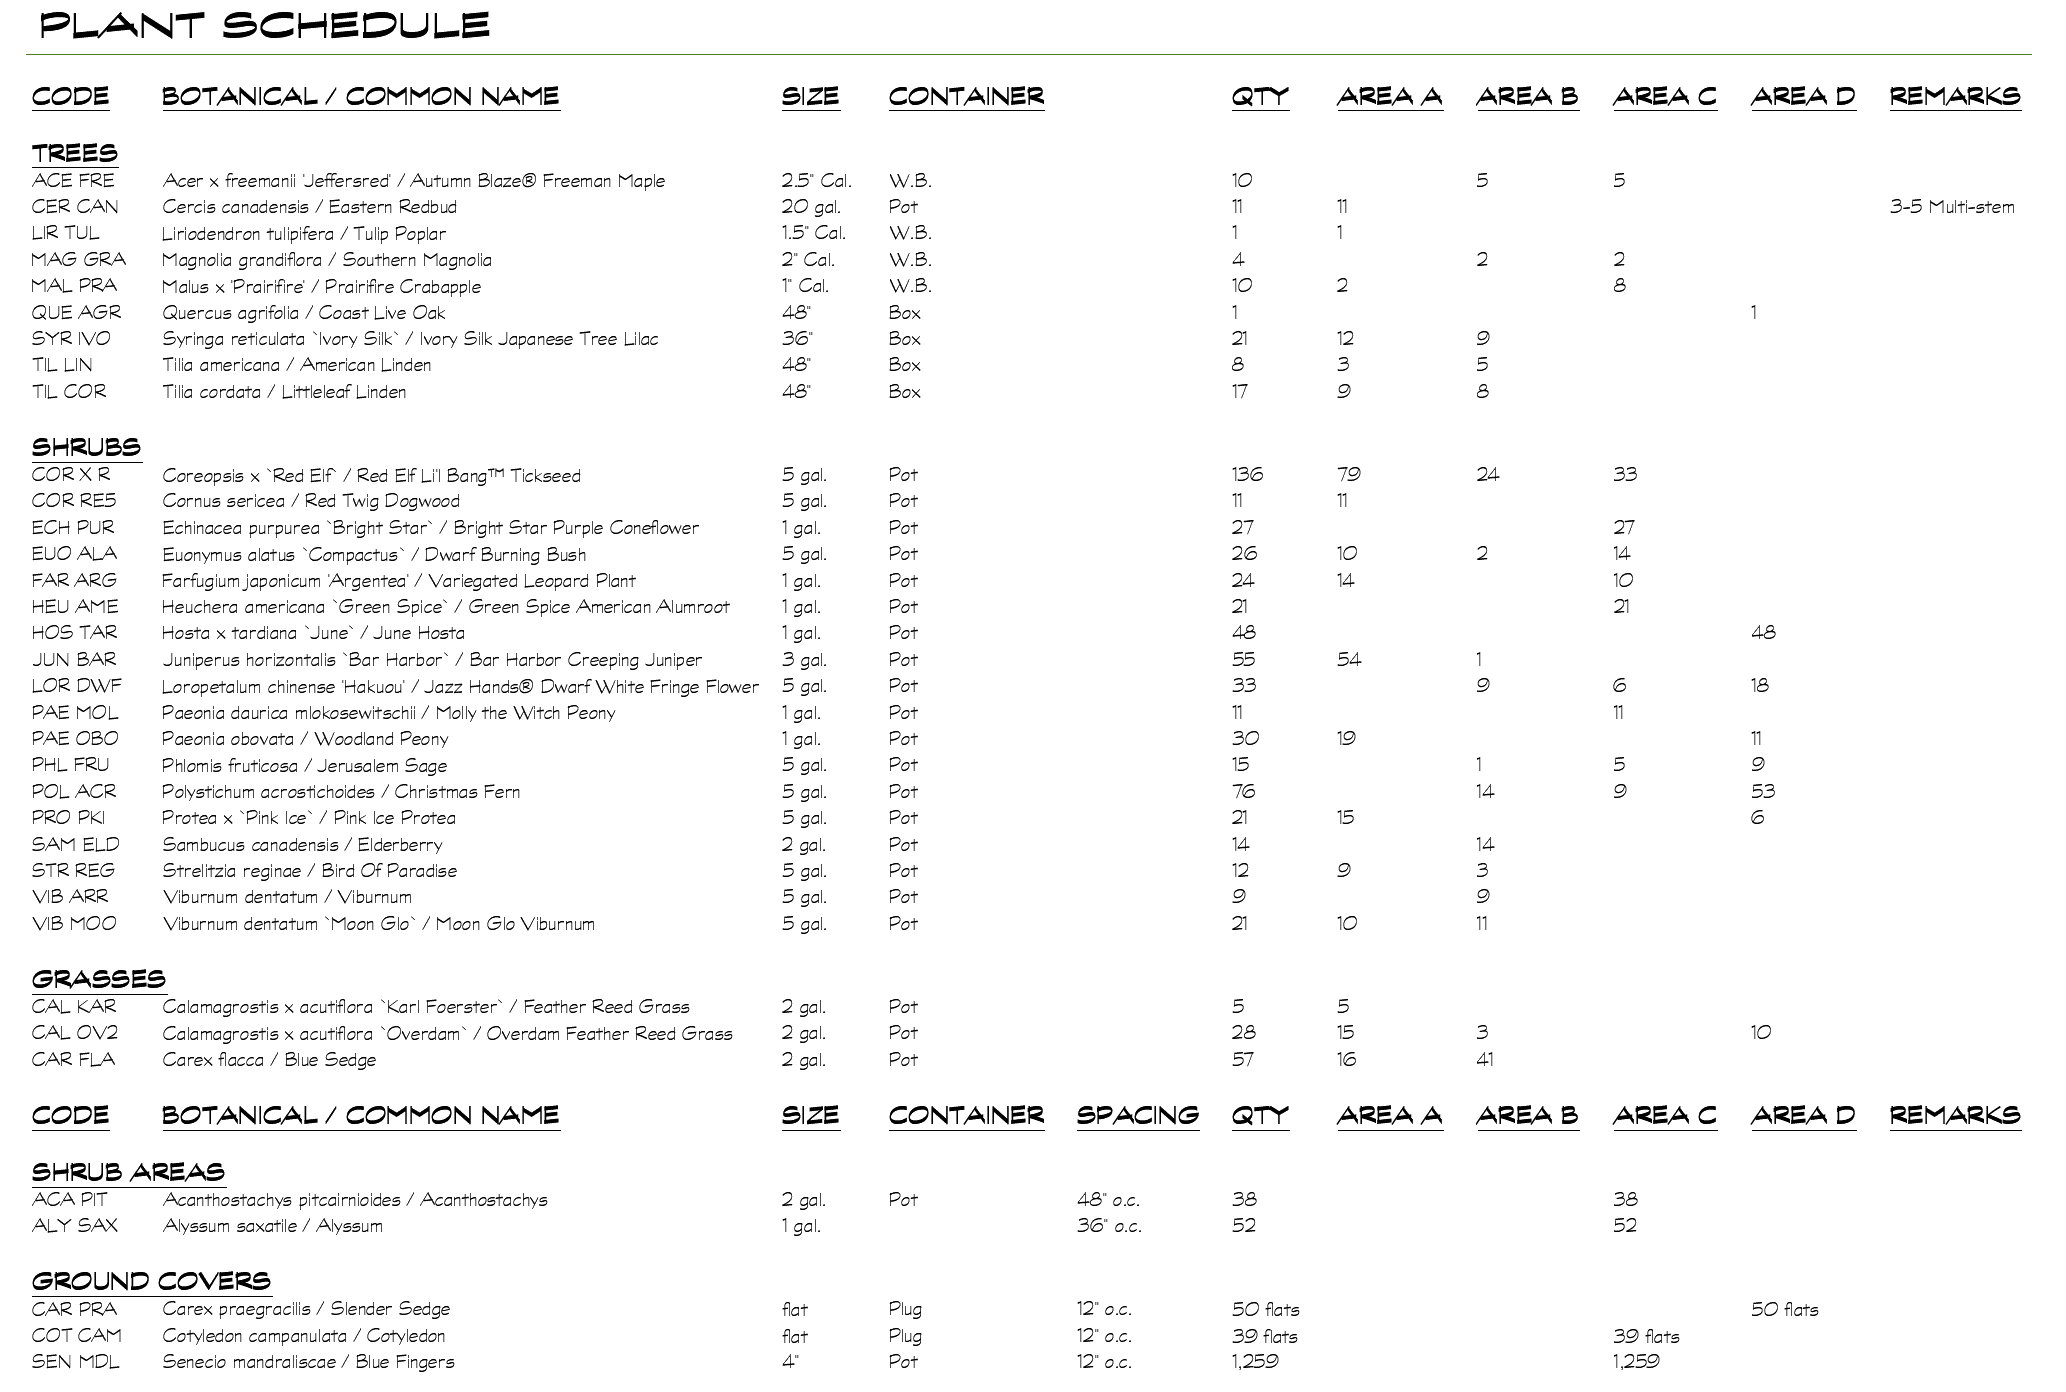
If you right-click or type A for [All work areas], the Plant Schedule will reflect all Work Areas within the schedule, showing the total plant quantities and then the quantities within the various Work Areas. In the following example, the seven Work Areas were titled Area A, Area B, etc.
If you right-click or press Enter for <Entire drawing>, the Plant Schedule will ignore your Work Areas. As a result, the schedule you place will include every plant in your drawing, regardless of whether or not it lies within a Work Area.
A Shrub Areas or groundcover is considered to be inside a Work Area if a majority of its boundary points are inside that Work Area. A tree or shrub is inside a Work Area if its center point lies within that Work Area.
Reordering Your Schedule (Column Order)
The Plant Schedule dialog box no longer includes an option to list the Quantity before Name of each plant.
In previous versions, we'd recommended that you leave this option unchecked when creating Plant Schedules for multiple Work Areas in a drawing, which would prevent several issues with the schedule order and appearance.
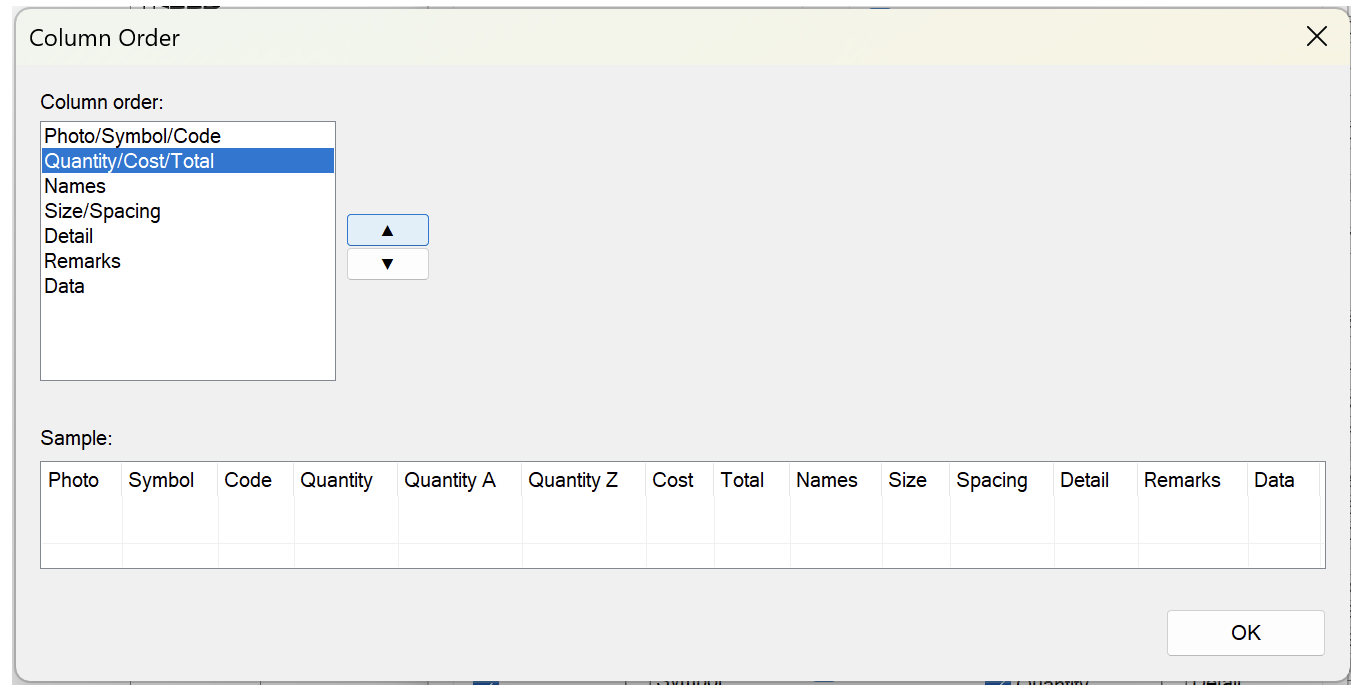
We've eliminated the need for that precaution in adding the Column Order feature in the Plant Schedule dialog box (pictured below).
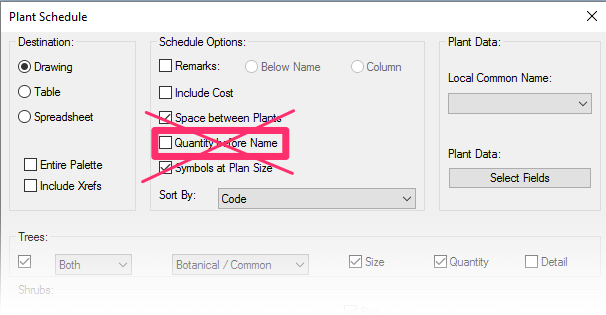

The Column Order feature essentially moves all columns together, making your schedules easier to read and, in this case, eliminating the need for the Quantity before name option. More information
If you want your plant quantities to appear before your plant names in the schedule, you can simply ensure that the Quantity/Cost/Total entry appears before the Names entry in the Column order list.
Create a Plant Schedule Organized by Some, but Not All, Work Areas
Want to include more than one, but not all, Work Areas from your plan in a Plant Schedule? Follow our instructions to run a single schedule categorized by Work Area.
Work Areas and Hatches
Our software does not allow you to split a single hatch (such as a groundcover or Shrub Area) between multiple Work Areas. Splitting hatches in this way is not possible for a number of reasons – primarily because the only way to do so is to convert every hatch to a Region object, and then perform a Union and Subtraction against the Work Area in order to determine the area inside vs. outside the hatch.
This process can misfire because not all hatches can be converted to Region objects. Allowing splitting of hatches would require the software to highlight those areas in some fashion to alert users to them. But more importantly, that process of converting to Regions and Union/Subtracting takes time. For a complicated design with hundreds of areas could easily chug the computer for a number of minutes. While of course some users would be willing to accept that hit, we feel it's a bit beyond the acceptable range of about 7 seconds for the computer to finish doing whatever it was doing.
Even more importantly, splitting jobs into zones or phases typically coincides with a desire to turn off or half-tone the objects outside of the current viewport. In order to do this, you would need to draw the hatch as two separate hatches.
But after all of that explanation, we do believe that the ability to split hatches between Work Areas would be a handy feature to include in the software! In the future, as the Region functions become more reliable and a bit quicker, we will certainly be adding this functionality.
Editing Work Area Names to Change Schedule Titles
When you create a Work Area, one of the steps is to type a name for it. The name you select will also appear in the name of a Plant Schedule you generate for plants within that Work Area. If you want to change the title of the Plant Schedule, you'll need to delete the existing schedule and rename the Work Area. When you re-place the schedule, it will include the new Work Area name. For specific instructions, see our Edit a Work Area Name to Change a Schedule Title article.
If your Work Area has a scale linked to it, simply change the name – not the scale. When you place a new schedule, it will feature that new name.
Work Areas in Xrefs
Quick video
Our software now recognizes Work Areas within Xrefs. That means you can run a schedule that includes plants, irrigation equipment, or site amenities within Work Areas that exist in files you've attached to the main drawing. When you go to generate your schedule, you can simply select individual Work Areas in your Xrefs as if they are in the current drawing. If you select All Work Areas, Land F/X objects within Work Areas in your Xrefs will be included in the schedule as if those Work Areas were in the main drawing.
For more information and specific instructions, see our Work Areas in Xrefs page.
Nested Work Areas
In response to client requests, we've added the ability to create nested Work Areas – that is, Work Areas within Work Areas. Our schedule tools (Plant Schedule, Irrigation Schedule, Reference Notes Schedules, etc.) will now recognize objects within these nested Work Areas. More information
Related Webinars
- Using Work Areas: Work Areas provide a perfect way to organize your schedules, scales, layers, and User Coordination Systems (UCSs). Whether you need to separate out phases in your schedules or show an area at a different scale and viewing angle, you need to know how to manipulate a Work Area. (1 hr 2 min)
- Ask Us Anything! Spotlight on Plant Schedules Join us for the first "Ask Us Anything," which focused on Plant Schedules, including the massive 2023 update that overhauled the Plant Schedule dialog box and opened new possibilities for your Plant Schedules. (1 hr 7 min)
- Plant Schedules: Land F/X provides a wide range of options for configuring a Plant Schedule for your landscape design. We’ll show you how to organize your columns and include or omit elements such as plant symbols, codes, cost estimates, spacing, and plants from your Xrefs. Join us to explore these choices and pick up valuable insights for crafting your ideal schedule. (1 hr 5 min) Planting F/X for Beginners Part 2: In this second installment, we'll dive right into some of the tools you need to know about for the best experience and fastest workflow when starting with Land F/X planting plans, including how to break up your Plant Schedule using Work Areas. (1 hr 3 min)
- Common Land F/X Questions: This webinar covers some of our lesser-known tools, including Work Areas. (1 hr)
Troubleshooting
General Work Area troubleshooting
Issue: Work Areas are not recognizing or calculating a Shrub Area or groundcover hatch
Issue: You are unable to create or place a Work Area


