
The Quick Access Toolbar
- Adding Tools to the Quick Access Toolbar
- Removing Tools from the Quick Access Toolbar
- Moving the Quick Access Toolbar Above or Below the Ribbons
- Adding Tools That Aren't on the Ribbon
- Troubleshooting
The Quick Access toolbar is a central location where you can easily get to the AutoCAD and Land F/X tools you use most. Located below the ribbons, the Quick Access toolbar (pictured below) is a space where you can store buttons for tools of your choice. These buttons will be open and accessible regardless of which ribbon you have open.
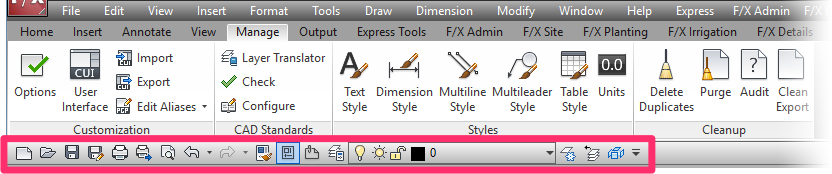
Your installation of AutoCAD or F/X CAD will generally include several buttons in the Quick Access Toolbar by default, such as the Save and Plot tools. You can add or subtract tools from this area as needed.
Want to customize the standard toolbars, rather than the Quick Access Toolbar? Here's how.
Adding Tools to the Quick Access Toolbar
To add a tool to the Quick Access Toolbar, open the ribbon where that tool is located. In this example, we'll add the Switch Windows tool, located on the ACAD View ribbon, to the Quick Access Toolbar.
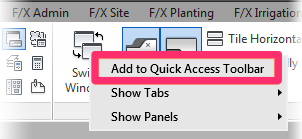
Right-click the button for the tool you want to add to the Quick-Access toolbar.
Select Add to Quick Access Toolbar from the menu that opens.
A button for the tool you selected will be added to the Quick Access Toolbar. In our example, we've added a button for the Switch Windows tool.
Adding Tools to the Quick Access Toolbar Via the Customize User Interface (CUI)
In some cases, you might want to add button to the Quick Access Toolbar for a tool that doesn't have a ribbon button in your particular AutoCAD version. For example, the Pan, Orbit, and Zoom tools are on a ribbon panel in AutCAD that isn't available in F/X CAD. In this case, you can add these tools to the Quick Access Toolbar using the Customize User Interface (CUI).
To open the CUI, type CUI in the Command line and press Enter.
Locate the Quick Access Toolbars path in the left pane, and expand it by clickin the + (plus) sign to the left of the path.
Within the expanded path, locate and expand the path for the Quick Access Toolbar where you want to add the tool (example: Quick Access Toolbar 1).
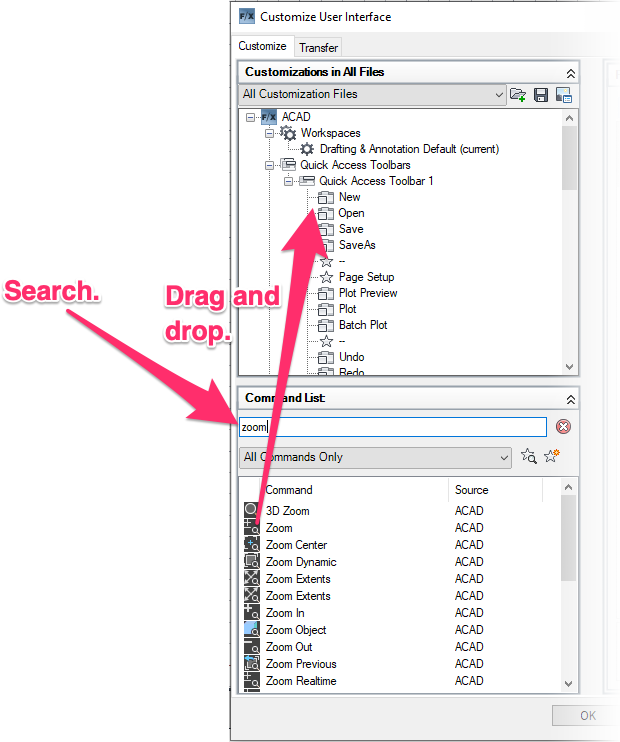
Type the name of the tool you want to add into the Command List search box. In your example, we'll search for the Zoom tool.
Click the tool in the list, then drag and drop it to the location within the Quick Access Toolbar where you want the button. In our example, we'll drag the Zoom tool near the beginning of the Quick Access Toolbar, between the New and Open tools.
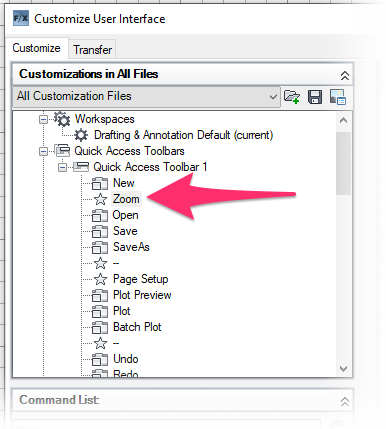
You should now see the name of the tool in the list, in the location where you dragged it.
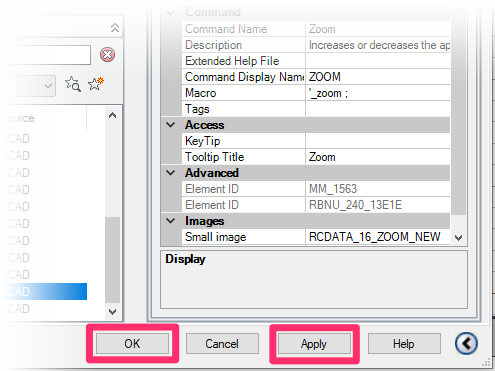
Click Apply to save the change, then click OK to close the CUI.
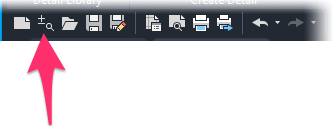
The tool will now be available as a button on the Quick Access Toolbar in the exact location where you dragged it in the CUI.
In our example, the Zoom tool is now available as a button between the New and Open tools.
Removing Tools from the Quick Access Toolbar
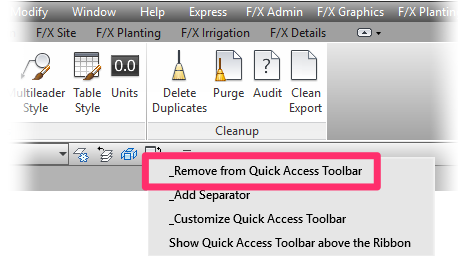
To remove a tool button from the Quick Access Toolbar, right-click the button you want to remove.
Select _Remove from Quick Access Toolbar from the menu that opens.
The button will be removed from the Quick Access Toolbar.
Moving the Quick Access Toolbar Above or Below the Ribbons
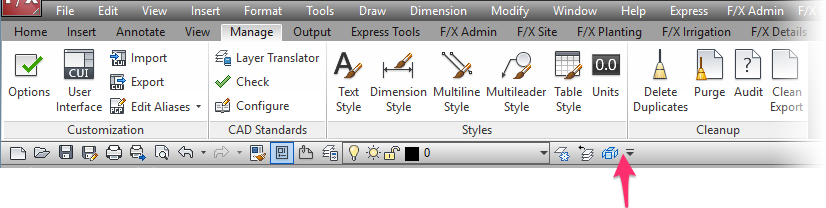
By default, the Quick Access Toolbar is located just below the ribbons.
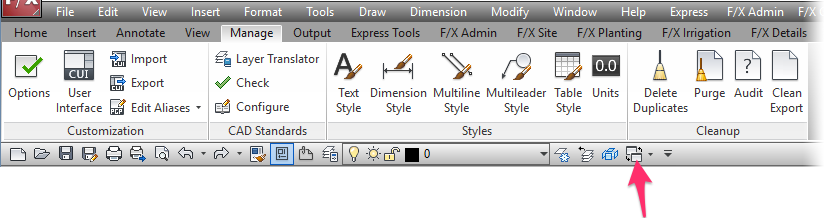
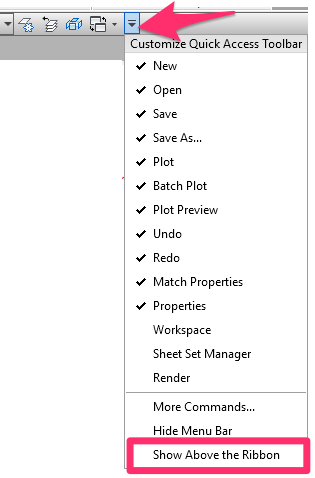
To move it above the ribbons, click the pull-down menu button on the right end of the toolbar, pictured to the right.
Then select Show Above the Ribbon from the menu that opens.
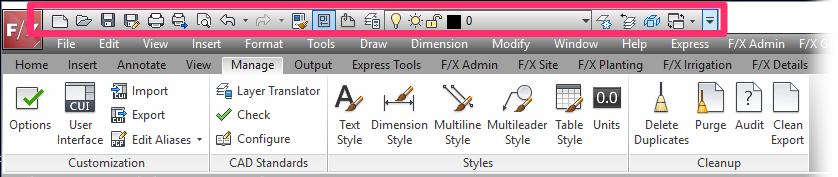
The Quick Access Toolbar will be moved to a spot above the ribbons, as pictured below.

To move the Quick Access Toolbar back below the ribbons, click the same pull-down menu button.
Then select Show Below the Ribbon from the menu that opens.
The Quick Access Toolbar will be move back to its original location below the ribbons.
Adding Tools That Aren't on the Ribbon
If you want your Quick Access Toolbar to include tools that aren't on the ribbon, you'll need to complete an extra set of steps.
For example, you might want to add some of the layer properties menus, currently available in the Properties panel. These menus were on the AutoCAD ribbon in older versions, as pictured below. This example shows the ribbon in Dark theme.

Autodesk removed these menus from the ribbon in 2016 to make way for the simplified ribbon. We recommend just using the normal Properties panel for these particular menus. However, the following steps will allow you to add these menus, as well as other tools not available in the ribbons, to your Quick Access Toolbar.
1. Follow our steps to move the Quick Access Toolbar, placing it below the ribbon. (You'll need the space.)
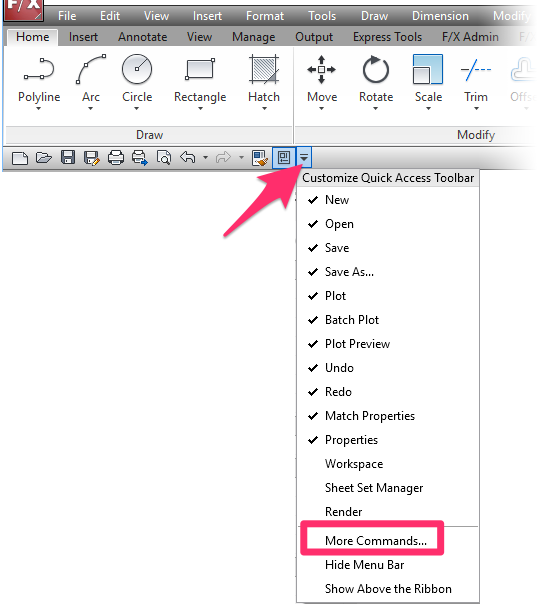
2. Click the options arrow to the right of the Quick Access Toolbar.
Select the More Commands option from the menu.
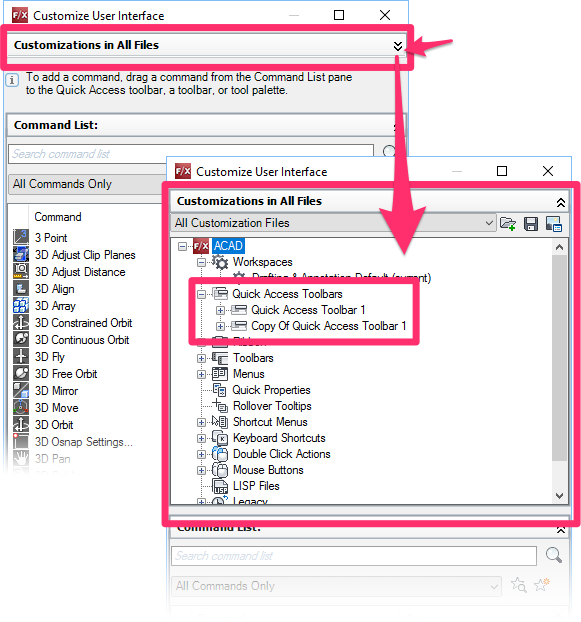
3. The Customize User Interface dialog box will open.
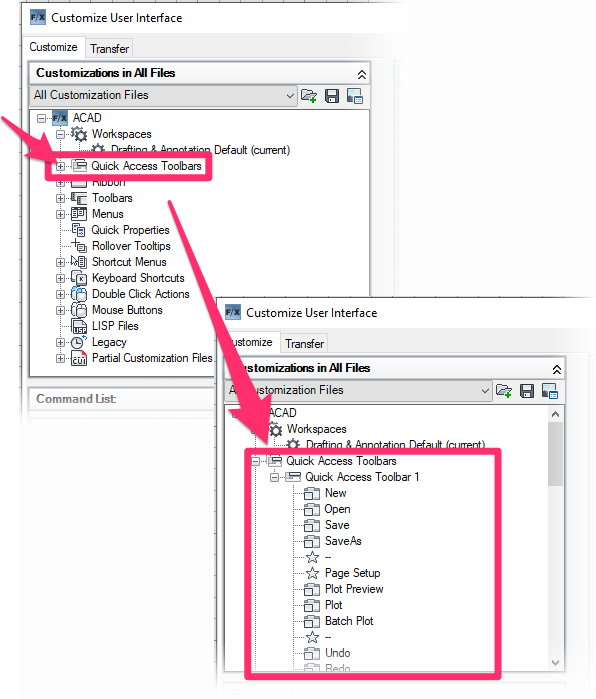
Click to the right of Customizations in All Files to expand this menu.
Expand the Quick Access Toolbars list by clicking the plus (+) sign to the left.
You may see two versions of the Quick Access Toolbar in this list.
4. If you do see two versions of the Quick Access Toolbar here (example: Quick Access Toolbar 1 and Copy of Quick Access Toolbar 1), you'll need to determine which one you're currently using. You will move commands to this list.
To determine which version you're currently using in your workspace, drop down each one and check the list of tools against the tool buttons you see in your Quick Access Toolbar. In our example, we can tell that the Copy of Quick Access Toolbar version is the one in use because its list of tools matches the tool buttons on the Quick Access Toolbar that's currently visible.
A quick way to confirm would be to move a command into one of the lists and click the Apply button. If the tool shows up on the Quick Access Toolbar in your workspace, you've moved it to the active one.

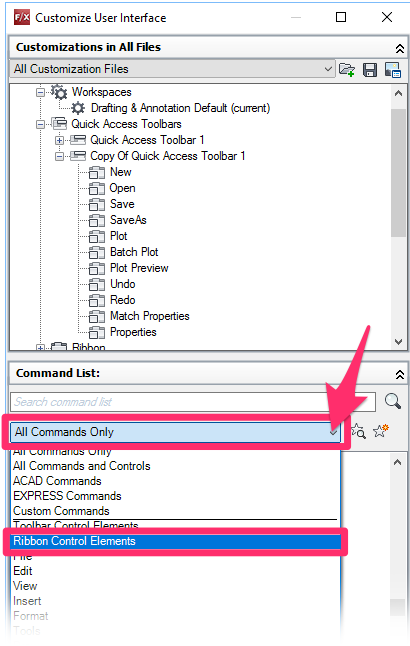
5. Drop down the All Commands Only menu by clicking where shown to the left.
Select the option for the type of commands you want to add to the Quick Access Toolbar.
In our example, we'll be adding several items known as Ribbon Control Elements, so we'll select the Ribbon Control Elements option from the menu.
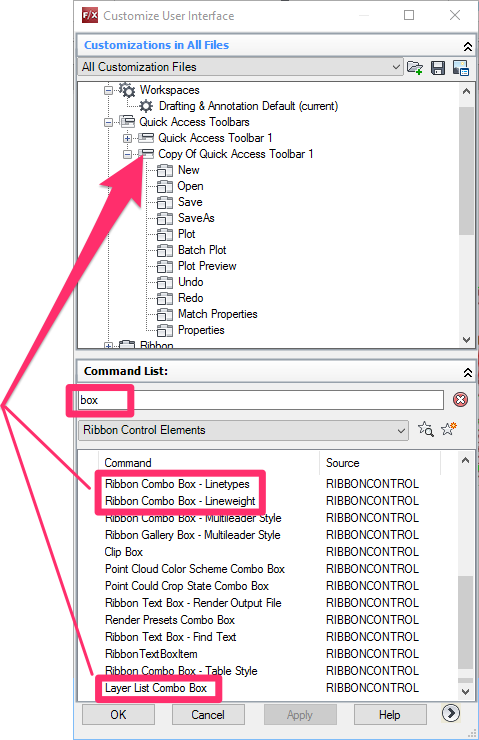
6. You'll now see a list of items you can add to your Quick Access Toolbar.
Drag the items you want into the list for the active version of the Quick Access Toolbar (which you verified in Step 4 above).
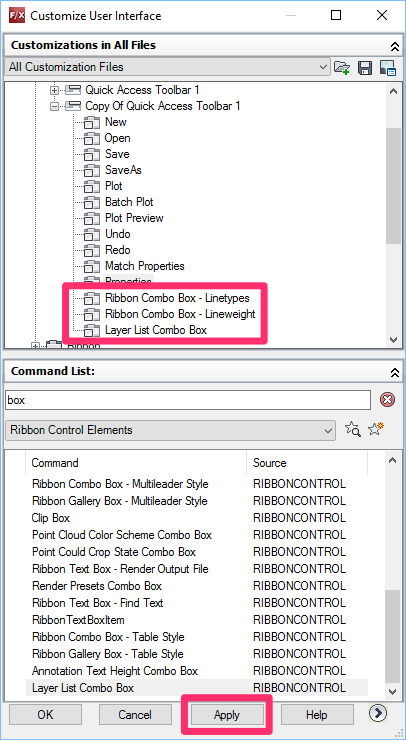
In our example, we will be adding three ribbon layer control boxes, so we'll search for the word "box" in the search field. We'll drag the following items into the Copy of Quick Access Toolbar 1 (which we found to be the active version):
- Ribbon Combo Box – Linetypes
- Ribbon Combo Box – Lineweight
- Layer List Combo Box
At this time, the combo box for layer color is not able to be added to the Quick Access Toolbar in any Autodesk product, including F/X CAD.
7. The items you added should now appear in the list of tools within the Quick Access Toolbar where you dragged them. You can put the tools in any order you want.
Click Apply to apply the change.
You Quick Access Toolbar in your workspace should now include the items you added. (See image below.)
Click OK to close the Customize User Interface dialog box.
In our example, the Quick Access Toolbar now includes the Linetypes, Lineweights, and Layer List Combo Box menus.

While it can be handy to have these types of items on your Quick Access Toolbar, our resident CAD gurus recommend using the Properties palette instead (or at least as well). Having the Properties palette always up or at least collapsed can help alert you to information about the objects you're clicking that you might not otherwise realize – for example, that the block or text object you're selecting is actually an Attribute item, or whether text is simple text or MText.
Troubleshooting
Issue: The layer pull-down is missing from the Quick Access Toolbar
Issue: Layers are not sorting alphabetically in the Quick Access Toolbar layer pull-down
Issue: The Quick Access Toolbar has reverted to a default version and/or is missing tools
Contact
- Land F/X


Our software tailors AutoCAD®, Revit®, and SketchUp® to the needs of landscape architects, irrigation designers, and other professionals. We automate your most tedious tasks and ensure accuracy, giving you more time to design.