Bubble Callouts for Text
Quick video
- Bubble Callouts Are Now Multileaders (MLeaders)!
- Bubble Callouts Overview
- Related Webinars
- Troubleshooting
Detail Bubble Callouts are created on the fly for one particular detail, but you can also apply them to more than one detail by just copying the schedule from one detail to another while creating them.
You'll need to have at least one Detail Template placed in a drawing before you can use Detail Bubble Callouts in that drawing.
Bubble Callouts Are Now Multileaders (MLeaders)!
We've built the Multileader (MLeader) function into our Bubble Callouts. That means it's now much easier to move a callout after placing it. Plus you can add leaders to an existing Bubble Callout. For more information, see our MLeaders documentation.
Bubble Callouts Overview
Bubble Callouts are unique in that the Bubble Callout tool will know which callouts, and related number reference, are used in an individual detail template.
You may easily be working on more than one detail at a time, and the different details may require different scales. The Bubble Callout tool will accommodate this situation in a variety of ways. You could label one detail and, if you need some or all of the first detail’s text on another detail, just copy the schedule to another detail – even if the other detail has a different scale. Start using Bubble Callout on the other detail template, and the schedule will regenerate to the new scale.
You could also delete some of the text notations in one detail that you're not using for another detail, and then just regenerate the schedule and renumber it.
Detail Bubble Callouts are convenient if you have text that is repetitive or if you have limited space for text. Because Bubble Callouts will accommodate translations easily, they can also be helpful if you create details in different languages.
Open the Bubble Callouts tool:

F/X Details ribbon, Bubble Callout flyout
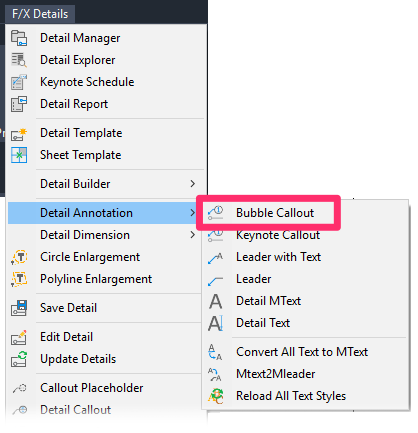
F/X Details menu, Bubble Callout option
Or type DetailBubble in the Command line
The Detail Bubble Callout dialog box will open.
Your Bubble Callout will automatically receive the next available number. You can renumber it as needed.
Type a note describing the callout in the text field pictured to the right.
Click Place to place the Bubble Callout.

The Command line will prompt you to set an Arrow point.
Click a to set the location of the callout arrow. The Command line will prompt you to set a Leader end point.
Click to place the callout leader. The Command line will prompt you to set a Callout location.
Click to place the Bubble Callout.
Here's an example of a Bubble Callout as placed on a sheet:

As soon as you place the callout, the Command Line will prompt: Upper Left Corner.

You'll now define a window area where you want to place the Detail Bubble Schedule, as pictured to the left.
The identifying note you entered when creating the Bubble Callout will now appear in this Schedule area.

If you happen to press the ESC key, or in some other way accidentally cancel the placement of the Schedule after placing the first Bubble Callout, don't worry.
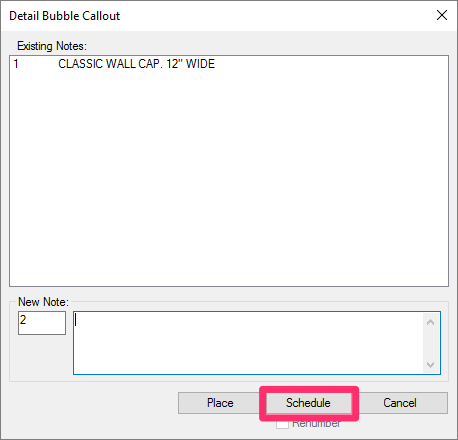
At any time, you can open the Detail Bubble Callout tool and click Schedule.
You'll then be able to define a window area where you want to place the Bubble Callout Schedule.
You can also chose to redo a schedule that's already included in the detail. If so, just erase it. You can then replace it by opening the Bubble Callout tool and clicking Schedule.
Here's what the detail pictured above might look like once we've placed several Bubble Callouts.

To place a schedule for all these callouts, open the Bubble Callout tool and click Schedule.
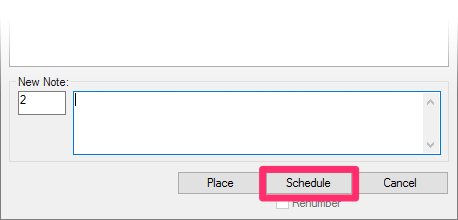

Define the window where you want the schedule to appear.
The schedule will be placed in the area you defined.
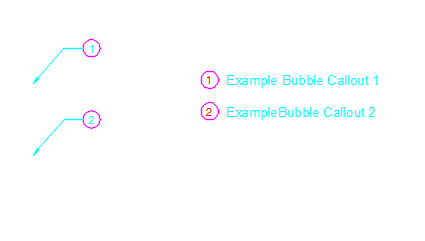
Note that the bubbles that appear in the schedule are smaller than the actual bubbles in the callouts as they appear in your details, allowing longer bubble callout schedules to fit within your details.

Customizing Bubble Callouts
Note that the callouts used in the MLeaders (the Bubble Callouts you place in your details) originate from the source drawing LAFX-TAG-BUBBLE.dwg, or in a metric drawing, LAFX-TAG-BUBBLE-M.dwg.
Meanwhile, the callouts used in the schedule are sourced from LAFX-TAG-BUBBLE-L.dwg, scaled down to 75%.
If you want, you can make changes to the source drawing LAFX-TAG-BUBBLE-L.dwg such as removing the bubble to just have the number in the schedule, or make the bubble match the exact size as the bubbles in the callouts.
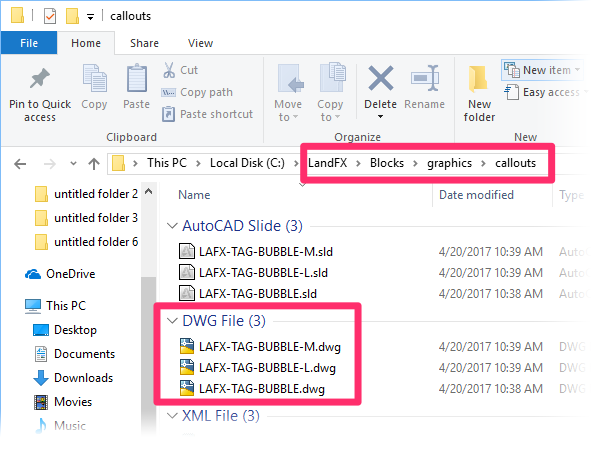
As with other callout source block drawings, these files will be located in your LandFX folder, within the folder path Blocks/graphic/callouts.
Because our block files are cloud based, these source block drawings will not download to this folder until you've placed them in a drawing.
You can then open the source drawings and edit the callouts to your liking.
Want your Bubble Callouts to match the size of the callouts in the Bubble Callout Schedule, as pictured to the right? Here's how.
How Does the System Know Which Detail Template You're Working On?
You may need to create several details at once, and you have several Detail Templates inserted in your drawing. The system will try to figure out which Detail Template you're currently working on by seeing which template is occupying the most space on the screen – that is, which Detail Template you're zoomed in on.
If several Detail Templates are visible on your screen, and the system isn't sure which one you're working on, the cursor will simply turn into a pickbox when you select the Bubble Callout tool. You'll then be allowed to select a template.
How are Detail Bubble Callouts Saved in the Detail?
The Detail Bubble Callouts and their text are saved within the detail – within the Bubble Callouts and the schedule, and not in some external location. Therefore, if you erase the callouts and the schedule within a detail, all callout information will be gone. You can erase just the callouts, leaving the schedule – or just the schedule, leaving the callouts – and still have the callout information in the detail.
Using and Moving Callout Information from One Detail to Another
It's extremely common to create several details at one time that are perhaps related to each other in some way, and may be using similar text descriptions and callouts. After creating a series of notations for one detail, you can simply copy the Detail Bubble Callout Schedule from one detail to another, regardless of any scale difference. Those notes will now be available in the second detail, and you can delete, edit, and even renumber the callouts as necessary. As soon as you place a callout on the new detail, the schedule will automatically rescale, if necessary, to the scale requirements of the new detail.
A Note on Numbering: The system won't like it when callouts have the same number. So if you need to bring over a note that has the same number as an existing note, we recommend copying the Mtext to a location just outside the detail frame in your drawing. There, it would be easy to copy the text and then paste it into the Detail Bubble dialog box.
Related Webinars
- Details for Beginners: Take a full tour of our detail system, where you’ll learn how to navigate our detail library, find the details you need, and use them in your drawing set. (1 hr 1 min)
- Design F/X Setup: Join us for a complete demonstration on how our software helps you manage and use construction details. We’ll provide an overview of our entire system, including detail annotation and callouts. (53 min)
- Working With Scale: We'll give you some tips for organizing standard details vs. project details, using smart annotation (including knowing the difference between Bubble Callouts and Keynote Callouts), and developing advanced detail builder skills. (54 min)
- Getting Started with the Detail Tools: We'll show you the basic tools you need to familiarize yourself with on the F/X Details ribbon, including annotation tools and smart callouts. (58 min)
- Detail Tips And Tricks: Learn some advanced techniques and best practices to create details that communicate your design intent clearly, including how to call out other details within a detail or from another sheet or drawing. (59 min)
Troubleshooting
Issue: Bubble Callouts are coming in blank, with no numbers
Issue: You try to delete a Bubble Callout item from the schedule, but it keeps reappearing
Issue: Your Bubble Callout text is scaled incorrectly – it's too large or too small
Issue: Your Bubble Callouts are only going to one side of their leaders – to the right or left
Issue: You received an Invalid Input error when attempting to place a Bubble Callout


