Place Drip Equipment
Quick video
Drip equipment includes the various components to supply water and provide flushing and air relief control.
These items are all placed in a similar fashion – with the use of the Place Equipment tool or from the Irrigation Manager.
Placing Drip Equipment Overview
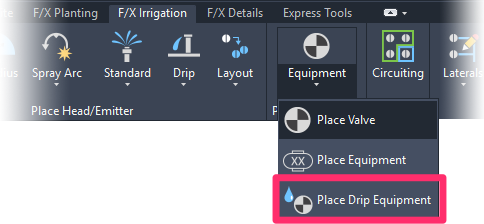
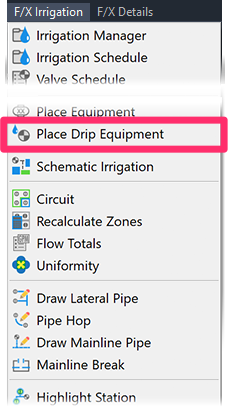
Open our Place Drip Equipment tool:

F/X Irrigation ribbon, Place Drip Equipment flyout
or type FX_PlaceDripEquip in the Command line

F/X Irrigation menu, Place Drip Equipment option
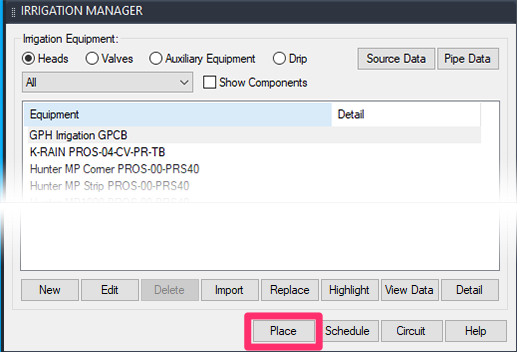
You can also highlight the equipment in the Irrigation Manager and click Place.


The Select Drip Equipment dialog box will open. This dialog box lists all drip equipment you've added to your project. Select a piece of equipment, then click Place.
If you used the Irrigation Manager to place the equipment, you'll skip this step.
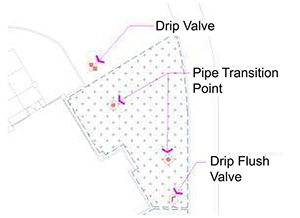
Back in your drawing, click the locations where you want to place the drip equipment.

Placing a drip valve, pipe transition point, and drip flush valve within a drip emitter area

Piping the mainline to the drive valve, and piping lateral line to the two pipe transition points
Drip emitters are designed to look for plants in your Xrefs – not in the current drawing. When the software runs through the project to determine the number of plants for which it needs to calculate flow, it will look through the current drawing first. If it finds any reference to plants, it will stop looking. If it does not find any plants, it will then move on to the Xrefs. Therefore, you should always create your drip plan in a separate .dwg from your planting plan and then Xref the planting plan into your drip design. If the drawing containing your drip plan also contains plants, you will need to find and remove those plants. Here's how.
Related Webinars
- Irrigation for Beginners: We'll show how to navigate through the Irrigation ribbon and build a familiarity with our conceptual-level tools. You'll also learn the basics of adding equipment to a project, placing, piping, sizing, and scheduling. (1 hr 45 min)
- Designing with Drip: Learn to use drip irrigation, from placing drip rings, bubblers, single emitters, emitters by area, and dripline by area all the way to zoning and piping. (1 hr 3 min)
- Drip Irrigation: We’ll go through the entire process – from placing drip rings, bubblers, single emitters, emitters by area, and dripline by area to zoning and piping. (1 hr 5 min)
- Irrigation Tools – What You Need to Know: We'll show you the ins and outs of basic irrigation setup using our software, including how to add drip, sprays, and rotors to a project. (1 hr 6 min)
- How The Manufacturer Connection Works: The Manufacturer Connection is the relationship between the designer and manufacturer that Land F/X has used to separate ourselves from other design software programs. Learn how it helps you spec equipment for irrigation designs. (53 min)
- Drip Irrigation Selection: Shelly Walker of GPH Irrigation goes over some applications that will help make your projects as efficient and environmentally responsible as possible. (50 min)
Troubleshooting
Issue: A Drip Area isn't reading plants in the Xref
Issue: Polyline selected has arc segments – it must consist of only line segments
Issue: Error accessing equipment data in the project
Issue: Drip components in separate areas are connecting or sizing automatically
Issue: The pressure loss is too high in your drip control valve or drip kit valve
Issue: Your drip hatches are not showing up in Paper Space
Issue: High flow (GPM) calculated in your drip valves
<
Issue: You saw a Missing File Error when attempting to place drip equipment
Issue: Error: File ... .dwg Was Created by an Incompatible Version of AutoCAD when placing drip equipment
Issue: Error: "Unhandled exception in dcl-slideview-load ARX" when placing drip equipment
Issue: The drip tubing calculations are incorrect (too high) in an Area for Dripline
Issue: Drip emitter areas in your drawing are showing the incorrect emitter quantity or flow rate


