Pipe to Drip Equipment
Quick video
- Piping to Individual Drip Components
- Piping to Drip Areas
- Piping to Multiple Drip Areas
- Piping to Single-Length Dripline
- Verifying Connections
- Related Webinars
- Troubleshooting
When piping to individual drip components, you can simply draw lateral pipe as you would to any piece of equipment.
Some other options:
- Pipe with standard lateral pipe to a pipe transition point, and then from there, pipe to the individual emitters. (To place a transition point, just click within your site where you want the transition to be while drawing pipe.)
- Use our Areas for Drip Emitters. With drip emitter areas placed as hatches, you can then place pipe transition points and individual emitters within the hatched areas as necessary.
- Place larger drip emitter areas, and place either Generic Plants or simply faint circles to depict the plants being served. You could still place the pipe transition points and then provide notes on the plan. Along with the representations of the plants to be server, these items should make it more than clear to the contractor how the system is to be connected.
If you need to pipe from a valve to a drip area, you have a few options, depending on your preferences and the requirements of your design. You can either place the valve directly into a drip area or pipe to the area using our Draw Lateral tool.
Piping to Individual Drip Components
If you need to pipe to individual drip emitters or other drip components aside from drip emitter areas or dripline areas, you can simply use the same process as lateral piping to a head.
Piping to Drip Areas
If you need to pipe from a valve to a drip area, you can either:
- Place the valve within the drip area
- Pipe to a transition point within the drip area
- Draw lateral pipe directly into the drip area
Placing a Valve Within a Drip Area
The quickest way to pipe from a valve to a drip area is to place the valve within the drip area. The drip area will automatically connect to the valve and recognize its flow as if you've piped from the valve to that area.
In previous versions of Irrigation F/X, you would have been required to dead-end a lateral pipe from a valve to a drip area for the valve to be recognized as piped to that area. We've since engineered drip areas with the ability to connect automatically with valves placed within them. If you've placed a valve within a drip area but that area doesn't seem to be recognizing the valve, you may need to update to the latest version.
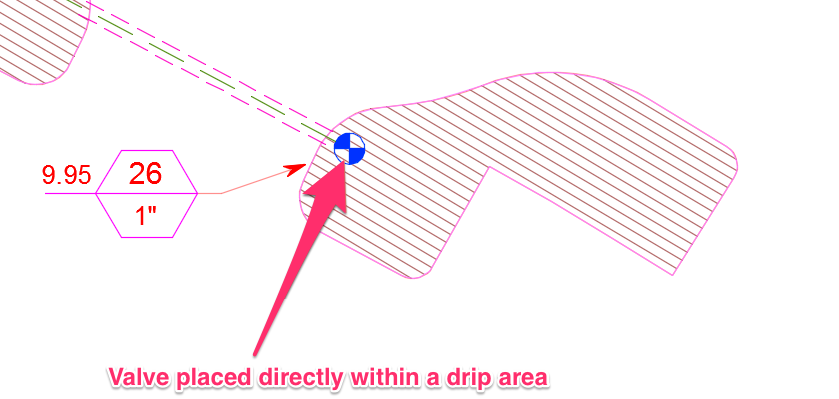
If you're looking to place multiple valves within a single area in order to calculate how the flow will split between the valves, we recommend using our Schematic Irrigation tool. Valves placed within a Schematic area will also be recognized as being piped to that area, allowing you to make a quick determination of the flow to each valve without the need to pipe to the area where you place them. For more information, see our placing valves within Schematic areas documentation.
Piping to a Transition Point Within a Drip Area
You can also pipe from a valve to a pipe transition point placed within a drip area using our Draw Lateral tool. Irrigation F/X will also recognize a transition point placed within a drip area as having been piped to that area.
Some designers prefer the look of a pipe transition point to that of a dead-ended pipe. This method requires a few extra steps than simply drawing pipe to a drip area from a valve.
In the example shown below, we've piped from a valve within a drip area to transition point within a second drip area.
Note that we've also piped from the valve to a transition point within the same drip area before continuing on to the second drip area. This additional transition point allows the valve to remain connected to the drip area where we've placed it.

In this example, the transition point in the top drip area (along with the valve) acts as a de facto piece of stubbed-off pipe from the valve to the drip area in that it allows the area to remain connected to the valve after we've piped to the second area.
Piping Directly to a Drip Area
As with previous versions of Irrigation F/X, you can also dead-end lateral pipe into drip areas. This method is a good option if you need to pipe from one drip area to another and don't mind the look of pipe endpoints in your design. If you'd rather not have visible pipe ends, you might want to pipe to transition points instead.
To pipe into a drip area, open our Draw Lateral tool and draw a section pipe from a valve directly into the area. Click to place the endpoint. Note that you'll also need to dead-end a length of pipe into an area containing a valve if you want that area remain connected with the valve.
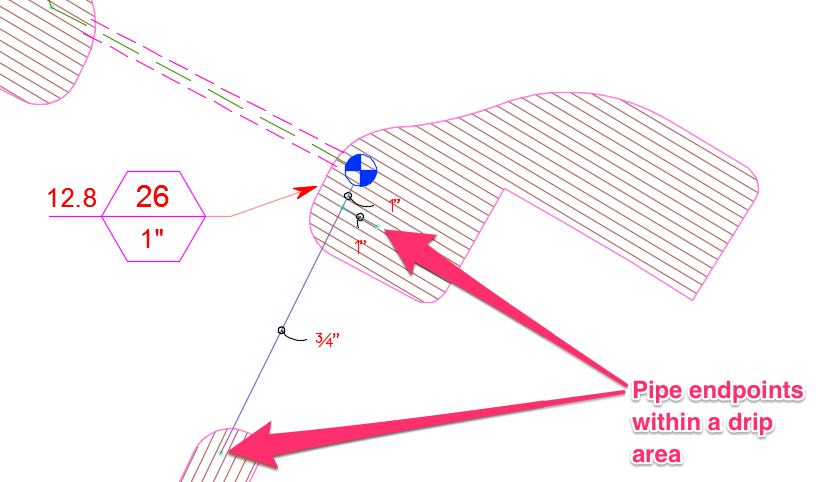
Individual bubblers and emitters inside a drip area will be added to the flow total. If you have more than one pipe transition point in the area, the flow will be divided by the number of transition points.
Piping to Multiple Drip Areas
If you need to pipe to two or more drip areas, keep in mind that you cannot pipe to multiple drip areas by simply putting lateral sections between the areas, as pictured below.
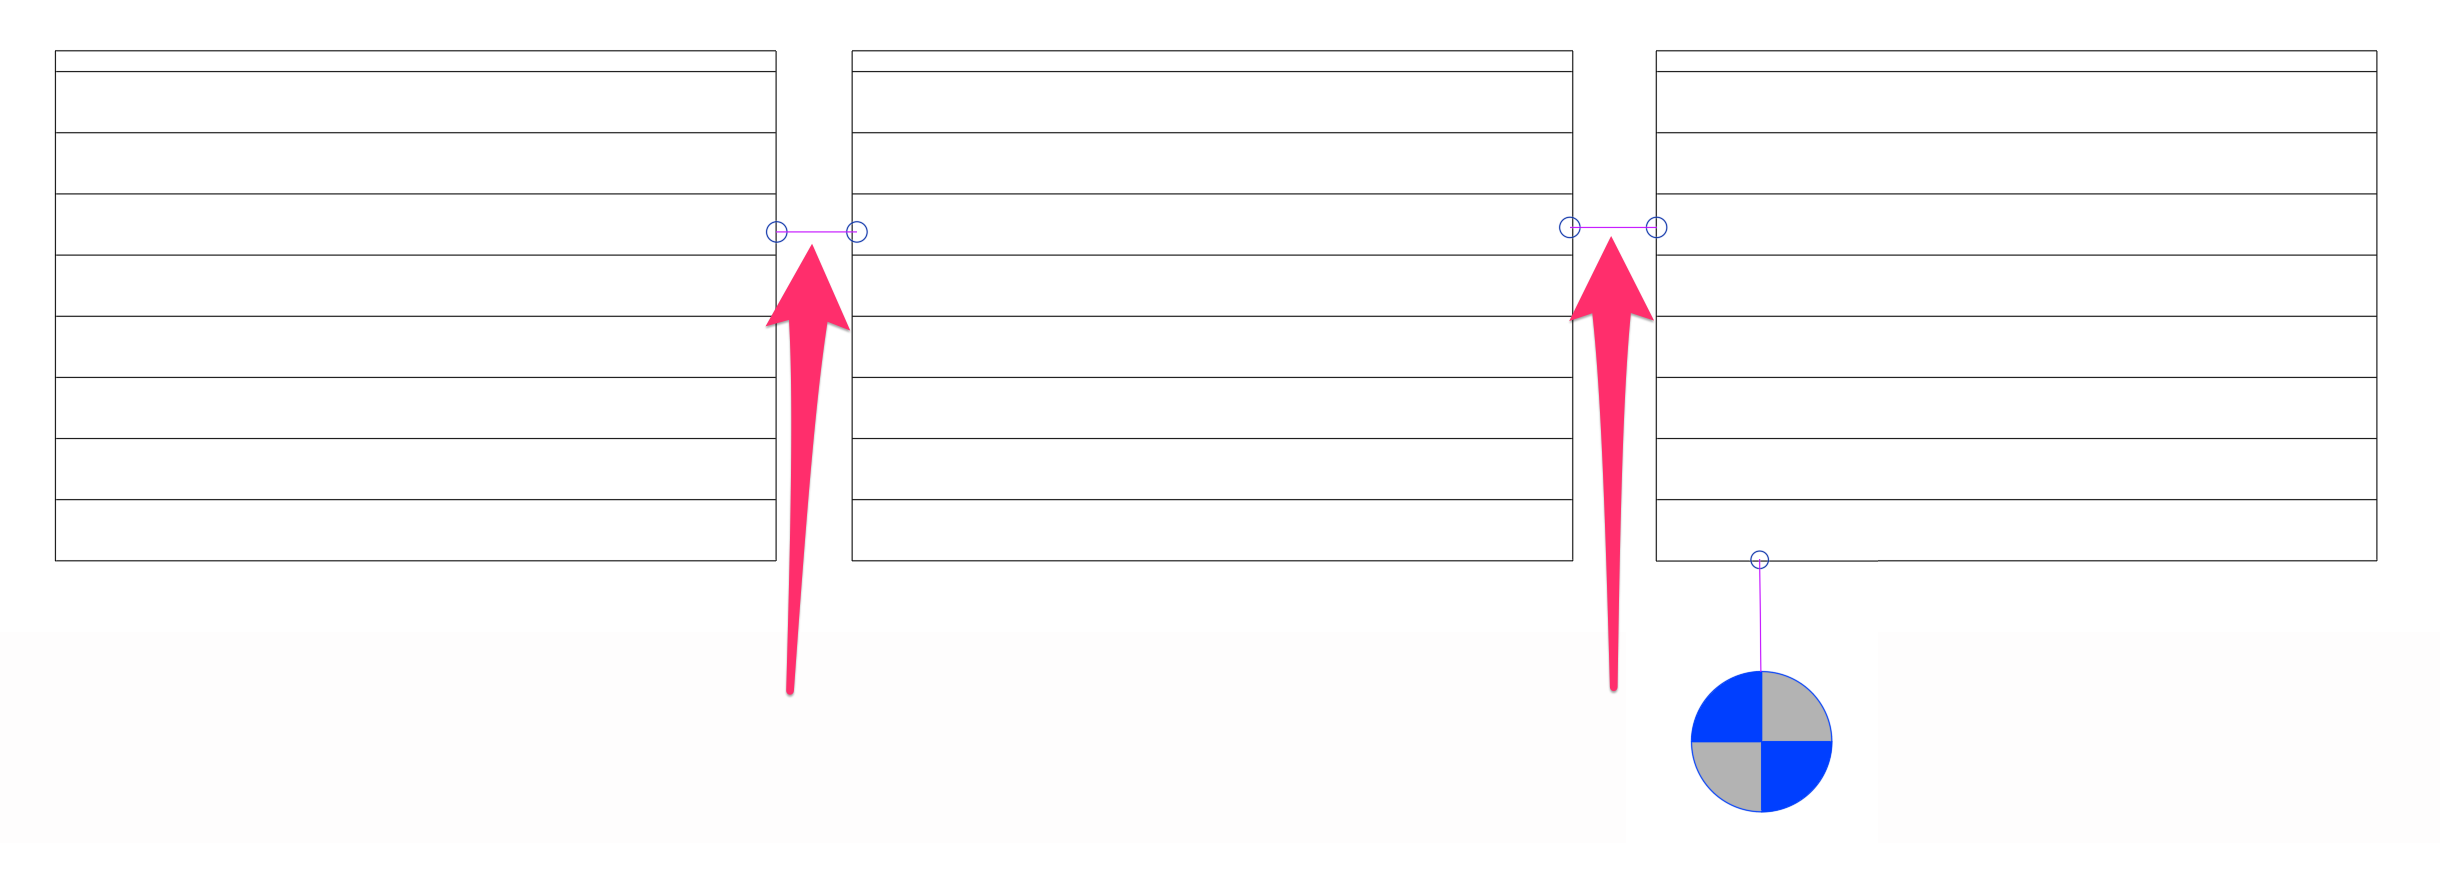
All laterals need to be connected directly to the valve. You can meet this requirement by simply piping through the drip areas, making sure to dead-end the pipe into each area you pipe to, as pictured below.
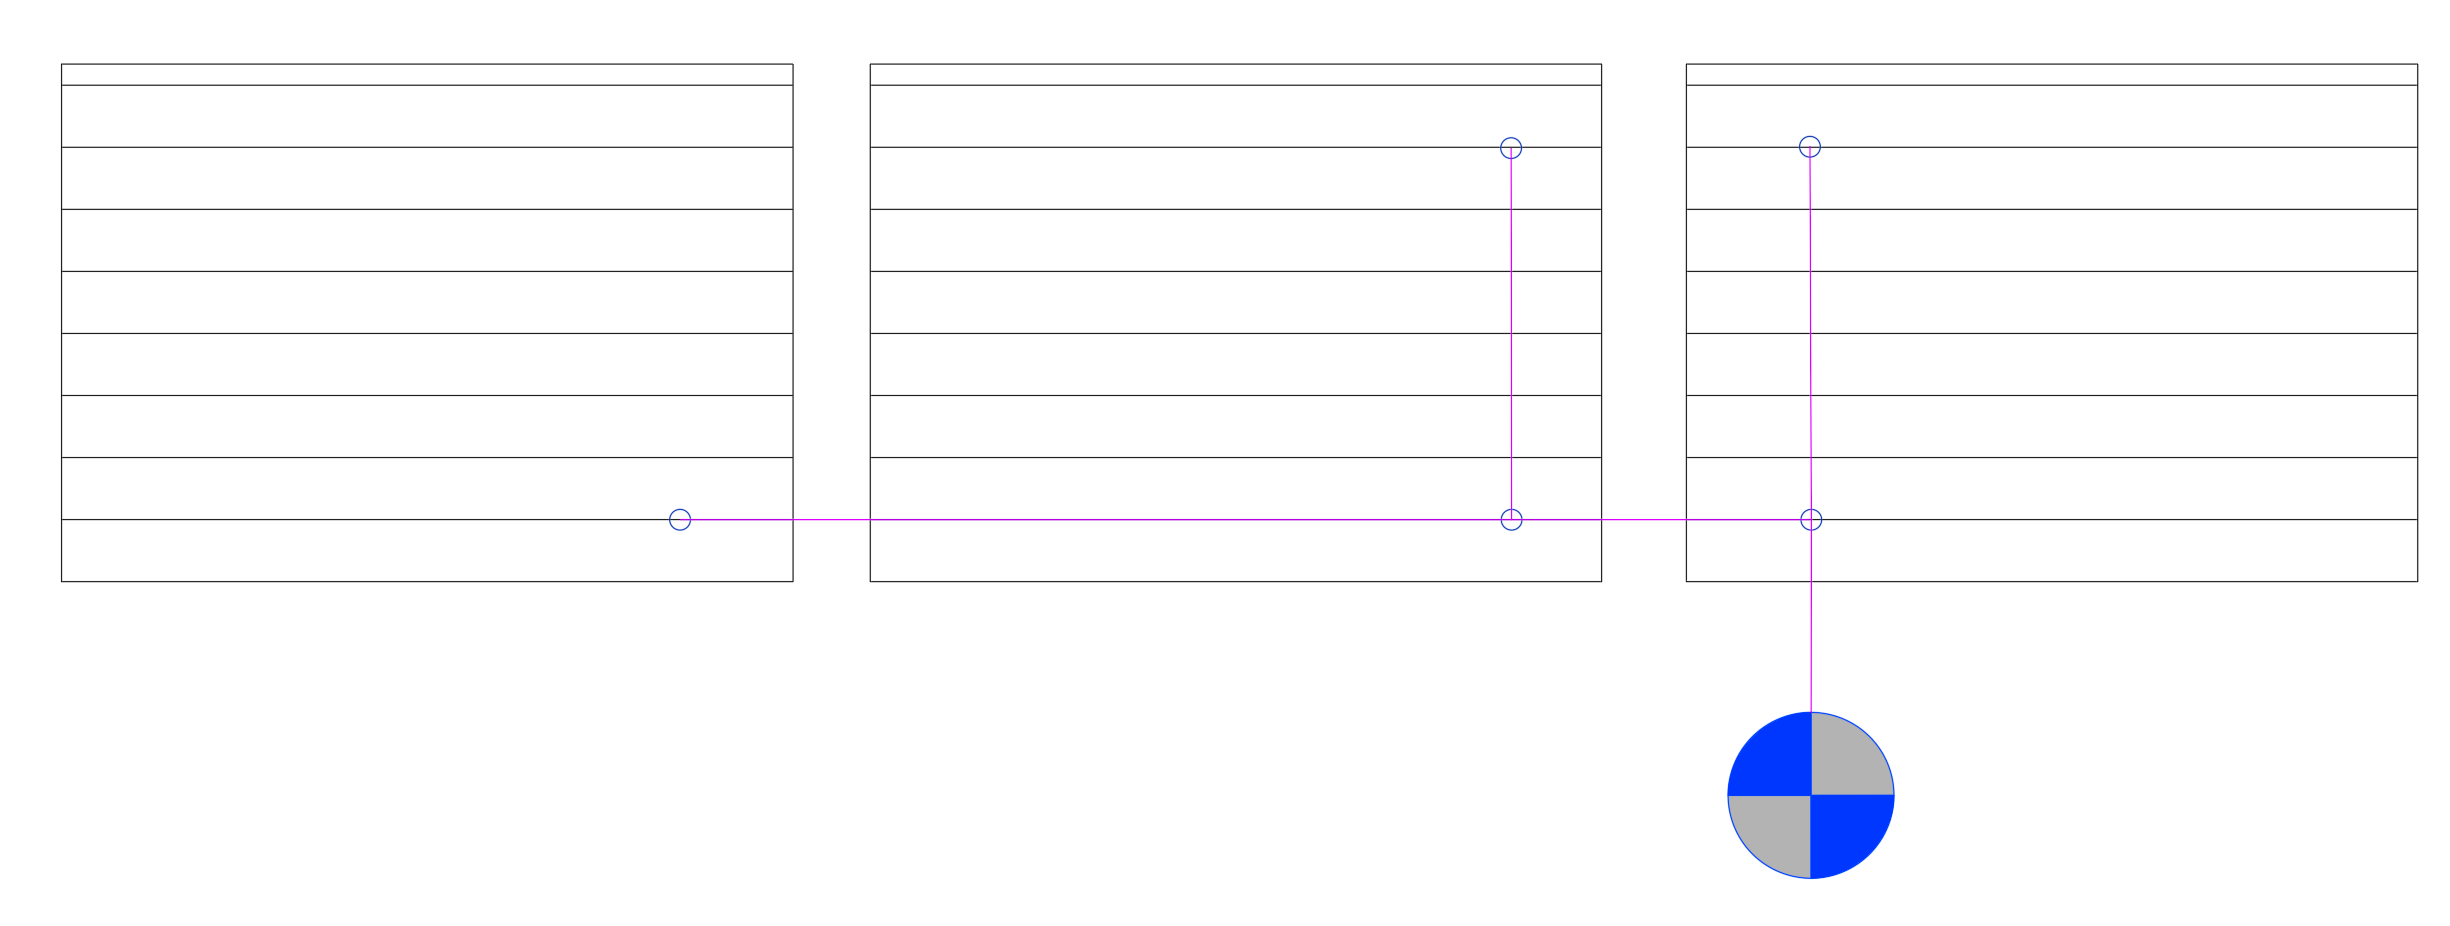
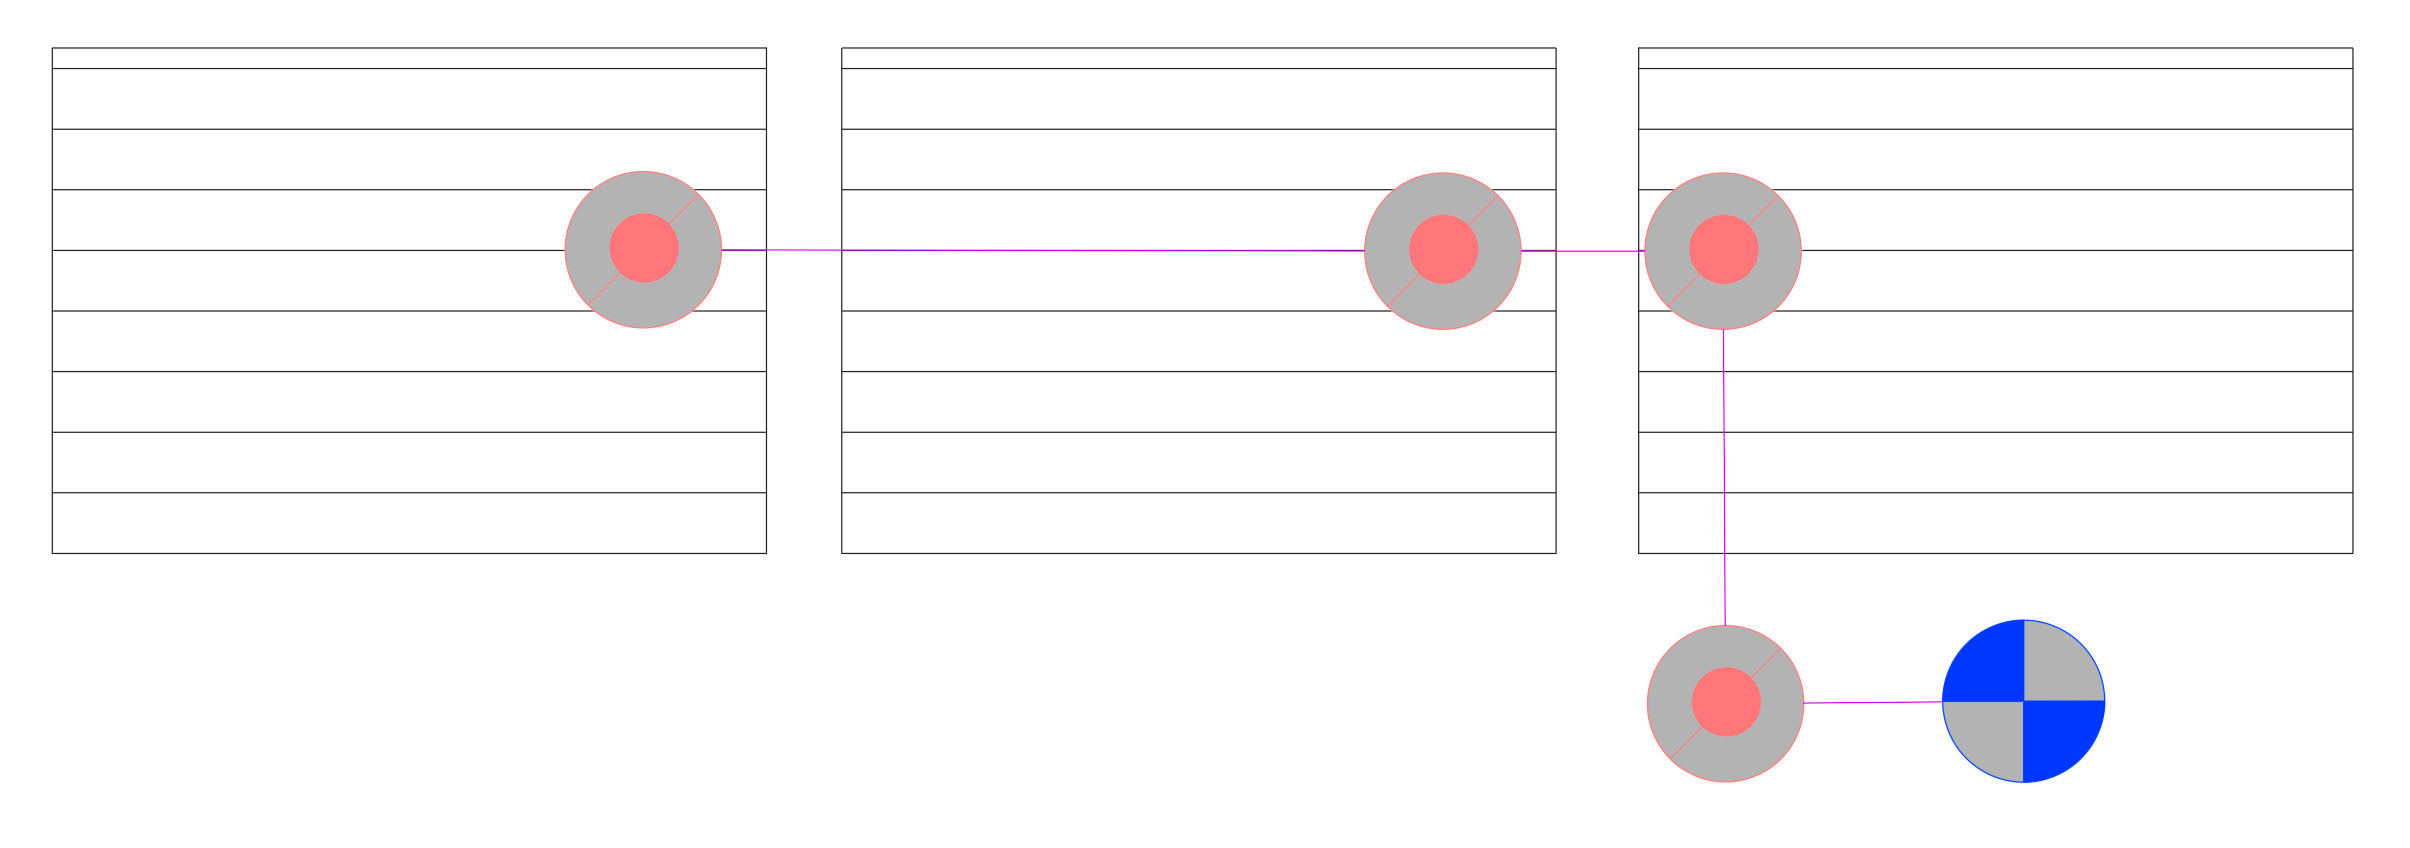
You can also use pipe transition points to connect the drip areas.
First, follow our instructions to add your pipe transition points to your project. Then place a pipe transition point in each drip area by following our instructions to place drip equipment.
Finally, use our Draw Lateral tool to draw lateral pipe from the valve to each drip area's transition point, connecting the transitioning points with each other in series, as pictured below.
Piping to Single-Length Dripline
Single-length dripline requires the lateral pipe to be connected directly to the single-length dripline fitting and back to the valve, as pictured in the example below.

To begin, you can either:
Option 1:
Place sections of underground laterals, making sure to leave fittings where you plan on tying your single-length dripline into your system ...
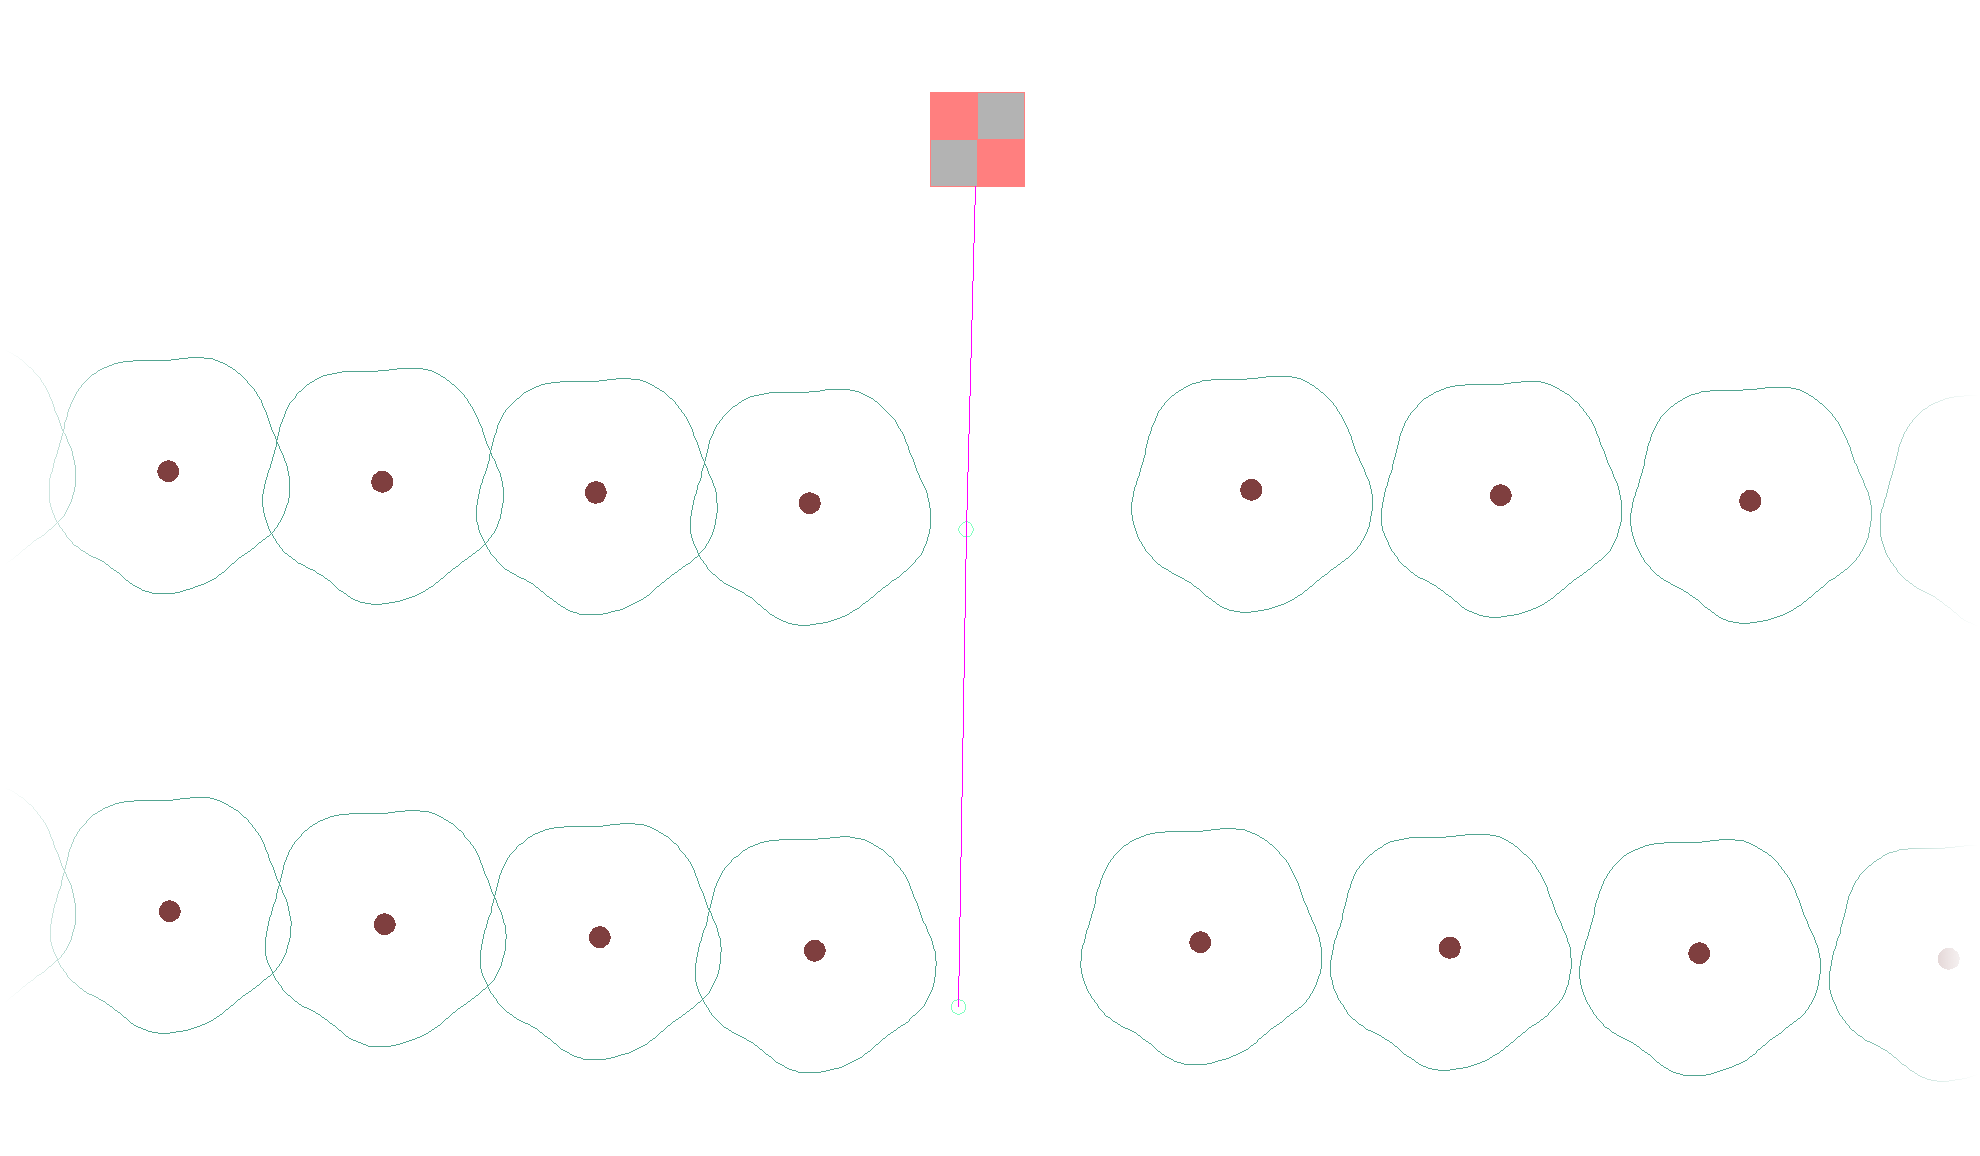
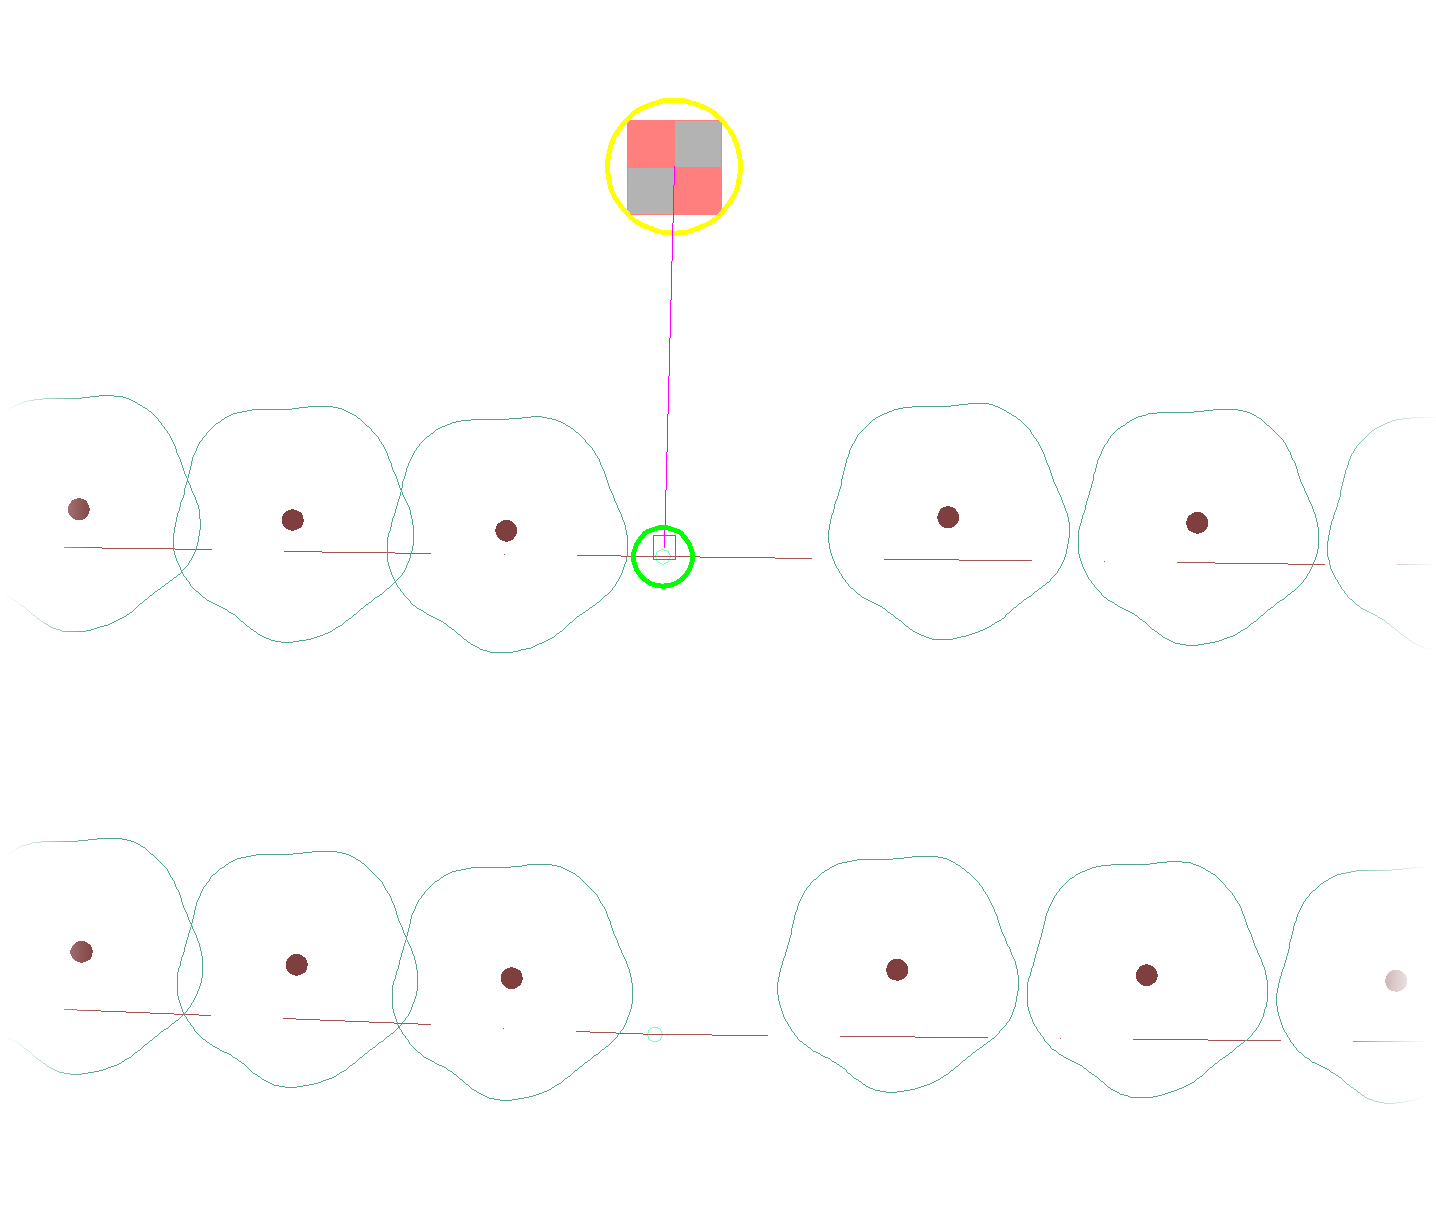
... then draw your sections of single-length dripline, connecting them to the fittings, or
Option 2:
Place sections of single-length dripline, making sure to leave fittings where you plan on tying your underground laterals back to the valve ...
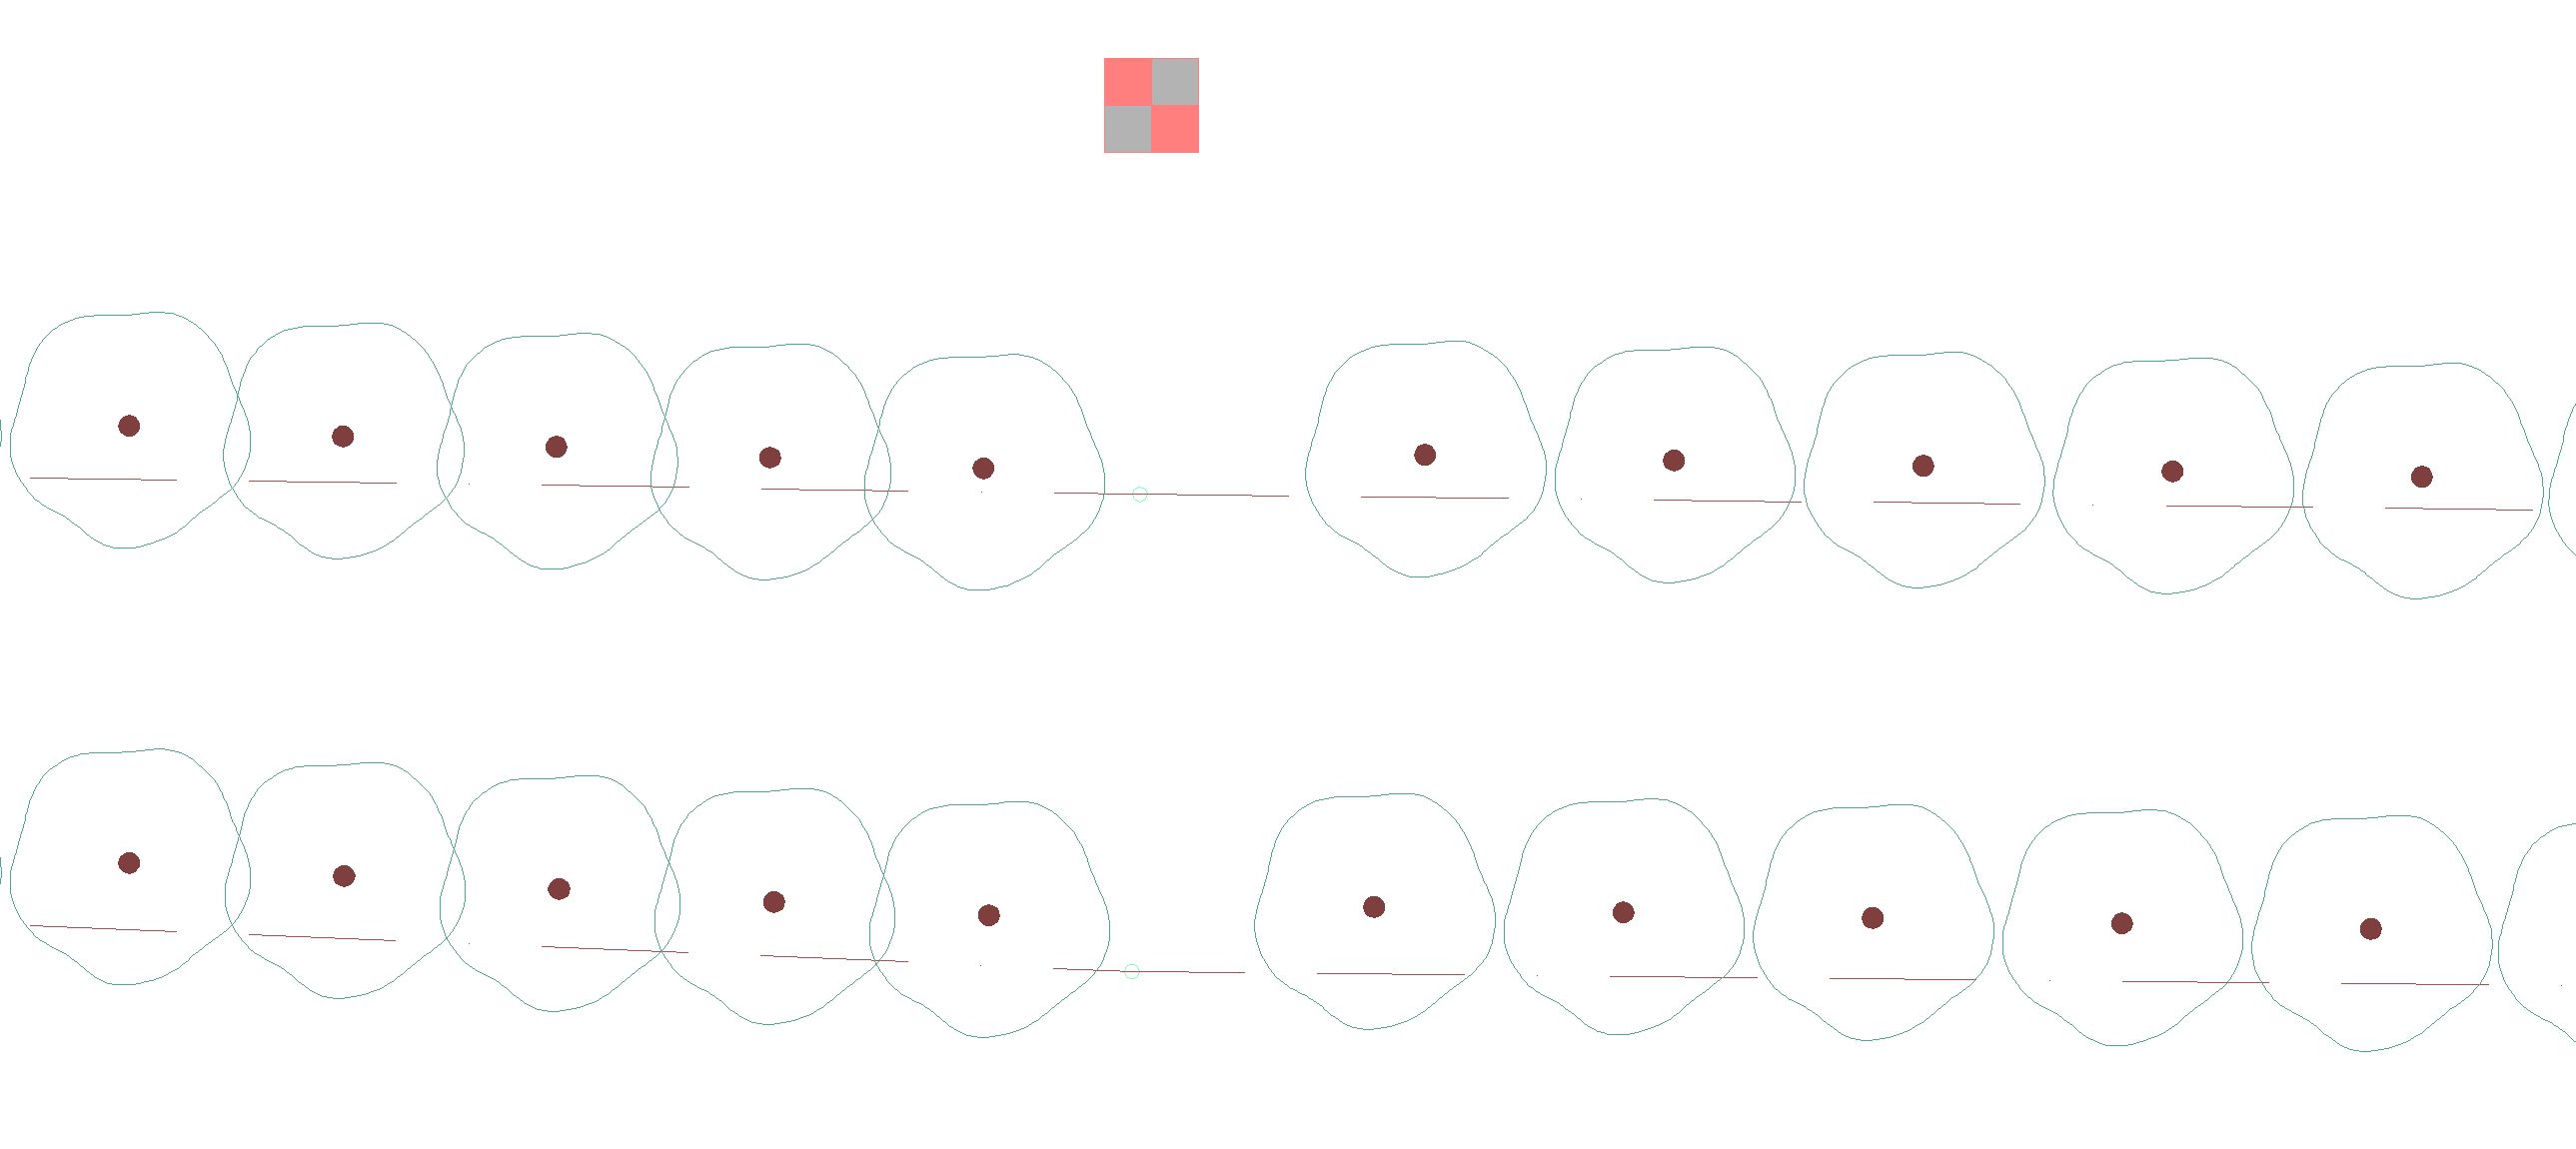
... then connect laterals to the ends of single-length dripline.
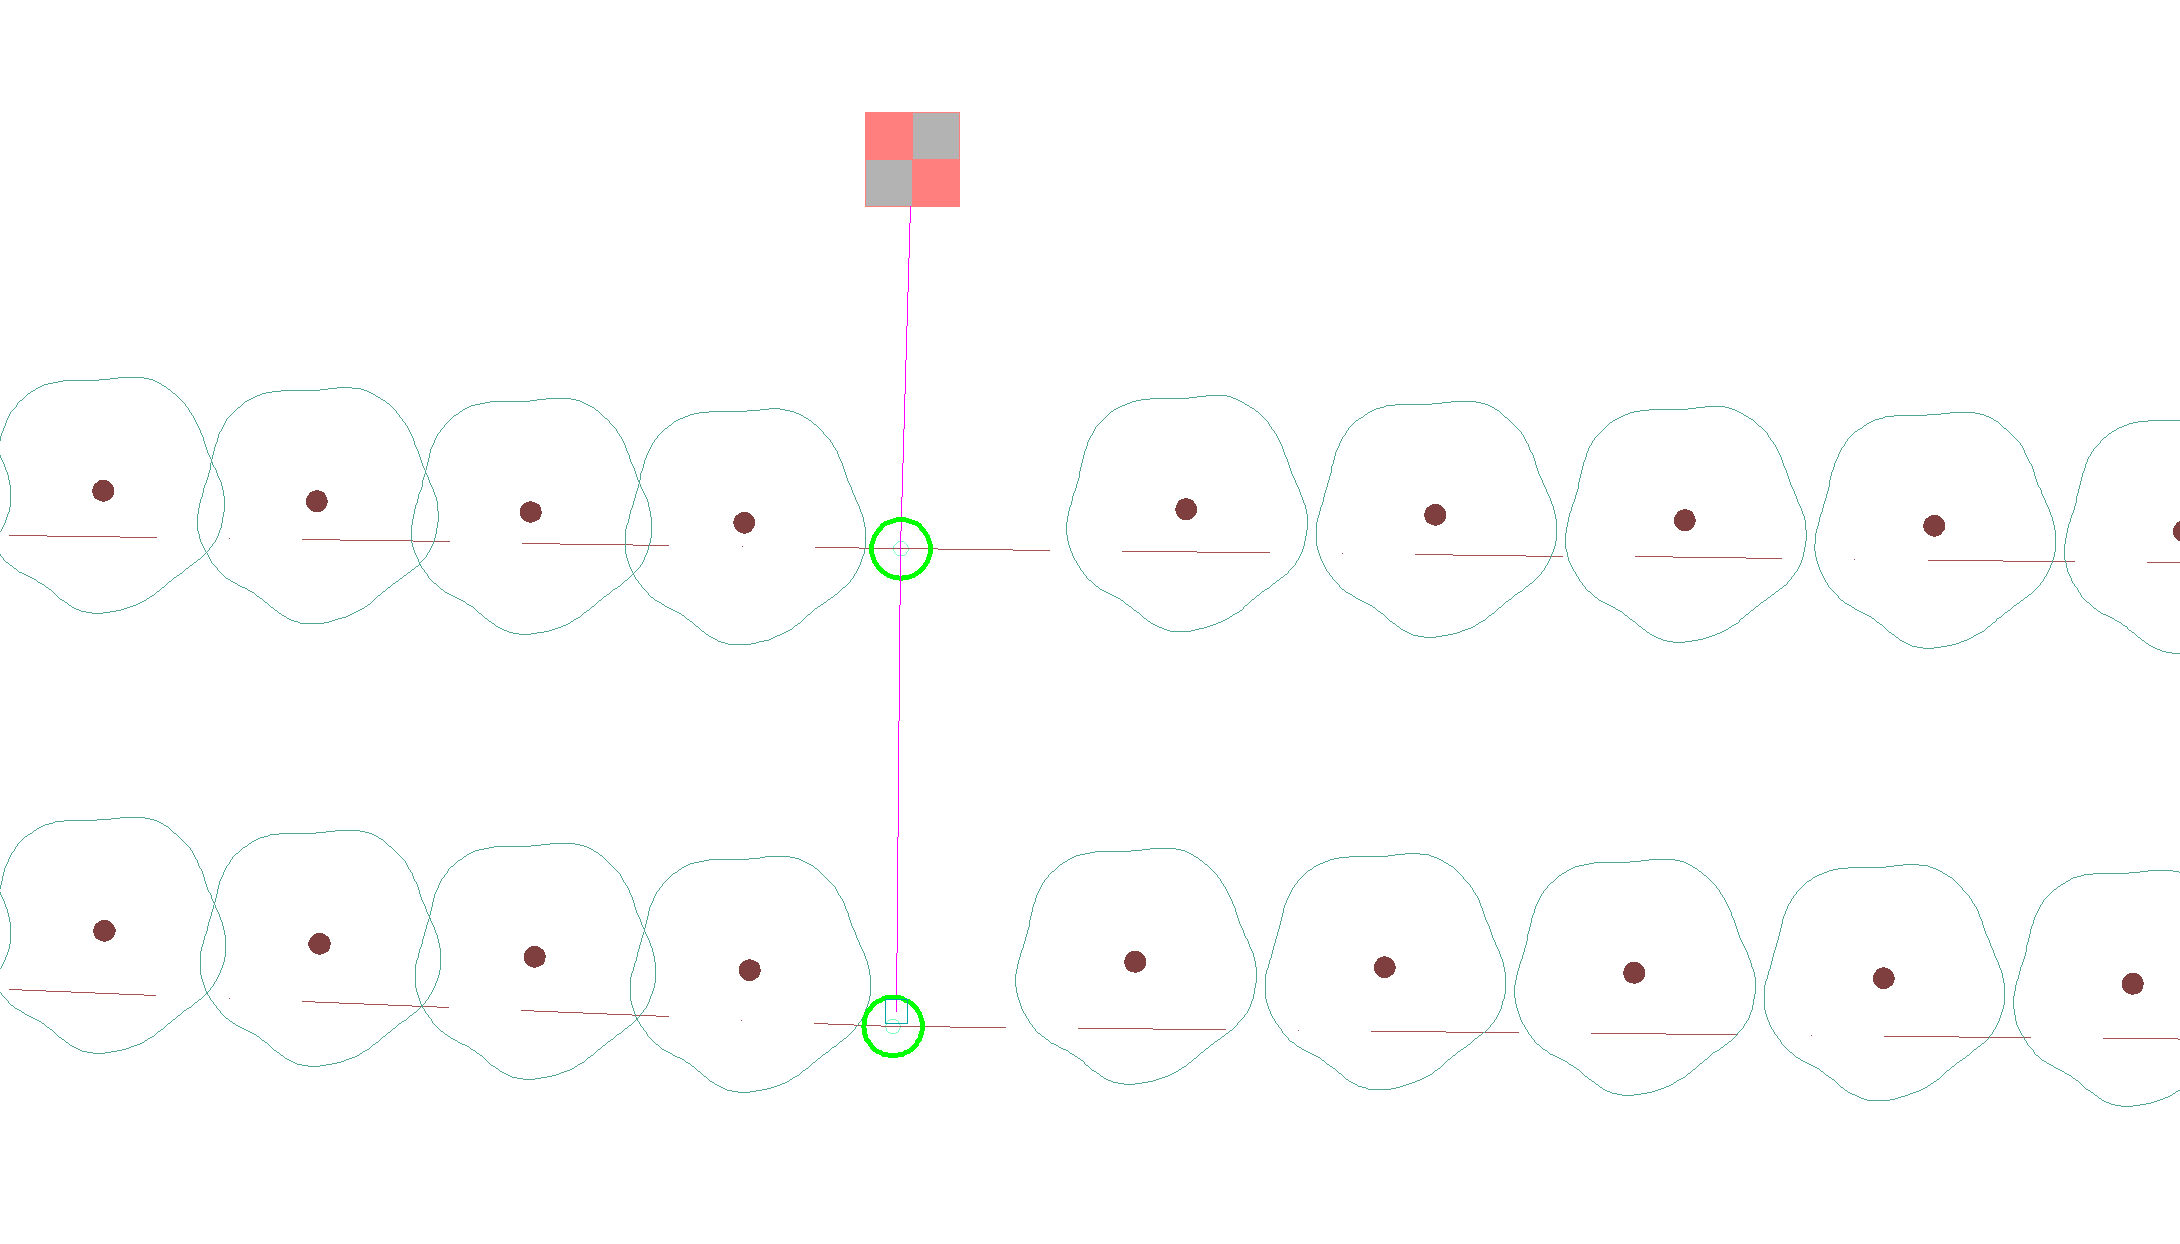
Incorporating Blank Tubing
Want to show blank tubing between runs of single-length dripline? Add the following step at the beginning of the process described above.
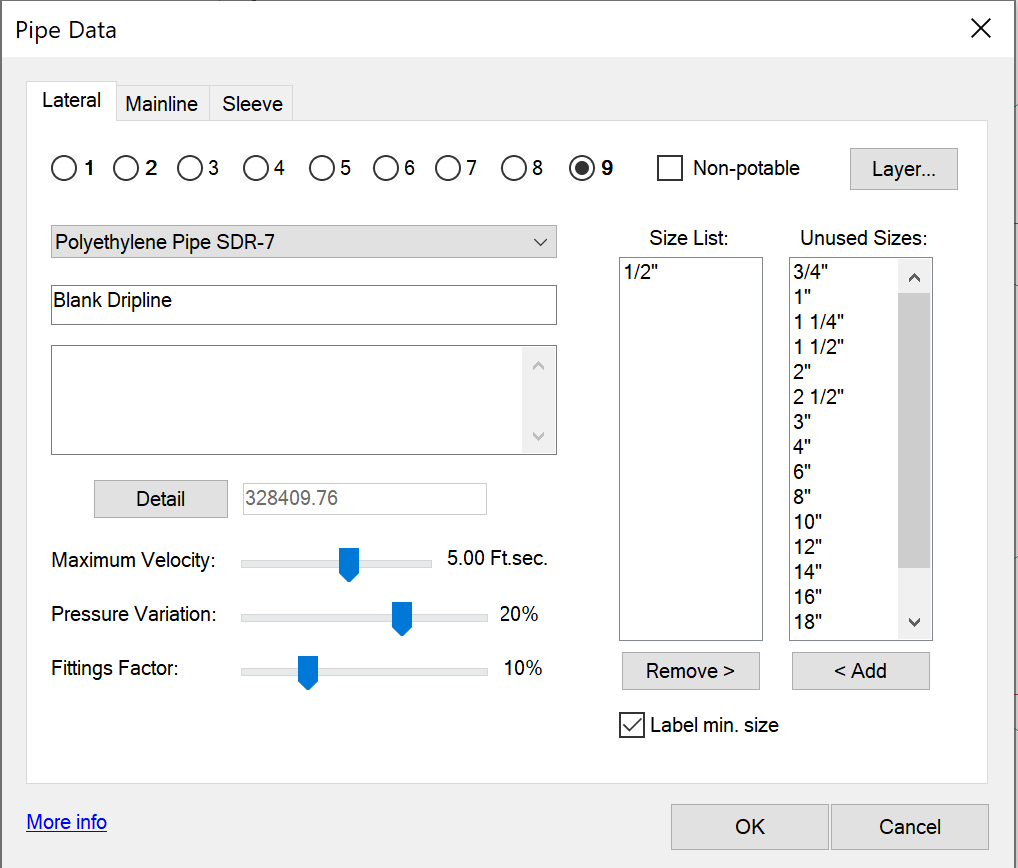
Open our Pipe Data tool and add a new class of pipe.
We recommend using Class 9 because this class won't be used that often. List only 1/2" as an available size, and give it a description such as Blank drip tubing.
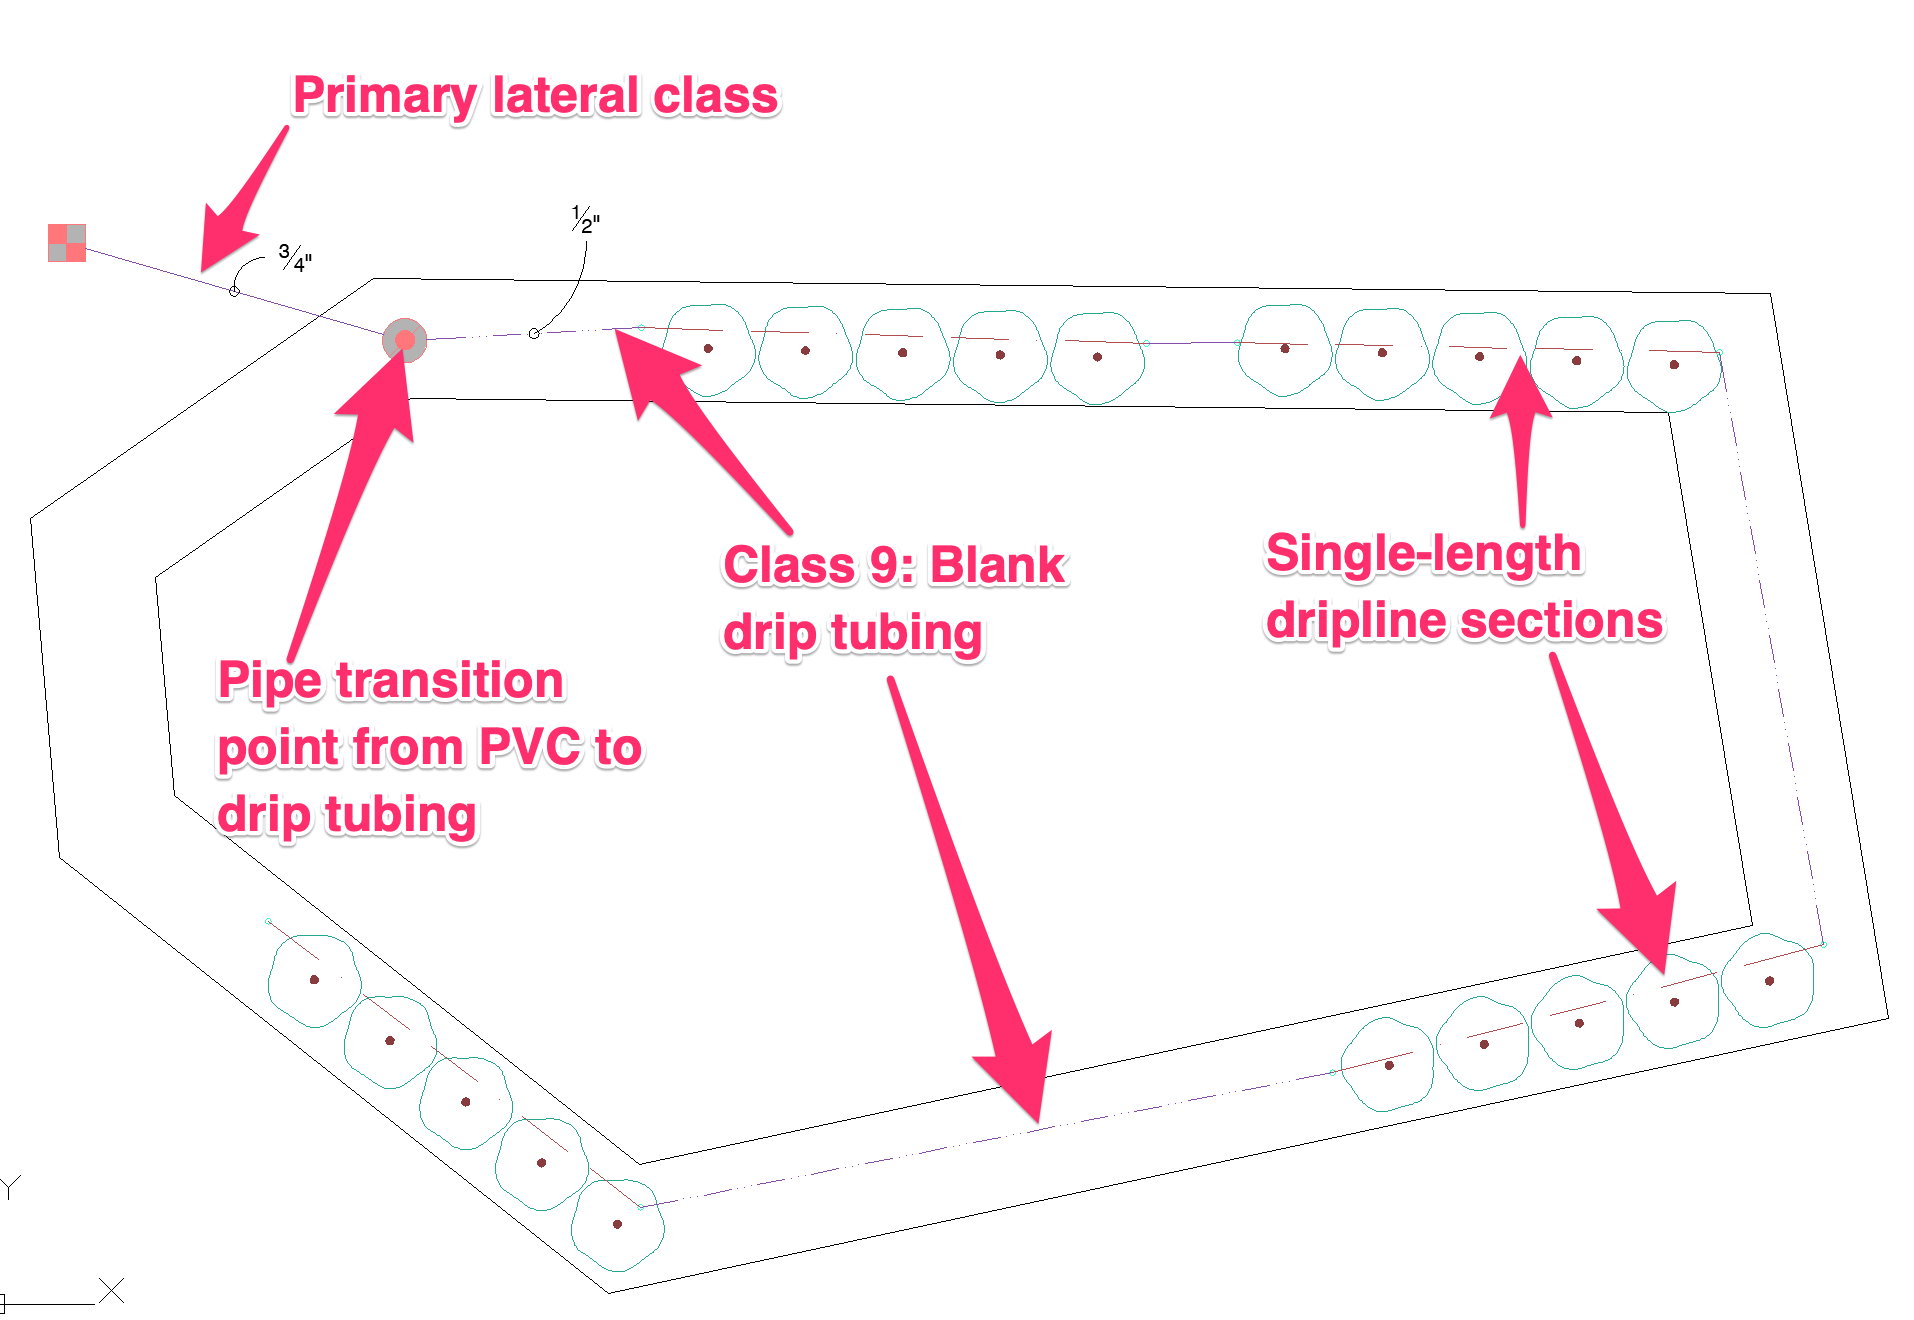
Now, when you incorporate your single-length dripline, you can go from the primary class of underground laterals and switch to your blank tubing class (Class 9 in our example), connecting to the single-length dripline as in the example below.
Verifying Connections
Once you've drawn the pipe to connect drip equipment, we recommend verifying your connections using our Highlight Station tool.
The cursor will turn into a pickbox. You can then click drip emitters and drip emitter areas to highlight them and determine which of these items are connected correctly and which are not.
You can also use our Verify Laterals and Verify Mainline tools to check your valve connections.
For further information on error checking for pipes, see our Lateral Line Error Checking and Mainline Error Checking documentation.
Related Webinars
- Designing with Drip: Learn to use drip irrigation, from placing drip rings, bubblers, single emitters, emitters by area, and dripline by area all the way to zoning and piping. (1 hr 3 min)
- Drip Irrigation: We’ll go through the entire process – from placing drip rings, bubblers, single emitters, emitters by area, and dripline by area to zoning and piping. (1 hr 5 min)
- Drip Irrigation Selection: Shelly Walker of GPH Irrigation goes over some applications that will help make your projects as efficient and environmentally responsible as possible. (50 min)
- Irrigation Tools – What You Need to Know: We'll show you the ins and outs of basic irrigation setup using our software, including how to add drip, sprays, and rotors to a project. (1 hr 6 min)
Troubleshooting
Issue: High flow (GPM) calculated in your drip valves
Issue: The drip tubing calculations are incorrect (too high) in an Area for Dripline


