Pipe Data
Quick video
- Pipe Data Overview
- Lateral Pipe Data
- Mainline Pipe Data
- Using Multiple Pipe Classes in Your Project
- Pipe Sleeves
- Applying the Current Pipe Data Settings as the Default
- Related Webinars
- Troubleshooting
Our Pipe Data tool allows you to specify the classes of lateral and mainline pipe you'll use in your irrigation project. You'll also use Pipe Data to configure the design requirements for the calculation of pipe sizes in your system design.
You won't be able to size your lateral or mainline pipes (set their widths) until you've set up the pipe classes you'll use, so we recommend setting the Pipe Data early in the irrigation design process.
Once you've configured the settings for your Pipe Data, you can apply those settings as the default in the active Preference Set using the Irrigation Preferences. You can also create additional Preference Sets and apply new default settings to each one. Find out how.
Pipe Data Overview
The Pipe Data tool is available as a button within the Irrigation Manager.
Open the Irrigation Manager:

F/X Irrigation ribbon, Irrigation button
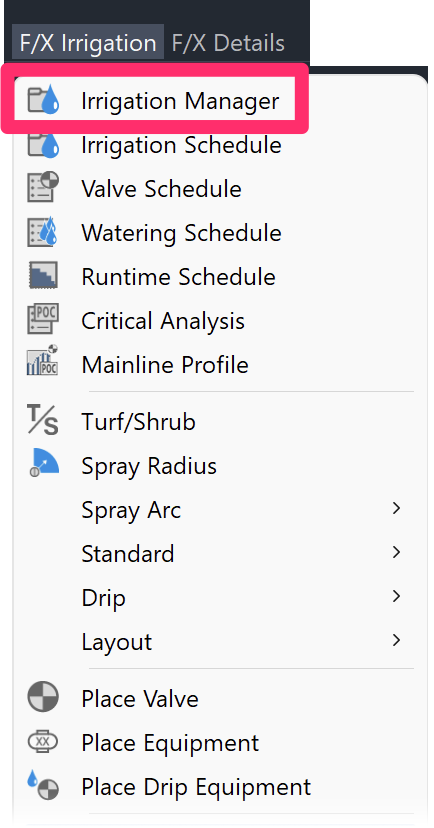
F/X Irrigation menu, Irrigation Manager option
or type ProjectIrrigation in the Command line
From the Irrigation Manager, click the Pipe Data button to access the data and criteria for the irrigation lateral and mainline piping.

The Pipe Data dialog box will open. Here, you can specify the type of pipe used for the project and configure the design requirements for the calculation of the pipe sizes.

The Pipe Data dialog box includes separate tabs for specifying the different classes of lateral and mainline pipe you'll use in your project, as well as the type(s) of pipe sleeve you want to use.
Lateral Pipe Data
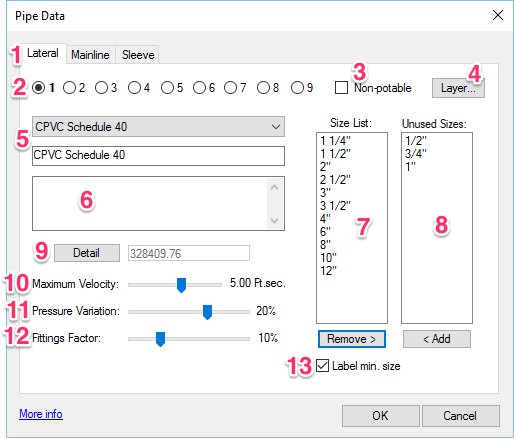
1. Select the Lateral tab to specify the lateral pipe classes you'll use in your project.
2. You can use up to 9 classes (types) of lateral pipe within any one design. When you draw the pipe, you can toggle between the pipe classes you've defined for your project. As long as you set up your classes correctly, the system will automatically assign each of your lateral classes to the correct pipe size in your drawing. More information
3. Check this box if you plan to use non-potable water in your project.
4. (optional) Click Layer to set the layer where your lateral pipe will be placed.
5. Select a Lateral Pipe class from this menu.
6. (optional) Type a description for the selected lateral pipe class in this text field.
7. The Size List includes all sizes of the selected lateral pipe class that are part of your project. You can remove any of these sizes from your project for easier toggling by highlighting that size and clicking Remove.
8. The Unused Sizes list includes all sizes for the selected pipe class that are available but that are not part of your project (i.e., unused). You can add any of these sizes to your project by highlighting that size and clicking Add.
9. (optional) Select a detail to represent the lateral line piping. This detail will be referenced in the Irrigation Schedule.
10. Use this slide to set a Maximum Velocity.
11. Use this slide to set a Pressure Variation. If you want, you can turn this value off by moving the slider all the way to the left.
12. Use this slide to set a Fittings Factor.
13.Label Minimum Size: Check this box to have the minimum pipe size labeled.
Ready to start drawing lateral pipe?
See our Lateral Line Piping page for information and instructions.
Lateral Pipe Class
Use this menu to select a class of lateral pipe you'll use in your system. You can use up to 9 different pipe classes and configure each one to your needs.
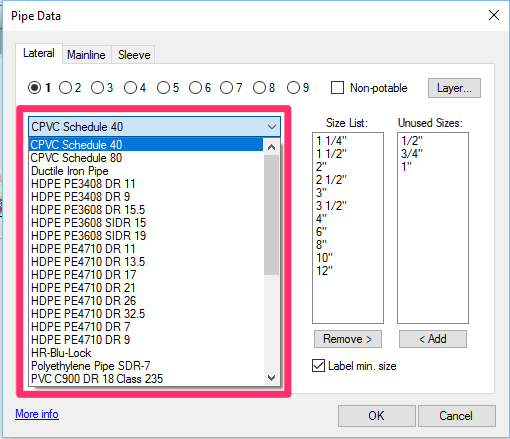
We've removed the "combination" classes, with a much-needed improvement in how the different pipe classes work with pipe sizing. The system will automatically move pipe to the appropriate layer when it sizes, which gives you more control with which classes are used and at which size the transition occurs. You can also now achieve exact quantities by pipe class. Just make sure to set up your classes from smallest to largest.
The old classes will remain in your past projects only until you go into the Pipe Data dialog box. Once you're here, the system will need to validate the pipe types being used and will refresh the pipe lists to what is available.
If the system cannot find an exact match in pipe classes (that is, you were using the combination classes), it will default to the first pipe class in the list. So you'll need to make sure it's properly set to your desired class.
More information about using multiple pipe classes in your designs

The lateral pipe classes you see in the menu will depend on the class that's currently selected in the Pipe Classes within the Irrigation Preferences (pictured to the left).
If you've opened the Preferences and noticed that the buttons and options are grayed out and you can't make changes, the current Preference Set may be restricted. More information >
If you need to use more than one class of lateral pipe in your project, you can type C while drawing the lateral piping to toggle between pipe classes, or use number keys (1 through 9) to toggle to the corresponding class you've set up. The first type of pipe you added to your project will be assigned a continuous linetype, and other classes will be assigned other types of line graphics, such as dash-dot, etc. The system will keep track of the length of each class of pipe used. More information
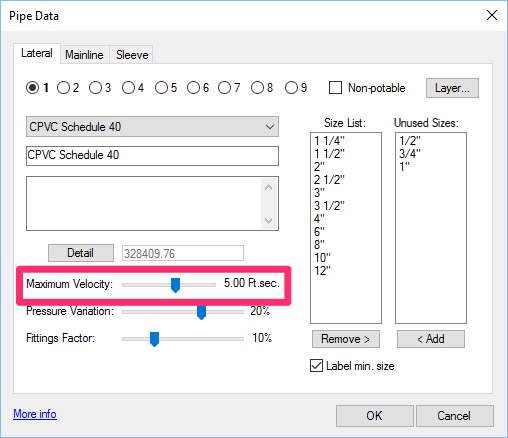
Maximum Velocity (Lateral Pipe)
Use this slide to set a maximum velocity that will apply once the lateral pipe is sized.
Pressure Variation (Lateral Pipe)
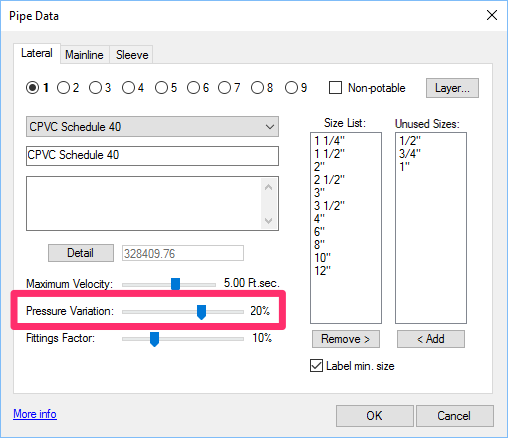
The Pressure Variation is the change in design pressure between the first and last heads within the lateral system.
This setting is generally used to balance the system. It's expressed as a percentage of the design pressure that will be the maximum variation (or difference) between any two heads.
You can use the slide bar to set a percent variation between 0 and 30%, with a default of 20%.
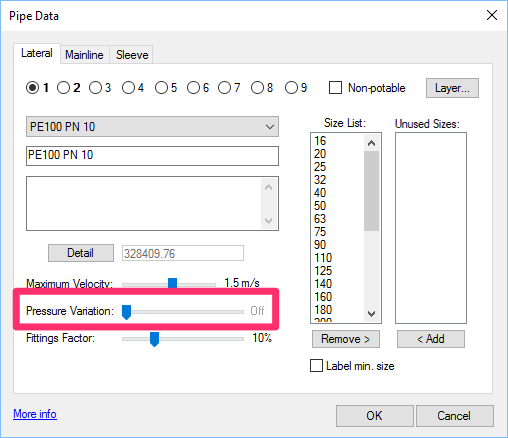
If you want, you can turn the Pressure Variation off by moving the slider all the way to the left.
This setting will disable the automatic reduction of velocity in your design.
Fittings Factor (Lateral Pipe)
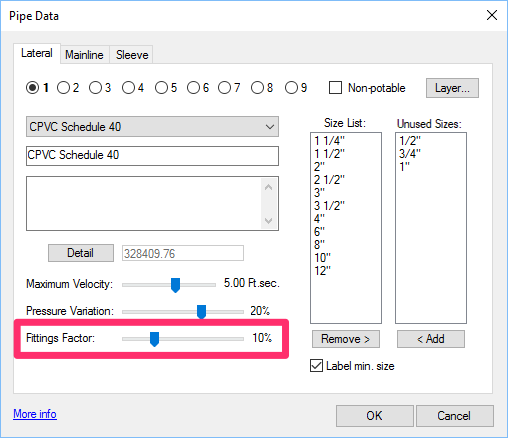
The Fittings Factor is a percentage of the total pressure loss through a length of pipe to compensate for fitting loss, field piping variations, and factor of safety.
You can use the slide to set a percentage variation between 0 and 20%, with a default of 10%. (For example, if you set a 10% factor, the system will add 10% to the loss through the lateral pipe.)
Label Minimum Size
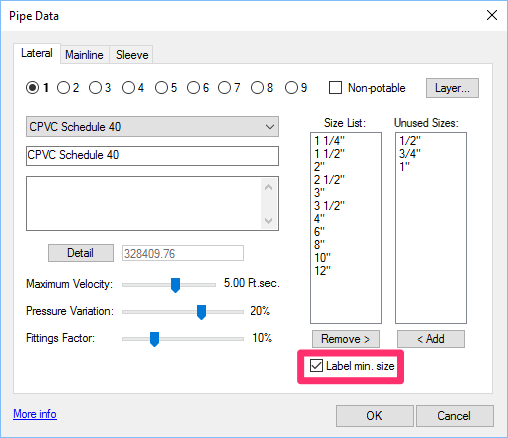
If you check this box, the minimum sized will be labeled in your drawing.
When this option is checked, many of the minimum sized pipes will be labeled, but you'll still need to review the callouts and add or delete them as necessary.
Leaving this box unchecked will have the following results:
- None of the minimum sized pipes will be labeled.
- You'll have fewer size callouts to deal with and clean up.
- A note similar to the text shown below will be added to the pipe description in the Irrigation Schedule (as in the image below).

Size List/Unused Sizes (Lateral Pipe)
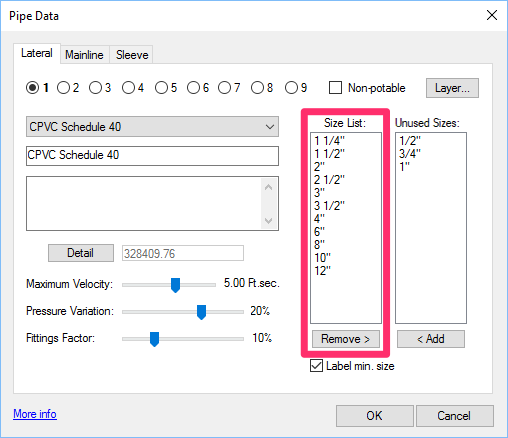
The Size List displays all lateral pipe sizes that are currently part of your project for the selected class.
Highlight a pipe size and click Remove to remove that size from your project. That size will be moved to the Unused Sizes list (see below).
The Unused Sizes list displays all pipe sizes that are available within the selected class but aren't currently part of your project (i.e., unused).
Highlight a size and click Add to add that size to your project. That size will be moved to the Size List (see above).

Mainline Pipe Data
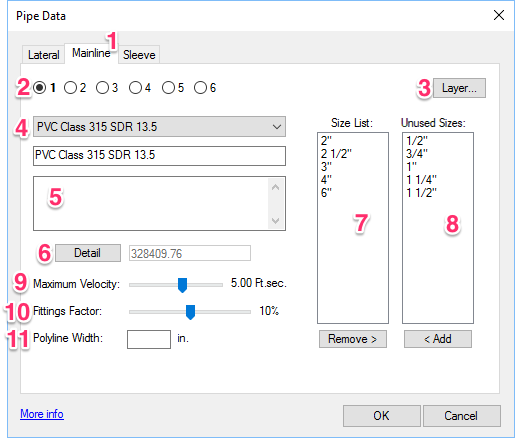
1. Select the Mainline tab to specify the mainline pipe classes you'll use in your project.
2. You can use six classes of mainline pipe within any one design. When you draw the pipe, you can toggle between the mainline classes you defined for your project. As long as you set up your classes correctly, the system will automatically assign each of your mainline classes to the correct pipe size in your drawing. More information
3. (optional) click Layer to set the layer where your mainline pipe will be placed.
4. Select Mainline Pipe class from this menu.
5. (optional) type a description for the selected mainline pipe class in this text field.
6. (optional) select a detail to associate with your mainline. This detail will be referenced in the Irrigation Schedule.
7. The Size List includes all sizes of the selected lateral pipe class that are part of your project. You can remove any of these sizes from your project for easier toggling by highlighting that size and clicking the Remove button.
8. The Unused Sizes list includes all sizes for the selected pipe class that are available but that are not part of your project (i.e., unused). You can add any of these sizes to your project by highlighting that size and clicking Add.
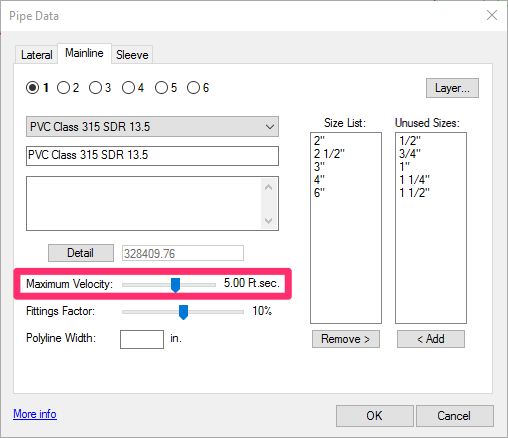
9. Maximum Velocity: Use this slide to set a maximum velocity that will apply once the mainline is sized.
10. Use this slide to set a Fittings Factor.
11. (optional) Type a Polyline Width for the selected type of mainline pipe.
Ready to start drawing mainline pipe?
See our Mainline Piping documentation for information and instructions.
Mainline Pipe Class
Use this menu to select a mainline pipe class to use in your project.
You can use up to 6 mainline classes in each of your projects.

We've removed the "combination" classes, with a much-needed improvement in how the different pipe classes work with pipe sizing. The system will automatically move pipe to the appropriate layer when it sizes, which gives you more control with which classes are used and at which size the transition occurs. You can also now achieve exact quantities by class of pipe. Just make sure to set up your classes from smallest to largest.
The old classes will remain in your past projects only until you go into the Pipe Data dialog box. Once you're here, the system will need to validate the pipe types being used and will refresh the pipe lists to what is available.
If the system cannot find an exact match in pipe classes (that is, you were using the combination classes), it will default to the first pipe class in the list. So you will need to make sure it is properly set to your desired class.
More information about using multiple pipe classes in your designs

As with your lateral pipe classes, the pipe classes you see in the menu will depend on what's currently selected in the Pipe Classes menu within the Irrigation Preferences.
Maximum Velocity (Mainline)
Use this slide to set a maximum velocity that will apply once the mainline is sized.
Fittings Factor (Mainline)
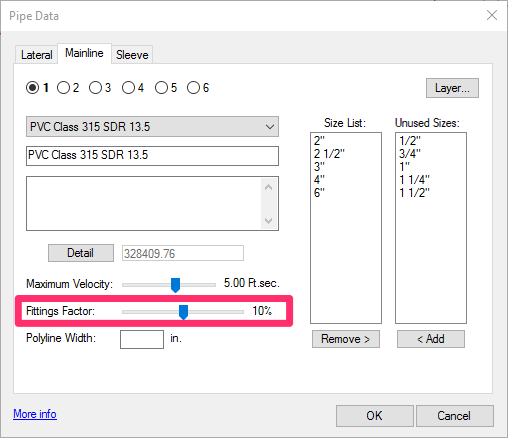
The Fittings Factor is a percentage of the total pressure loss through a length of mainline pipe to compensate for fitting loss, field piping variations, and factor of safety.
You can use the slide to set a percentage variation between 0 and 20%, with a default of 10%. (For example, if you set a 10% factor, the system will add 10% to the loss through the lateral pipe.)
Size List/Unused Sizes (Mainline Pipe)
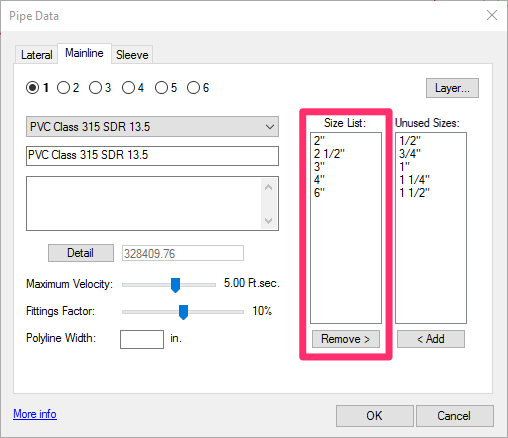
The Size List displays all mainline pipe sizes that are currently part of your project.
Highlight a pipe size and click Remove to remove that size from your project. That size will be moved to the Unused Sizes list (see below).
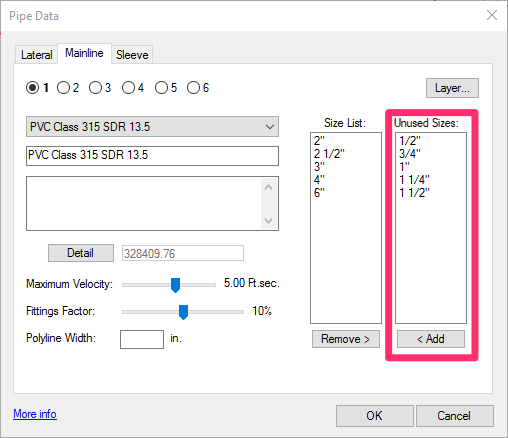
The Unused Sizes list displays all pipe sizes that are available within the selected mainline class but aren't currently part of your project (i.e., unused).
Highlight a size and click Add to add that size to your project. That size will be moved to the Size List (see above).
Using Multiple Pipe Classes
The Pipe Data tool allows you to specify up to 9 classes of lateral pipe and 6 classes of mainline in each of your projects. As long as you meet a few specific criteria in setting up your pipe classes, the system will automatically assign each of your classes to the correct size of lateral or mainline pipe.

Pipe Sleeves
The bottom section of the Pipe Data dialog box allows you to adjust the data for pipe sleeves used in your design. Here, you can select a Pipe Sleeve Category and enter text for the Irrigation Schedule that will describe your pipe sleeves.
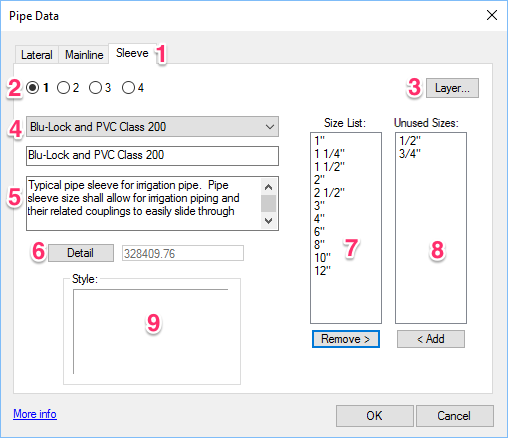
1. Select the Sleeve tab to specify your pipe sleeves.
2. You can use up to four types of pipe sleeve within any one design. When you draw the pipe sleeve, you can toggle between the types of sleeve categories you've defined for your project.
3. (optional) Click Layer to set the layer where your pipe sleeve will be placed.
4. Select a pipe sleeve category from this menu.
5. This text field will autopopulate with a description of the selected sleeve type. You're free to edit this text to your liking.
6. (optional) Select a detail to represent the pipe sleeve. This detail will be referenced in the Irrigation Schedule.
7. The Size List includes all sizes of the selected pipe sleeve type that are part of your project. You can remove any of these sizes from your project for easier toggling by highlighting that size and clicking Remove.
8. The Unused Sizes list includes all sizes for the selected pipe sleeve type that are available but that are not part of your project (i.e., unused). You can add any of these sizes to your project by highlighting that size and clicking Add.
9. Click this thumbnail to display all possible pipe sleeve styles, allowing you to assign a style to each sleeve type you specify.
Pipe Sleeve Styles
Here are the pipe sleeve styles that show up when you click the Style thumbnail (#9 in the Pipe Sleeve Data section above).
Click a sleeve style to use that style for your pipe sleeves.

Applying the Current Pipe Data Settings as the Default
Once you've configured your Pipe Data the way you want it, you can apply those settings as the defaults under the active Preference Set in the Irrigation Preferences. You can also create different defaults for different Preference Sets.
For specific instructions, see the Pipe Data Defaults section of our Irrigation Preferences documentation.
Related Webinars
- Understanding Pressure and Flow: Learn the differences between static and dynamic pressure, how specific equipment types affect that pressure, how flow affects pipe sizing, and what to consider when dealing with pressure issues both before and after installation. (1 hr 4 min)
- Getting Started with Irrigation F/X: This tour and tutorial will help you make the most of everything Irrigation F/X has to offer. We start with the fundamentals, such as how to set up your projects and Preferences, before diving into our collection of time-saving irrigation design tools. (59 min)
- Irrigation Tools – What You Need to Know: We'll show you the ins and outs of basic irrigation setup using our software. (1 hr 6 min)
Troubleshooting
Issue: Your Pipe Data Defaults settings in the Irrigation Preferences aren't saving or sticking
Issue: Your mainline pipe is coming in too thick
Issue: You want to use custom linetypes for different pipe sizes
Issue: The Irrigation Schedule is showing the incorrect pipe class for a pipe sleeve


