The Sheet Index
- Advanced Sheet Index Workflows: Integrating the CAD Sheet Set Manager
- Sheet Index Overview
- Opening a Sheet
- Creating a New Sheet
- Editing a Sheet
- Reordering Your Sheets
- Deleting a Sheet
- Assigning a Sheet to a Layout Tab
- Generating a Sheet Schedule (Legend)
- Importing Standard Sheets into a Land F/X Project
- Related Webinars
- Troubleshooting
Using our Sheet index, you can easily organize, edit, and add to the sheets associated with each Layout tab in your drawing – including your detail sheets.
Remember to keep each of your sheets in its own drawing. Why? Standard CAD practices include using the WBLOCK command to clean each drawing you receive from others. This command is included in our Nuke tool, which cleans drawings with one click. For the cleanup process to work correctly, each of your sheets needs to be in a different drawing.
You only need to use the Sheet Index while placing details. When you do so, the system will prompt you to select the sheet number associated with the current Layout tab. You can use the Sheet Index to set the sheet ahead of time, or to make changes such as reassigning sheets. If you use AutoCAD SheetSets, the Sheet Index will automatically read that information and populate the sheet list for you.
Advanced Sheet Index Workflows: Integrating the CAD Sheet Set Manager
Although many Land F/X users simply use the Sheet Index to manage their details, we've found that some users also integrate the CAD Sheet Set Manager in organizing and working with their sheets. See our Advanced Sheet Index Workflows: Integrating the CAD Sheet Set Manager documentation for more information and instructions.
Are you working with attributes in your layout or title block to automate items such as your sheet number? If so, we recommend using the CAD Sheet Set Manager to start auto-generating sheets in your Sheet Index using one of the workflows in the article linked above.
Sheet Index Overview
To work with the data associated with a sheet, open the Project Manager for your project while that sheet's Layout tab is open.
Open the Project Manager:

F/X Admin ribbon, Project Manager button
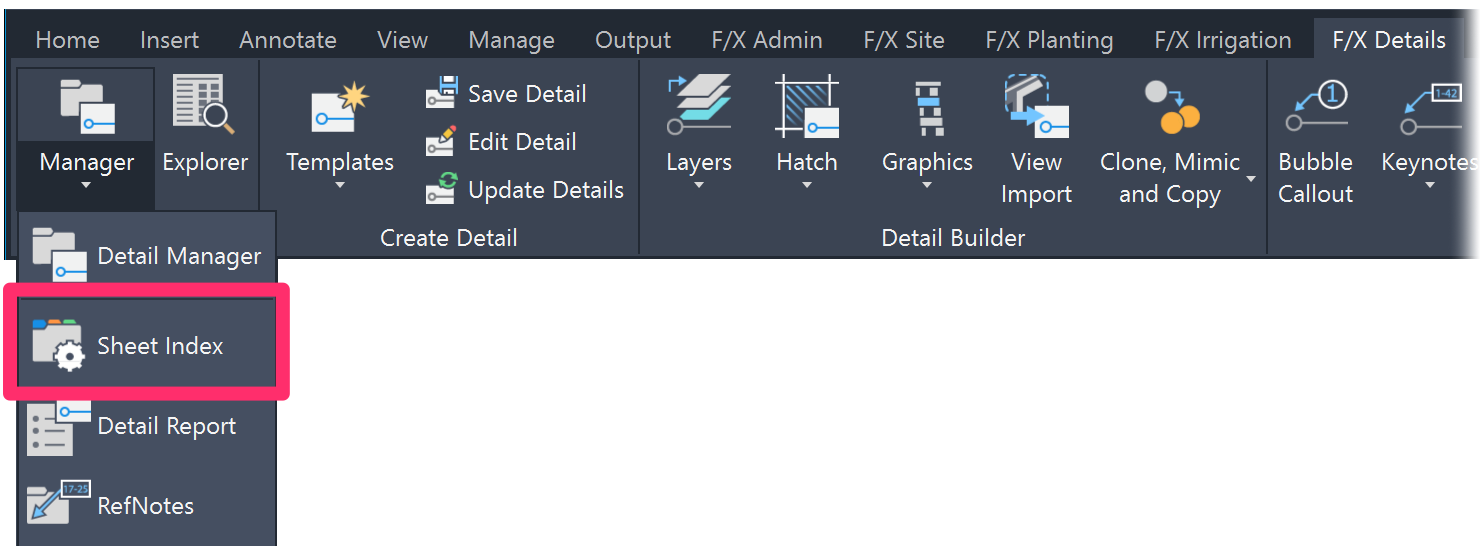
F/X Details ribbon, Sheet Index flyout
or type ProjectManager in the Command line
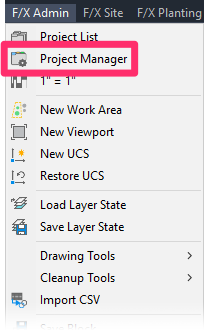
F/X Admin pull-down menu
Once you've set the current project, the Project Manager option on this menu will change to the name of the project, as pictured to the right.
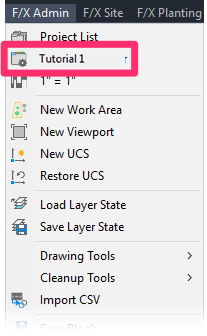
The Project Manager includes the Sheet Index for your project.
The Sheet Index will list the sheet numbers and title for any Layout tabs (Paper Space) in your project to which you have assigned sheets. Here, you can make several edits to the current project's sheets.
The Project Manager is your mission control center for your Land F/X projects, providing several useful capabilities in addition to the Sheet Index. For more information, see our Project Manager documentation.

Opening a Sheet

To open the drawing (DWG file) associated with a sheet, highlight that sheet in the Sheet Index and click Open.
Creating a New Sheet
To create a new sheet, click New.


The Sheet Information dialog box will open. All fields will be blank.
Give the new sheet a Sheet number and Sheet title in the appropriate fields.
In our example, we'll give our sheet the number L-204 and the name Example.

Renaming Layout Tabs
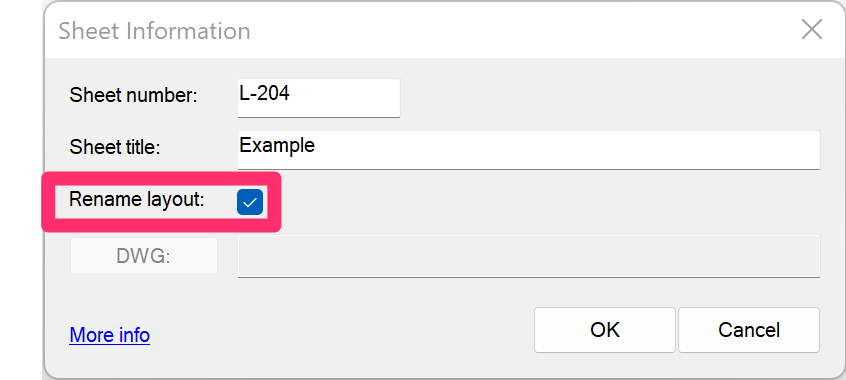
When creating a sheet, you can also choose to rename the Paper Space layout tab you'll assign to the new sheet. Check the Rename layout box when creating your sheet.
After you assign a layout tab to that sheet, the tab will be renamed with that sheet's sheet number.


Once you've given the new sheet a number and title, click OK.
The new sheet will now appear in the Sheet Index.
Note that the new sheet will not yet have a drawing assigned to it.
At this point, you'll need to assign a DWG file (drawing) to the new sheet. This will tell the system that the sheet contains the linework from that drawing. For detailed instructions, see the Editing a Sheet and Changing a Sheet's DWG sections below.
Editing a Sheet
If you want to change a sheet's information, highlight the sheet and click Edit.

The Sheet Information dialog box will open.

1. Sheet number: Change this to a number of your choice. The system will not let you change this to a sheet number that is already taken in the project.
2. Sheet title: Edit or change as desired.
3. Rename layout: Check this box to rename the Paper Space layout tab associated with this sheet. If you've already assigned a layout tab to the sheet, it will be renamed immediately based on the sheet number. You can also assign a tab to the sheet later. If you've checked this box, the sheet will be renamed when you assign it.
4. DWG: This field shows the location on your computer or server where the drawing associated with the selected sheet is stored. See Changing a Sheet's DWG below
Changing a Sheet's DWG
The field to the right of the DWG button in the Sheet Information dialog box shows the path to the file containing the drawing that is associated with the selected sheet.
To associate the sheet with a new drawing file (DWG), click DWG.


You'll now see the dialog box pictured to the left. Here, you can browse to a DWG to associate with this sheet.
Select the file, then click Open.
The DWG you selected will now be associated with the selected sheet, and the file path to that DWG will now appear in the field to the right of the DWG button in the Sheet Information dialog box.
Renumbering a Sheet
When you place details into a Layout tab, you'll be required to give that Layout tab a sheet number. You may want to change this sheet number.
You DO NOT HAVE TO create a sheet number for every sheet Layout tab in your project. You DO HAVE TO create and assign a sheet number for a Layout tab when you place a detail into that Layout tab. This is because the system needs to know the specific sheet number of your drawing that is assigned to this Layout tab.
It could be that the only sheets listed in your Sheet Index are those that have details placed in them. However, you may elect to create sheets and assign them to various Layout tabs to help you organize your project. If you did so, two other buttons in the Project Manager Sheet Index may be of importance: Open to open the CAD drawing of a highlighted sheet in the Sheet Index, and Legend to quickly place a Sheet Legend (schedule) of all your sheets into a CAD drawing.
Reordering Your Sheets
We've added the capability to reorder your sheets in the Details Preferences. Information and instructions
Deleting a Sheet
To delete a sheet from your project, highlight that sheet and click the Delete button in the Project Manager.


You'll be asked whether you wish to delete the sheet from your project.
Click Yes to delete the sheet from your project.
Click No to retain the sheet in your project and return to the Project Manager.
Deleting a Sheet That Includes Details
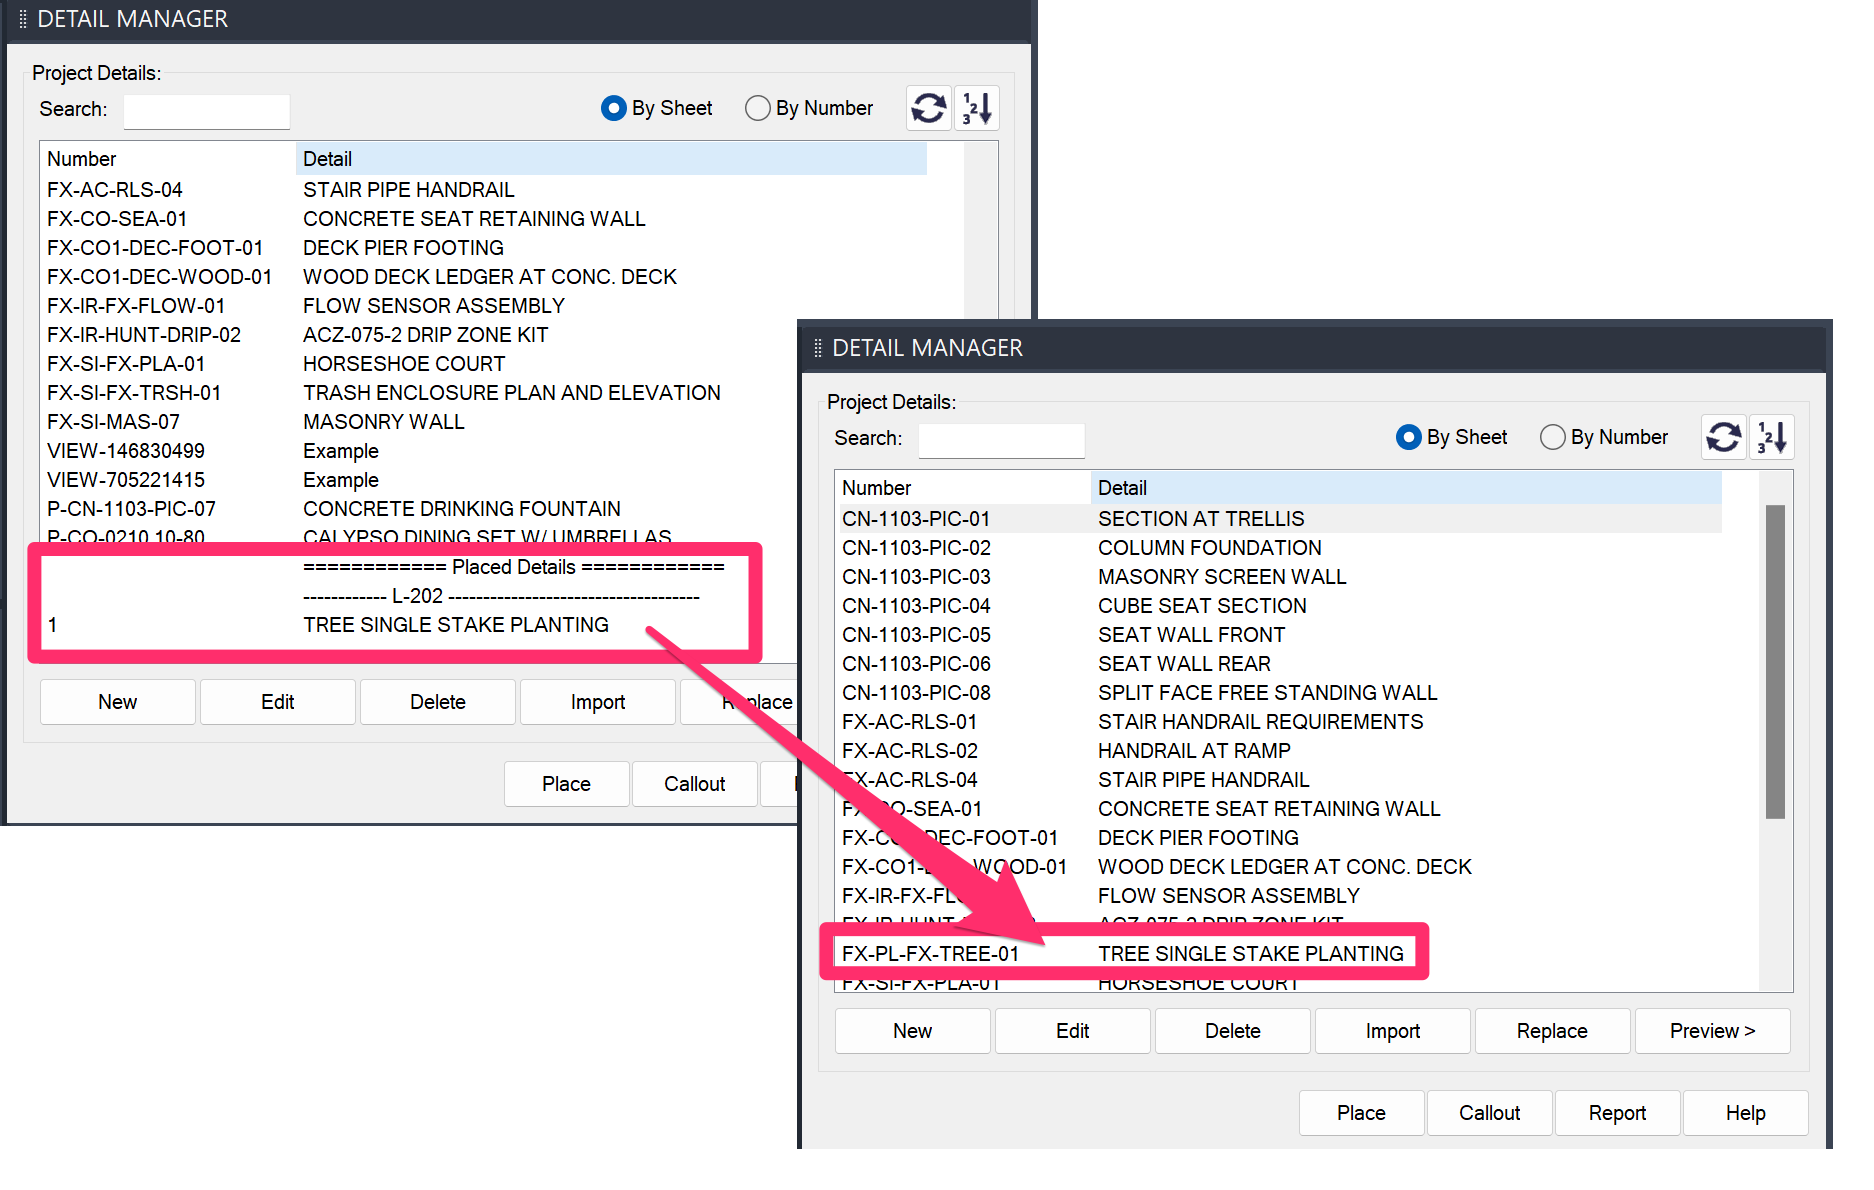
If you delete a sheet where you've already placed details, those details will be marked as unplaced.
That means they'll move automatically from the Placed Details list in the Detail Manager back up to the list of unplaced details.
Assigning a Sheet to a Layout Tab
To assign a sheet to a layout tab, highlight that sheet in the Sheet Index, then click the Assign button.
You can then select a layout tab for the sheet in the Select Layout dialog box.
In this example, we'll assign the sheet L101 – Detail Site Plan to a layout tab by highlighting it in the Sheet Index and clicking Assign.


The Select Layout dialog box for the selected sheet will open.
We can then assign a layout tab (example: Layout1) to our sheet by highlighting the layout tab in the list and then clicking OK.
The sheet will now be associated with the selected layout tab.

If you selected the Rename layout option when creating the sheet you're currently assigning to a layout tab, that layout tab will be renamed automatically to that sheet's sheet number.

You can also rename a layout tab to a sheet's number after assigning it. Just edit the sheet and make sure the Rename layout box is checked.

When assigning a sheet to a layout tab, you might see a message that the sheet you selected is already associated with another tab. If you'd like to assign the sheet to another tab, click Yes. Otherwise, click No to maintain the original association.
Generating a Sheet Schedule (Legend)

You can create a legend, or schedule, of all sheets associated with a project, and then place that legend in the drawing.
To do so, click the Legend button in the Sheet Index.
The Sheet Index Schedule is now powered by our Reference Notes (RefNotes) Schedule feature, which we improved with some major updates as of August 2024. More information
You'll now see a dialog box where you can select a Destination for the schedule (legend).
The Destination section of the Sheet Index dialog box includes several options for how and where you want to place or send your schedule.
- Table: Place the schedule in your drawing as a table.
- Gridlines non-plot: Check this option if you want the lines separating the table cells to be non-plot. Uncheck this option if you want the table lines to plot.
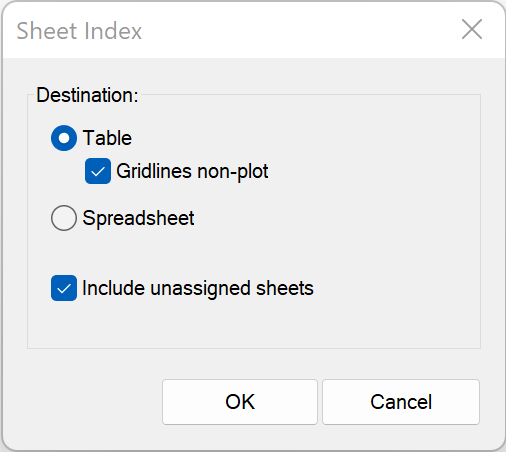
We've replaced the Drawing and Table options with this single Table option and the Gridlines non-plot checkbox. If you select Gridlines non-plot, the schedule will place with gray gridlines that will not show up when you plot your drawing (essentially the same as the former Drawing option). Deselecting this option will result in a schedule placing as a table with gridlines set to plot (essentially the same as the original Table option). This updated system allows you to edit your schedules much more easily.
- Spreadsheet: Export the schedule to a spreadsheet program such as MS Excel.
You can also choose to select or deselect the option to Include unassigned sheets in the schedule.
If you chose to place the schedule as a table in your drawing, the AutoCAD Command line will prompt:
Upper left corner.
Click to place the schedule. Here's an example:

The Sheet Index Legend sorts your sheets automatically. To reorganize it in a different way, select the Spreadsheet option when creating a legend. You can then reorder the legend in the spreadsheet. We have a pending wishlist item to allow custom ordering of the sheets.
Importing Standard Sheets into a Land F/X Project
If you find yourself using the same sheets from job to job, we recommend using our Template tool to import your standard sheets into each new project you start.
First, open a project that includes your standard sheets, or create a new project and add your standard sheets using the Sheet Index. You don't need to associate the sheets with any particular DWG file.
Once you've added all your sheets, save that project as a template.

Then create a project based on the template you've just saved.
Make sure the Sheets option is checked when you create the project.
This method is currently the only way to import sheets into your Land F/X projects. In general, we suggest creating a new project and then importing objects such as plants and details from a template into that project – mainly because it allows you to refine your palette for each project. Although we've retained the additional checkboxes for users who are accustomed to this older method of importing, we recommend only checking the Sheets option to import your sheets at this point, and then following our steps to import any additional needed objects from a template.
The sheets will be imported into the project you created based on the template.
Note that each sheet will be disassociated with the DWG it was originally associated with in the template.
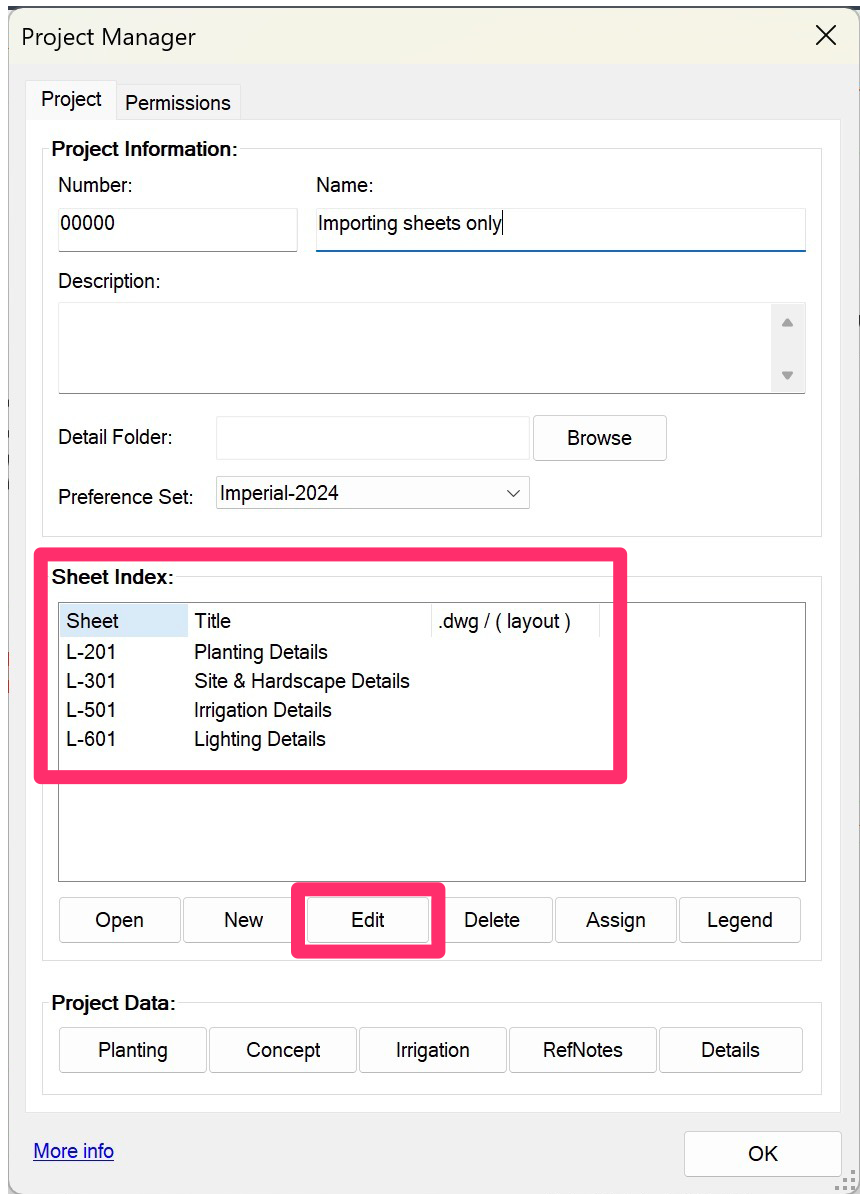
To associate an imported sheet with a DWG included in this drawing set, or add any other necessary information to that sheet, click Edit and follow our steps to edit that sheet.
Related Webinars
- Sheet Set Manager and Land F/X: The AutoCAD Sheet Set Manager provides a fantastic method for coordinating large drawing packages with multiple DWG files. The Sheet Index, available within the Land F/X Project Manager, is another incredibly easy-to-use tool for organizing your drawing sheets. We'll cover the specific roles played by each, then show you how to set them up for best use with your Land F/X projects. (1 hr 7 min)
- Details for Beginners: Take a full tour of our detail system, where you’ll learn how to navigate our detail library, find the details you need, and use them in your drawing set. (1 hr 1 min)
- Sheet Setup and Management: We explore the Sheet Index and demonstrate our recommended setup process for maximum organization and efficiency, including creating a separate DWG for each layout and title block, and Xrefing your main drawing into sheet files. (1 hr)
Troubleshooting
Issue: Sheets Are Being Added to the Index Autonomously, Even Though They Have Been Deleted
Issue: Sheet (sheet number) is already associated with layout tab (layout tab number)
Issue: You are unable to create a project-specific folder from the Sheet Index
Issue: (Sheet Number) is Already Associated with Another Drawing (Opening the Project Manager)
Issue: You want to advance a project into a new phase (e.g., permitting to construction)
Issue: One or more of your sheet numbers are showing the text pxql;, pxqc;, or pxqr; in their titles
Issue: Error: 'bad xsubr(L) instruction (offs code) when working with the Sheet Index


