The Project Manager
Quick video
- Project Manager Overview
- Renumbering or Renaming a Project
- The Sheet Index
- Working With AutoCAD Sheet Sets
- Associating a Project With a Detail Folder Location
- Disassociating a Drawing With a Project
- Related Webinars
- Troubleshooting
Our Project Manager stores the important details of your project, including your plant palettes and equuipment and amenity inventories, in one central location from within AutoCAD.
Note: Our Project Manager allows you to view and edit information about existing Land F/X projects. Prior to working with the Project Manager, you must either start a new project or open an existing one. For more information, visit our Create a New Project or Open an Existing Project documentation section.
Project Manager Overview
Open the Project Manager:

F/X Admin ribbon, Project Manager button

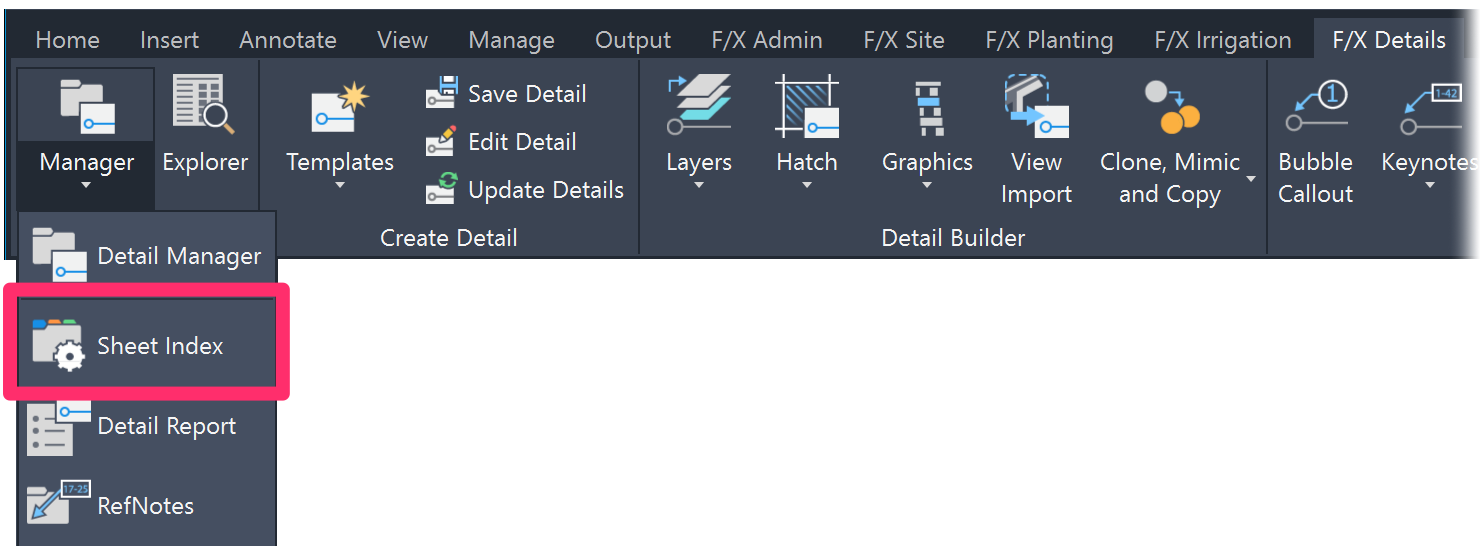
F/X Details ribbon, Sheet Index flyout
or type ProjectManager in the Command line

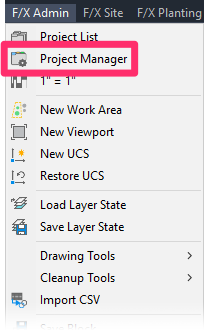
F/X Admin pull-down menu
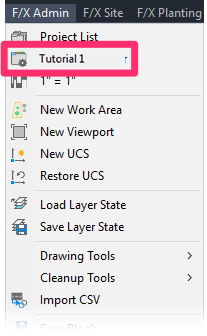
Once you've set the current project, the Project Manager option on this menu will change to the name of the project, as pictured to the right.

The Project Manager is the main dialog box for a specific project, where you can get a quick overview of the project and access the data associated with it. Note that the Project Manager now includes two tabs: Project and Permissions.
Project Tab

1. Select the Project tab to view the information listed below about naming and configuring the project.
2. Project Number: Must be unique for each project.
3. Project Name: Not required to be unique.
4. Project Description: If you want, type a more detailed description of the project here.
5. Detail Folder: Set the location of the folder that will contain details from the current project. Once you've assigned a detail folder, you'll see a Remove button to the right, which you can use to remove the detail folder from the project.
6. The Preference Set currently selected for this project. If you want, you can use this menu to set a new Preference Set for this project.
7. Sheet Index: This list shows drawings to which you have assigned sheets.
8. Selections for sheet name and numbers: Open, New, Edit, Delete, Assign, Legend
9. Project Data buttons to open each of the following managers:
- Planting(Plant Manager)
- Concept (Concept Manager
- Irrigation (Irrigation Manager)
- Ref Notes (Reference Notes Manager)
- Details (Detail Manager)
Permissions Tab

1. Mark this project as Read/Write. All users throughout your office will be able to make changes to the project, such as adding or editing plants.
Projects are set to Read/Write by default. Most offices won't have the need to change this status.
2. Mark this project as Read-Only. Once a project is marked Read-Only, no users in your office will be able to make changes to it. See our Read-Only Projects page.
Placed/Unplaced status of plants, Reference Notes, irrigation components, and other objects will still update as users place them.
3. Make this project Read-Only by user. For example, if you only want project managers to be able to make changes to the project, you can make the project Read-Only for everyone but the project managers. For more information, see our Read-Only projects page.
Are you unable to change the administrator of a project because the person currently set as the administrator is no longer with your firm, or you no longer have access to his or her computer? Here's what to do.
Renumbering or Renaming a Project
You are free to renumber and/or rename your projects as necessary using the Project Manager. If you want to rename a project, keep in mind the following:
- Each project number has to be unique. You could potentially have several projects with the same name, but each of those projects would need to have its own unique project number.
- If you want to base a new project on an existing project, remember to use Project Templates. Don't just open an existing project and save it under a new name with the intent of making changes. This practice can cause any number of problems with your project.
Associating a Project With a Detail Folder Location
The Project Manager allows you to specify a folder where details used in the current project will be saved and stored. Once you've specified this folder, you can use the Detail Explorer to add details directly to the project by dragging and dropping.
To set the detail folder for your project, open the Project Manager and click Browse.

You'll now see the Select detail folder for your project dialog box – essentially an abbreviated version of the Detail Explorer. At this point, you can either select an existing detail folder for your project or create a new one.
Selecting an Existing Folder

To select an existing folder, highlight it and click OK.
Creating a New Folder
To create a new folder, select the detail folder where you want to create your new folder, then click New.


You can now type a Name and Code for the new detail folder.
Once you've either selected or created your detail folder, the folder path will appear in the Detail Folder field in the Project Manager.
Now when you drag and drop details to this location, or to any subcategory location under this one, the detail will be added to the project automatically.
You'll also see a Remove button, which you can click to remove the association between the detail folder and this project.

You can always click Browse to change this folder setting as needed. However, this feature has a couple of limitations:
- You cannot simply disassociate a detail folder from a project. Instead, you need to assign it to another folder.
- You cannot set a detail folder to a subfolder within another project's detail folder.
The organizational structure of your detail categories and the corresponding folders will depend on your preferences or office standards. For more information on detail categories, visit our Creating a Detail New Category documentation.
The Sheet Index
You can develop the Sheet Index listing when you first start the project, or as the project develops. With the Sheet Index:
- Details entered onto specific sheets will be automatically referenced throughout the project.
- You can open a sheet drawing from this dialog box immediately by double-clicking the sheet number.
- The staff project manager can quickly lay out the extent of the drawings. The extent and scope of the project drawings is communicated as an aid to project staff as well as new staff to the project.
Assigning a specific sheet number to a single DWG is not necessary for most functions of our software, and can be quite convenient. This becomes most important when place details, as they require a reference to a detail number on a specific sheet number. For more detailed information, see our Sheet Index page.
Working With AutoCAD Sheet Sets
Our software allows you to use AutoCAD Sheet Sets to establish and maintain your sheets. For more information, see our Working With Sheet Sets page.
Disassociating a Drawing With a Project
In some cases, a drawing may become locked into a project, so to speak. If you need to, you can follow our steps to disassociate a project with a drawing.
Related Webinars
- Sheet Set Manager and Land F/X: The AutoCAD Sheet Set Manager provides a fantastic method for coordinating large drawing packages with multiple DWG files. The Sheet Index, available within the Land F/X Project Manager, is another incredibly easy-to-use tool for organizing your drawing sheets. We'll cover the specific roles played by each, then show you how to set them up for best use with your Land F/X projects. (1 hr 7 min)
- Land F/X Admin & Setup: This webinar will show you what you need to know about Land F/X admin processes and project setup. (1 hr 1 min)
Troubleshooting
Issue: Disassociate or remove a detail folder from a project or detail category
Issue: You are unable to create a project-specific folder from the Sheet Index
Issue: (Sheet Number) is Already Associated with Another Drawing (Opening the Project Manager)
Issue: You want to advance a project into a new phase (e.g., permitting to construction)


