Customize Our Default Text Styles
Quick video
- The Two Versions of the Text Manager
- Customizing Our Text Styles
- CAD & Font Files
- Placing Text in Your Drawing
- Creating a New Text Style
- Reload (Update) All Text Styles
- A Note on the Concept Schedule Text Style (Discontinued March 2019)
- Print Preferences
- Related Webinars
- Troubleshooting
Our software includes a system of default Text Styles. Each Text Style is automatically assigned to one or more specific types of text placed in your drawings by one of our features such as labeling plants or placing a Spot Elevation. (For example, our Plant Callout text style controls the appearance of the plant code and count in your plant labels.) Although we have taken care to set a logical font and point size for each of the default Text Styles, you're free to customize them to match your standards.
For detailed information on our Text Styles, please see our Text Style System documentation page. That page also includes a list of all the default Text Styles, which identifies the types of text controlled by each style.
The Two Versions of the Text Manager
You can customize our Text Styles from the Text Manager, accessed from either the General Preferences or our Text tool.
The General Preferences and Text tool call up slightly different versions of the Text Manager, as described below. Both versions allow you to edit the default Text Styles.
General Preferences
Our the General Preferences screen includes a Text Styles section that lists all our default Text Styles. You can customize your Text Styles for your Preference Sets from here.
Open the General Preferences screen:

F/X Admin ribbon
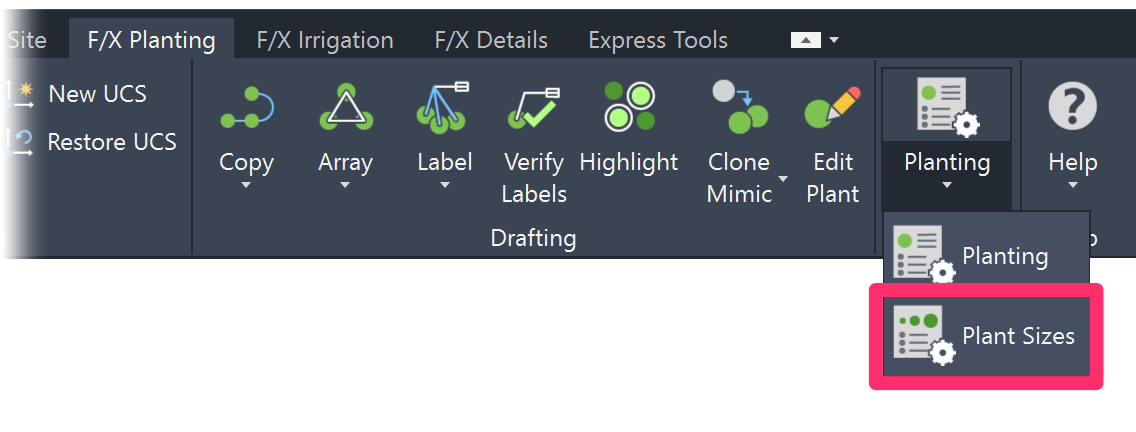
Preferences flyout buttons on any of the other F/X ribbons
or type *FXPreferences in the Command line

Any of the F/X pull-down menus
(F/X Admin, F/X Site, F/X Planting, F/X Irrigation, or F/X Details)
The Preferences screen will open. Select the General tab.
You'll see a Text Styles section in the top right corner of the dialog box that lists our default Text Styles.
To edit one of the Land F/X Text Styles, select it in the list and click Edit.

The Text Manager will open.
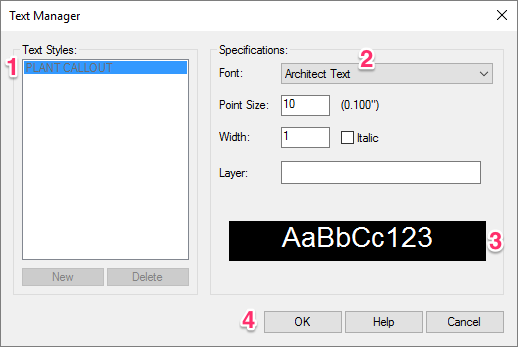
1. The name of the selected Text Style (example: Plant Callout)
2. Specifications: Use these menus and fields to customize the selected text style. For more information, see Customizing Our Text Styles below.
3. Preview of the current specifications of the selected Text Style
4. Click OK to save your changes.
Text Tool
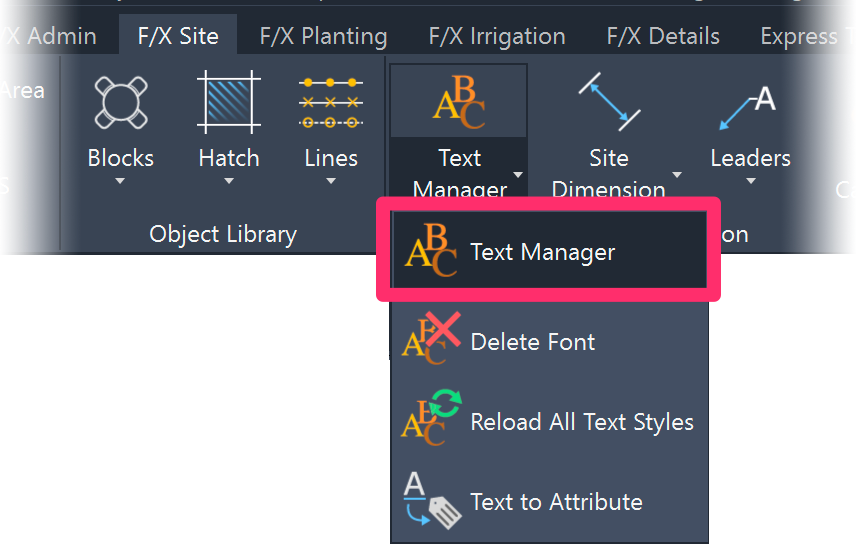
F/X Site ribbon, Text button
or type *FX_Fonts in the Command line
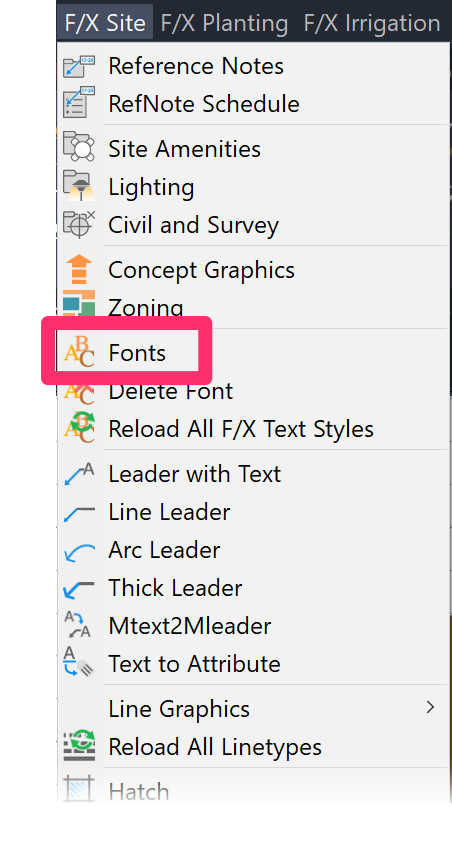
F/X Graphics menu, Fonts button
The Text Manager will open. This version of the Text Manager is slightly different from the version you access from the General Preferences.
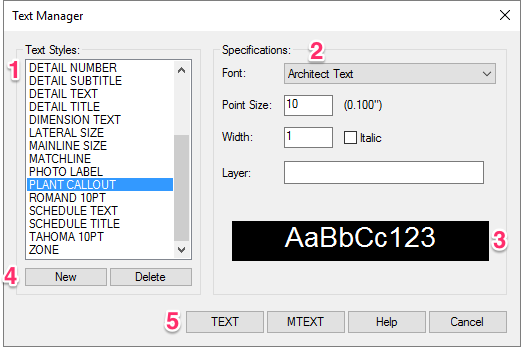
1. A list of all available Text Styles. Select a style from the list to edit it.
2. Specifications: Use these menus and fields to customize the selected text style. For more information, see Customizing Our Text Styles below.
3. Preview of the current specifications of the selected Text Style
4. Buttons to create a New text style and Delete an existing Text Style.
Be careful when deleting Text Styles. Once you delete a style, its settings will be deleted as well.
5. Buttons to place single-line TEXT and multiline text (MTEXT) in your drawing. For details, please see our Placing Text in Your Drawing documentation page.
Why Two Versions?
We purposely engineered two versions of the Text Manager for the following reasons:
- The General Preferences screen is meant to be a location where you only configure your preferences, as opposed to, for example, placing items in the drawing. The Text tool, on the other hand, is a Site tool geared toward placing text in your drawing.
- We wanted to prevent users from accidentally deleting Text Styles or configuring the wrong Text Style from the General Preferences.
- We still wanted to provide the ability to customize the Text Styles using either tool.
Customizing Our Text Styles
To customize one of the Text Styles, select it in the Text Manager and configure the settings in the Specifications section to meet your needs. In the following example, we'll edit the settings of the Callout Light Text Style.
The most common text styles to review early on are the Schedule Text and Schedule Title styles, which control the text for Planting, Irrigation, and Reference Notes Schedules. For detailed information on each of the default text styles, please see our List of Text Styles documentation.
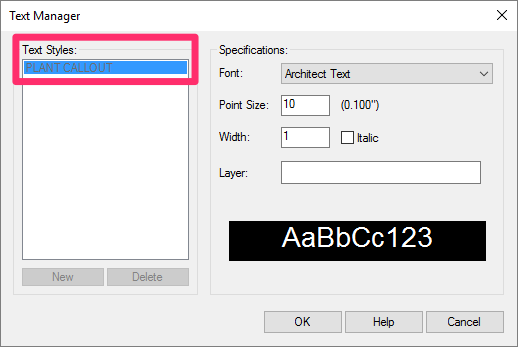
Text Manager as accessed from the General Preferences
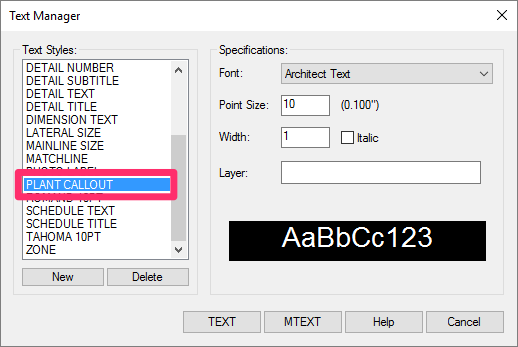
Text Manager as accessed from the Text tool
The screenshots provided below depict the Text Manager as accessed from the General Preferences.
Selecting a Font
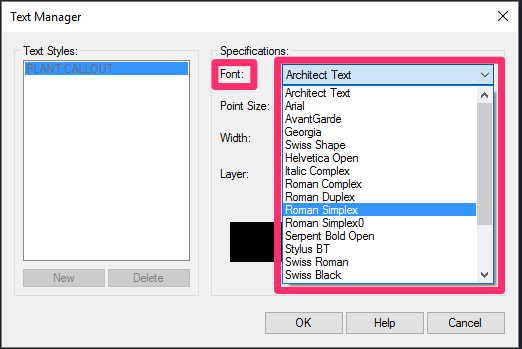
To change the font assigned to the selected Text Style, select a font from the Font menu (example: Roman Simplex).
A note on superscripts (example: m2)
Do you want to include superscripts in one of your Text Styles? For example, do you want square meters in your plant labels to display as m2 instead of sq.m.? Note that not all SHX fonts allow for superscripts, so the system checks whether your chosen font is SHX (.shx) or TrueType (TTF or .ttf), and displays as m^2 or sq.m. accordingly. To ensure the font assigned to a particular Text Style displays superscripts, switch to a TTF font. In the case of plant labels, you'd select a TTF font for the Plant Callout style.
Adding a New Font to the Menu

Want to use a font that isn't included in the menu?
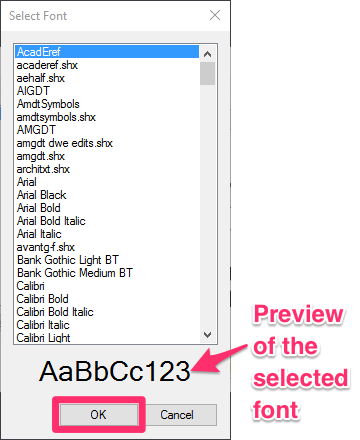
You can add a new font by selecting the <Add New> option at the bottom of the Font menu.
The Select Font dialog box will open.
Select your desired font from the menu.
The large letters near the bottom of this dialog box provide a preview of the selected font.
Click OK to add the new font to the Font menu in the Text Manager.
Don't see your desired font here? See the Font Files section below.
Selecting a Point Size
Our software measures text size in points.
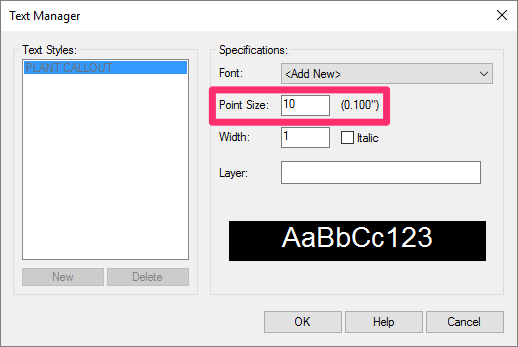
Type a value in the Point Size field.
Assume about 0.01 inch, or 0.25 mm, per point.
Text Styles are scaled so that the text will appear the same size when printing when placed in Model Space or Paper Space. Our Scale feature controls the scale of your text, so a 10-point font will automatically be scaled properly in Model Space or Paper Space to plot at 10-point size.
Width, Italic, and Layer Settings
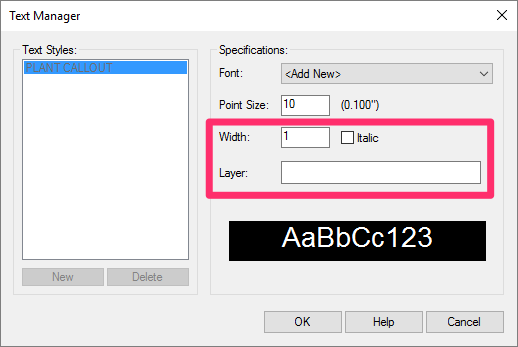
Width: Entering a number in this field assigns the Text Style with a width relative to its height. (The default setting of 1 results in text with proportionate width and height.)
Italic: Option to place the selected Text Style in italics
Layer: Option to enter a layer name, which will result in the Text Style always being placed in that layer. (The layer will be created automatically if it doesn't yet exist in the current drawing.)
CAD & Font Files
You can add Windows TrueType (TTF) fonts or AutoCAD-compatible SHX fonts to our database of fonts.
Are you planning to use Open Type Fonts (OTF)?
Unfortunately, OTF fonts do not function properly with AutoCAD. To check whether you have OTF fonts on your computer, ensure that your file extensions are visible, then check for fonts with a .otf extension in the location C/:Windows/Fonts (see image below).
If you do in fact have OTF fonts, you'll need to either install the TrueType Font (TTF) version of each OTF, or choose alternative fonts to use in TTF format.
To access a font for any program on your computer, including CAD, you need to have it installed as a font file. In Windows, fonts are stored in the folder C/:Windows/Fonts.
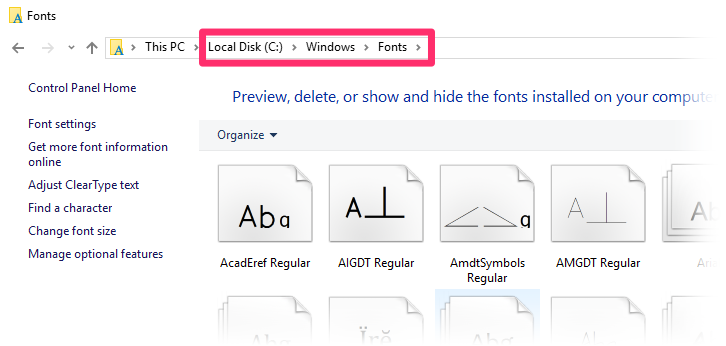
If a specific font isn't available from the Text Manager, check this folder. If you don't see a file with that font's name, you'll need to download the font and install it in this folder.
To install a TrueType font, you'll first need to install the font into Windows. These fonts are usually located in the WINDOWS/Fonts folder (pictured above), but you'll need to copy the font to a different location. From the Fonts Control Panel, you can hold down the "Ctrl" key while dragging the font into a folder on the Windows Desktop, for example.
The SHX fonts may be supplied by AutoCAD. Click Tools/Options/Files/Support File Search Path for the location of AutoCAD fonts. You can also supply these fonts yourself in the folder of your choice.
If the font won't load, put it in the folder LandFX/fonts. You should then be able to see the font in CAD.
Still having issues with fonts? You may be dealing with a corrupt font file.
Creating a New Text Style
For instructions on creating your own new Text Style, see our Creating Text Styles documentation.
Placing Text in Your Drawing
If you need to place text directly in your drawing, you can use our Text tool. For instructions, see our Placing Text in Your Drawing documentation.
Reload (Update) All Text Styles
Our REAT (Reload All Text Styles) tool updates all text in the current drawing to reflect your Text Style settings in the active Preference Set. Learn more about the REAT tool.
We've also added a Text Styles option in our BatchMan batch file processing tool that updates all Text Styles in multiple drawing files to match your default Preference Set.
A Note on the Concept Schedule Text Style (Discontinued March 2019)
We've removed the Concept Schedule style as of March 2019. The Schedule Text style will now apply to Concept Plant Schedule text.
Want to give your Concept Plant Schedules their own text style, separate from the Schedule Text style? Here's how.
We've discontinued the Concept Schedule Text style to simplify and improve several tools. We recommend updating your office's Preference Set standards in accordance with this change, and only using the solution linked above for past projects.
Print Preferences
Did you know you can print out all the Text Styles saved in your Preference Set for quick review and reference? Just use our Print Preferences feature.
Related Webinars
- Making Text Work in CAD: Join us to learn the essentials of how to use letters, numbers, and other characters effectively in CAD, including how to work with Text Styles and the Text Manager. (1 hr 4 min)
Troubleshooting
Issue: Text styles/fonts not displaying correctly
Issue: Schedule Text or Schedule Title is appearing in the wrong font, point size, etc.
Issue: Fonts are replaced by the font Simplex.shx when you open your drawing
Issue: Text is not reflecting the thickness of the layer color in your CTB when you plot


