Planting Preferences
PDF (download & print)
- Do You Work in an Office With Multiple Land F/X Users? Read This First!
- Accessing the Preferences Screen
- Planting Preferences Overview
- Plant Code
- Exclude Shrubs
- Plant Groups (Subcategories)
- Schedule Defaults
- Selecting and Customizing Plant Labels
- Landing Distance
- Set your Preferences for Labeling Concept Plants
- Labels Placed Within a Viewport
- Line Colors and Layers
- Preference Sets
- Other Preferences Categories
- Related Webinars
- Troubleshooting
Our Preferences settings allow you to configure our software quickly to work closer to the way you work. Although we recommend reviewing the Preferences early in the process of using our software, you can make changes to the Preferences at any time.
The Planting Preferences screen includes settings for plant codes, symbols, and labels.
Changing a setting in the Preferences does not affect any existing projects. We engineered this preventive measure to keep users from altering the contents of current projects unintentionally. If you make a change in your Preferences and want to apply it to an existing drawing, you'll need to delete and purge any items that would be affected by the new Preferences settings. When you place these items back in the drawing, the new Preferences will be applied.
Do You Work in an Office With Multiple Land F/X Users? Read This First!
Preferences are saved in what's known as a Preference Set. If you work in an office where multiple people use our software with an office server or shared online folder, it's extremely important to realize that your office's Preference Sets are shared by everyone. That means if you make changes to an active Preference Set, you're making those changes for everyone who uses that Preference Set. Before delving into changing your Preferences, make sure you have a good understanding of what Preference Sets are and how they work.
If you're not sure whether you should be making changes to a Preference Set, ask your CAD manager.
Accessing the Preferences Screen

F/X Admin ribbon
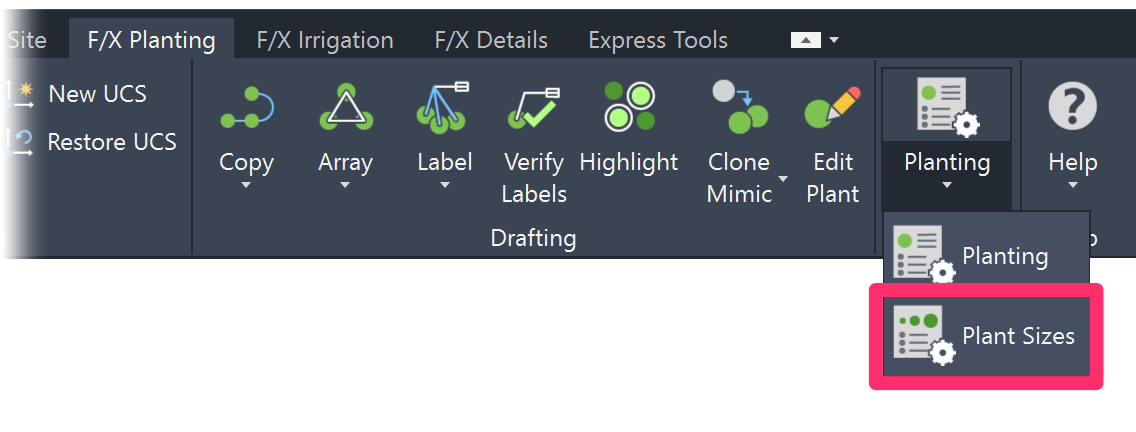
Preferences flyout buttons on any of the other F/X ribbons
or type *FXPreferences in the Command line

Any of the F/X pull-down menus
(F/X Admin, F/X Site, F/X Planting, F/X Irrigation, or F/X Details)
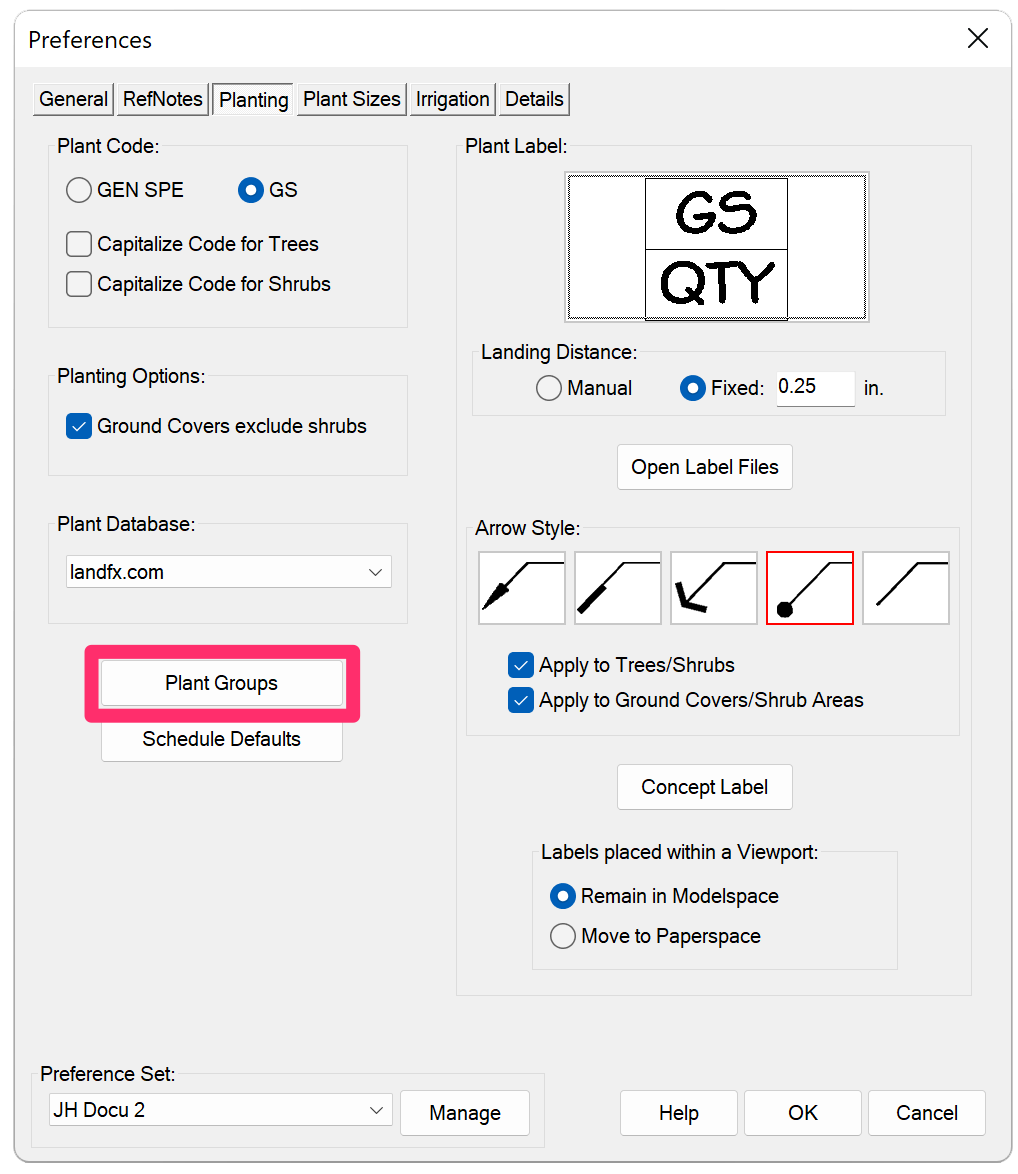
The Preferences screen will open. (See image below.)
Planting Preferences Overview
It's a good idea to set the following planting preferences early in the design process:
- Plant Code: do you want it displayed in GEN SPE (the first three letters of the genus and species) or GS (the first letter of the genus and species)?
- Plant Label: At least review the options and choose one. You can always change your mind when you start to label.
- The Fonts under the General settings for Plant Callout, Schedule Text, and Schedule Title.
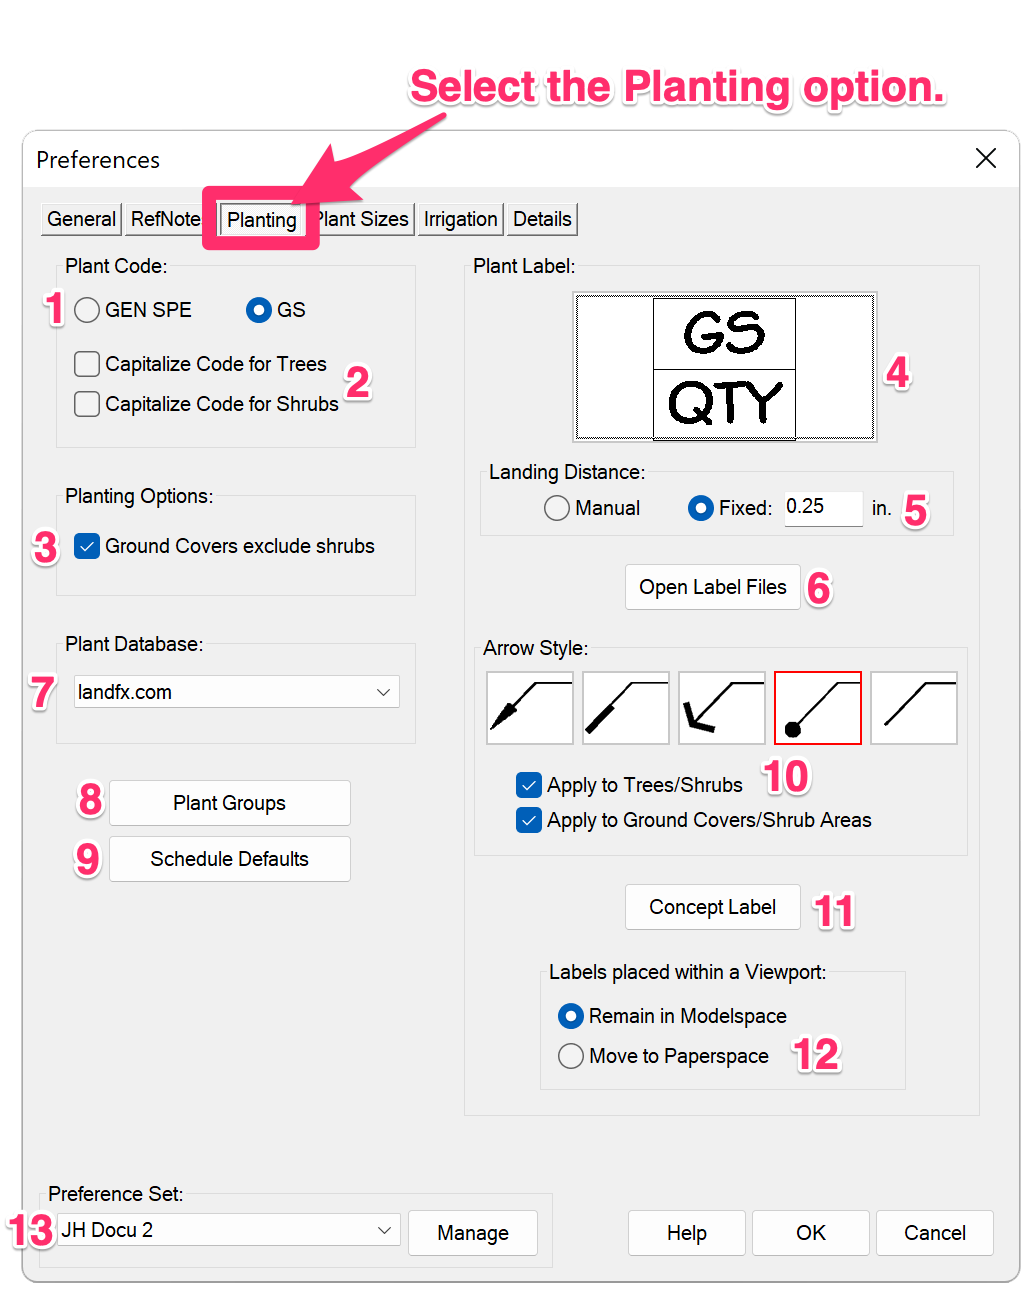
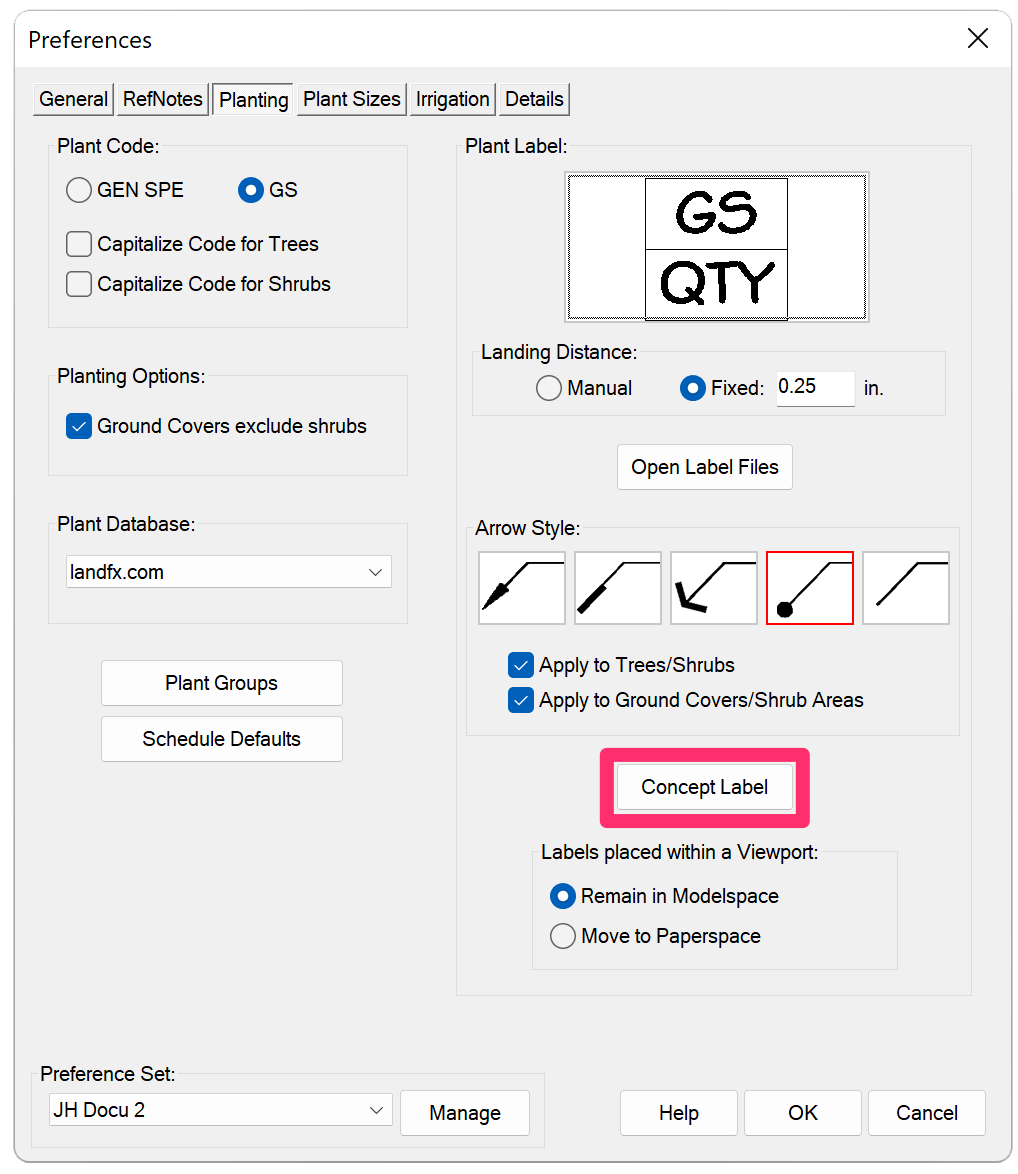
1. Plant Code: Specify the type of Plant Code to be assigned to each plant when it's added to a project. Note that changing this setting won't change the codes for all the plants in your project, so it's important to make this decision at the beginning of your project.
2. Options to capitalize the plant code for trees and/or shrubs.
3. Option to exclude shrubs from groundcover hatches.
4. Plant Label: Click this box to see options for the plant labels. Some label styles are optimized for the GEN SPE style code, while others are optimized for the shorter GS style code. Some use Multileaders (MLeaders), and some use simple blocks. It's up to you to choose a label and a code preference that will work together – ideally, at the beginning stages of a project. Changing a label style will not affect any labels you've already placed in your drawing.
5. Landing Distance: Use these options to control the length of the extension line that connects the label to the leader – aka the landing distance – in labels for both your project plants and Concept Plants.
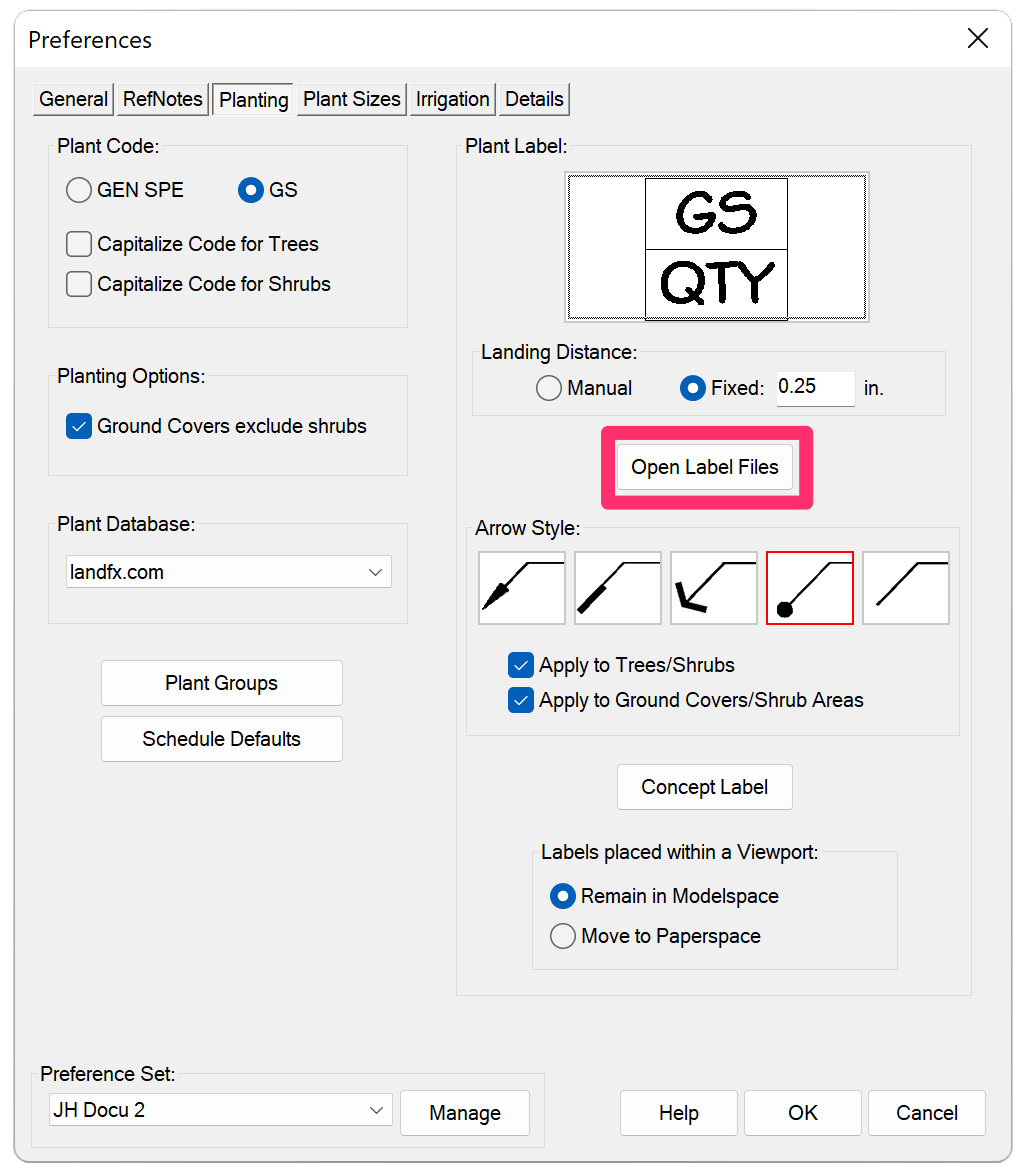
6. Open Label Files: Open the drawings that contain the plant label blocks. You can then edit the labels to your preferences. For more information, see our Edit Plant Labels documentation.
7. Select a plant database to use when adding plants to your projects. You can choose to use our default plant database or PlantFile, an Australia-based online plant database. More information and instructions for using PlantFile
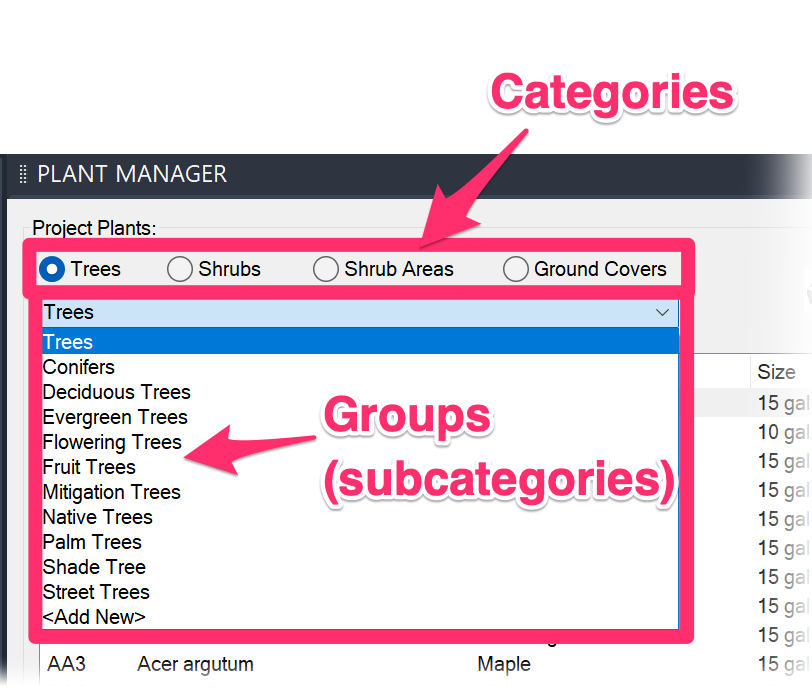
8. Manage the Plant Groups (subcategories) available for each plant category in the Plant Manager.
9. Schedule Defaults: Click this button to apply the current settings in the Plant Schedule dialog box as default settings in the active Preference Set.
10. Arrow Style: Select an arrow style for your plant labels. You can choose to apply an arrow style to trees and shrubs, and/or groundcovers and Shrub Areas.
11. Click this button to set your preferences for labeling Concept Plants. More information
12. Labels Placed Within a Viewport: Select whether labels placed within a viewport will remain in Model Space or be moved to Paper Space.
13. Once you've configured all your Preferences, save them into a Preference Set. More Information
Appearance is the main consideration involved with choosing Planting Preferences. What do you want your symbols and plant callouts to look like? For examples of the potential different looks for the same design, see our Planting Construction Documents Gallery. In addition to graphic examples from other firms, this section provides several different looks for an example design.
Plant Code
This section provides options for how your plant codes appear in your labels and schedules.
In a multi-user environment, the Plant Code setting is office wide and is not intended to accommodate frequent changes back and forth between two code lengths.
If you change the Plant Code setting, you'll see an option to Change code for all plants in the current project. Use this feature with caution. The drawing with all the plant symbols MUST be open and active if you click Yes, since the system will change the plants in the Plant Manager and the embedded data in the plant symbol. If the drawing is not active and open, the embedded data in the plant symbols won't change and will disconnect from the newly coded plant in the Manager. If you're not able to have a single drawing with all symbols in the project open and active, you should click No and manually edit each plant in the current project to the desired code.
By default, plant codes include abbreviations for the genus and species of the plant.
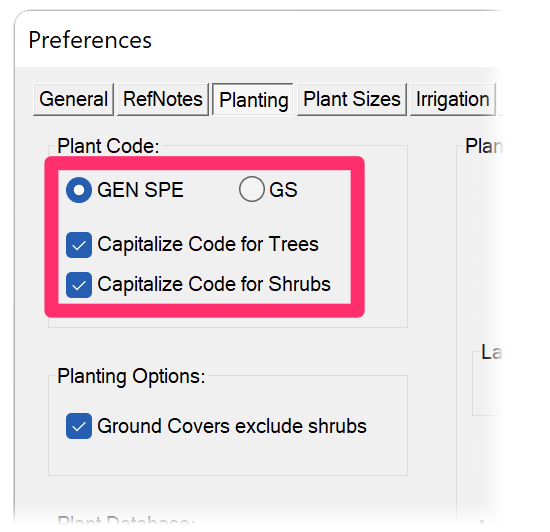
To give your plants three-letter codes for both genus and species in ALL CAPS:
- Select the GEN SPE option and
- Check the Capitalize Code box

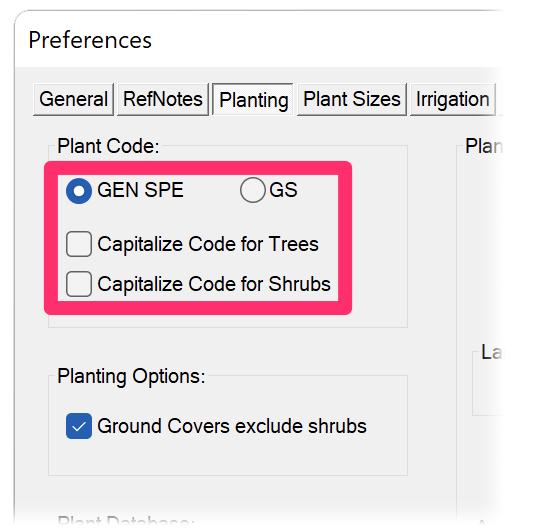
To give your plants three-letter codes for genus and species with initial capital letters followed by lowercase letters:
- Select the GEN SPE option and
- Uncheck the Capitalize Code box

This Plant Code style, generally used in plans that include Alphanumeric plant symbols, requires a few extra steps. For instructions, see our Lowercase Plant Codes documentation.
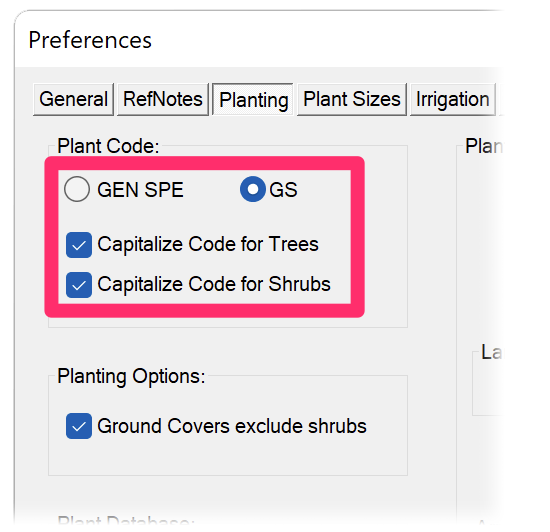
To give your plants two-letter codes in capital letters, select the GS option.

Exclude Shrubs
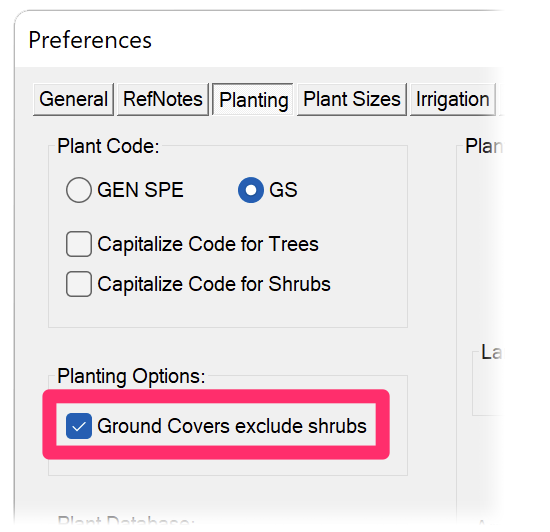
The Ground Covers Exclude Shrubs option allows you to place shrubs within groundcover hatches but not have the hatch apply to the shrub symbols. For more information, see our Exclude Shrubs documentation.
If you have Exclude Shrubs active, you may notice that the Multiple option for excluding interior objects (such as boulders or stepping stones) from the groundcover hatch is not available. That's because these two features cannot function at the same time. If you want to exclude shrubs and additional interior objects from a groundcover hatch, you'll need to complete a few manual steps. Information and instructions
Plant Groups (Subcategories)
Quick video
Click the Plant Groups button to manage the list of Plant Groups (aka Subcategories) available within the four plant categories in the Plant Manager, as in the example below.
The Edit Plant Groups dialog box will open.
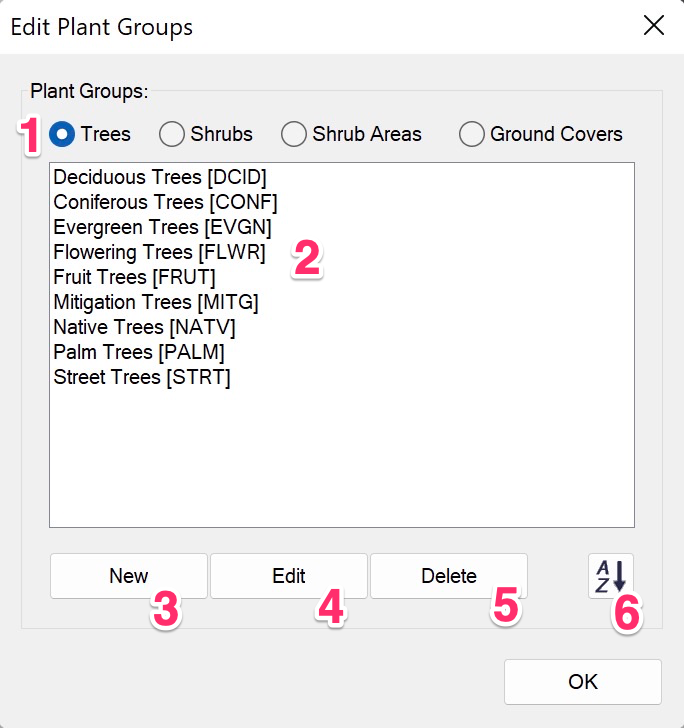
1. Options for each of the four available plant categories (Trees, Shrubs, Shrub Areas, and Groundcovers. Select one of these options to edit the groups, or subcategories available within that category.
2. The current list of groups within the selected plant category. As you add, edit, and delete subcategories, you'll see your changes in this list.
5. Delete a group from the list.
6. A-Z button added to restore alphabetical ordering in your plant groups.
The Plant Groups now allow for drag-and-drop reordering. Just drag groups up or down in the list to order it to your liking.
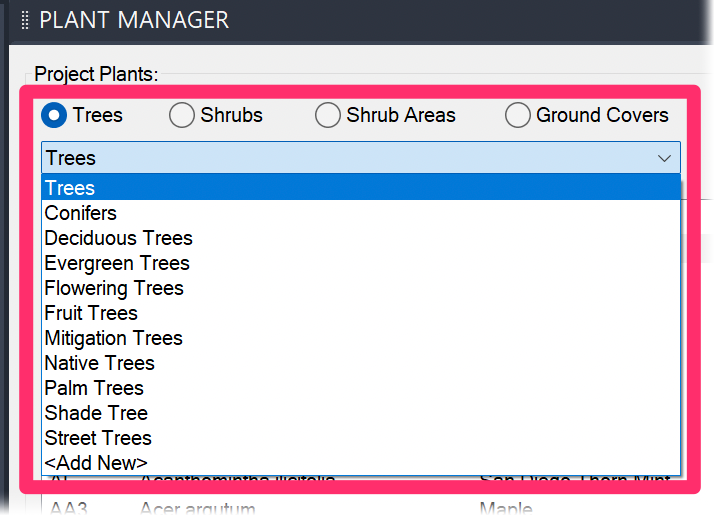
The plant groups available in the Edit Plant Groups dialog box (pictured above) correspond with the available groups in the menu for each plant category in the Plant Manager.
When you make changes in the Planting Preferences, you'll see those changes reflected in the Plant Manager when you have the same Preference Set active. If you want, you can create a different list of plant groups for each of your Preference Sets.
For information on how plant categories and subcategories work, see the Categories and Subcategories section of our Plant Manager documentation.
Creating & Editing Plant Groups
You're free to create and configure your own custom plant groups, as well as edit existing groups.
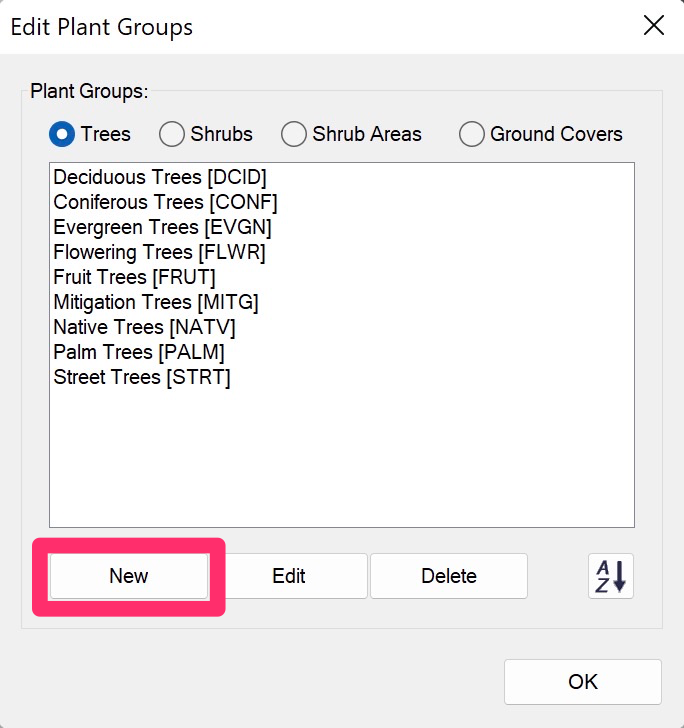
Click New to begin creating a new plant group.
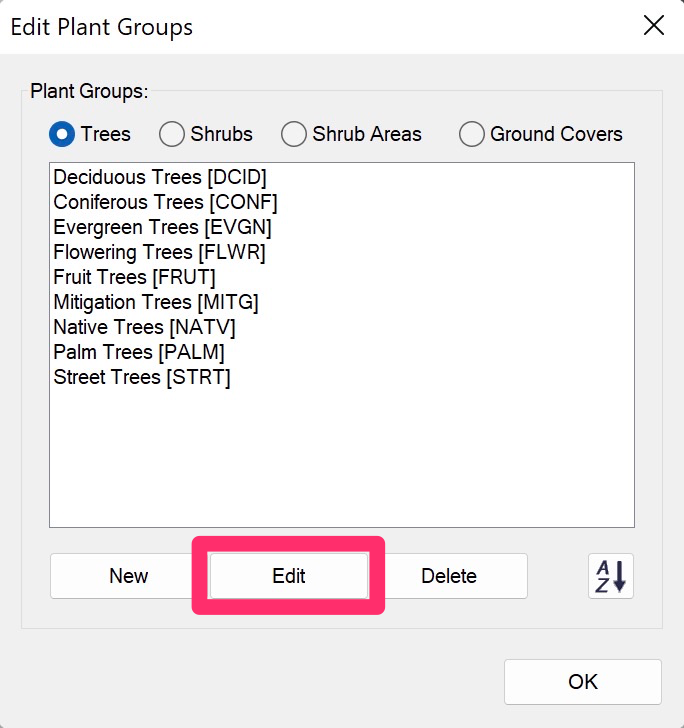
Select an existing group and click Edit to edit an existing plant group.
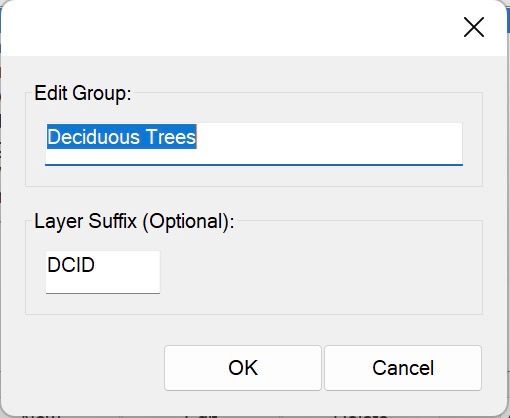
A dialog box will open, allowing you to configure your new plant group or edit a selected group.
Here, you can add a name to your new plant group or edit the name of the existing group.
Our default plant groups include layer suffixes that make it easier to work with your plant groups. You can edit these suffixes, as well as add your own suffixes when creating plant groups. (See note below.)
Plant Group Layer Suffixes
When a plant associated with a plant group is placed in a drawing, it will be placed on a layer whose name includes the suffix assigned to that plant group. This feature makes it easy to perform an action on all placed plants in that group, such as freezing or locking their assigned layer.
Project-Specific Plant Groups
Want a plant group to be specific to a project? Here's how:
1. Add the group in the Planting Preferences.
2. For each plant you want in the group, add that plant to your project.
3. Delete the group from the Preference Set, again in the Planting Preferences. The group will remain in the project where you used it.
Schedule Defaults
When you go to create a Plant Schedule, you have the opportunity to configure a number of settings in the Plant Schedule dialog box. These settings consist of menus, radio buttons, and checkboxes that control settings ranging from which plant categories (Trees, Shrubs, etc.) to include in the schedule, whether to include costs, plant spacing, sizes – an extensive collection of settings, to say the least.
Let's say you've configured the settings in the Plant Schedule dialog box to look like this:
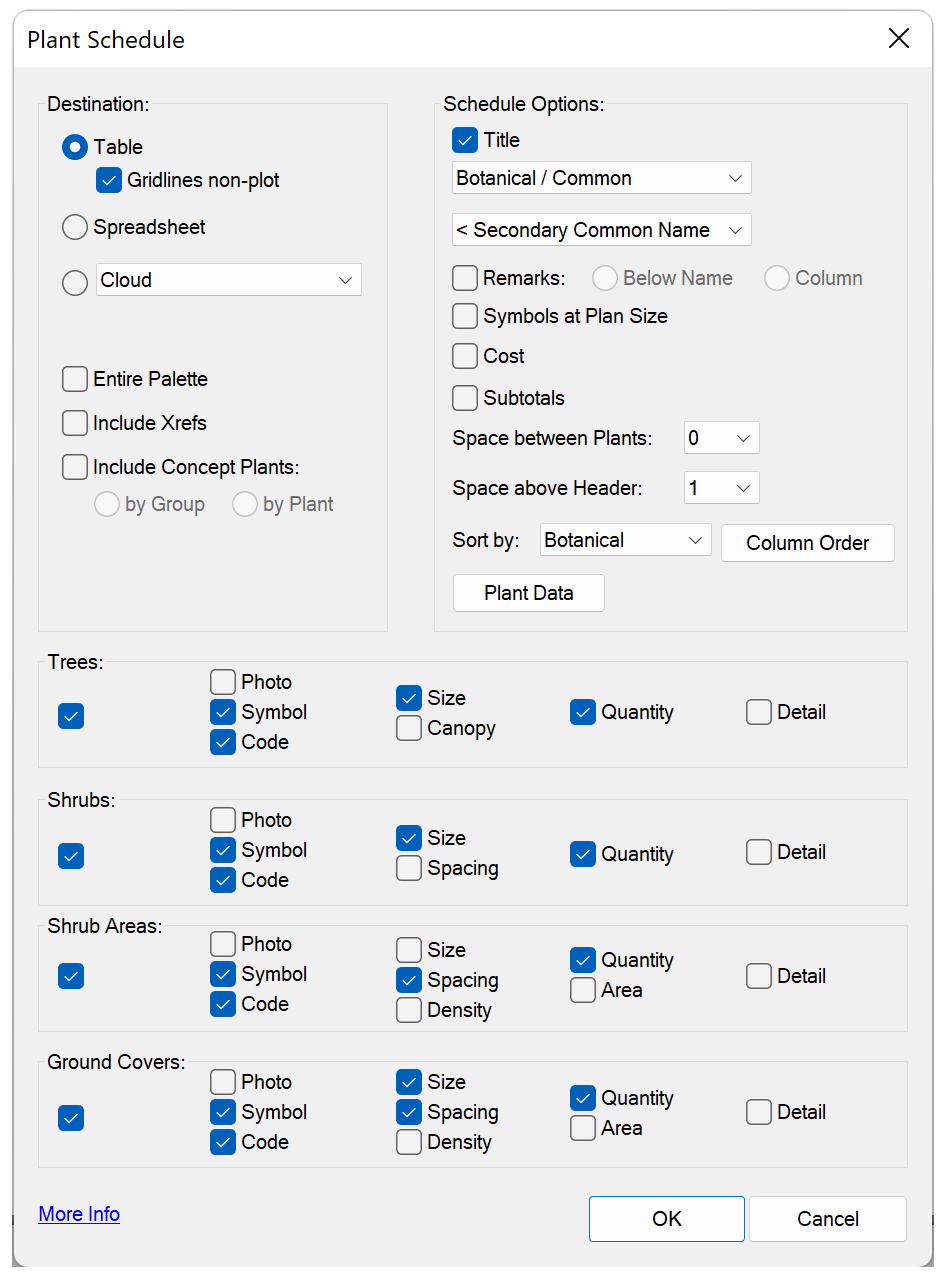
If you know you'll often use this combination of settings, you'd obviously like to avoid having to set them again and again. That's why we created the Schedule Defaults button in the Planting Preferences.
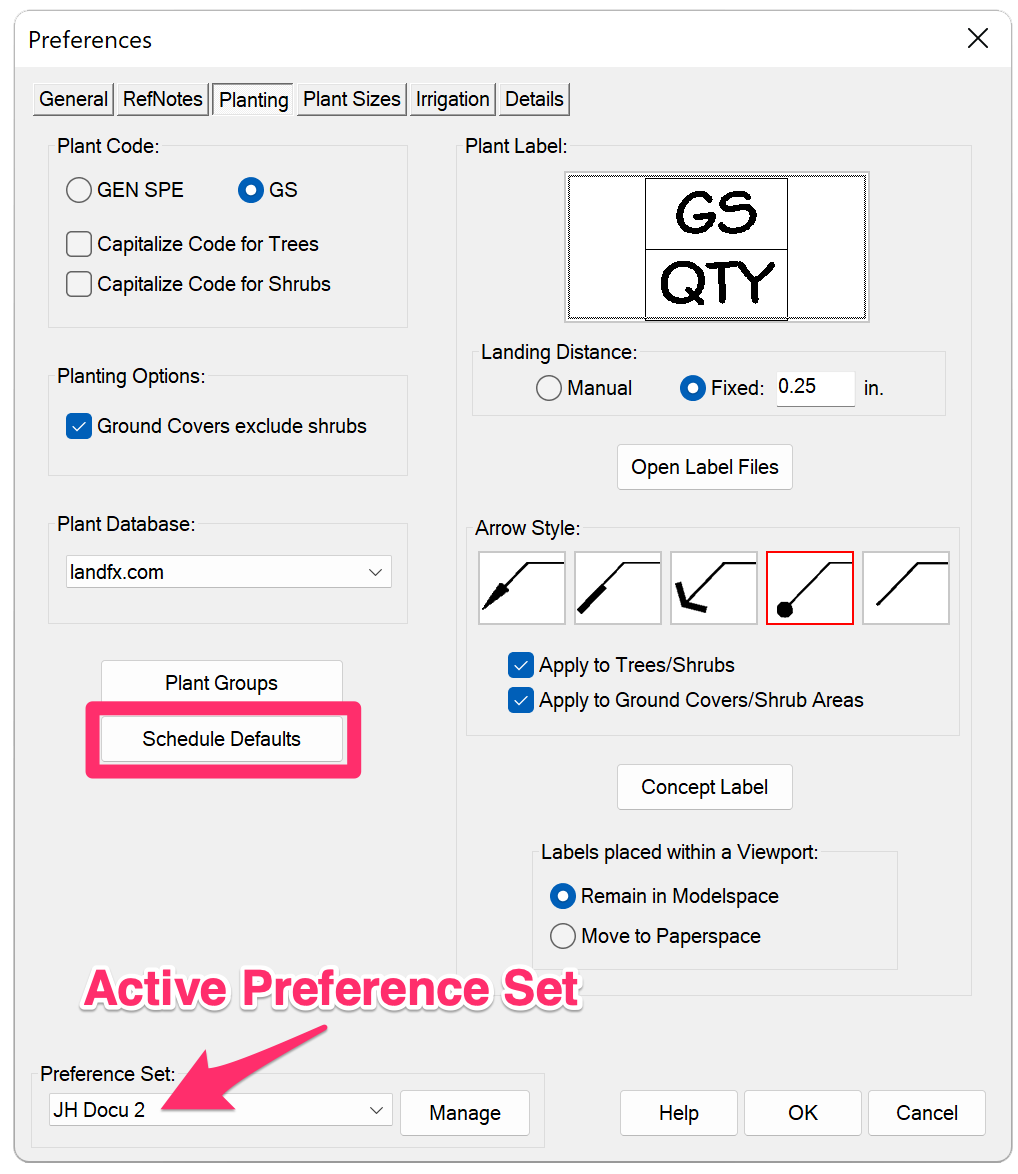
When you click Schedule Defaults, the current settings from the Plant Schedule dialog box will be applied to the currently active Preference Set.
For example, if we select the Preference Set we've named New Preferences from the menu (see image below) and then click Schedule Defaults, the current settings in the Plant Schedule dialog box will be applied automatically to schedules we create while we have that Preference Set open.
As you can imagine, this feature can come in extremely handy when you move between projects, or clients, or phases of a project, when you don't necessarily want to include certain data (such as cost) in the Plant Schedule. You can create several different Preference Sets with different Schedule Defaults built in. It's all up to your (or your office) and how you want to use Preference Sets.
Plant data fields created using our plant data tagging system cannot be saved with schedule defaults. More information about our plant data tagging system
Selecting and Customizing Plant Labels
Click the Plant Label thumbnail image to see the available plant label styles.

Selecting a Plant Label Style
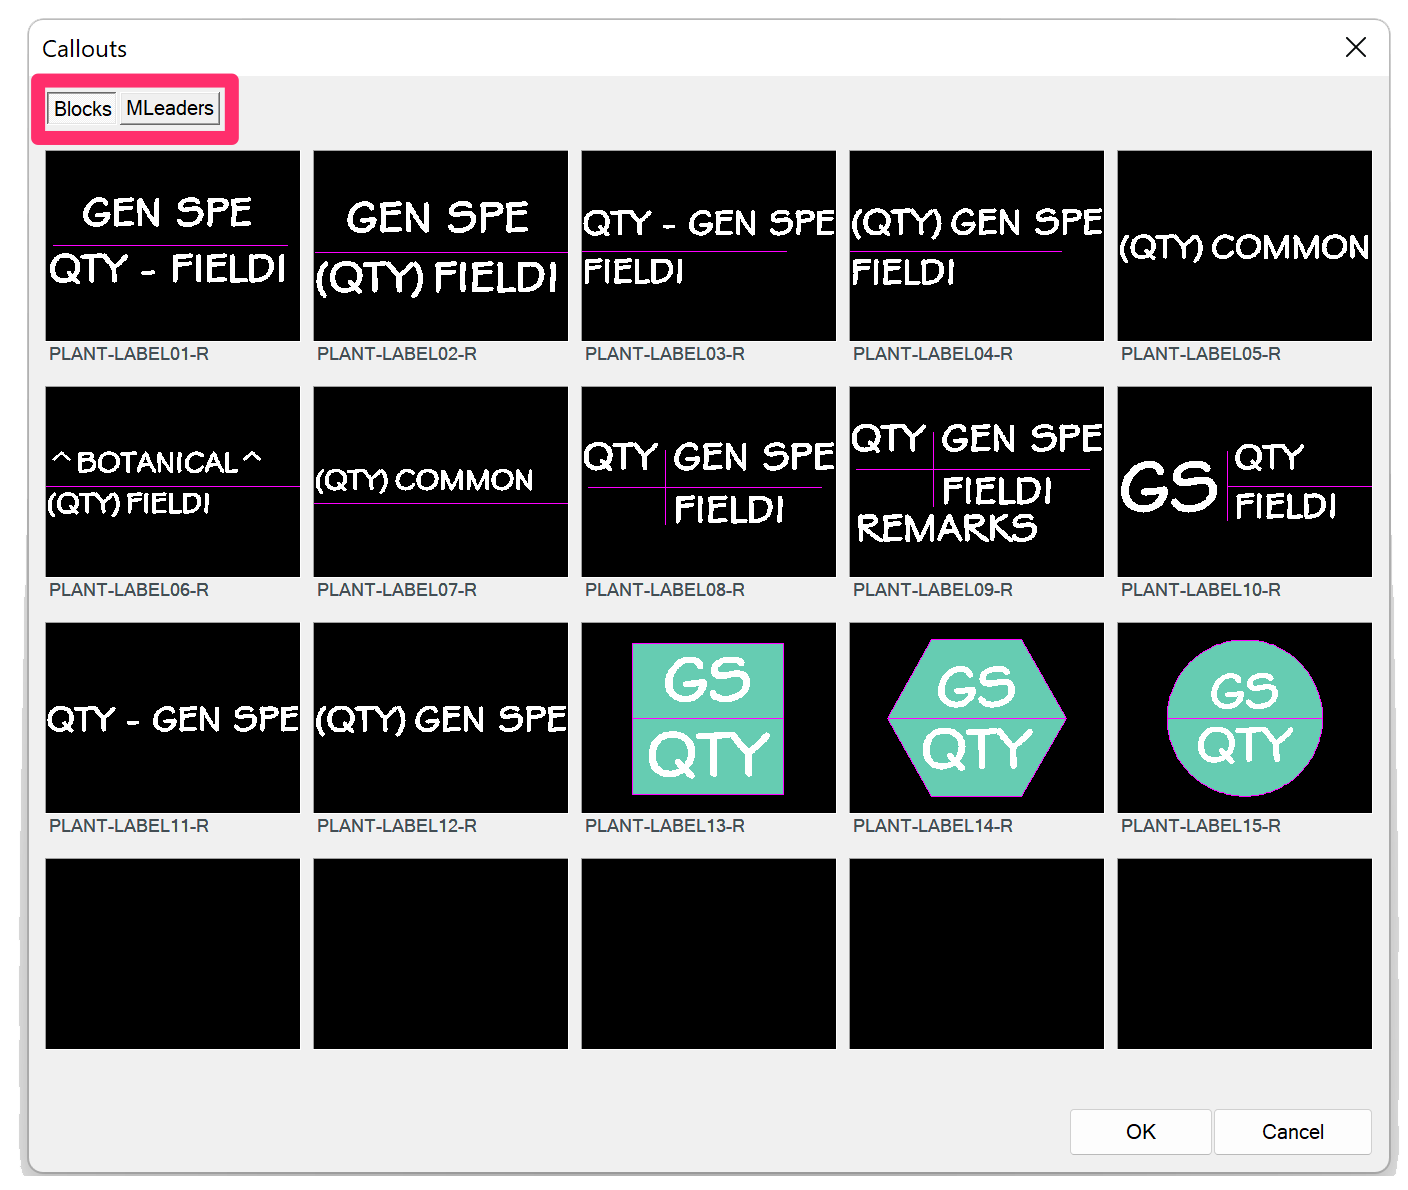
The Callouts dialog box will open. Here, you can view all available plant label formats.
We updated our plant label styles in 2019, adding some new features to our existing block-based label styles and adding a whole new set of label styles that use MLeaders. For information on these updated label styles, and to find out how to get them, see our Updated Plant Label Styles (2019) documentation.
Select the Blocks tab to choose a block-based label style, or select the MLeaders tab to choose an MLeader style.
Quick video
Due to the limitations of MLeaders, you won't be able to change the style of an MLeader label once it's been placed. Instead, you would need to delete the label, change the style, and then place it again. To be safe, ensure that you're using your desired label style when you first place your MLeaders.
Select the label style of your choice, and click OK.
The style you selected will become the active label style.
We recommend having a good deal of familiarity with MLeaders and how they work if you choose to use an MLeader style.
Customizing the Plant Label Files
If none of the labels are exactly what you are looking for, select the closest option for what you want from among the available options shown above. Then click OK.
After selecting the closest label style to what you're looking for, click the Open Label Files button in the Planting Preferences.
Want to create your own plant label style that looks nothing like any of ours? If so, we still recommend editing one of our existing plant label files to look how you want it to look, rather than creating a label from scratch. We've built some important coding into our label files that optimize these labels' performance in CAD. Once you've edited one of our label files, simply save it under a new name.
Quick video
The source file for the label style you selected will open, and you can make your edits.
If you selected one of our block-based label styles, the left (-L) and right (-R) source files will open. Take care to edit both of these files.
Each of our MLeaders-based label styles has just one source file, which is different between Imperial and metric.
Want more information about customizing plant labels? Here's where to go:
- Creating a New Plant Label Style
- Defining Your Standard for Plant Labels
- Font Justifications
- Attribute Definitions for Plant Labels
Landing Distance
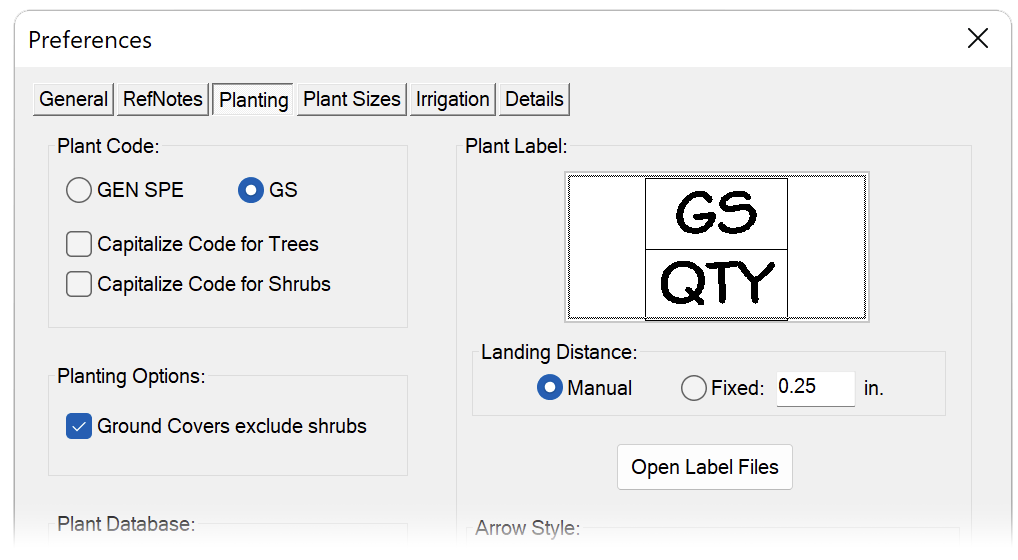
You can use the Landing Distance options to customize what's known as the extension line of your plant labels – the line that connects the leader to the plant label itself. This setting will apply to both your project plants and Concept Plants.
Here's an example of a plant label extension line:


Selecting the Manual option gives you the ability to set the length of the extension line manually.
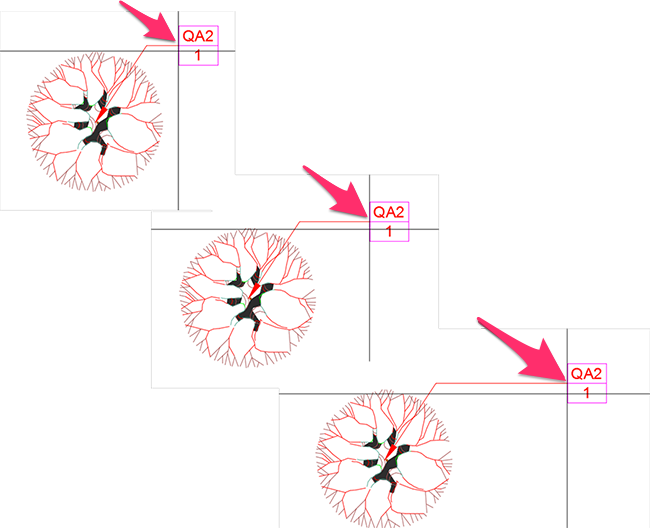
When you place your label with this option selected, you'll first click to set the end of the leader.
Then, as you move the cursor, the label and extension line will follow.
When you see the extension line length you want, click to place the label.
The label will place, connected to the leader with an extension line of the length you specified.
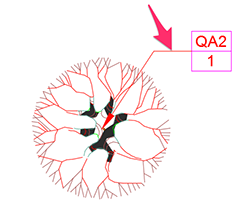
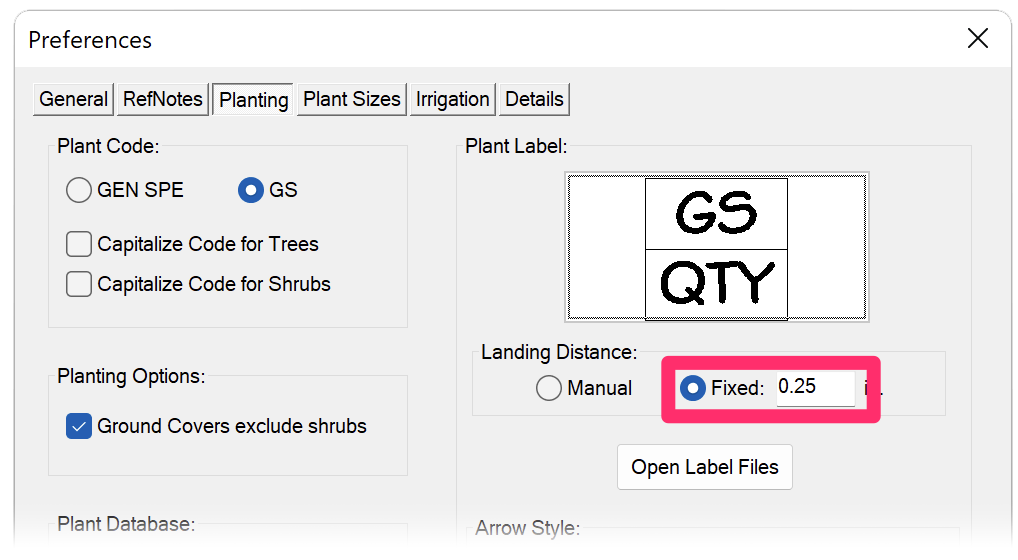
The Fixed option allows you to specify an exact length for the extension line in each of your labels. Just type the value of your choice in inches or millimeters in the text field.
In this example, we'll select the Fixed option and enter a value of 0.25 inches.
The unit setting will be governed by the units you've set in your drawing. You can easily set your drawing units by using our Scale tool.
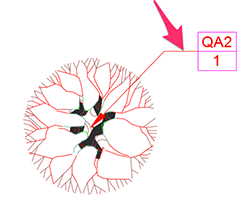
The resulting extension line will have your chosen length every time – in our example, 0.25 inches.
If you want precision in your extension lines, Fixed is the way to go!
Set Your Preferences for Labeling Concept Plants
We've added options for customizing the labels you apply to your Concept Plants.
To control the look and contents of your Concept Plant labels, click Concept Label.
The Concept Plant Label dialog box will open, and you can set your preferences for your Concept Plant labels.
1. Check this box to underline the names of your planting groups in your Concept Plant labels.
2. Choose how to list plant quantities: (QTY) or QTY -.
3. Choose to list plants by their botanical or common name, or by their plant code.
4. Use this menu to add a custom user field to your Concept Labels. See our documentation on adding custom fields to project plants and Concept Plants for more information.
5. You can review the options you've selected in this dynamic preview section.
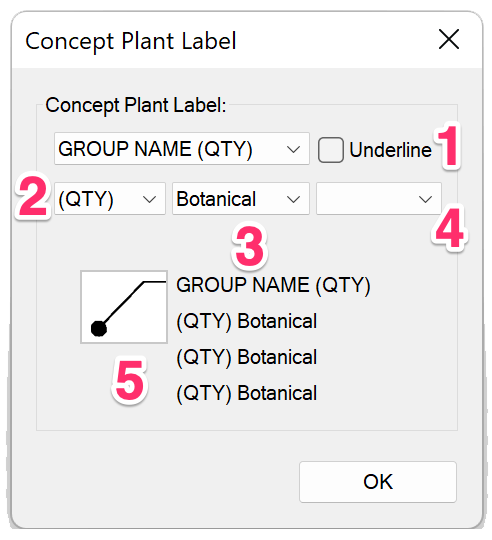
If you choose the blank menu item for any of these options, that information will not show in the resulting label.
Landing Distance for Concept Plant Labels
Concept Plant labels will take on the landing distance – that is, the length of the extension line connecting the label to the leader – from the setting you choose for your project plant labels. See the Landing Distance section above for details and instructions.
Labels Placed Within a Viewport

The Labels Placed Within a Viewport section, located in the lower right corner of the Planting Preferences screen, affects the appearance of plant labels when you place them in a viewport within either Model Space or Paper Space.
Remain in Modelspace
Select Remain in Modelspace to keep your plant labels in Model Space when you label your plants in a Paper Space viewport.
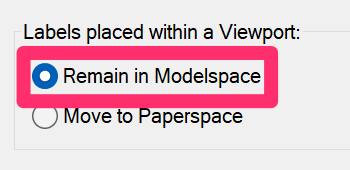
Your labels will not be visible outside the viewport, as pictured to the right.

Move to Paperspace
Select Move to Paperspace to place your Plant Labels in Paper Space when you label your plants in a Paper Space viewport.
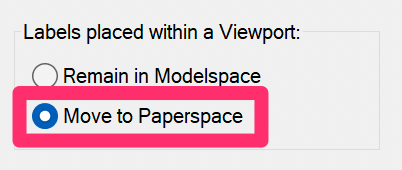
Your Plant Labels will be visible in Paper Space even when they extend outside the boundary of the viewport, as pictured to the right.

If you plan to label your plants in Paper Space, make sure you have the Move to Paperspace option selected.
Line Colors and Layers
Do our default line colors, such as those assigned to the plant labels, conflict with your office standard? Fear not; we offer an easy way to change your line colors to suit your preference. Learn more about customizing your layer and line colors by visiting our Land F/X Layers documentation section.
Saving Your Preferences in a Preference Set
Preferences control the look and feel of your usage of our software to match your office standards. However, some projects may require different preferences, such as those produced for a client whose requirements differ from your office standard. These projects may require different text styles, or callout looks, or schedule setups, different colors, or any of the various items covered in Preferences.
Once you've configured your Preferences, you can save them as a Preference Set. You can create multiple Preference Sets – one for each client, project type, region ... the choice is yours. When starting a job for a particular client, for example, open the Preference Set you've created for that client. Your standards for that client will be applied automatically as you draft.
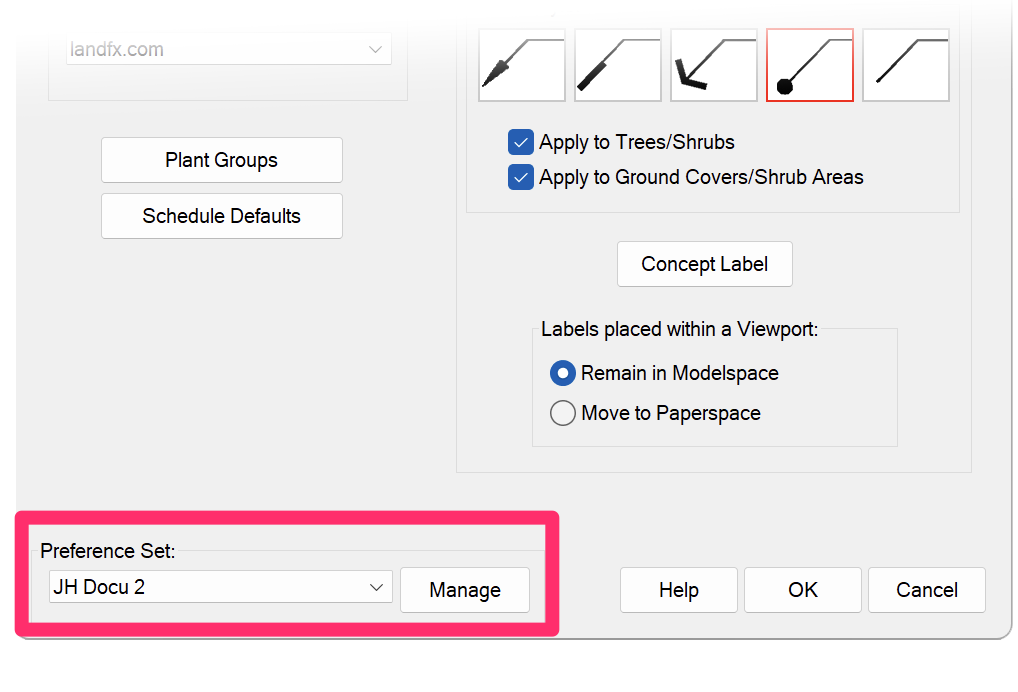
In all six Preferences screens, the Preference Set options are in the bottom left corner of the Preferences dialog box.
For detailed information on creating a Preference Set, see our Preference Sets documentation.
Other Preferences Categories
- General: Preferences for Text Styles used by our software (such as for schedules, callouts, titles), as well as license information and several other options, including layer settings and line colors.
- RefNotes: Preferences for how your office organizes Reference Notes (RefNotes).
- Plant Sizes: Preferences for the list of plant sizes, default plant size, the number and type of fields in the schedule, and the default cost for each plant in your project.
- Irrigation: Preferences for the valve callouts, pipe data, and irrigation schedules.
- Details: Preferences for the Detail Module size and callout
Related Webinars
- Implementing Your Office CAD Standards: Find out how easily you can adapt your own office standards to Land F/X – and how effectively the software will then apply them to your projects. (1 hr 2 min)
- Customize for Office Color Standards: This webinar covers the necessary tools and techniques for a black belt in the art of office standards – from CTB plotting files to valuable Land F/X tools that enable instant layer color conversions and office color setup. (1 hr 2 min)
- Customizing Land F/X: Learn how to work with specific blocks, layer names, sheet protocols, and other distinct elements that make up your firm’s practices and preferences. (1 hr 3 min)
- Planting F/X Setup for a Multi-Office Firm: Wondering how to acquaint your office with our planting tools? Michael Bain, CAD manager at Boffa Miskell Limited, walks through his introduction of Land F/X into the New Zealand firm with 7 offices and 70+ landscape architects. Michael shows how easy it was to get the firm's standards into the software, and provides real numbers showing the time savings they experienced right away. (1 hr)
- Setting up Templates and Preferences for Repeat Clients: To save time and increase your accuracy, learn how to deliver a consistent drawing package for your repeat clients by setting up project templates and Preference Sets. (50 min)
Troubleshooting
Issue: You are unable to open any of the Preferences screens, and your office has our Cloud Data option


