Placing Concept Plants
Quick video
- Concept Plants Overview
- Placing Groundcover Polyline Borders
- Creating a Mix of Seeds or Plant Species
- Labeling Concept Plants
- Converting Concept Plants to Project Plants
- Having a Hatch Issue with Groundcovers or Shrub Areas? Download Our Updated Hatch Patterns Manually
- Related Webinars
- Troubleshooting
When you design using our Concept Plants, you'll work with a group of plants that capture the general intent of your design. Use the Concept Manager to access the Concept Plant symbols you want to place in your drawing.
We made some major updates to the functionality of Concept Plants in 2018. The crux of the update was to engineer an option to include Concept Plants in the regular Plant Schedule. You can now drag and drop plants into the Concept Palette from the Plant Manager to build your palette. You can also move between a Concept Schedule and a regular Plant Schedule with a few clicks, showing all individual plants, configured perfectly with your assigned percentages – plus it even auto-assigns percentages if you didn’t. This is wildly awesome capability, all driven by numerous amazing wishlist requests over the years.
For more information on Concept Plants, including instructions on how to add them to your project, see our Concept Manager documentation.
Generic Plants vs. Concept Plants vs. Project Plants
We offer three basic ways of placing plants in your drawings, each with its own specific purpose in the design phase:
- Generic Plants are "dumb" plant blocks (that is, they have no data attached to them). Designing with Generic Plants is like designing the old way – just putting plant symbols in your drawing without assigning them to plants from a database. Essentially, they serve as placeholders until you’re ready to replace them with actual plants from our database using our Mimic Plant tool.
- You can use Concept Plants to complete a high-level conversation plan with the client before locking into your final plants. You can replace them with actual plants from our database when ready.
- The Plant Manager is for when you know the exact plants you want to use.
Concept Plants Overview
Open the Concept Manager:

F/X Planting ribbon, Concept Plant Manager flyout
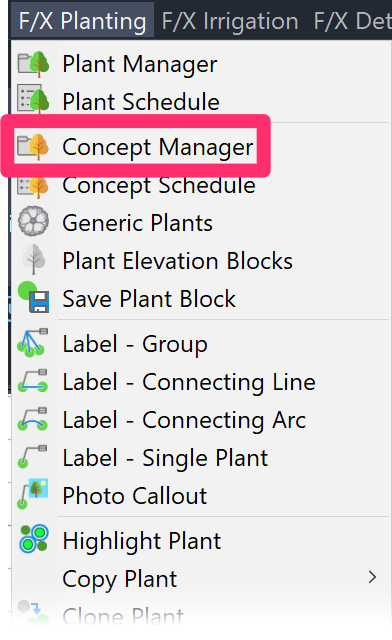
F/X Planting menu, Concept Manager option
typing ConceptPlants in the Command line
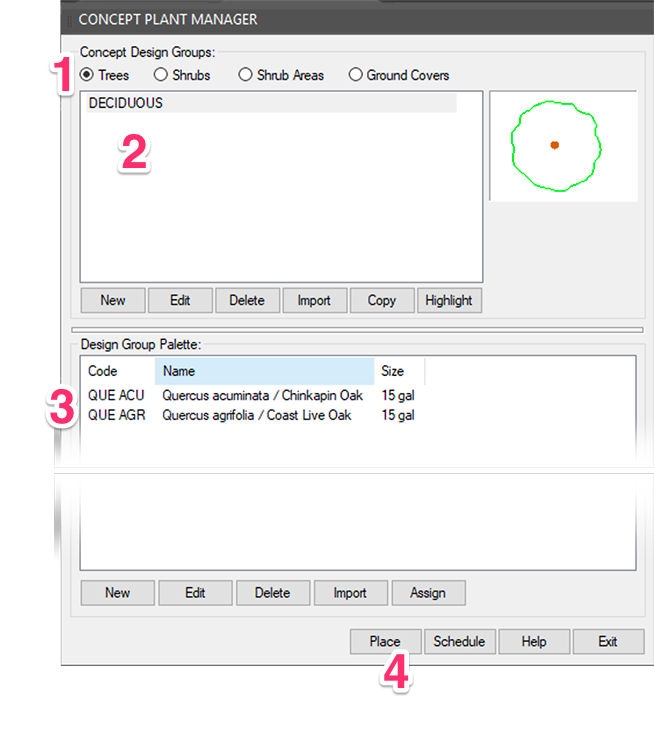
The Concept Manager will open.
1. Select the option for your desired plant category (example: Trees).
2. Highlight a Design Group within the selected plant category (example: DECIDUOUS).
3. Highlight a plant from the selected Design Group Plant Palette.
4. Click Place to place the Concept Plant in the drawing.
You can also place Concept Plants by double-clicking the symbol thumbnail image in the top right corner of the Concept Plant Manager.
Want to use our Exclude Shrubs tool? It will work with Concept groundcovers, but only manually – and only with shrubs you've added and placed from the Plant Manager. When you're about to place a concept groundcover, press the E key to trigger the Exclude Shrubs option when you place the groundcover. Note that Exclude Shrubs will not recognize and exclude individual Concept shrubs.
Click to place the plant, and repeat until you've placed all your desired instances of the selected plant. If you're placing a groundcover or Shrub Area, place it just as you would place a groundcover or Shrub Area you've added as a project plant.
All Concept Plants are placed in Model Space.
To continue placing other Concept Plants, right-click to open the Plant Manager.
Concept Plants allow you to express design intent in a somewhat abstract fashion. The Concept system is equally important for firms and students because:
- Different sets of Design Groups can be saved as templates, and when a new project is started, it is based on the appropriate template, thus saving a great deal of time.
- Maximizing of time efficiency is important because you want to allocate time for big picture decisions, and not focus on the little minutiae in creating a plan.
Placing Concept Trees and Shrubs
To place a Concept tree or shrub, select it in the Concept Manager and click to place it, just as you would a tree or shrub from the Plant Manager.
Keyboard Commands for Placing Concept Trees and Shrubs
When placing Concept trees or shrubs, you can type K to see the available keyboard commands. These commands correspond to the keyboard commands available in our Plant Shotgun feature.
Type any of the following commands on your keyboard. (The Keyboard Commands dialog box is only informational – the key buttons won't actually fire the commands.)
- 1–0: Set a number of Concept Plants to place (aka Shotgun Mode).
- Q/E: Toggle to the previous/next available Concept Plant in the Concept Plant Manager.
- T: Enter Paint Mode, where you can "paint" an area with copies of the selected Concept Plant.
- W/S: If placing multiple Concept Plants, set a wider/smaller spacing for them (aka Shotgun Spacing).
- A/D: Rotate the Concept Plant(s) you're placing to the left/right.
- L: Label your Concept Plants.
- X: Enable our Xhair Angle tool, which allows you to place Concept Plants at a set angle.
- V: Switch to our Copy along Line tool.
- C: Switch to our Copy along Arc tool.

Placing Concept Groundcovers and Shrub Areas
Groundcovers and Shrub Areas are placed as hatches, much like these plant categories when used as normal project plants. As with project plants, you can either select an existing polyline boundary to place one of these planting areas, or draw a polyline boundary on the fly.
Drawing a Hatch Boundary "On the Fly"
If you haven't yet drawn a polyline boundary for a Concept groundcover or Shrub Area, you can do so "on the fly" after selecting your hatch pattern.
When you go to place a planting area, the Command line will prompt you to Select polyline or interior point to hatch, [Draw Exclude shrubs Multiple].
Start drawing your closed polyline. Once you close it, the hatched area will appear within the polyline boundary.
Placing Groundcover Polyline Borders
Concept groundcovers are represented by a hatch and require a non-plot controlling polyline border.
To add a graphical edge to the groundcover areas, use one of our Line Graphics to border the area.
In our example, we'll use our Scallop Line tool to draw an edge for the groundcover. Make the active layer L-PLANT-EDGE for a thicker line, as well as to provide control of the lineweight you use.
The image to the right shows an example of a Scallop Line.
A Scallop Line can serve as an edge of a hatched area. A Scallop Line is also a polyline, so if you use it to encircle the entire area, it will provide the hatching border.
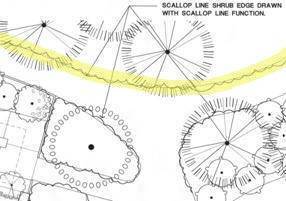
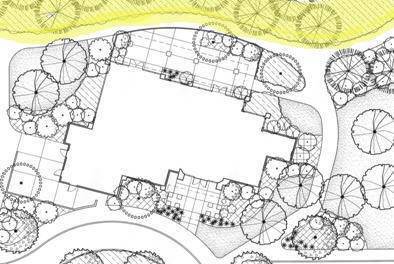
Add the groundcover hatch fills at the intended groundcover areas by either using the non-plot border polyline or a closed Scallop Line.
Our Random Pointy Line tool can also be useful for this purpose.
Creating a Mix of Seeds or Plant Species
Quick video
We make it easy to create your own custom mixes of seeds, sods, grasses, or other plant species. You can do so by creating a Design Group in the Concept Plant Manager.
For more information and instructions, see our Create a Mix of Multiple Seeds or Plant Species documentation. You can also see this feature in action by watching our Grass Mix Power Tip.
Labeling Concept Plants
Ready to label your concept plan? Follow our instructions for labeling Concept Plants.
Converting Concept Plants to Project Plants
When you create a concept plan, the ultimate goal will be to convert your concept plants to project plants (that is, actual plants that you've added to your plant palette). In the interest of avoiding confusion, it's a good idea to select new symbols for the project plants when you make the conversion. That's why we recommend selecting Concept Plant symbols you're unlikely to use in your actual planting plan.
Having a Hatch Issue with Groundcovers or Shrub Areas? Download Our Updated Hatch Patterns Manually
Are you experiencing any of the following issues with your hatches?
- Hatches looking fragmented or broken apart
- Hatches with scales that are too large or too dense
- Hatches that place blank or empty
- Hatches that are not appearing in schedules
- File size bloating
If so, follow our steps to download our updated hatch patterns manually.
Related Webinars
- Concept Planting Tools: Learn all about this valuable set of tools, which allow you to set up an initial planting plan – even before you’ve built your palette. (1 hr 1 min) Planting F/X for Beginners Part 2: In this second installment, we'll dive right into some of the tools you need to know about for the best experience and fastest workflow when starting with Land F/X planting plans, including Concept Plants. (1 hr 3 min)
- Modular Planting Design: If you’re trying to design with plant communities, have you tried using the plant mix tools in our Concept Plant Manager? Tune in to see how these tools simplify this planting design process dramatically – including the details. (1 hr 1 min)
Troubleshooting
Issue: Blocks or hatches are not available when I try to select a symbol
Issue: Work Areas are not recognizing or calculating a Concept groundcover or Shrub Area hatch
Issue: Bad DXF group (10) error when placing a Concept Plant
Issue: Your Concept Plant labels are not listing all Concept Plant types
Issue: One or more of your Concept Design Groups are missing from the Concept Plant Manager
Issue: Tree trunks are appearing hollow, not solid, or displaying as lines only
Issue: You are unable to place Concept Plants in an office using Land F/X on a shared online location, and may be seeing gray Xs on the source file icons, cannot open the plant blocks' DWG source files, and may see Invalid block or Missing file errors
Issue: Your Concept groundcover or Shrub Area hatches are showing up incorrectly, or as random lines or solid colors
Issue: Your plant symbols are showing up with transparency when placed in your drawing
Issue: A placed groundcover hatch looks fragmented or isn't joined like it should be
Issue: A placed groundcover hatch looks different from its thumbnail preview slide in the Hatch dialog box


