Customize Plant Schedules
Quick video
- Plant Schedule Fonts
- Plant Schedule Format
- User-Defined Data Fields
- Plant Schedule Destination Options (Drawing, Table, Spreadsheet)
- Plant Code Styles
- Change Plant Schedule Column Widths
- Schedule Text in Uppercase (or Upper and Lowercase)
- Create a Background Fill or Mask for Your Schedules
- Rearranging the Column Order in Your Schedule
- Schedule Integration: Send Plant Schedules Directly to Another Provider
- Applying the Current Schedule Settings as the Default
- Examples of Plant Schedules
Quick video
We make it easy to make your Plant Schedules look exactly how you want them. Use this guide to dial in your schedules to your standards.
Plant Schedule Fonts
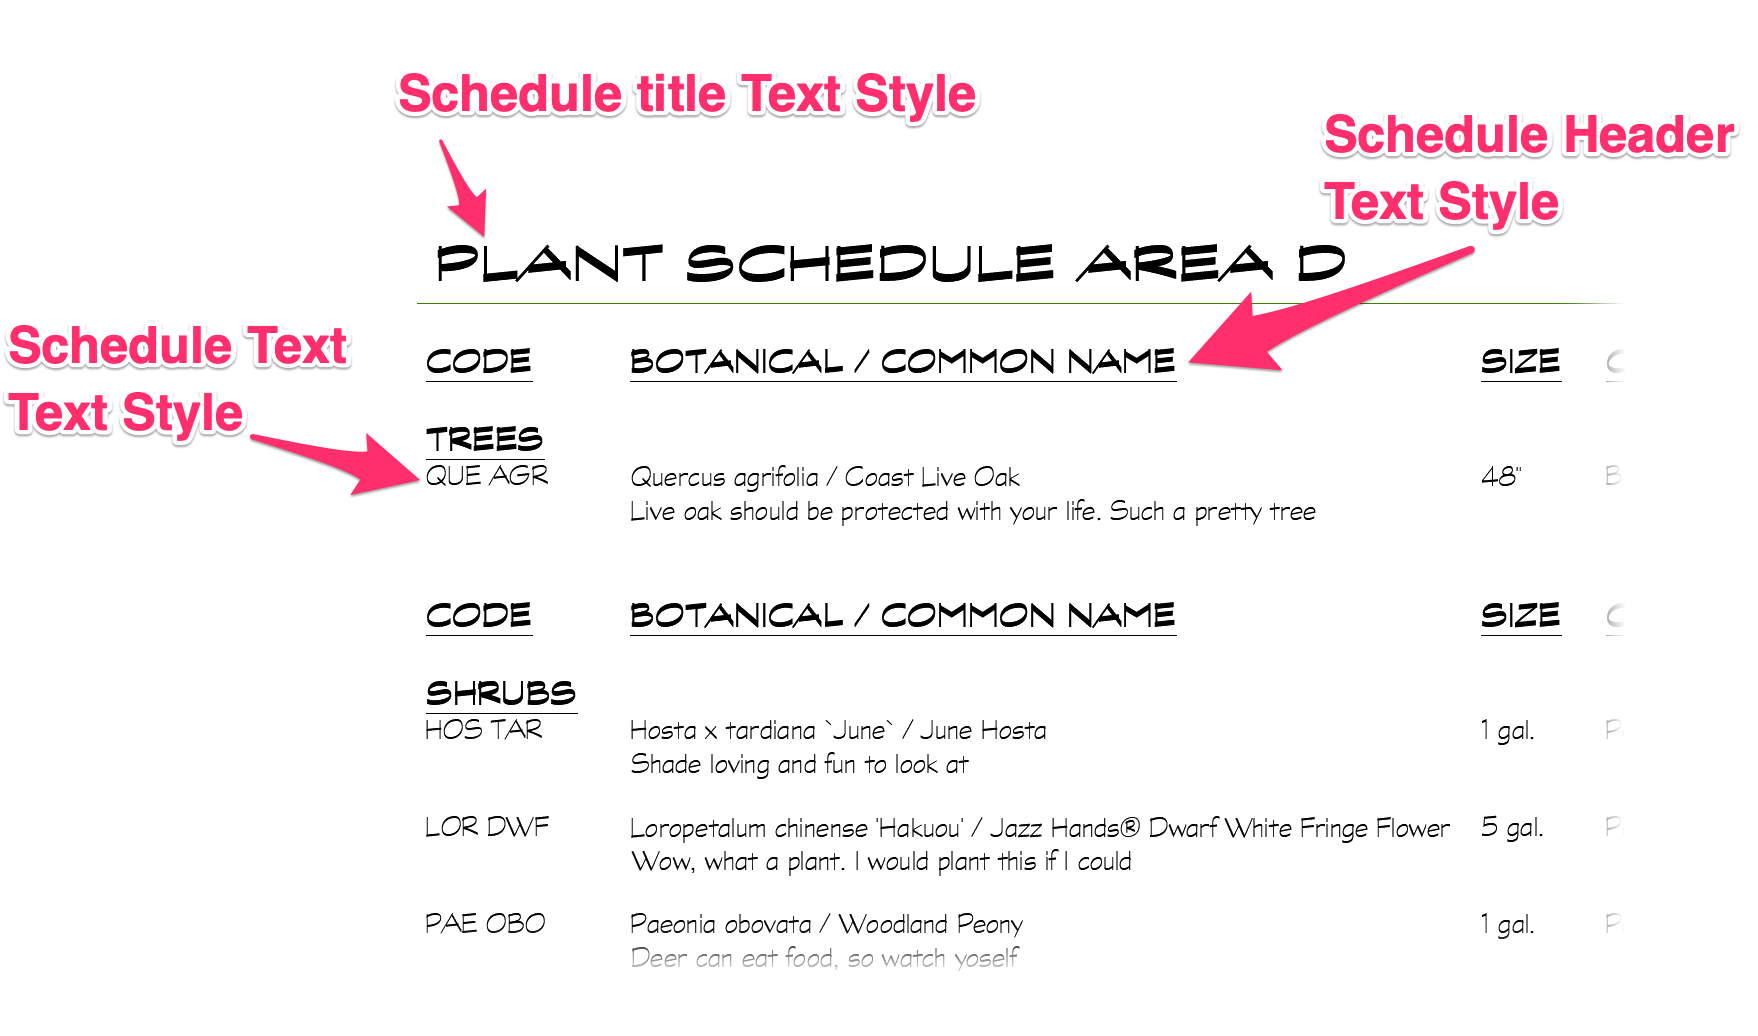
Fonts, point sizes, and other text elements used for specific purposes in our software are controlled by a system of default Text Styles.
Plant Schedules incorporate three Text Styles you can configure to meet your preferences:
- Schedule Title: Applies to titles of each of your schedules, including Plant Schedules.
- Schedule Header: Applies to column headers within schedules.
- Schedule Text: Applies to all other text within each of your schedules, including Plant Schedules.

To configure these styles, follow our instructions for customizing our Text Styles for the following styles:
Your Text Style settings are saved through your Preference Sets, so you can create several different text settings for your schedules – one for each client, project type, etc. – and apply them instantly.
Plant Schedule Format
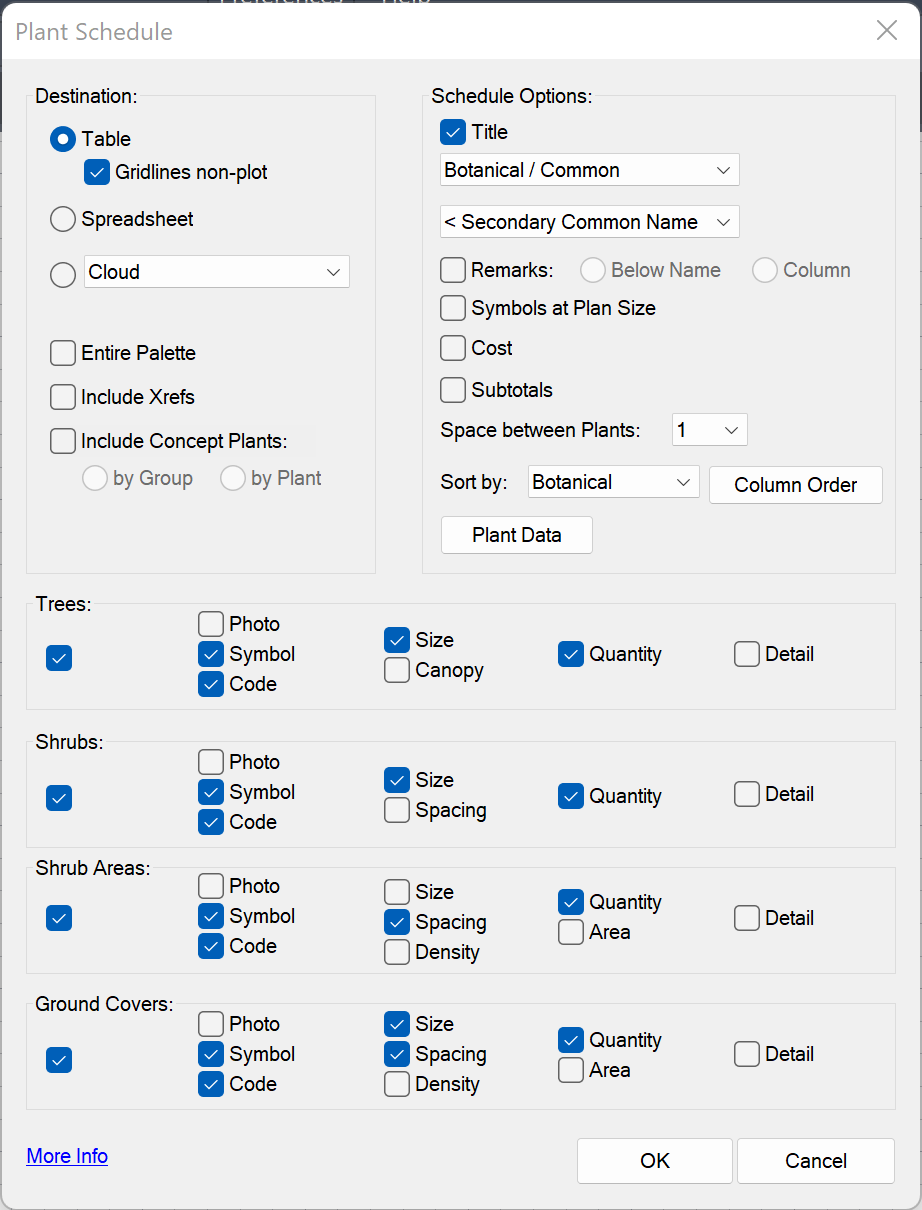
We offer numerous options for formatting your Plant Schedule. It's all available in a single Plant Schedule dialog box, pictured to the right.
Accessed through our Plant Schedule tool, this dialog box gives you a vast number of choices for which information you choose to include or exclude in your Plant Schedules. You can easily reconfigure these options each time you place a schedule.
For further information and instructions, see our Plant Schedules documentation.

User-Defined Data Fields

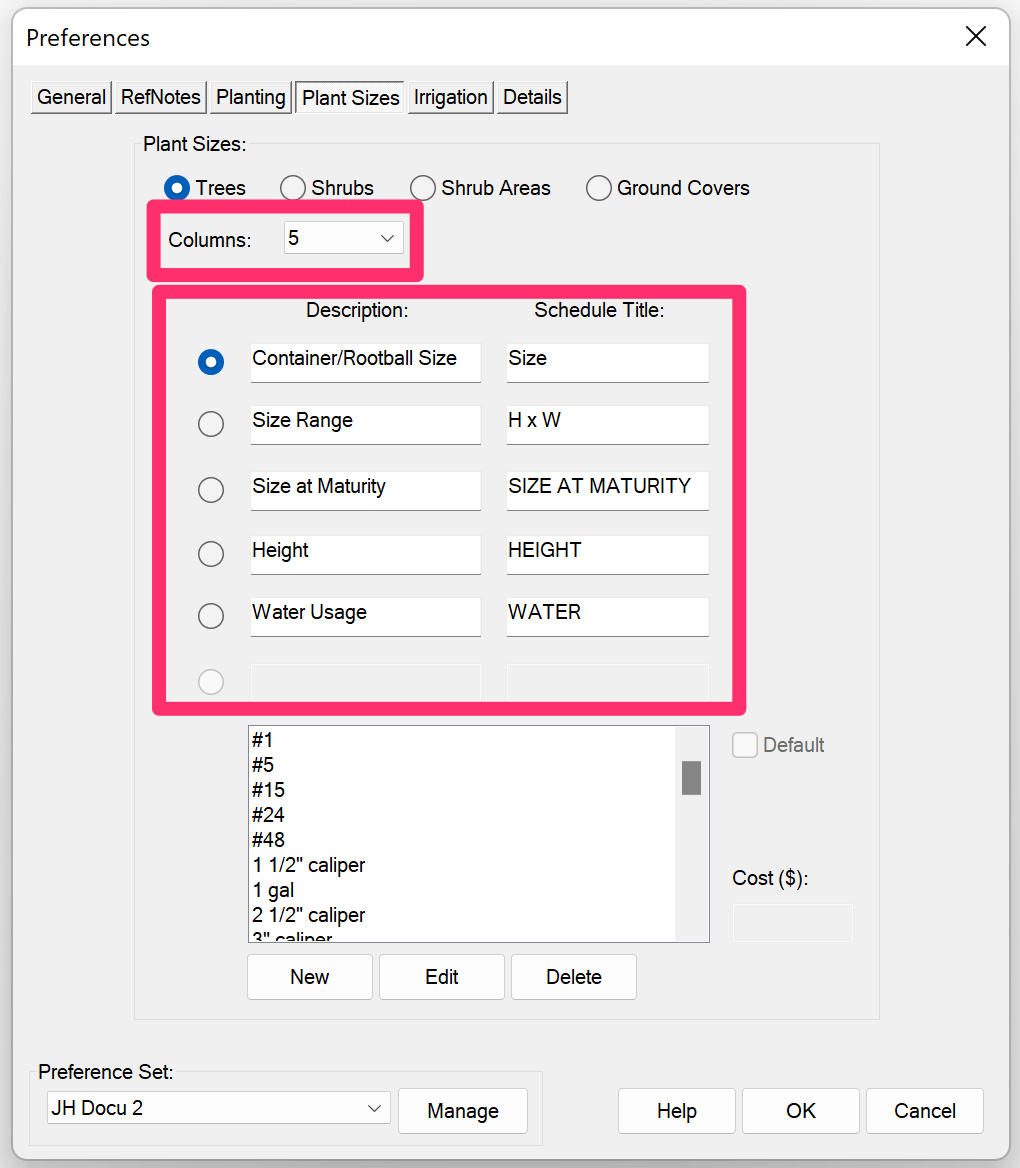
Want even more control over the columns that appear in your Plant Schedule? You can create up to six custom fields for each plant type (Trees, Shrubs, Shrub Areas, Groundcovers).
These customizable fields are available in our Plant Sizes Preferences screen, pictured to the left. For further information and instructions, see our documentation on:
As with your Text Style settings, these custom fields are saved through your Preference Sets.
Plant Schedule Destination Options (Drawing, Table, Spreadsheet)
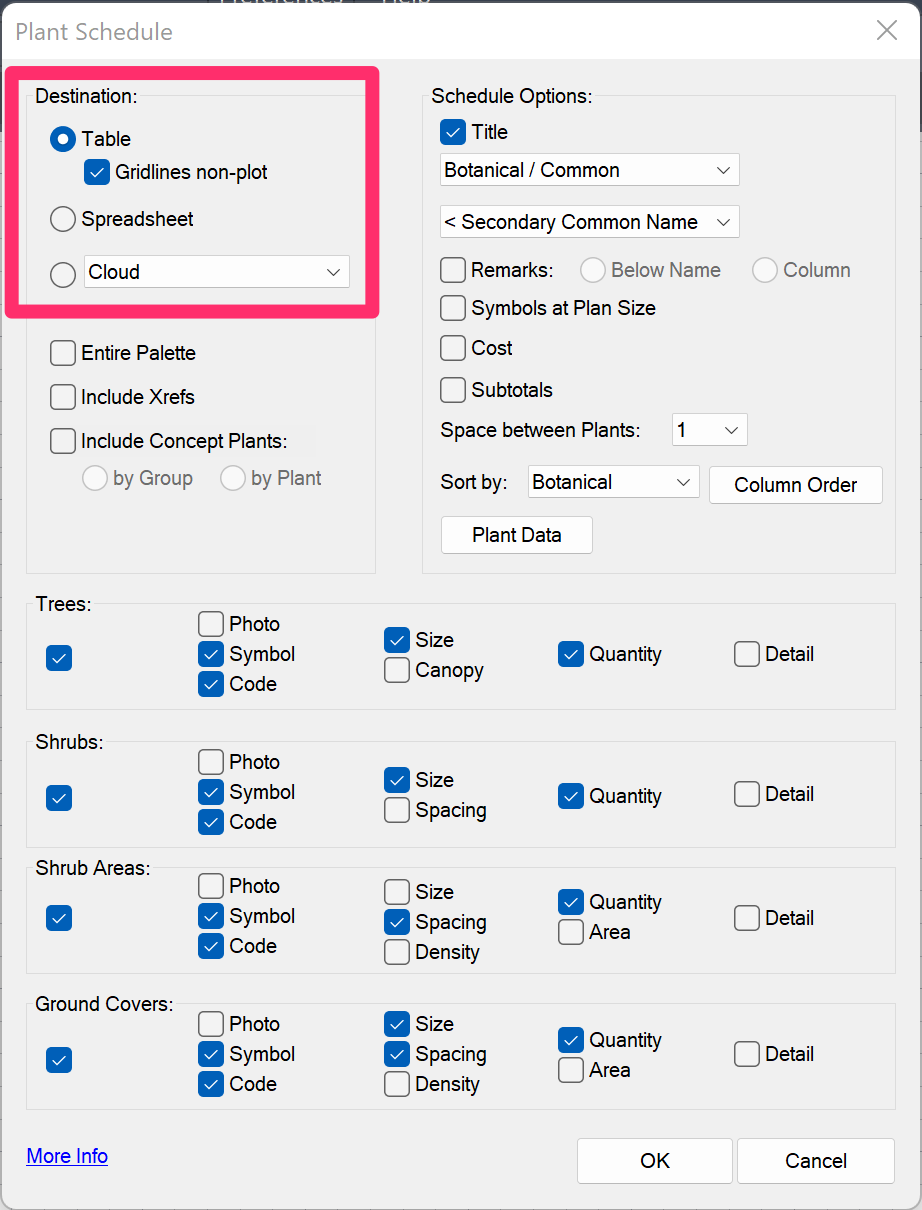
When placing a Plant Schedule, you have several options for the Destination where you'll send that schedule.
For further information, see our Plant Schedule Destination options documentation.

Plant Code Styles
Each plant you add to a Land F/X project will have its own unique plant code that will identify that plant by abbreviations of its genus and species in both your labels and Plant Schedules. You can choose to give this code three possible styles:
- GEN SPE (three capital letters for the genus and three capital letters for the species)
- Gen Spe (three letters for the genus and species, with initial caps and internal lowercase letters)
- GS (one capital letter for the genus and one for the species)
For instructions on how to customize this code style, see the Plant Code section in our Planting Preferences article.
Change Plant Schedule Column Widths
You can easily change the widths of your Plant Schedule columns using the AutoCAD Block Editor. However, you can only adjust the column widths of a schedule you've placed as a table.
Want the freedom to adjust your schedule column widths manually, but don't want visible table borders in your schedule? Follow our steps to create a table-style schedule without lines.
Schedule Text in Uppercase (or Upper and Lowercase)
You can control whether the text in any of your schedules appears in all uppercase, or in upper and lowercase, from the General Preferences. For instructions, see our Schedule Text in Uppercase Knowledge Base article.
This setting will apply to all schedules you place in your drawings, including:
- Plant Schedule
- Irrigation Schedule
- Details Schedule
-
Site schedules such as:
- Reference Notes (RefNotes) Schedule
- Lighting Schedule
- Concept Schedule
- Zoning Schedule
- Site Development Schedule
- Grading Schedule
Create a Background Fill or Mask for Your Schedules
Some designers want to give their schedules a background fill to allow it to pop from the rest of the drawing. You can create a background fill for your schedule using the Table Style Manager. Find out how.
Rearranging the Column Order in Your Schedule
In the interest of keeping our software easy to use – and limited by some restrictions from the CAD platform – we’ve decided to limit the built-in arrangement options to more widely accepted arrangements. However, you can easily rearrange your schedule columns at will while also keeping the ability to regenerate the schedule.
Schedule Integration: Send Plant Schedules Directly to Another Provider
Our Schedule Integration tool allows you to send your Plant Schedules directly to another service provider – for instance, your company’s estimating and invoicing system. See our Schedule Integration documentation for more information.
Applying the Current Schedule Settings as the Default
Once you've configured your Plant Schedule the way you want it, you can apply those settings as the defaults under the active Preference Set in the Planting Preferences. You can also create different defaults for different Preference Sets.
For specific instructions, see the Schedule Defaults section on our Planting Preferences documentation page.
If you open the Preferences and notice that the buttons and options are grayed out and you can't make changes, the current Preference Set may be restricted. More information
Examples of Plant Schedules
To see a few examples of what different Plant Schedules look like with different options selected, see our Plant Schedule examples documentation.


