Area/Volume Reference Notes
Quick video
- Area/Volume Reference Notes Overview
- Accessing the Reference Notes Manager
- Adding an Area/Volume Reference Note
- Configuring the Data Assigned to an Area/Volume RefNote
- Placing an Area/Volume Reference Note
- Area Reference Notes and the Reference Note Schedule
- Excluding Objects from an Area/Volume Reference Note Hatch
- Editing a Placed Area/Volume RefNote Hatch (Hint: Use Our P-Hatch Tool)
- Importing RefNotes from a Template or Project
- Having a Hatch Issue? Download Our Updated Hatch Patterns Manually
- Other Reference Note Types
- Related Webinars
- Troubleshooting
An Area/Volume Reference Note allows you to refer to an area of your site design and have the area or volume calculation automatically placed into the Reference Note Schedule. Area/Volume notes provide a quick and accurate method of placing items such as gravel and bark and assigning data such as cost per square foot or meter, or cubic foot or meter.
Using a closed polyline, you can draw areas to be defined by Area/Volume Reference Notes. You can do so on any layer you wish. When you associate a polyline with your noted area, the bounding linetype will change automatically. You can also draw the area while placing the Reference Note.
Area/ Volume Reference Notes are denoted by a hatch pattern.
We previously offered separate Area and Volume Reference Notes. Due to the similarity of how these Reference Notes work, we've combined the two types into a single category.
Area/Volume Reference Notes Overview
Quick video
You can use Area/Volume Reference Notes when you want to display and keep track of an area for the contractor's convenience and clarity, or for your own cost estimation. You can assign a cost to the area or volume, and run the Reference Note Schedule to a spreadsheet for a total cost of this item – a useful feature for cost estimations and budget control. You can also run a Reference Note Schedule with these areas indicated by their hatch pattern rather than simply by a note number.
Area/Volume reference notes can be quite helpful in making a plan easy to bid. For example, you can use an Area/Volume Reference Note to mark and calculate the area for a 2-inch-thick bark mulch on a Landscape Site Plan.
An Area/Volume Reference Note can also be helpful in creating paving layouts, as you clearly define the different types of paving and keep track of the square footage (or square meters) of each pavement type.
Accessing the Reference Notes Manager
Open the Reference Notes (RefNotes) Manager:
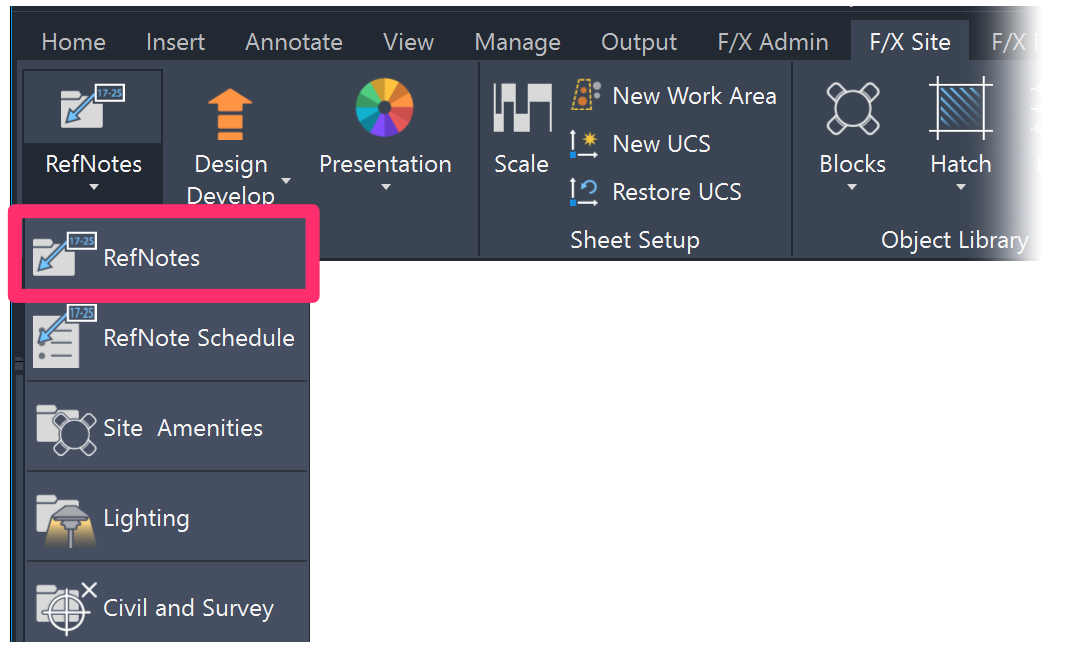
F/X Site ribbon, RefNotes flyout
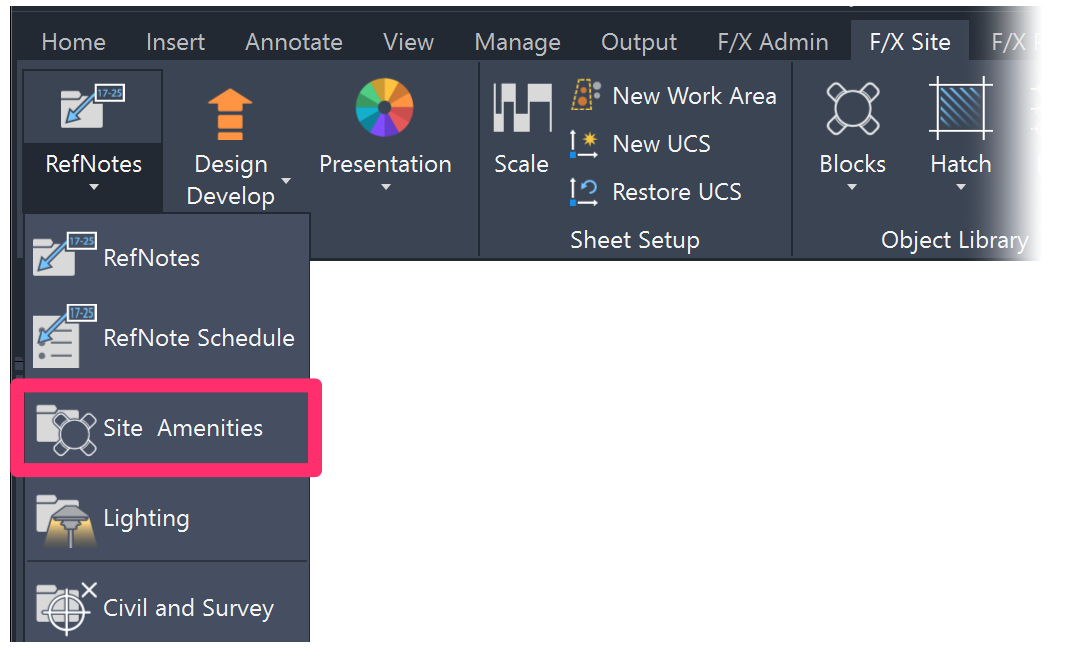
F/X Site ribbon, Site Amenities flyout

F/X Details ribbon, RefNotes flyout
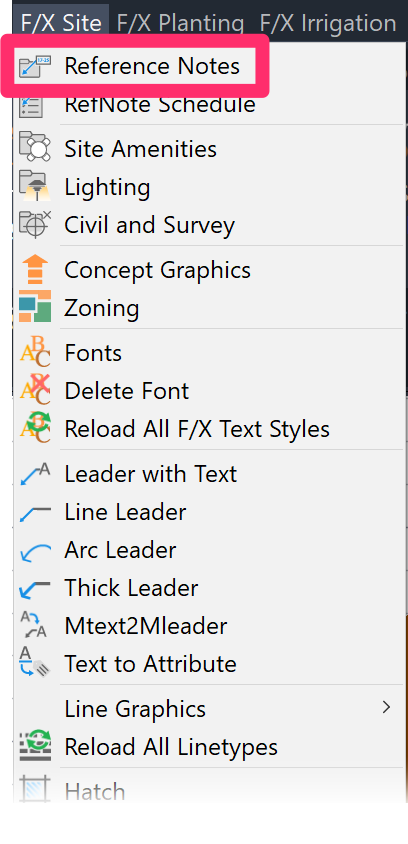
F/X Site menu
Or use one of the following keyboard commands:
- RefNotes
- FX_Amenities
Adding an Area/Volume Reference Note
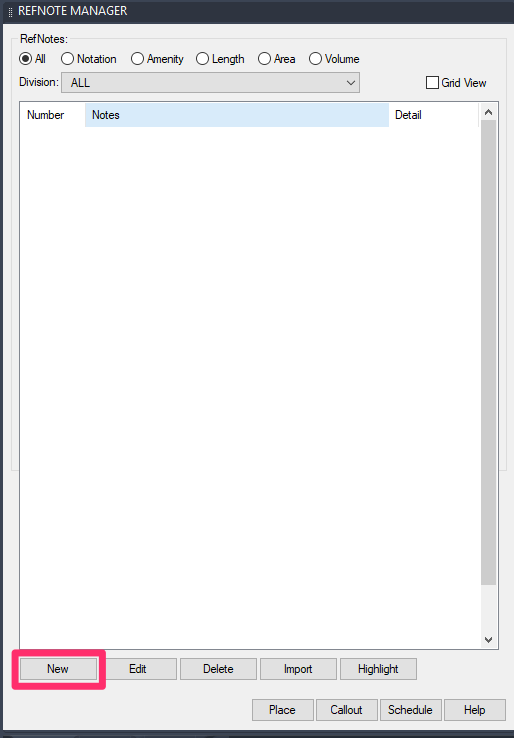
To add a new Reference Note, click New in the RefNotes Manager.

The New Reference Note dialog box will open. Under Reference Note Type, select Area / Volume.
The Select Manufacturer dialog box will open. You can now:

Adding a Generic or Custom RefNote
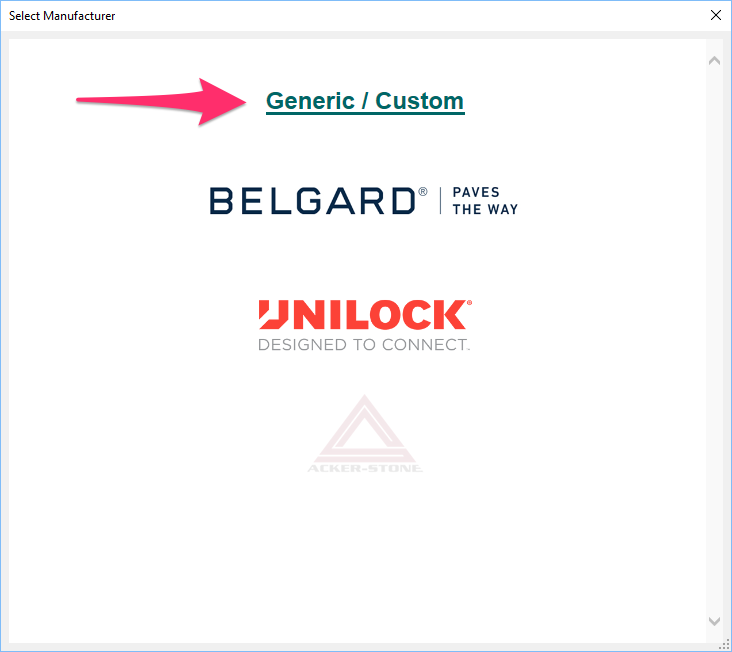
Click Generic/Custom to add a generic or custom RefNote.
The Hatch dialog box will open. Here, you can select a hatch pattern to represent the material represented in your Area/Volume RefNote.
We've updated our hatch patterns library to include subcategories for each hatch type, visible as extra tabs within each hatch type tab. More information

The available Reference Note hatches are the same hatches as those available when you use our Hatch tool. However, your Reference Note hatches differ from site hatches in that they become selectable Land F/X objects. For more information on our default hatch patterns, see our Hatch Patterns documentation.
Click a hatch pattern to select it, then click OK. You will be brought back to the New Reference Note dialog box, where you can configure the data assigned to your RefNote.
Adding a Hardscaping Material from a Manufacturer
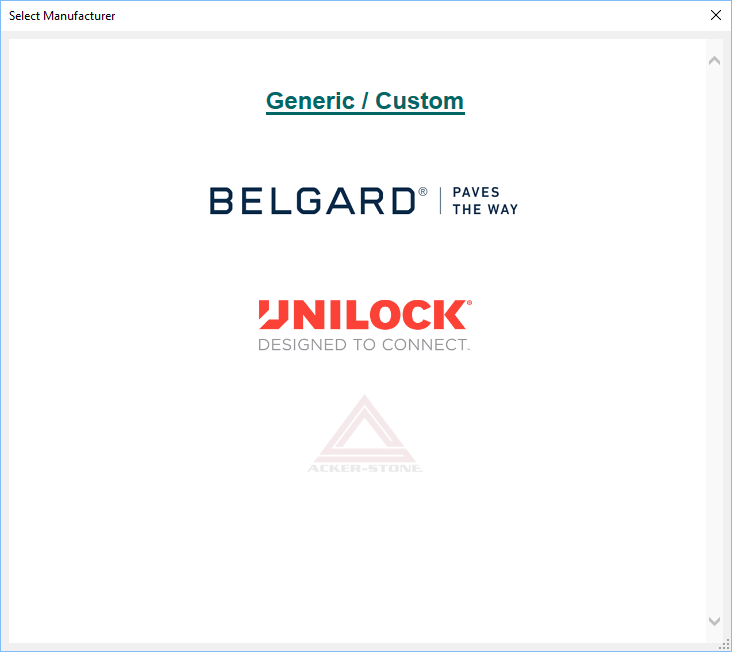
To select a hardscape manufacturer, select that manufacturer's logo.
You can also click Send me their Catalog to receive a manufacturer's catalog, or Web site to jump to that manufacturer's website.
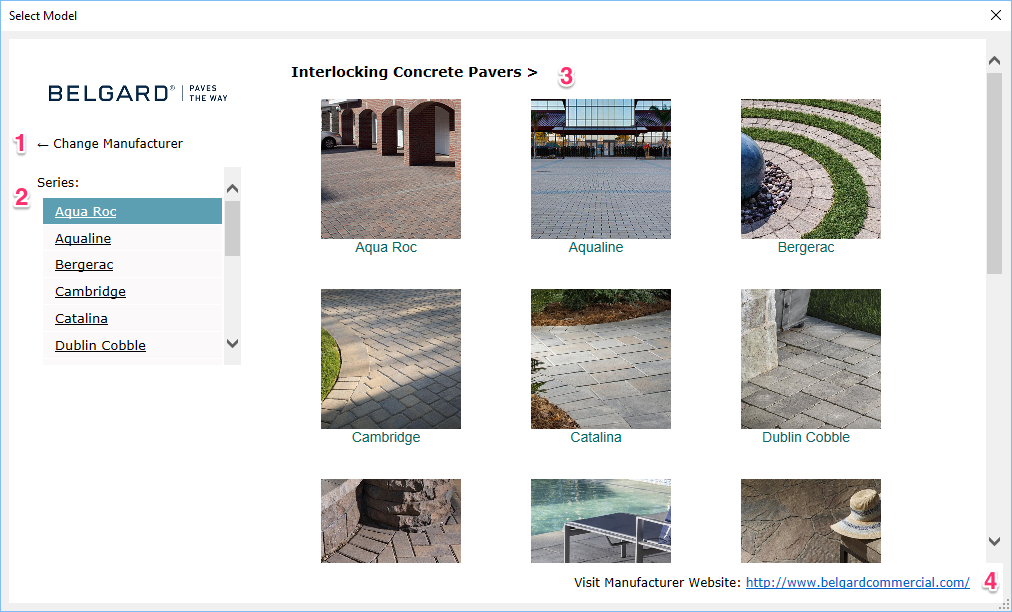
The Select Series dialog box will open.
1. Click this link to select a different manufacturer.
2. Pick a series from the manufacturer you selected.
3. Thumbnail images for each model within the selected series. Click a thumbnail to select the corresponding product.
4. Click this link to go to the manufacturer's website to learn more about the manufacturer and its products.
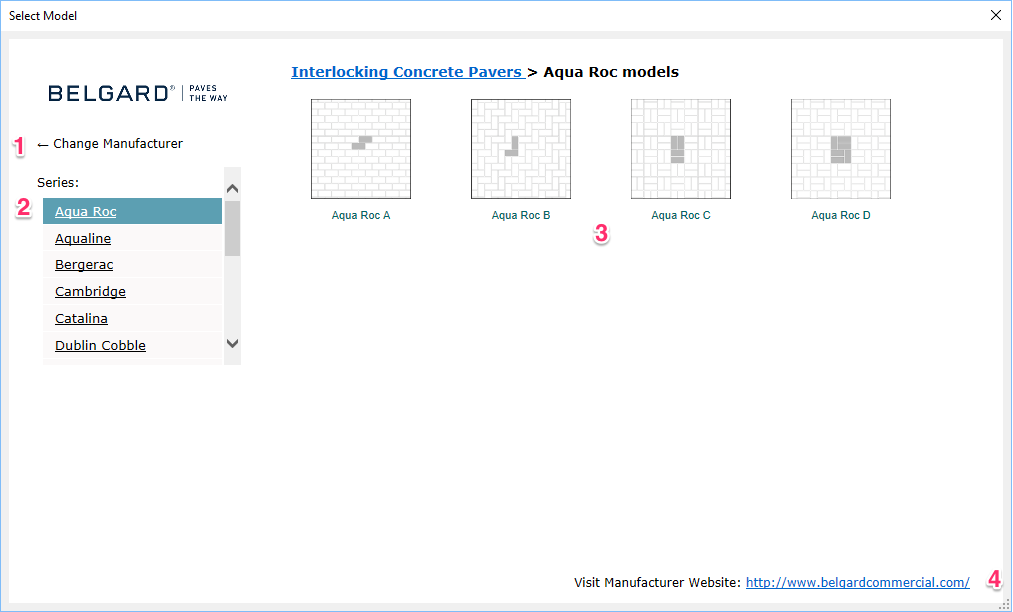
When you select a series, the Select Model dialog box will open.
1. Click this link to select a different manufacturer.
2. You can select a different series from this menu if you want.
3. Thumbnail images of each model within the selected series. Select the one you want to add.
4. Click this link to go to the manufacturer's website to learn more about the manufacturer and its products.
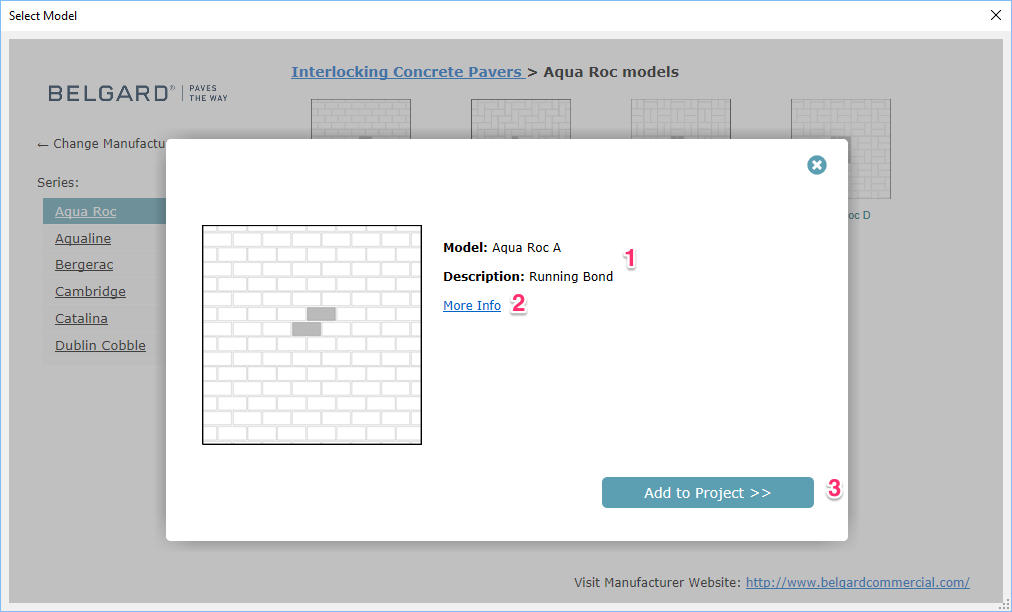
This dialog box will open when you select a hardscaping material model.
1. Model name and description of the selected product.
2. Click this link to see more information about the selected product series from the manufacturer's catalog.
3. Click this button to add the product series to your project.
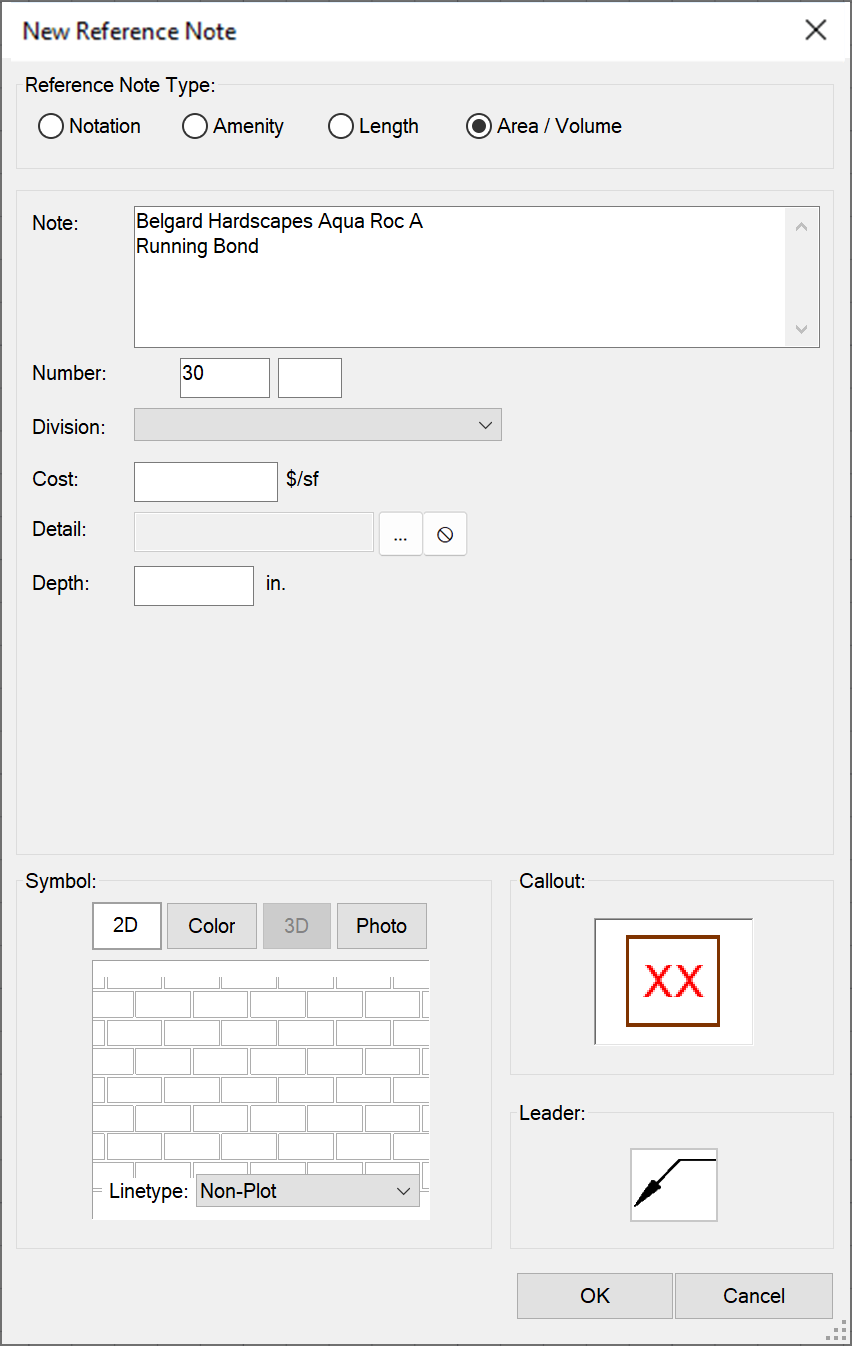
The New Reference Note dialog box will open, with the Note field populated with notes from the manufacturer on the selected model, and the assigned hatch for that material model in the Symbol thumbnail area.
You can now configure the data assigned to your RefNote. Click OK to add the product to your project.
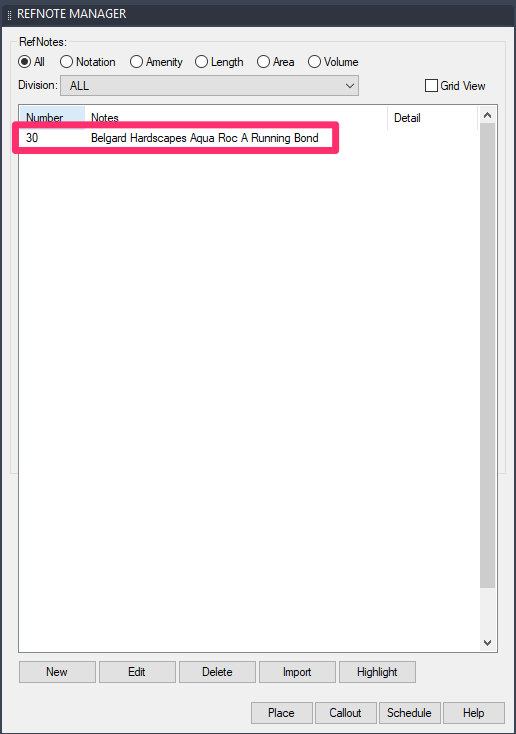
The product you added will be listed in the RefNotes Manager.
Configuring the Data Assigned to an Area / Volume RefNote
Once you've added your RefNote, the New Reference Note dialog box will open. Here, you can add and edit the data that's assigned to the RefNote.

1. Reference Note Type: Verify that Area/Volume is selected.
2. Note: Enter up to 256 characters of text to associate with the Reference Note. If you selected a hardscaping material from a manufacturer, this field will autopopulate with that manufacturer's notes on the material. More information
3. Number: Type a number for the new Reference Note. For more information, see our Reference Note Numbers documentation.
4. Division: If you want, select a Construction Specifications Institute Division for the Reference Note. For more information, see our Reference Note Divisions documentation section.
5. Cost: If you want, type a cost for this item in either square or cubic units. This information will apply if you decide to send the Reference Note Schedule to a spreadsheet format. More information
6. Detail: If you want, click the ... (Set Detail) button to go to the project’s Detail Manager and select a detail. More information
7. Depth: Type the depth of this item in inches. Adding a depth for the material will automatically cause this Reference Note to calculate volume rather than area.
8. If you want, you can add custom User Fields to your RefNotes. You can then create and assign values for these fields (for example, you can create a Color field and then add color values such as Terra Cotta, Gray, etc. to assign to RefNotes). These fields are tied to the Divisions, so you'll need to assign a division to a RefNote before you can assign these fields and values to that RefNote. You won’t see this option until you’ve assigned a division to the RefNote.
9. The hatch pattern you set when you first added the RefNote will display in this thumbnail preview box when the 2D tab is selected. If you selected a manufacturer's material, you'll see the assigned hatch for that material. To change or edit the hatch symbol assigned to this RefNote, click the preview thumbnail while the 2D tab is selected.
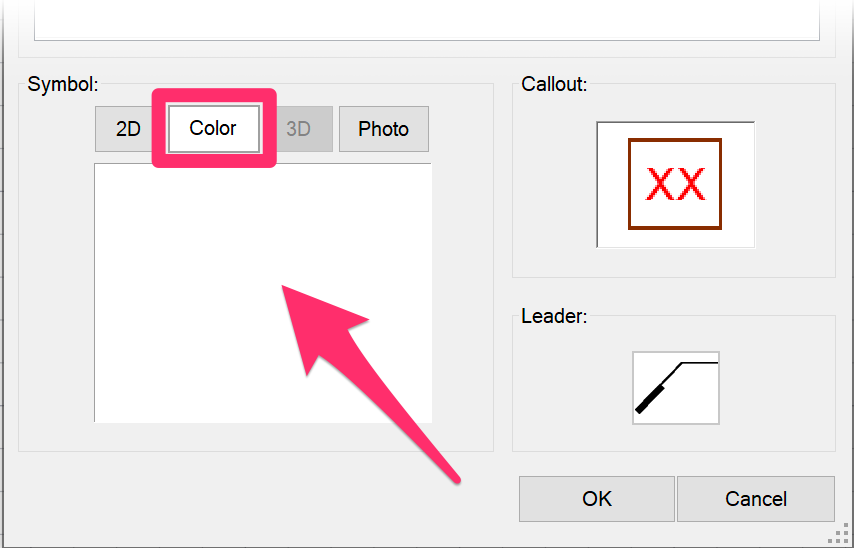
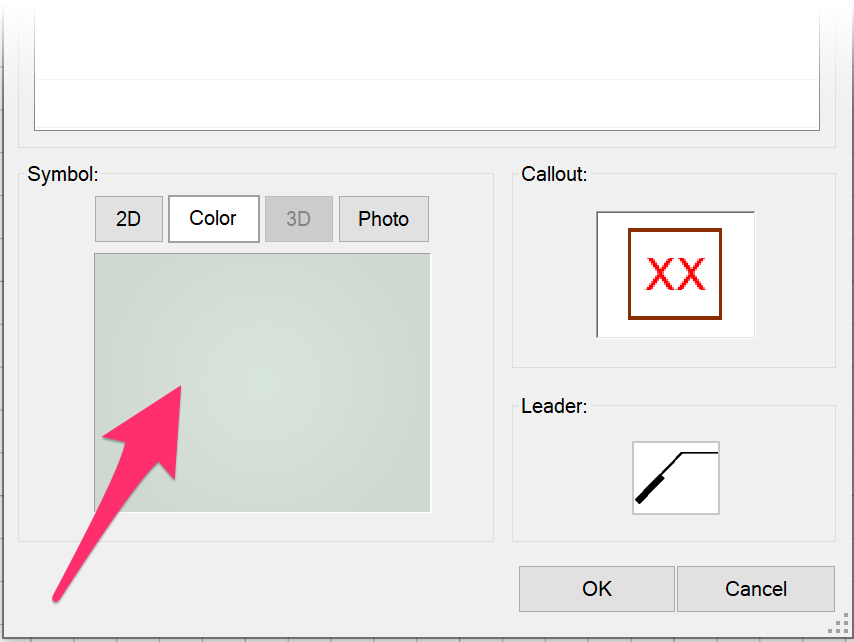
Select the Color tab to assign a solid color to the RefNote for use with our Color Render tool. More information
If you want, you can click Photo to browse to a photo of the item represented by the RefNote, and place it as a Photo Callout. After you've selected a photo for the RefNote, it will display in the thumbnail preview box while the Photo tab is selected.
Note that the current tab stays active as you edit or add other RefNotes.
10. Click either the Callout or Leader preview thumbnail to choose your styles for callout boxes and leaders for this RefNote. See our Leader and Callout Style Options documentation for more information.
11. Linetype: Select an option from this menu to define the linetype of the hatch polyline boundary. The options in this menu are simply linetypes that have been added from AutoCAD to the current drawing. More information
Cost
You can assign a cost factor to the material denoted by the hatch and run the Reference Note Schedule to a spreadsheet for a total cost of this item – useful for cost estimations and budget control. The Cost field will show square units (feet or meters) until you enter a Depth for the material. If you do enter a Depth, the Cost field will automatically convert to calculate cubic, rather than square, units.
Assigning a Color to an Area/Volume RefNote for Use With Our Color Render Tool
You can now assign a color to an Area/Volume RefNote for use with our Color Render tool when adding or editing the RefNote.
To assign a RefNote with a color, select the Color tab in the Symbol area.
Then click the symbol thumbnail box.
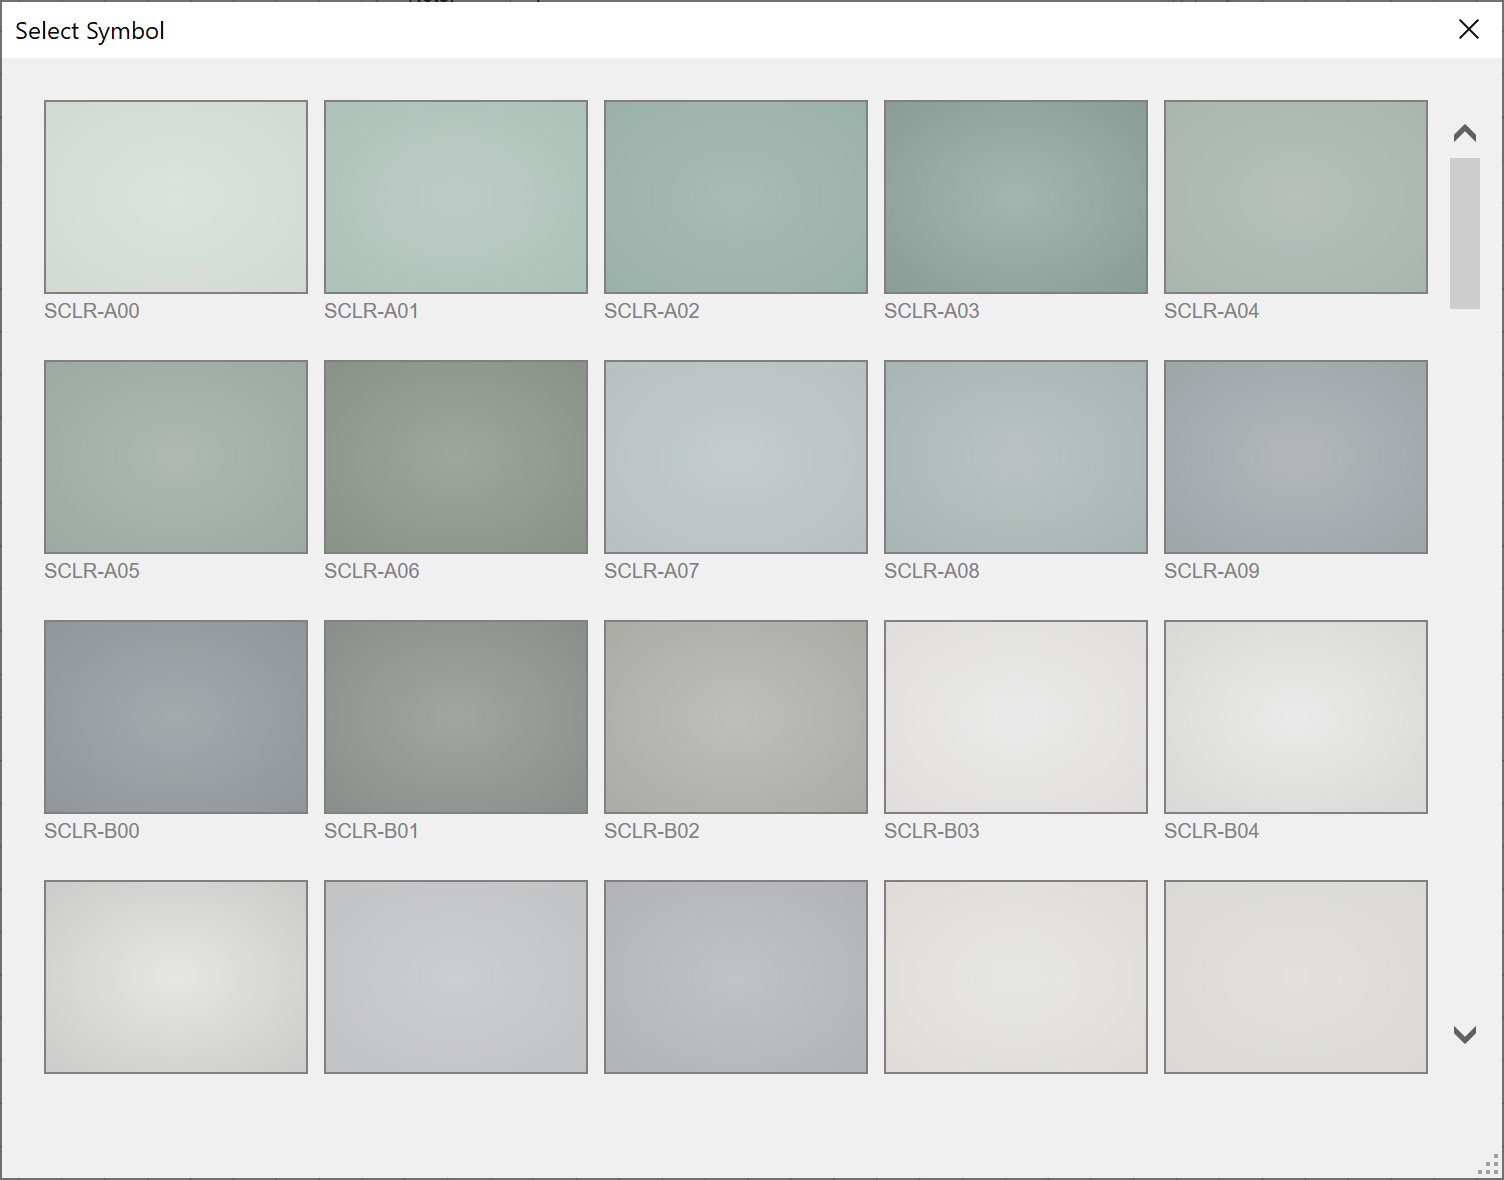
In the Select Symbol dialog box, choose a color for the RefNote, then click OK to assign the color.
You'll now see the color in the thumbnail preview box when the Color tab is selected.
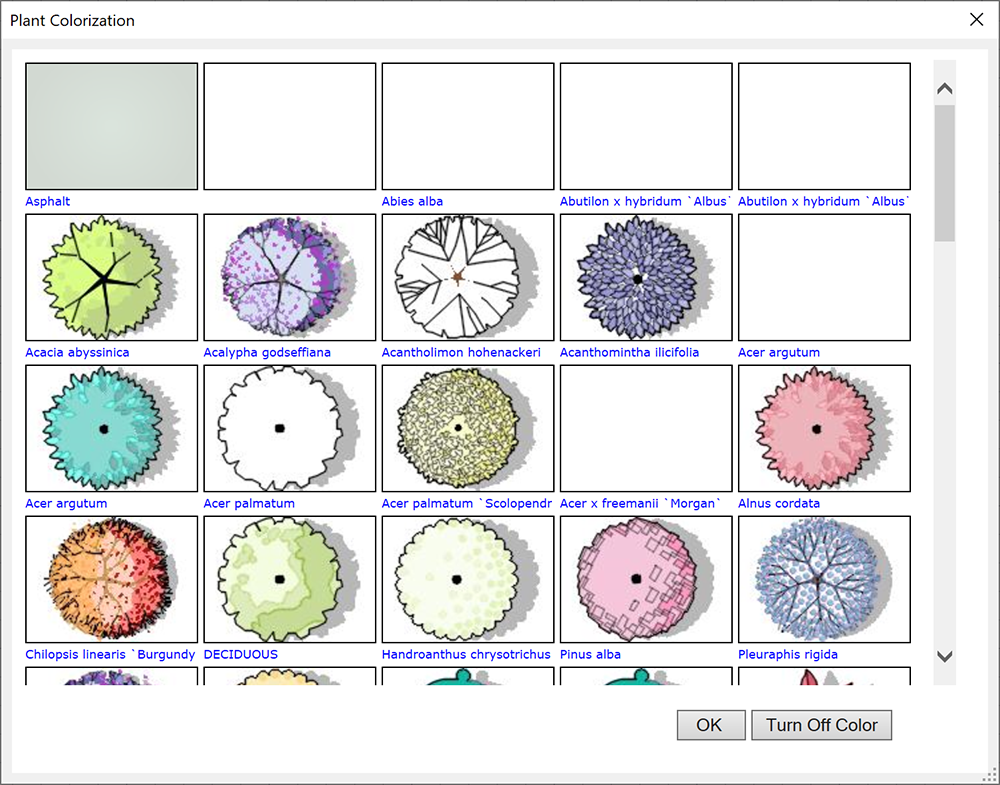
When you open our Color Render tool, the color will be assigned to the Area/Volume RefNote and will apply to hatched regions in your drawing where you've placed the RefNote.
Linetype
If you don't want the polyline border to be of any linetype, or to show up on the drawing, select Non-Plot from the Linetype menu. When you select the polyline border, the border line layer will change automatically to L-NPLT, and the layer will have plotting turned off.
Placing an Area/Volume Reference Note
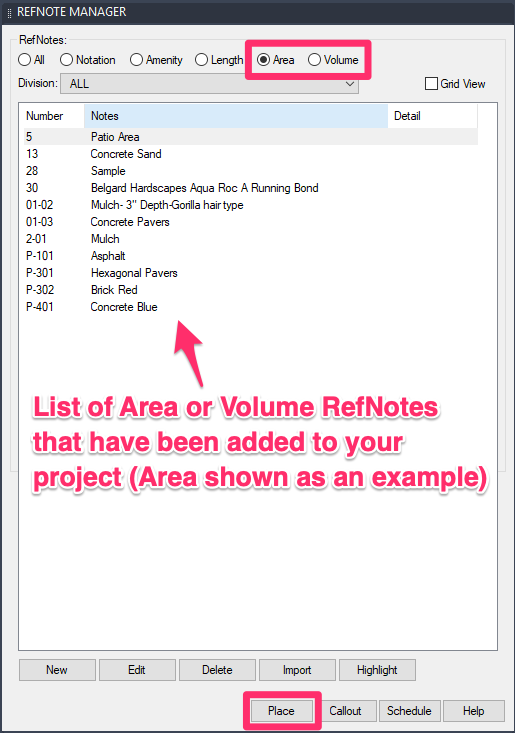
In the Reference Notes Manager, select Area or Volume from the Reference Note Type pull-down menu.
In this example, we'll place an Area RefNote.
Select the RefNote you want to place, and click Place.
The cursor will turn into a pickbox, and the Command line will prompt you to Select polyline to hatch [Draw Multiple].
When placing RefNotes, you can press the F8 and F9 keys to toggle between Ortho and Snap modes, respectively. This will allow you to lock your leaders at certain angles.
Selecting an Existing Polyline Boundary
To select an existing polyline, use the pickbox to select a closed polyline area to hatch.
After selecting the option for an Area/Volume reference note, use the pickbox to select a closed polyline defining the area where your RefNote will be placed.


When you click the polyline, the hatch pattern assigned to the note is applied to the area.
In this case, the linetype selected to represent this area was a non-plot line, so the polyline border automatically changed to this type of line.
Drawing a Polyline Boundary "On the Fly"
If you haven't yet drawn a polyline boundary for your RefNote hatch, you can also draw a boundary "on the fly" at this point.
When you go to place an Area/Volume Reference Note hatch, the Command line will prompt you to Select polyline to hatch [Draw Multiple].
Start drawing your closed polyline. Once you close it, the hatched area will appear within the polyline boundary.
In previous versions, drawing your hatch boundary on the fly would require you to first type D for Draw. We've now built in the ability to simply start drawing your closed polyline. As long as the first point you select isn't an existing polyline, the Draw command will be fired automatically.
This feature works with all of our hatch types, including:
Area/Volume Reference Note Hatches and the Reference Note Schedule
You can represent Area/Volume RefNote hatch patterns in the Reference Note Schedule in one of two ways:
- With a symbol (a sample of the hatch pattern). If you want to represent the hatch patterns with a symbol, simply leave the schedule the way it is.
or
- With a code (a Reference Note callout). If you want the schedule to show a code (or callout number), you will need to associate some of the hatch patterns with a callout by using the Reference Note Callout tool.
Excluding Objects from an Area/Volume Reference Note Hatch
Want to hatch an area but avoid hatching objects within that area? Area/Volume Reference Notes allow you to do just that – when you use the Multiple command while hatching. (Type M when placing your hatch and follow the prompts.)
For more information, see our Exclude Objects from Site Hatch documentation.
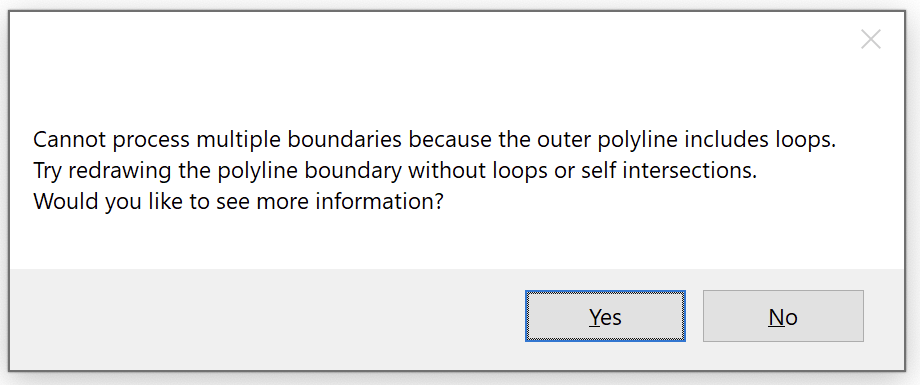
Cannot process multiple boundaries because the outer polyline includes loops.
Seeing this error message when trying to use the Multiple option while placing a RefNote hatch?
Editing a Placed Area or Volume RefNote Hatch (Hint: Use Our P-Hatch Tool)
Quick video
Need to add to or subtract from an existing placed area or volume hatch in your drawing?
If so, we strongly recommend using our P-Hatch tool rather than the native CAD Hatch Edit command. Here's why.
Importing RefNotes from a Template or Project
If you find yourself adding the same RefNotes to multiple projects, we recommend setting up a project template and then adding your commonly used RefNotes to that template. You can then import them into a new project from that template. This practice can save you immeasurable amounts of time, considering all the data you need to fill out for each RefNote you create. With templates, you only need to add and configure your RefNotes once, then import them – along with all attached data – into the present project.
For more information and instructions, see our Importing Reference Notes documentation.
Having a Hatch Issue? Download Our Updated Hatch Patterns Manually
Are you experiencing any of the following issues with your hatches?
- Hatches looking fragmented or broken apart
- Hatches with scales that are too large or too dense
- Hatches that place blank or empty
- Hatches that are not appearing in schedules
- File size bloating
If so, follow our steps to download our updated hatch patterns manually.
Other Reference Note Types
For information on the other types of Reference Notes, see our documentation on:
- Notation Reference Notes: Place a numeric symbol referring to a text notation.
- Length Reference Notes: Place an item of linear quantity, and calculate data such as cost per foot.
- Amenity Reference Notes: Place one or more site objects, and calculate quantities and costs automatically.
Related Webinars
- Getting Started with RefNotes: Our Reference Notes (RefNotes) tool provides a quick way to spec and place site furniture, play structures, hardscaping materials, retaining walls, and pretty much any other item you need in your landscape plan. We'll go over the basics. (58 min)
- Ask Us Anything! Spotlight on RefNote Schedules: Join us to see the unveiling of our revamped RefNotes Schedule and hear about our development intention. (54 min)
- Hatches We dive into the Land F/X hatch libraries, take a look at how Land F/X manages hatches, and show you how to integrate your own custom hatches and develop a better understanding of the inner workings of the Land F/X hatch system as a whole. (58 min)
- Hardscape Design: Hardscape design with Land F/X is all about Reference Notes (RefNotes). Learn about the myriad options available within our RefNotes tool that will streamline your project's workflow. We'll go over all the basics of RefNotes, including setting up and placing a RefNote, calling out your features, and placing a schedule. (1 hr 2 min)
- Streamlined Life Cycle of a Site & Hardscape Project: You have the tools at your fingertips – including our RefNotes tool – to take your site and hardscape design from concept to construction documentation, complete with quantities, data, callouts, and cost estimates. Learn a complete process spanning the life cycle of each project that will start cutting days off your overall drafting time. (1 hr 3 min)
- Streamlined Life Cycle of a Site & Hardscape Project: You have the tools at your fingertips – including our RefNotes tool – to take your site and hardscape design from concept to construction documentation, complete with quantities, data, callouts, and cost estimates. Learn a complete process spanning the life cycle of each project that will start cutting days off your overall drafting time. (1 hr 3 min)
- Understanding the Manufacturer Connection: The Manufacturer Connection is a dynamic and invaluable relationship that we at Land F/X have pioneered into an exclusive, easy to use tool that benefits both designers and manufacturers. Learn about the work we put into manufacturer content and how to enhance your CAD design and specification processes for site amenities, lighting, and hardscape. (1 hr 1 min)
- Permeable Surfaces with Concrete Paving: Permeable pavers offer a significant advantage over other porous materials because they allow water infiltration between units rather than through the pavers themselves. Because they come in a variety of shapes, colors, and textures, these pavers also offer an aesthetic quality. Brad Swanson of Unilock goes over these and other benefits and options. (1 hr 5 min)
- Intro to Site Tools: This webinar covers the basics of what our Site tools have to offer, including a segment on the Reference Notes Manager. (1 hr 2 min)
- Common Land F/X Questions: This webinar covers some of our lesser-known tools, including Reference Note User Fields. (1 hr)
- How The Manufacturer Connection Works: The Manufacturer Connection works in conjunction with our Reference Notes tool to help you spec site amenities and hardscape materials from specific manufacturers. Learn all about it here. (53 min)
- Using RefNotes & Cost Estimates: Setting up a project with RefNotes right from concept can help speed up the process to produce accurate detailed drawings, and construction drawings, with cost estimates at every step along the way. We'll go through some advanced-user tips with RefNotes using an actual project. (46 min)
- Importance of Lines in Design: Lines, partitions, and edges are some of the most powerful design tools in a landscape architect's arsenal. Daniel Martin from Permaloc explains the significant economic and environmental benefits of edging with expertise. (54 min)
Troubleshooting
Issue: You are unable to edit or call out a RefNote hatch
Issue: When placing a RefNote hatch, you saw the following error message: Unable to locate target hatch
Issue: AutoCAD crashes when you place a RefNote hatch – but only when the Land F/X menus are loaded
Issue: You need to remove the hatch from internal objects within a RefNote hatch
Having other issues with Reference Notes? See our RefNotes Troubleshooting section.
Issue: You are unable to change the rotation of a hatch pattern
Issue: You are unable to change the scale of a hatch pattern
Issue: A placed RefNote hatch looks fragmented or isn't joined like it should be
Issue: A placed RefNote hatch looks different from its thumbnail preview slide in the Hatch dialog box
Issue: Error 404: Missing Remote File and missing SLD files when attempting to place a RefNote hatch


