Edit Plant Information (Project Plants and Concept Plants)
Quick video
- Editing Plant Information Overview
- The Plant Info Dialog Box
- Plant Code
- Group
- Remarks
- Set Detail
- Plant Information Fields
- Plant Symbols & Hatches
- Accounting for Existing Plants on Your Site
- Changing a Generic Plant Symbol Into a Project Plant
- Plant Data & Tagging
- Additional Tools
- When Should You Edit?
- Related Webinars
- Troubleshooting
After adding plants to your project, you may want to edit their information. You may need to correct plant data, such as rootball size or cost per unit. You may also want to change a plant's symbol to suit your preferences or office standards.
Any changes you make to plants will automatically update the drawing, including any callouts you've assigned to the plant. In other words, this tool provides the flexibility of making a casual specification for a plant and then, later in the design process, refining the plant.
You may also have placed one or more plants in your drawing that you want to replace with entirely different plants. For more information on replacing plants, visit our Change Plant documentation section.
Editing Plant Information Overview
You can edit plant information in the Plant Info dialog box, which you can access in one of the following ways:
Edit Plant Information Using the Edit Plant Tool
Open our Edit Plant tool:

F/X Planting ribbon, Edit Plant button
type FX_PlantInfo in the Command line
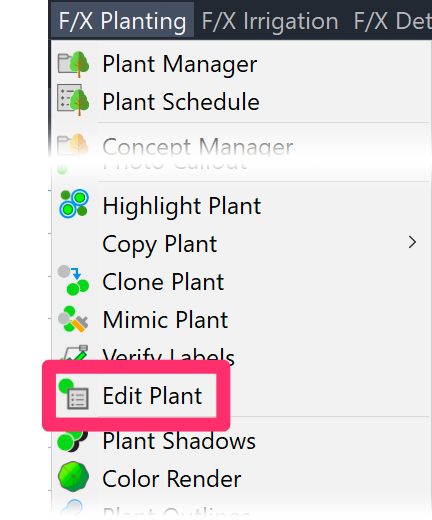
F/X Planting menu, Edit Plant option
The cursor will turn into a pickbox. Click a plant in your drawing to edit.
A Note on Shrub Areas
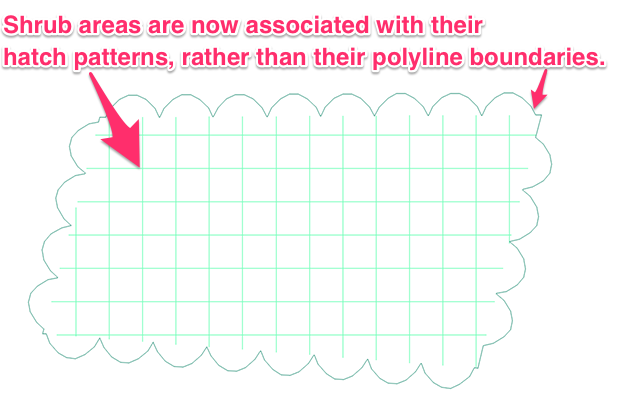
Shrub Areas are now associated with the hatches that represent them, rather than the polyline boundaries that surround them.
To select a Shrub Area, select the hatch rather than the boundary.
The Plant Info dialog box for the selected plant will open, allowing you to make edits.
Edit Plant Information Using the Plant Manager
You can also edit plants using the Plant Manager:

F/X Planting ribbon, Planting flyout
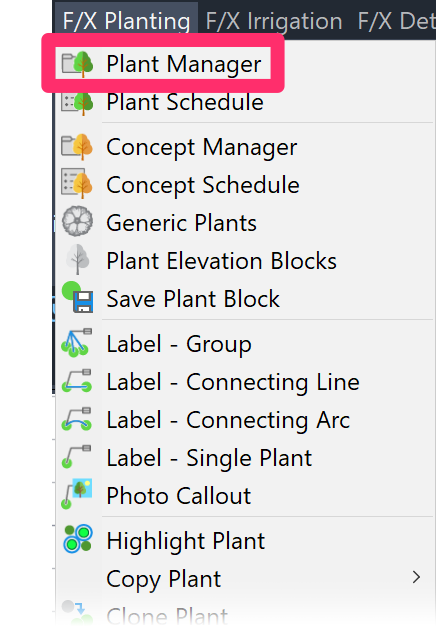
F/X Planting menu, Plant Manager option
or type ProjectPlants in the Command line
The Plant Manager for the current project will open.
Under Project Plants, select the category of plant you want to edit (example: Trees category).
Select the plant you want to edit in the list, then click Edit.
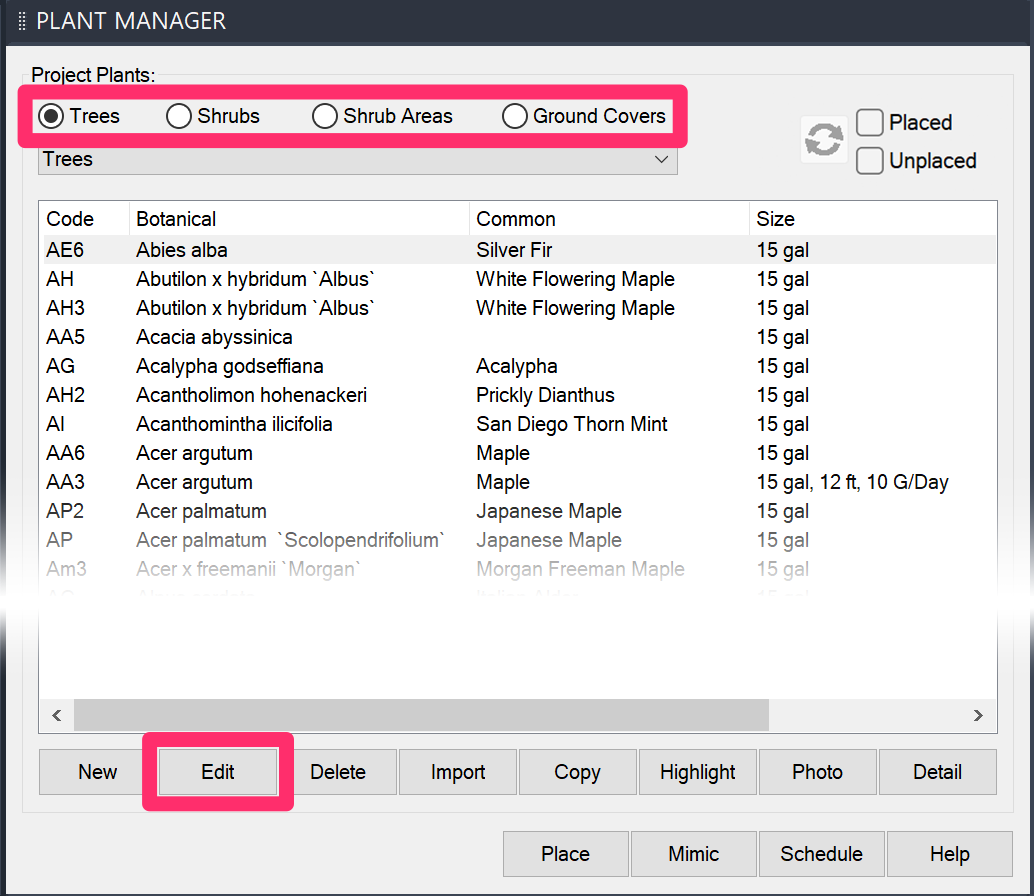
The Plant Info dialog box for the selected plant will open, allowing you to make edits.
Use caution when editing using this method while the design process is already under way.
Editing from the Plant Manager WILL NOT create problems if:
- The planting plan is the current drawing. In this case, any changes made from within the Plant Manager would instantly update throughout the drawing as with with the Edit Plant button.
- No plants from the project have been placed in any drawing to date. In this case, no drawing exists to update.
However, editing from the Plant Manager WILL create problems if:
- The planting plan has been under development but is not the current drawing, and you go to the Plant Manager without the planting plan drawing being active. In this case, the selected plant's data will be updated within the project's database, but these changes will not be reflected in the drawing. As a result, a data mismatch will occur in the project and data in the drawing.
The Plant Info Dialog Box
Whether you choose to edit plants on the fly by selecting them in your drawing, or with the help of the Plant Manager, you'll make your edits using the Plant Info dialog box.
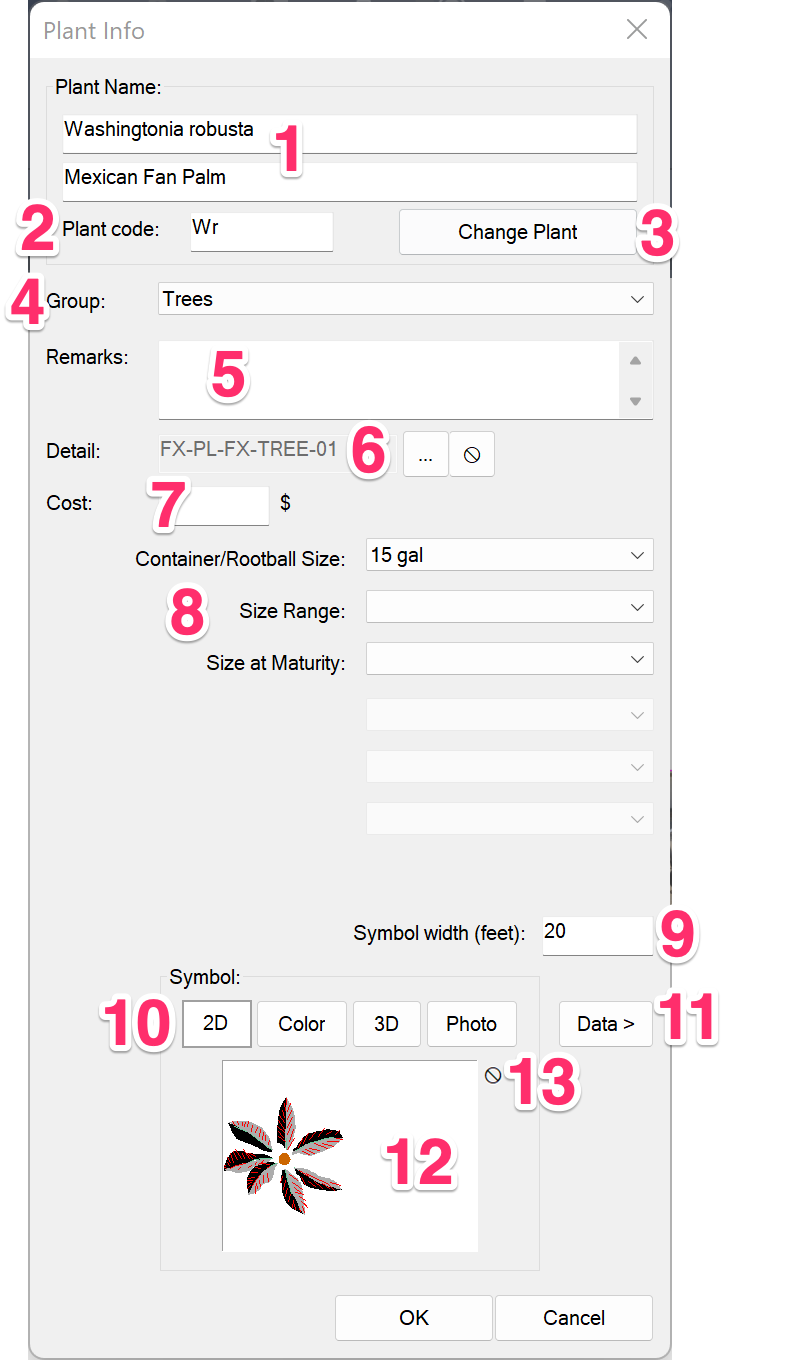
1. Plant Name: The botanical and common names for the selected plant. If you want, you can change this information.
2. The Plant Code assigned to the plant.
3. Change Plant: Click this button to replace the selected plant with an entirely different plant.
4. The Group, or subcategory category, of the selected plant. If you haven't set a subcategory, the plant will simply be grouped into its plant category (example: Trees).
5. Any Remarks, or notes, you want to assign to the plant – up to 256 characters.
6. If you want, set a detail for the plant.
7. If you want, set – or edit – a per-unit cost for the plant.
8. The Plant Information Fields, including user definable information fields.
9. The plant's Symbol Width in feet or meters, depending on how you have set your scale.
10. Buttons to toggle between the 2D, Color Render, and 3D symbols currently assigned to the selected plant, as well as a Photo assigned to the plant.
11. Data: Access the data associated with this plant.
12. Thumbnail image of the plant's 2D, color, or 3D Symbol, or of a photo currently assigned to the plant, depending on which symbol toggle button you have selected. For trees and individual shrubs, you'll select a symbol block to represent the plant in CAD. For groundcovers and Shrub Areas, you'll select a hatch to represent an area that is planted with that groundcover or Shrub Area.
13. Button to unassign a plant symbol. More information
Plant Code
This field displays the default code assigned to this plant, as it will appear in your labels and Plant Schedule. All plants in our database have a unique code automatically assigned to them.
You can edit the plant code as you choose.

Take care when editing a plant's code. Changes you make in the Plant Code field for a given project will affect that plant's code in all other drawings that use the same project. To avoid this issue entirely, we recommend setting up and working from a central project template that includes your office's preferred plant codes.
Plant codes can follow one of two possible formats:
- GEN SPE: The first three letters of the genus, followed by the first three letters of the Species.
- GS: The first letter of the Genus, followed by the first letter of the Species.
You can assign either of these plant code formats in the Planting Preferences.
Group
To give the plant a new subcategory (group), open the Group menu.
The menu will list all possible groups within the selected plant category. For example, groups within the Trees category include Conifers, Deciduous Trees, and so on.
If you want to move the selected plant to another group, select that group from this pull-down menu.
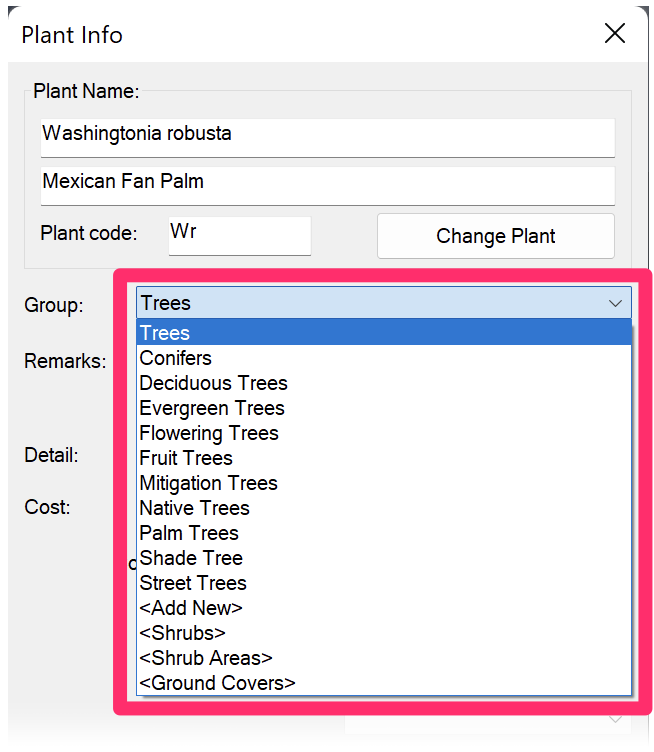
Note that the menu also offers the option <Add New>, which allows you to create a new group.
You can also select the entries for the subcategories – <Trees>, <Shrubs>, <Shrub Areas>, or <Ground Covers> – to move the selected plant to one of those categories.
Remarks
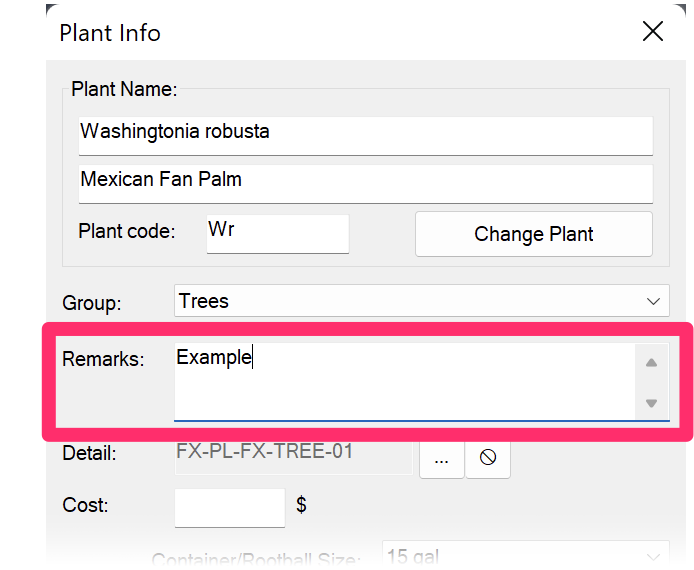
Any remarks, or notes, you add for the selected plant will appear on the Plant Schedule.
Remarks can consist of up to 256 characters.
Typical specification items, such as container size or caliper, are better handled in the Plant Information Fields.
Set Detail
If a detail has been set as a default for the plant category as a whole (example: for all Trees), that detail number will appear in this field.
If you want a different detail to represent this plant, click the ... (Set Detail) button and set a different detail to represent this plant.
For more information, see our Associating Details With Plants documentation.

Plant Information Fields
This portion of the Plant Info dialog box contains up to six user definable fields for how you typically specify this type of plant.
These include Container/Rootball Size, followed by other fields such as Caliper, Size Range, and three extra fields that you can customize in Plant Sizes Preferences.
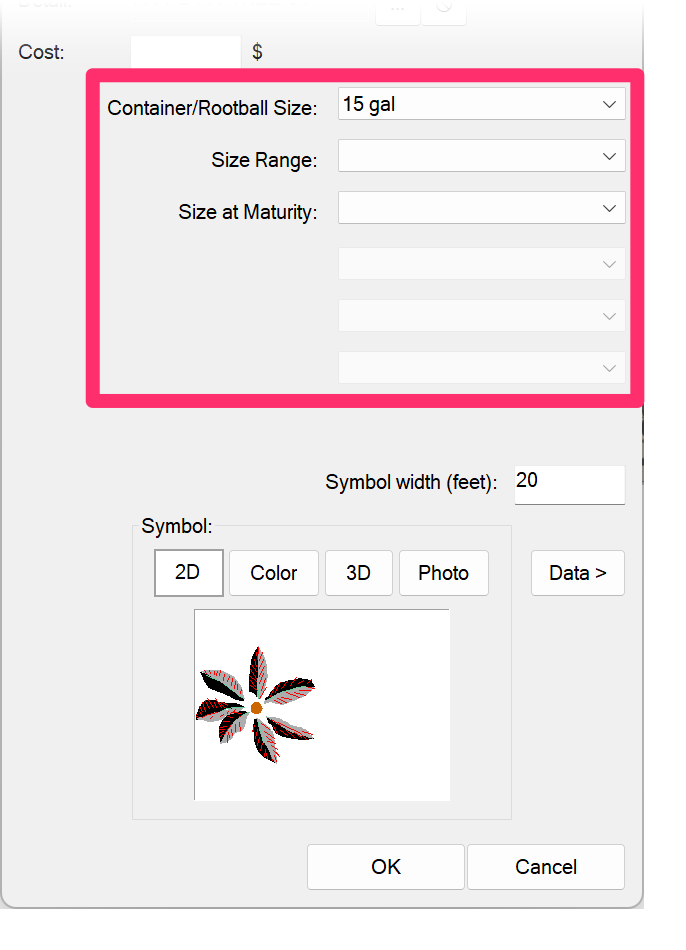
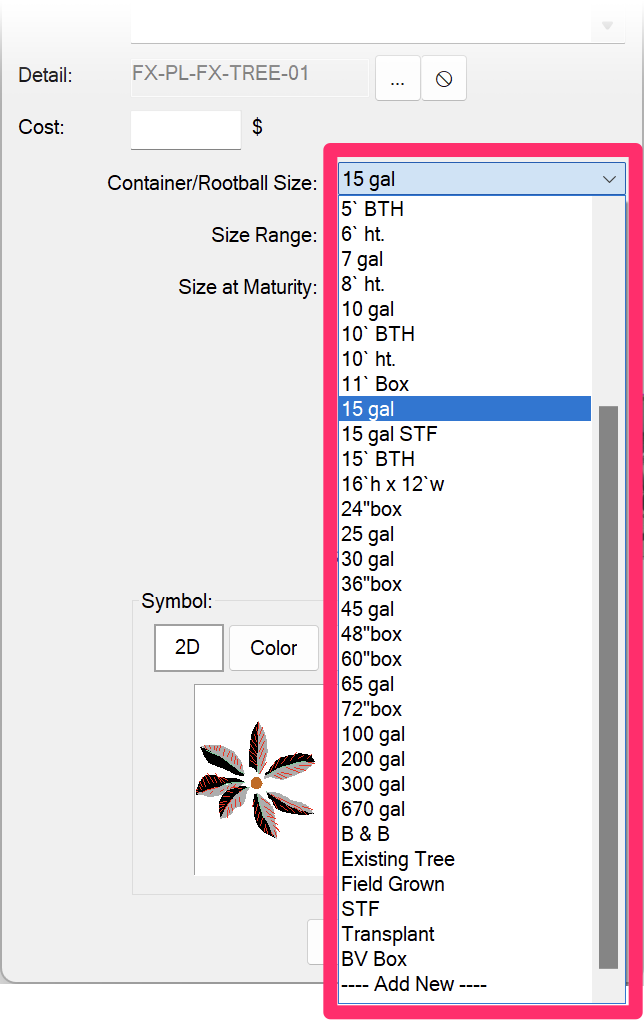
Each field has its own pull-down menu.
Pictured to the left is the menu for Container/Rootball Size, where you can select from several different sizes for the selected plant.
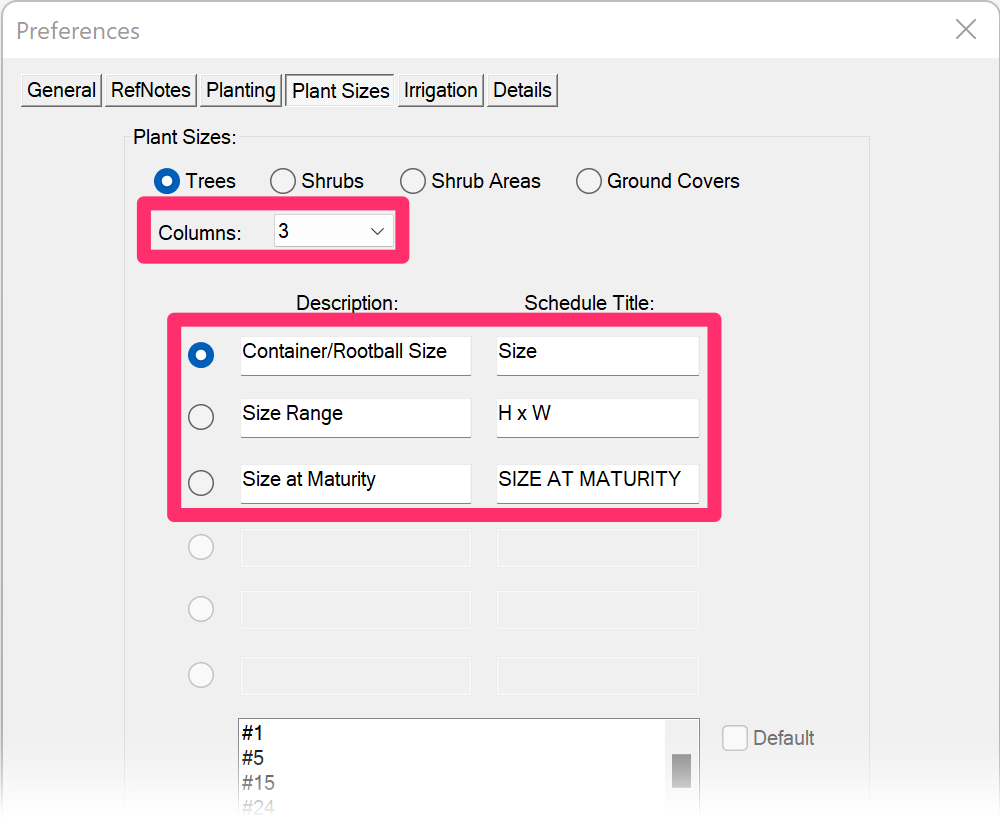
You can customize the Plant Information fields in the Plant Sizes Preferences screen.
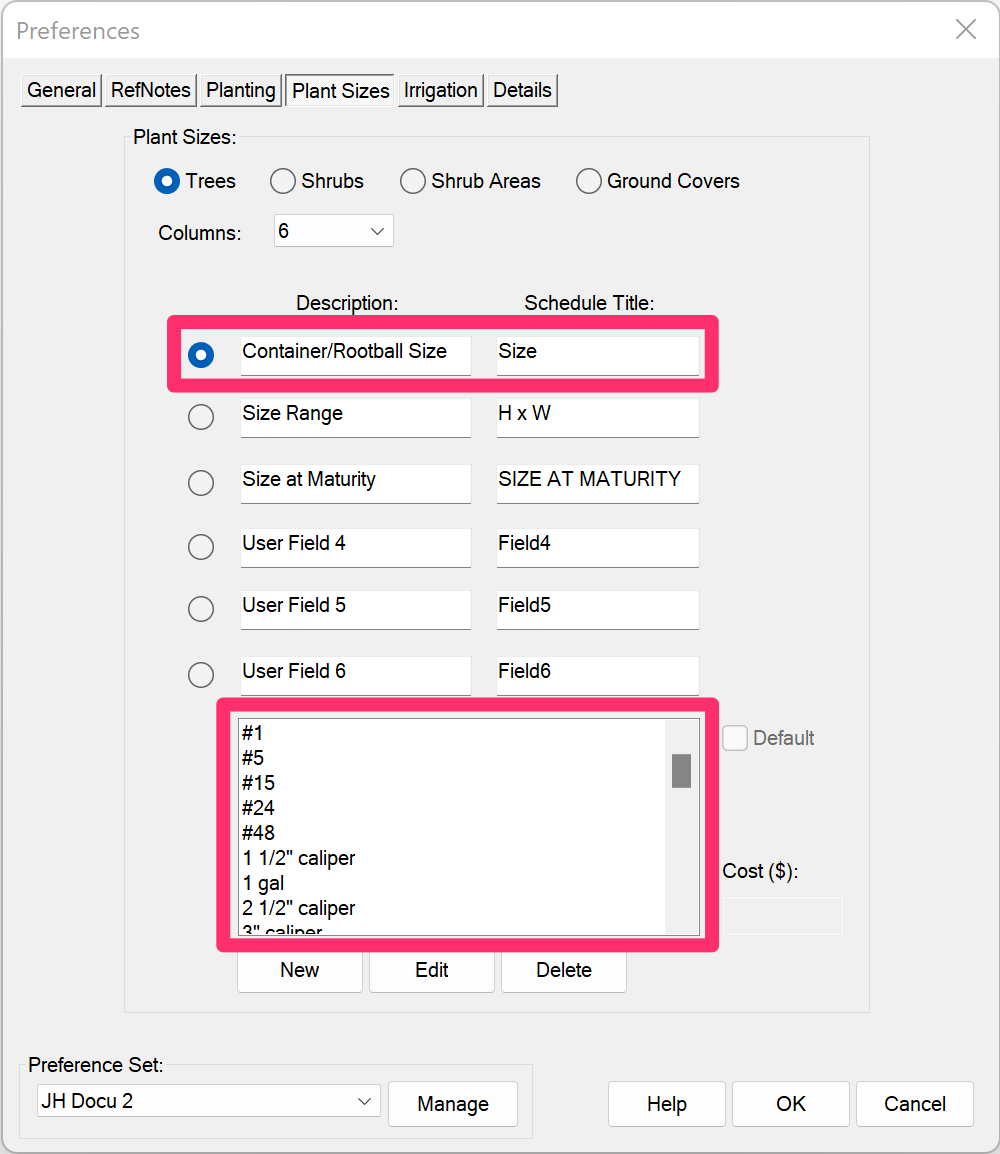
Select the number of columns that you want to appear in your Plant Schedule. In this example, as in the Plant Info dialog box as pictured above, we have 3 columns selected.
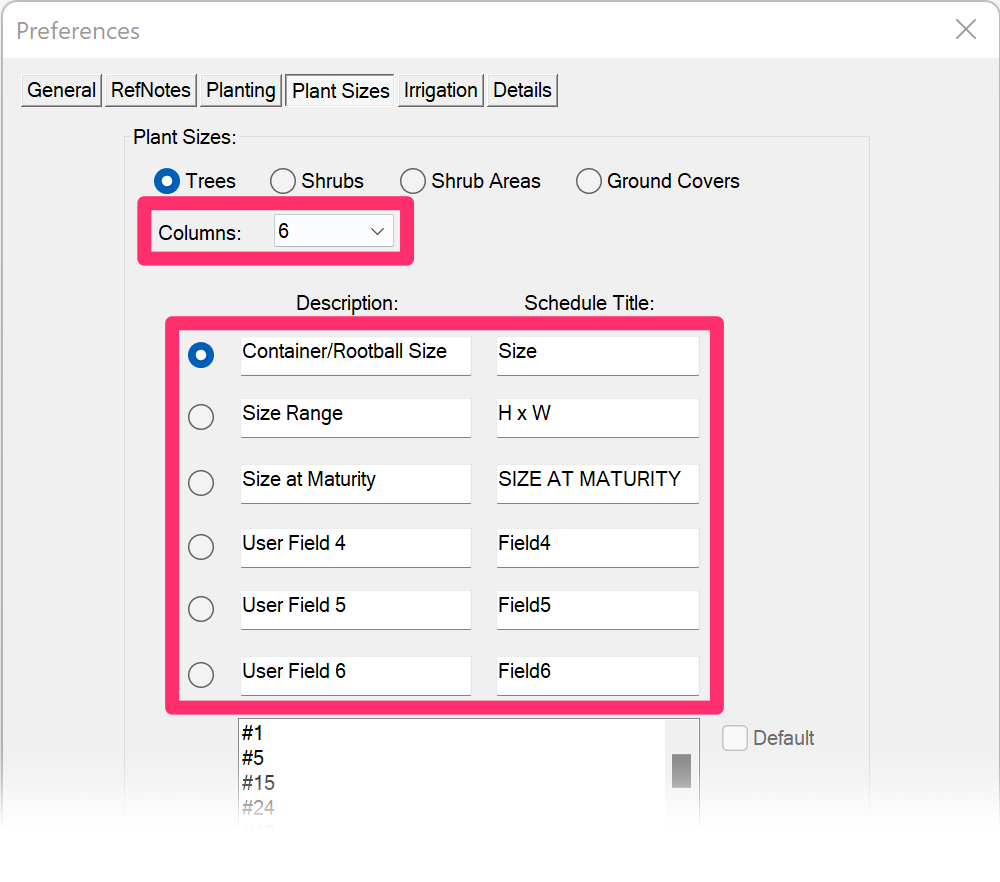
In this example, we've selected 6 columns, which adds User Fields 4, 5, and 5.
All six columns are completely customizable, allowing you to add any information you want to your plants.
These extra fields will be added to the Plant Info dialog box with the same names you give them here. See Additional Fields below.
Container/Rootball Size
Though all the fields are user definable, it's best to leave this field definition for container/rootball size, as this data may be indicated in the plant callout, depending on the type of callout. However, you might make a variety of changes to the listing options for this field, depending on your specification needs.
The container size will be the default size for that plant category that is set in the Plant Sizes Preferences before you edit it. There, you can set the default size for the average plant of this category to receive (example: 15 gal for trees, 5 gal for shrubs, etc.).
Additional Fields
The other five fields are whatever you define them to be. Note that just because a field is visible does not mean you have to use it. If you have six fields available and you only use one or two, only those you use will be included in your Plant Schedules.
Examples of other potential fields might include:
- Caliper
- Size Height or Size Width (or a Size category indicating both height and width with 10'Hx8'W sort of option)
- Clr Trunk Ht (Clear brown trunk height for palm trees)
- Water Usage (such as a WUCOLS water usage classifications in the western USA)
Here's an example:
Selecting 5 from the Columns menu in the Plant Sizes Preferences adds two additional fields.
We'll change the names of those fields to Height and Water Usage. Click OK to save your changes.


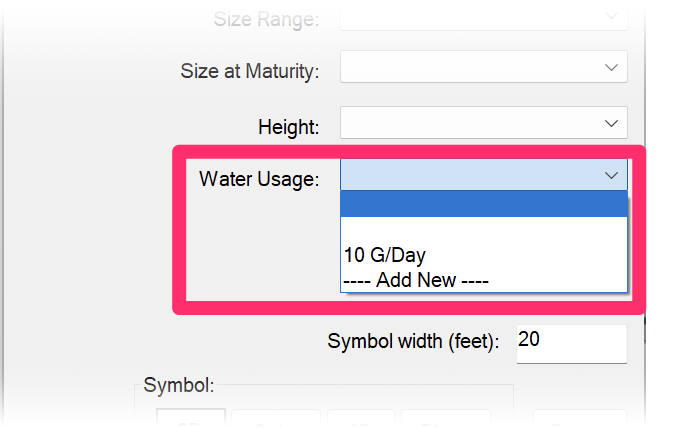
The extra fields are then added to the Plant Info dialog box. Note that the menus to the right of these new fields won't contain any entries except ---Add New---.
Select ---Add New--- to add a data entry to the menu.
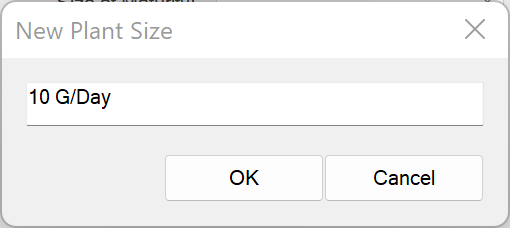
The New Plant Size dialog box will open, and you can enter the data of your choice. we'll give our tree a 10 gallon per day (10 G/Day) water usage. Click OK to add the data entry.
The entry will now be available from the menu, and you can select it.

These custom columns will be included in your Plant Schedule, along with the data you've set for them when adding information to each plant.
These additional fields might be unique to how your firm specifies plants, or specification requirements unique for different areas of the world, such as Number of Transplants for France.
Flat Count (Groundcovers and Shrub Areas)
For plants you've added as groundcovers or Shrub Areas, you can choose to express your plant counts in flats, sods, or seeds. For further information, see our documentation on:
In the interest of avoiding confusion with the contractor, your flat quantities will only appear in the Plant Schedule – not in your plant labels. Instead, a plant label for a groundcover area will show a full plant quantity in that area.
Plant Symbols and Hatches
Click the Symbol area to assign the plant with a symbol block (trees and individual shrubs) or a hatch (Shrub Areas and groundcovers).
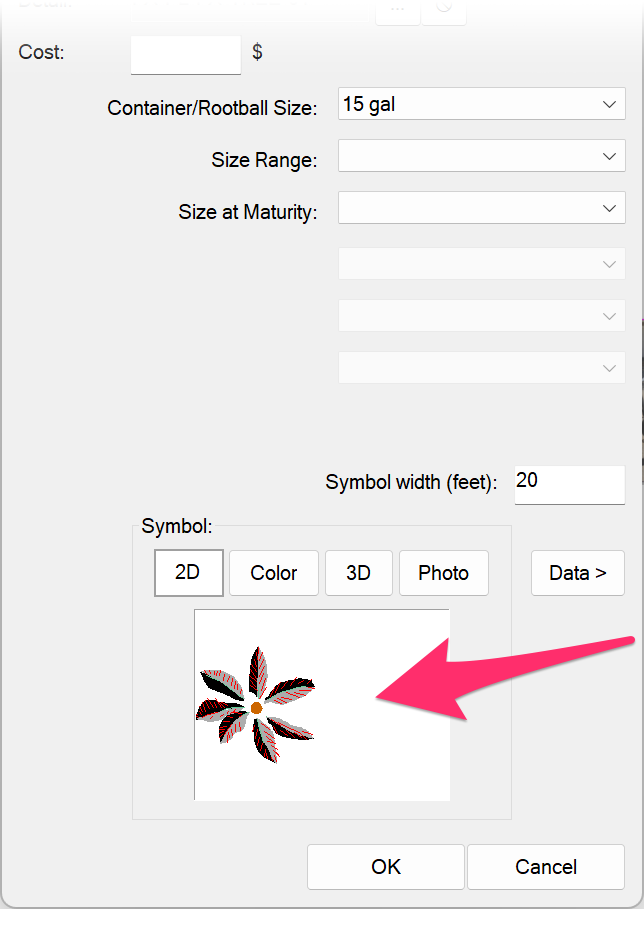
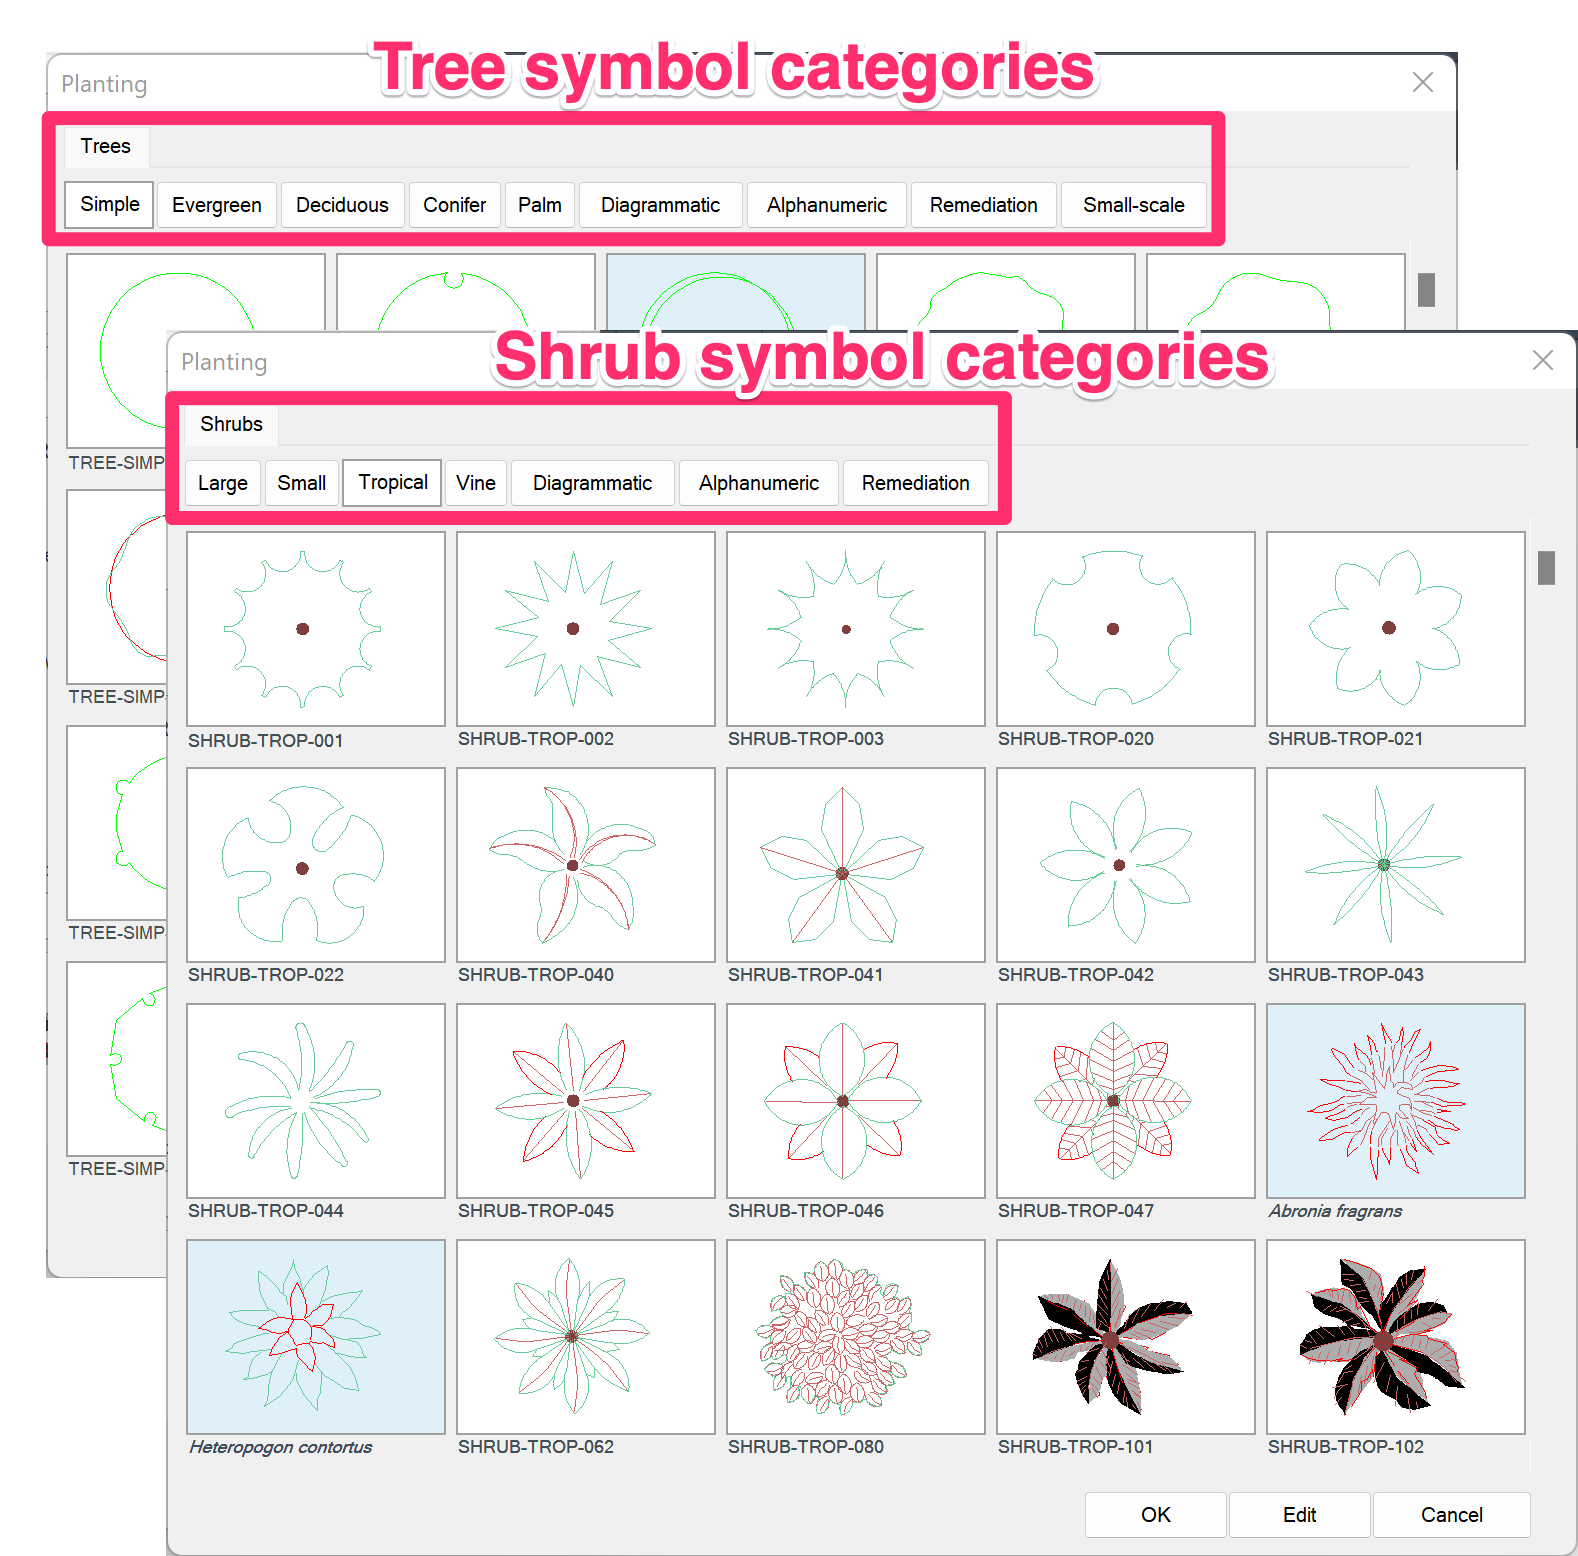
For plants you've added as trees or as shrubs, you'll select an individual plant symbol block to represent that plant in your drawing.
For plants you've added as a Shrub Area or groundcover, you'll select a groundcover hatch to represent an area filled with that plant.

Plant Symbol Toggles
The Plant Info dialog box now allows you to toggle between the symbols currently assigned to the selected plant.
We've added three buttons directly above the plant symbol thumbnail: 2D, Color, and 3D. Clicking each of these buttons will display the appropriate symbol in the thumbnail area.
Note that the 2D symbol is the default display.
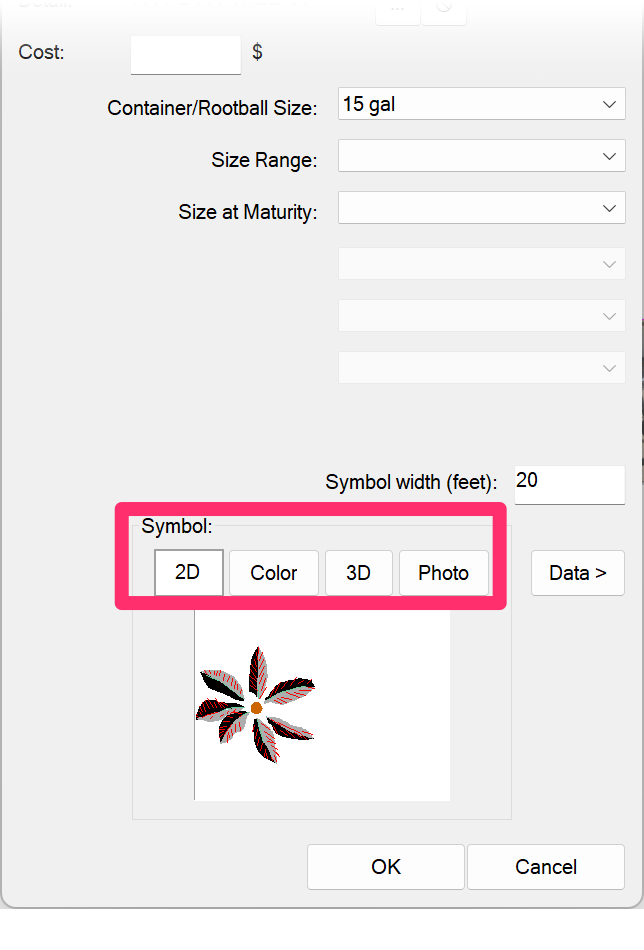
2D Symbol
Click 2D to see the 2-dimensional CAD symbol currently assigned to the plant.
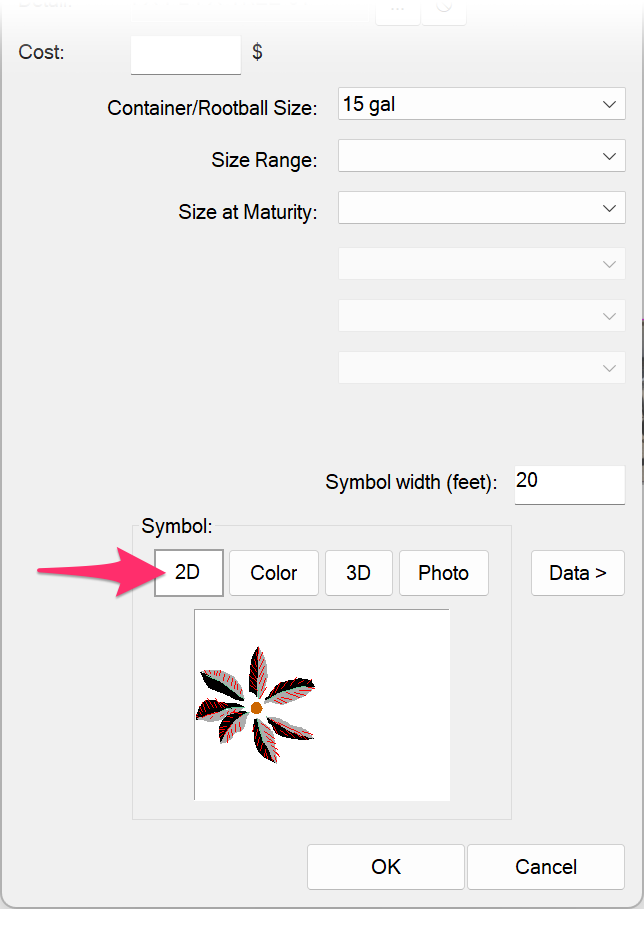
Click the Symbol thumbnail to open the Planting dialog box. There, you can select a 2D symbol for the selected plant.
For more information on 2D plant symbols, including customization, see our Plant Symbols documentation.
After selecting a symbol to represent your plant, you'll need to set its width in the Symbol width field.
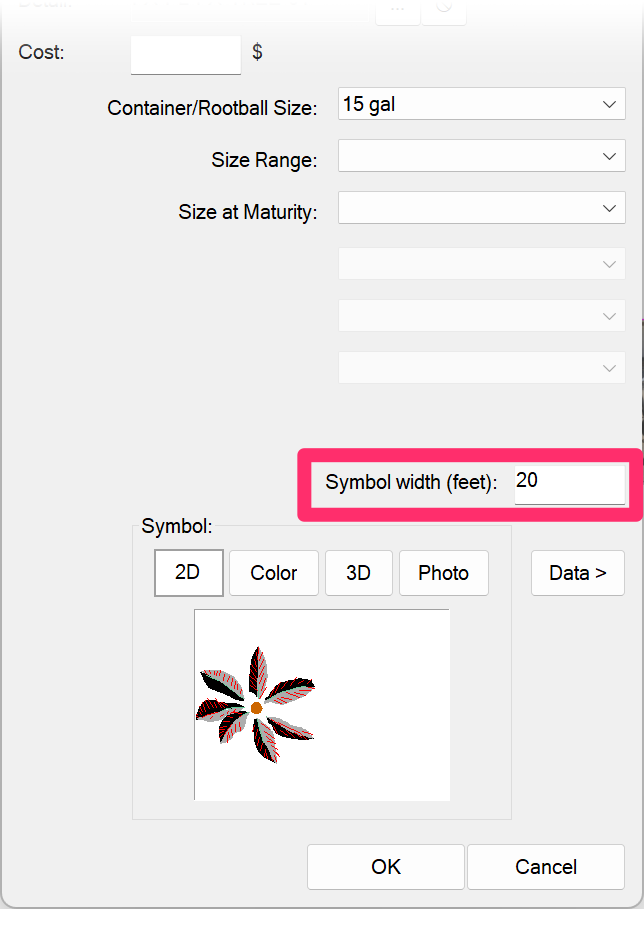
This box controls the width of the symbol as it is placed into the drawing. The default symbol sizes are:
- 20-foot diameter for trees
- 4-foot diameter for shrubs
Note: If you've set your scale in metric units, the Symbol width will be in meters.
Color Render Symbol
Click Color to see the color symbol currently assigned to the plant for use with our Color Render tool.
If you have yet to assign a color symbol to the plant, the thumbnail will be blank.
You can set a new color symbol by clicking the thumbnail. See our Color Render page for details.
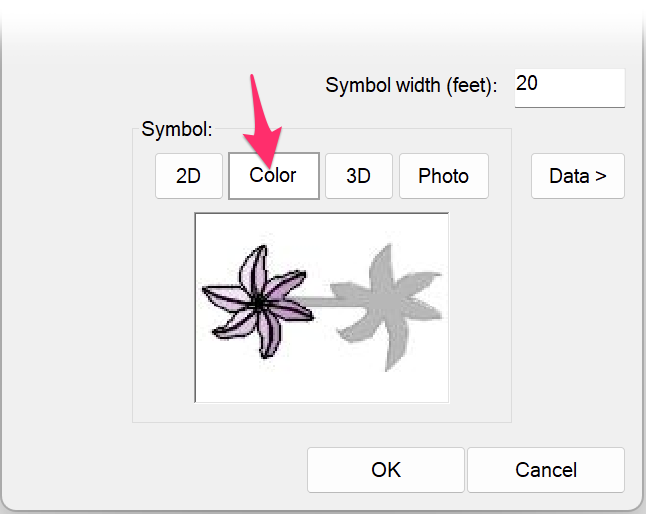
Clicking the Color Render thumbnail image will open the Plant Colorization dialog box. There, you can select a new color symbol for the plant if you want.
3D Symbol
Click 3D to see the 3D symbol currently assigned to the plant for use in Revit®, SketchUp, or Rhino.
If you have yet to assign a 3D symbol to the plant, the thumbnail will be blank.

Clicking the 3D thumbnail will open the Select Symbol dialog box, where you can assign a 3D symbol to the plant from within CAD. That symbol will then be assigned to the selected plant if you import your plan into a 3D platform.

Photo
If you've assigned a photo to the selected plant for use with our Photo Callout tool, click Photo to see a thumbnail preview of that photo in the Symbol area.
You can also assign a photo to the plant from here, or change the photo that's assigned to the plant, by clicking the Symbol thumbnail image while the Photo option is selected. The View Photos dialog box will open, allowing you to assign a photo to the plant.

Unassigning a Symbol
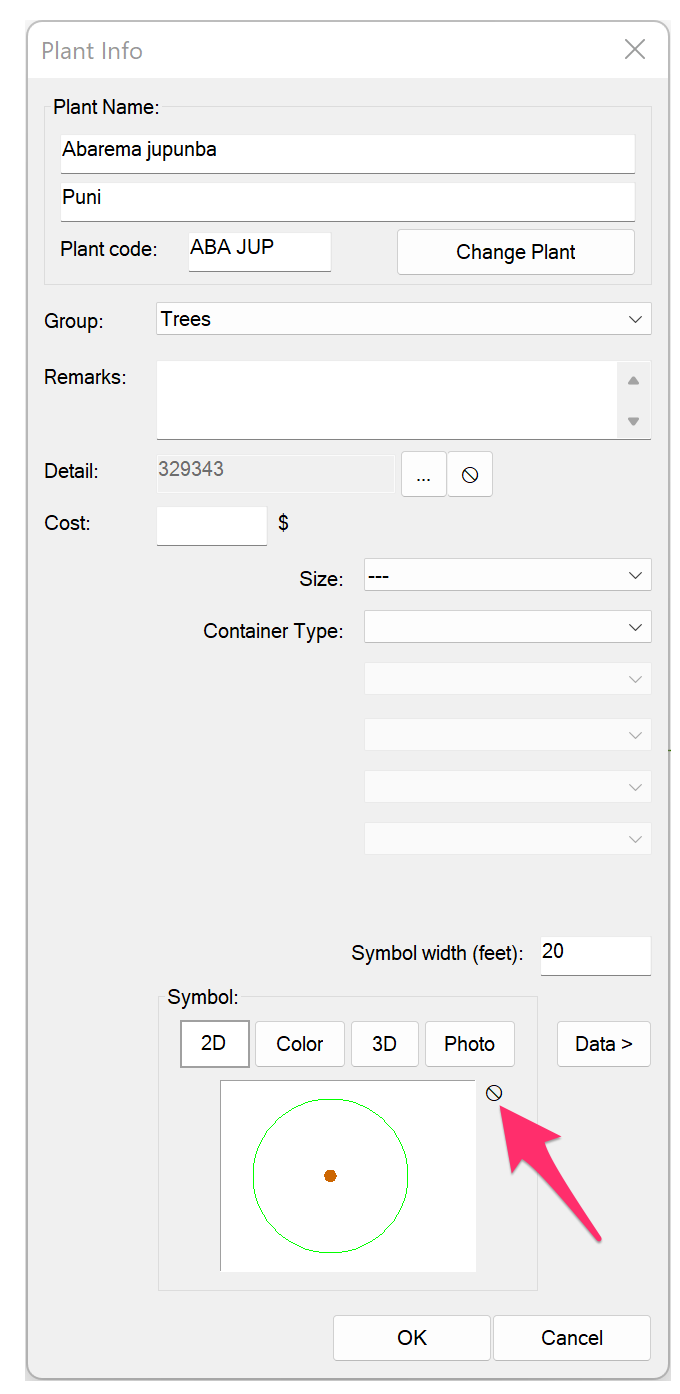
To unassign a symbol from a plant, click the Unassign button to the right of the symbol thumbnail.
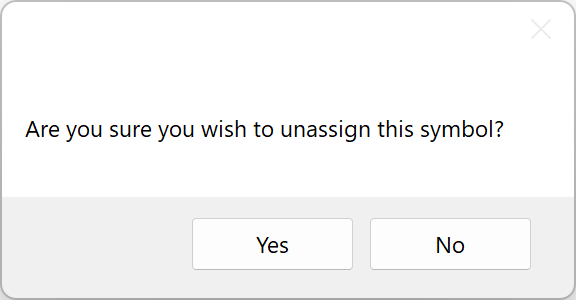
If the plant hasn't been placed in your drawing, you'll be asked whether you're sure you wish to unassign this symbol. Click Yes to unassign the symbol.
If the plant has been placed in the drawing, you'll see a message alerting you to this fact. If so you'll need to delete the plant(s) from the drawing before you'll be able to unassign its symbol.
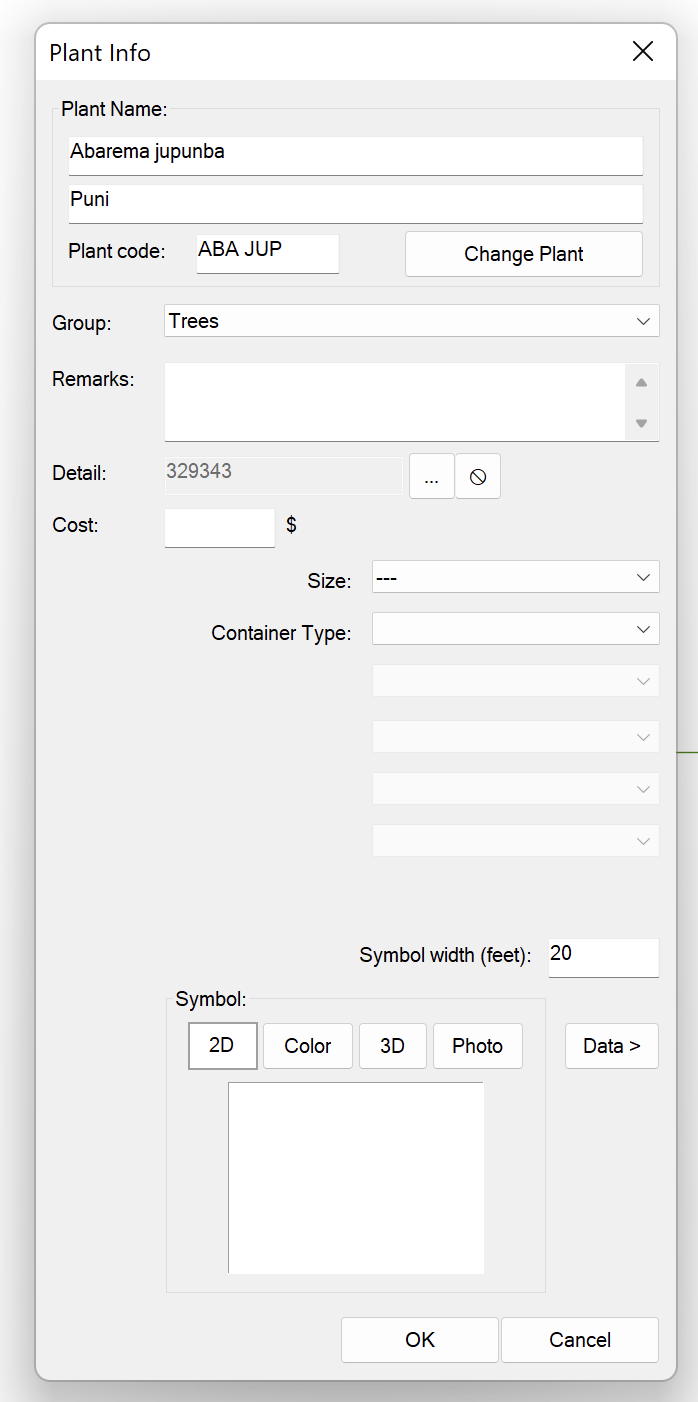
The symbol will be unassigned from the plant, and the symbol box will now be blank.
Accounting for Existing Plants on Your Site
Quick video
Do you need to account for existing plants on your project site? In an effort to further legitimize our plant database, we've removed users' abilities to add words such as existing, mulch, remove, or gravel to plants' names, as the terms are outside the realm of plant nomenclature.
In our overhauled plant data tagging system, you can now only add plant species that we can verify and make available to all other Land F/X users.
However, you still have a few options for adding plants to your projects and including the term "existing" in their names One method is to simply add the plant to your project and then change its name.
Just add the plant to your project, then edit the plant's data and change its name to Existing Tree or whatever you need.
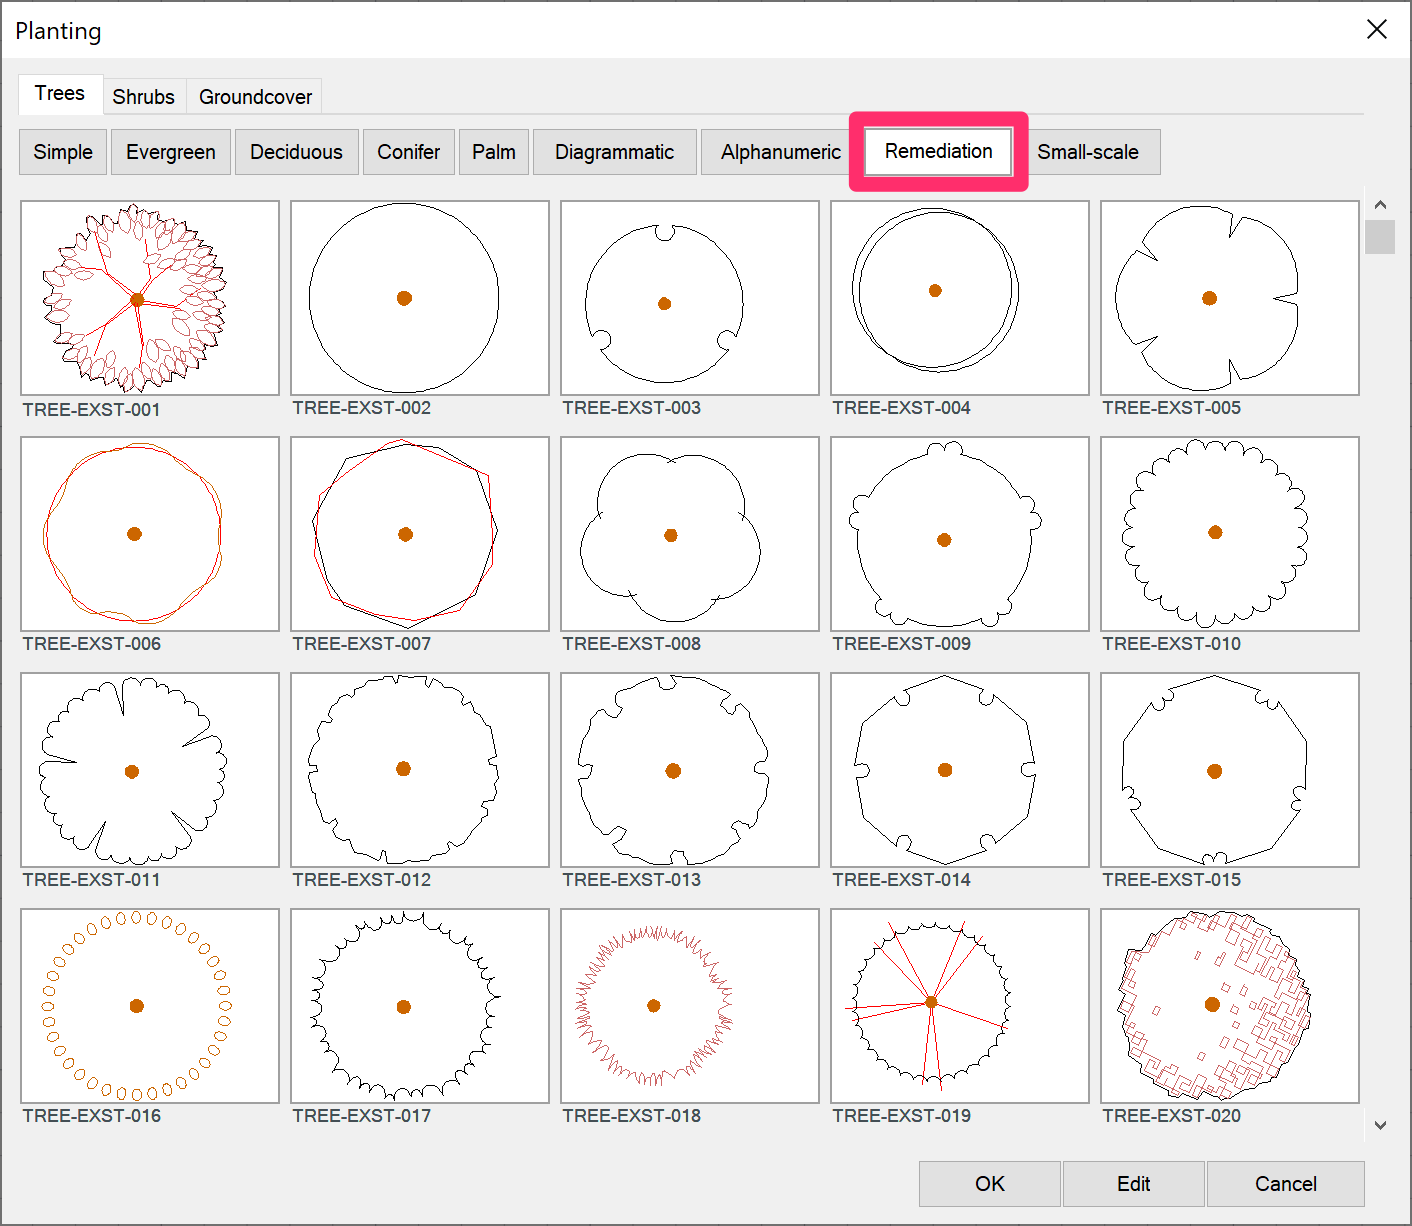
When choosing a symbol for existing plants, consider selecting one from the Remediation tab, where we have symbols already set up for existing plants. These symbols include their own unique layers for ease of separating your design plants from the existing conditions on the site.
Other possible methods:
You can also use one of the following methods for representing existing plants on your site:
- Add them as Design Groups in the Concept Plant Manager
- Don't need to call out the existing plants or list them in your schedule? Use Generic Plants.
Regardless of which method you use for accounting for existing plants, we recommend placing these plant symbols in their own drawing file and then Xrefing this plan into your design drawing file. This practice will keep your existing conditions separate from your design for better organization and easier troubleshooting.
Changing a Generic Plant Symbol Into a Project Plant
If you've placed Generic Plant symbols in your drawing, you can easily convert those symbols into project plants with attached data using the Edit Plant tool.
You can also use our Mimic Plant tool to select an existing project plant in your drawing and assign its data, including its symbol, to any Generic Plant symbol in your drawing.
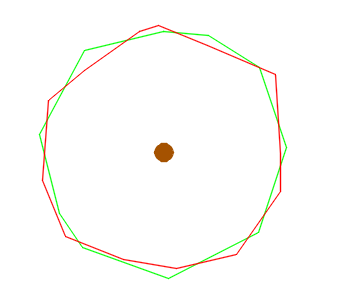
In this example, we'll convert this Generic Plant symbol into a project plant using Edit Plant.
Open Edit Plant and use the pickbox to select the Generic Plant symbol you want to change into a project plant.
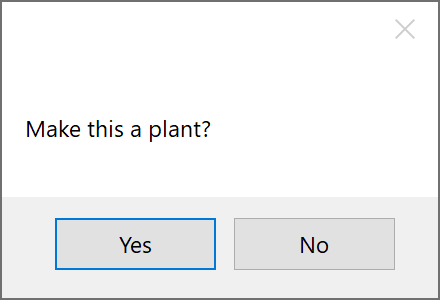
You'll be prompted Make this a plant?
Click Yes to turn the Generic Plant symbol into a project plant.
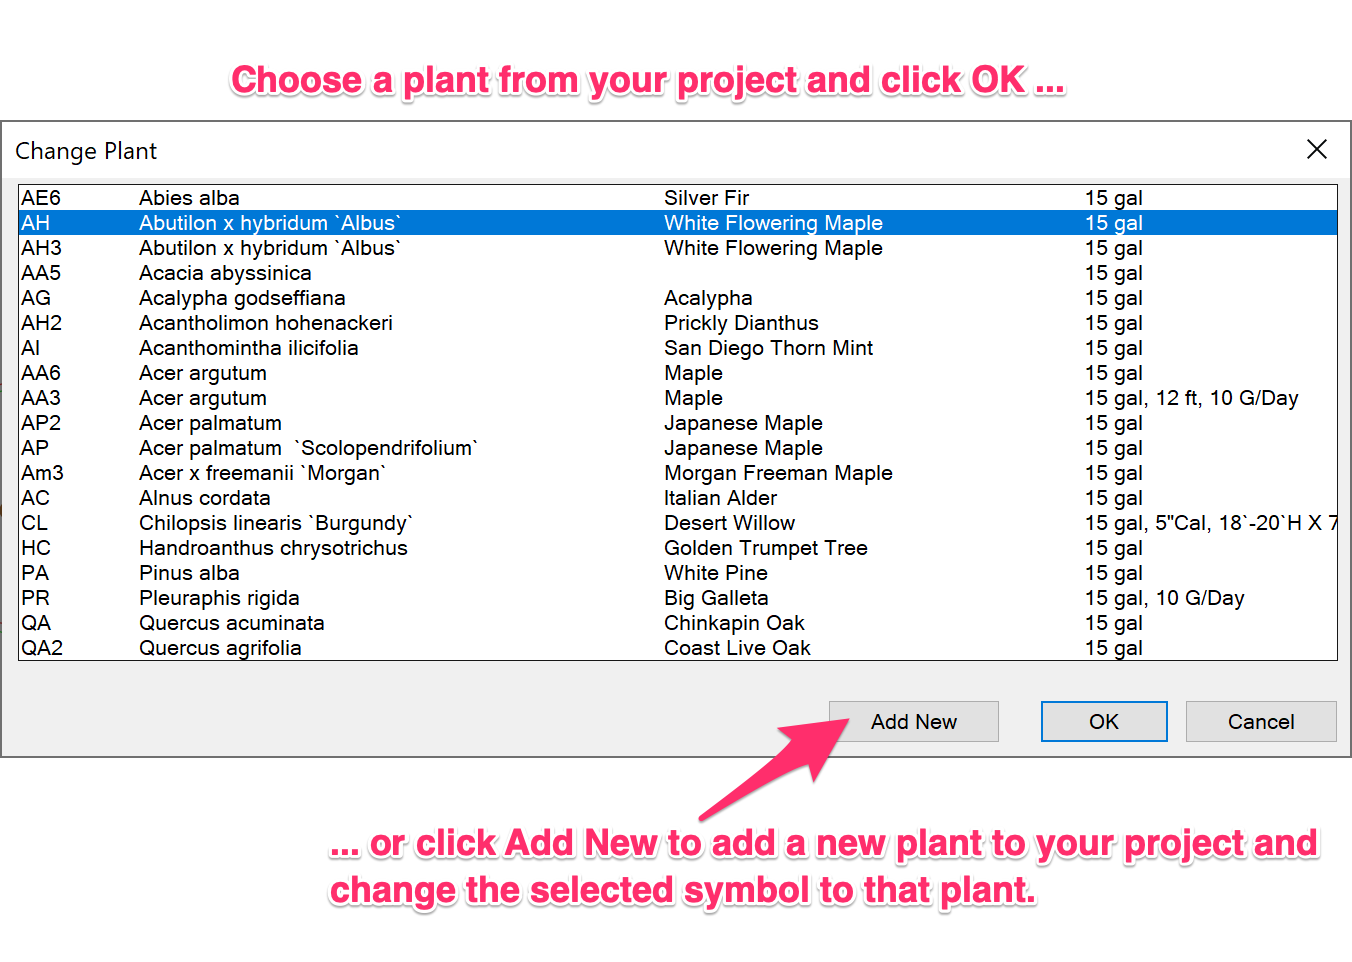
The Change Plant dialog box will open.
You can choose to:
- Select an existing plant from your project, then click OK to assign that plant's data to the selected Generic Plant symbol, or ...
- ... click Add New to add a new plant to your project, which will then have its data assigned to the selected Generic Plant symbol
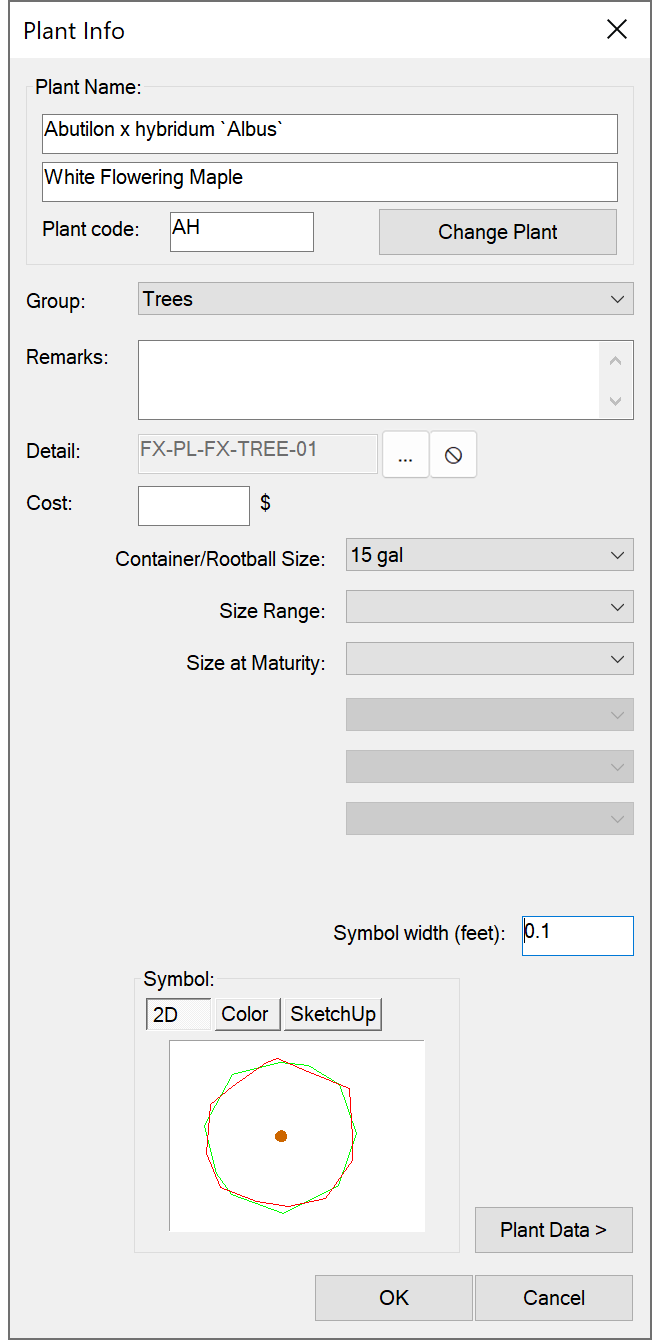
In our example, we'll change the Generic Plant symbol into the tree Abutilon x hybridum 'Albus', which already exists in our project.
Not seeing the plant type you need in the list?
Are you only seeing trees in this list and you want to convert the Generic Plant symbol into a shrub, or only seeing shrubs and want to convert the symbol into a tree?
Because the symbol is a generic block, or possibly one of your custom blocks, the system essentially has to guess what it is. If you're not seeing either trees or shrubs in the list, ensure that the symbol block is either:
- Named appropriately to the plant type it's supposed to represent (i.e., tree symbols should include -TREE in their names, and shrub symbols should include -SHRUB), or ...
- On the appropriate layer for the plant type it's supposed to represent (i.e., tree symbols should be layers whose names begin with LK-TREE and shrub symbols should be on layers whose names begin with LK-SHRB)
The Plant Info dialog box will open, showing that the selected symbol has been changed into the plant you selected.
At this point, you're also free to edit the plant's assigned data as needed.
Plant Data & Tagging
Quick video
Each plant in our database is assigned specific data via a system of common-sense tag groups created by our plant database team. These groups include and wiki-based tags added by Land F/X users and vetted by our team. The name of each plant is based on parameters set up by the International Society for Horticultural Science (ISHS).
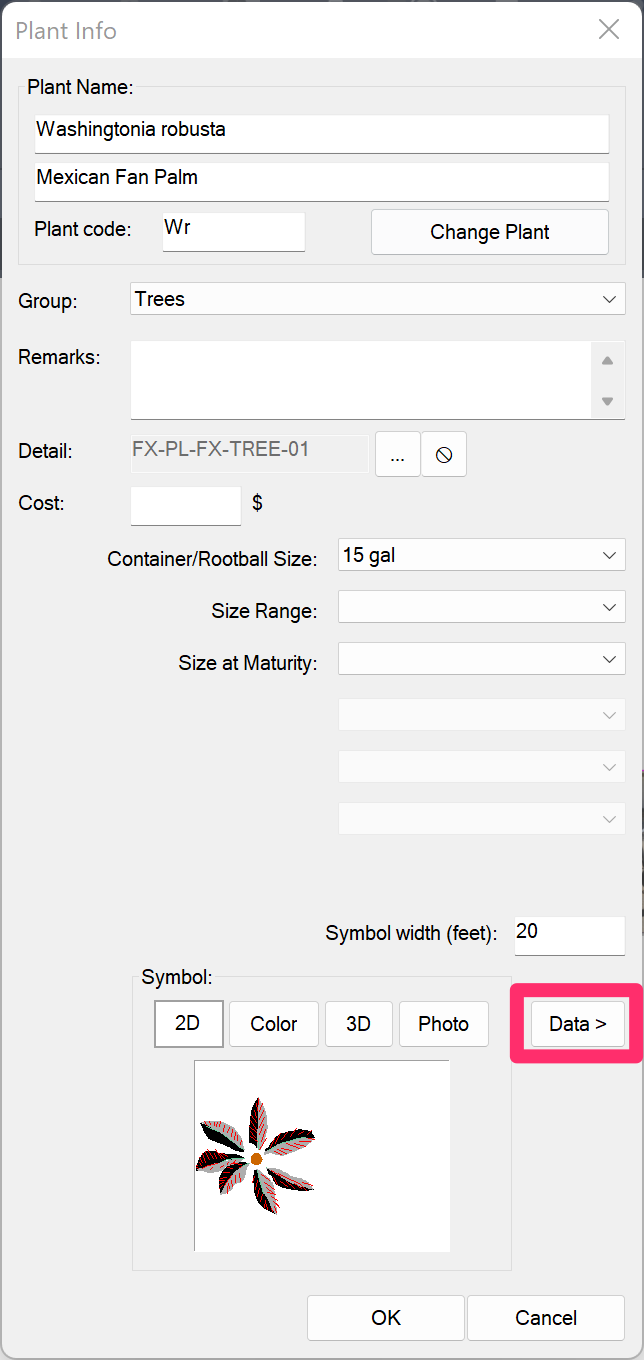
To view and edit the data assigned to a plant, click the Plant Data button.
You'll be brought to a dialog box where you can view and add tags to the plant you're currently editing. For more information and instructions on this feature, see our plant data tagging system documentation.
Although all Land F/X users can edit tags, our team will continue to add data and vet user data for accuracy.
Reverting to the Legacy Version of Our Plant Data System
We made some major updates to our plant data tagging system in April 2021. Want to revert to the legacy version of our plant data system that was available prior to these updates, including the old plant data dialog box? Here's how.
Additional Tools
Revisions can occur in the design process, and we offer several ways to deal with changes or editing that may occur.
- Change Plants: Substitute one or more existing plants in the drawing with an entirely new plant.
- Mimic Plant: Assign the properties of one plant to another plant or plants.
- Highlight Plant: Highlight all instances of a given plant in the drawing for the purposes of error checking or easy location.
When Should You Edit?
You might choose to edit your plants soon after you have added a number of plants to your project plant palette.
Or you might defer editing in order to focus on your plant palette. In this case, you might wait to edit until you start to place plants into your design (at which time you will need to edit anyway because you will need a symbol to represent the plant in the drawing).
Editing occurs when you change your mind about some aspect of a plant, or are directed by others to make a change. You'll find that you may want to change your mind about a symbol for a plant, or that symbol's size. It's common to place a plant into a drawing and immediately decide, "That symbol is too large (or small), and I want to change it."
Or you may place a symbol and think, "That looks too much like this other symbol, and I want a different one." Use the Plant Edit button to change the symbol quickly.
Finally, you may find that, after completing the design and cost estimate for a project, you need to reduce the cost. You can do so easily by specifying smaller plant sizes, or downsizing. Use the Plant Edit function to downsize all instances of a plant. The labels will automatically reflect the new container or plant sizes.
How Carefully Should You Edit?
We recommend avoiding wasting time early in a project carefully deciding all aspects of a plant specification. After all, you might not even use several of the plants you edit when you get to the final stage of design.
Instead, it might be more efficient to perform a quick review of a few overall plant requirements, such as container size, the symbol, and symbol width. You can always come back to the plant later in the project development and edit or change any aspect of it. You can even come back and change the plant itself. If you do so, all symbols, symbol sizes, callout information, etc. will update and change throughout the drawing.
Related Webinars
- Planting F/X for Beginners Part 2: In this second installment, we'll dive right into some of the tools you need to know about for the best experience and fastest workflow when starting with Land F/X planting plans, including how to edit plants. (1 hr 3 min)
Troubleshooting
Issue: After I edit plants, the callouts do not update
Issue: Blocks or hatches are not available when I try to select a symbol
Issue: Your plant labels disappeared after you edited a plant in the Plant Manager
Issue: One or more of your plants are missing from the Plant Manager
Issue: One or more plant label leader lines are pointing to 0,0 after you edited a plant or Concept Plant
Issue: Your hatch library is blank when you attempt to select a hatch for a groundcover or Shrub Area, or all the thumbnail previews are missing in the Hatch dialog box
Issue: You're trying to edit the scale of a hatch for a groundcover, but the scale is grayed out and you're unable to change the scale
Issue: You are unable to change the rotation of a hatch pattern
Revit® is a restricted trademark of Autodesk®.


