Placing Plants
Quick video
- Accessing the Plant Manager
- Placing Trees or Shrubs
- Placing Shrub Areas or Groundcovers
- Organizing and Filtering Your Plant List
- Calculating a Total for All Planted Areas
- Placing Plants You've Imported from Another Project or Template
- Tools for Placing Plants
- Placing Color Plant Symbols
- Creating a Mix of Seeds or Plant Species
- Having a Hatch Issue with Groundcovers or Shrub Areas? Download Our Updated Hatch Patterns Manually
- Related Webinars
- Troubleshooting
Once you've added plants into your plant palette for your project, you can then place them into a design.
Don't forget to check out our Plant Shotgun feature. Accessed as a series of keyboard commands available upon placing a plant, these handy tools make it easy to place multiple plants at a time, toggle between plant patterns, cycle up and down your plant palette on the fly, space and rotate your plants, and set custom crosshair angles. Find out more about this exciting feature by visiting our Plant Shotgun page.
Accessing the Plant Manager
To view a list of plants you've added to your project, open the Plant Manager:

F/X Planting ribbon, Plant Manager flyout
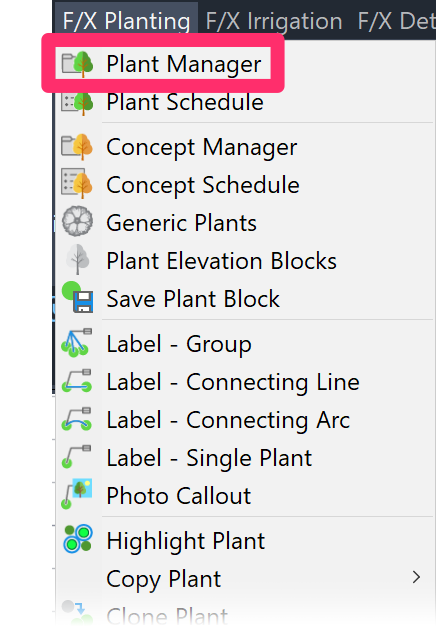
F/X Planting menu, Plant Manager option
or type ProjectPlants in the Command line
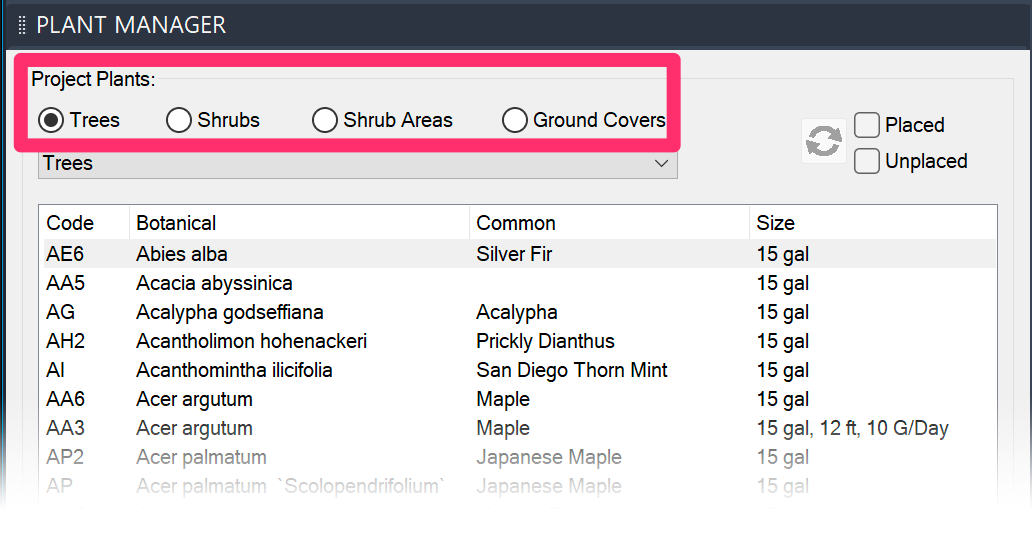
The Plant Manager lists the plants you've added to your project.
To place a plant, first select the correct plant category: Trees, Shrubs, Shrub Areas, or Ground Covers.
You'll then highlight the plant and click Place as described below.
Placing Trees or Shrubs
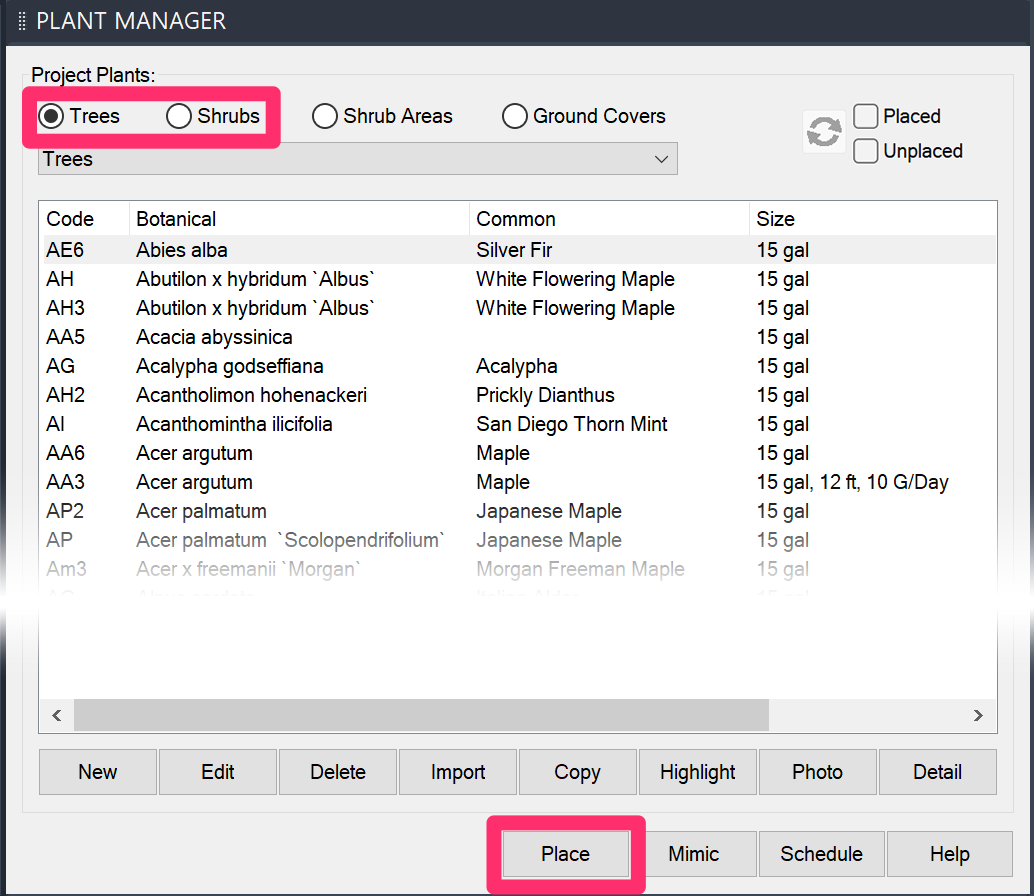
Select the plant category option for Trees to place a tree, or Shrubs to place a shrub.
Select the plant you want to place, and click Place.
You can also simply double-click the name of the tree or shrub to place it.
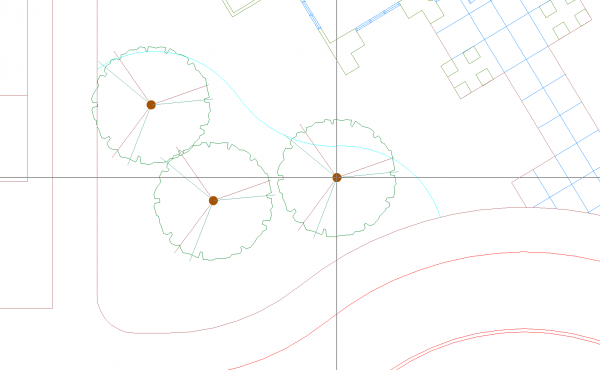
Click to place the tree or shrub. To place additional instances of the tree or shrub, continue to click.
Right-click or press Enter to go back to the Plant Manager. You can then select another tree or shrub and place it in your drawing.
Keyboard Commands for Placing Trees and Shrubs
When placing trees or shrubs, you can type K to see the available keyboard commands. These commands correspond to the keyboard commands available in our Plant Shotgun feature.
Type any of the following commands on your keyboard. (The Keyboard Commands dialog box is only informational – the key buttons won't actually fire the commands.)
- 1–0: Set a number of plants to place (aka Shotgun Mode).
- Q/E: Toggle to the previous/next available plant in the Plant Manager.
- T: Enter Paint Mode, where you can "paint" an area with copies of the selected plant.

- P: Switch to our Copy along Polyline tool.
- W/S: If placing multiple plants, set a wider/smaller spacing for them (aka Shotgun Spacing).
- A/D: Rotate the plant(s) you are placing to the left/right.
- L: Label the plant(s) you're placing.
- X: Enable our Xhair Angle tool, which allows you to place plants at a set angle.
- V: Switch to our Copy along Line tool.
- C: Switch to our Copy along Arc tool.
Get on-the-road training on our keyboard commands by playing our Drive game. It's a fun way to learn the commands, and you can do it inside any DWG drawing!
Placing Shrub Areas or Groundcovers
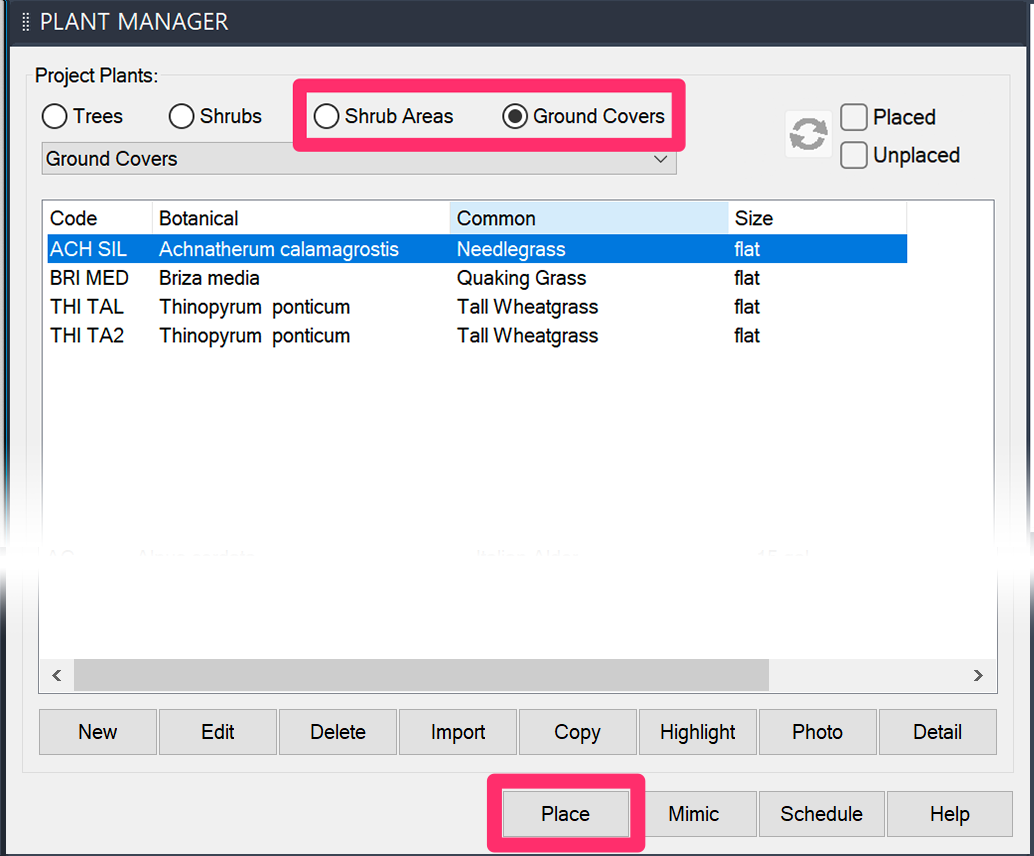
In the Plant Manager, select the Shrub Areas or Ground Covers category.
Select the plant you want to place, then click Place.
You can also simply double-click the name of the Shrub Area or groundcover to place it.
The cursor will turn into a pickbox, and the Command line will prompt you to Select polyline or interior point to hatch, [Draw Exclude shrubs Multiple].
You can now place your Shrub Area or groundcover in an existing closed polyline area or:
- Start drawing a closed polyline area. Your hatch will be applied to the area once you close it.
- Type E for Exclude Shrubs: The Exclude Shrubs tool automatically eliminates hatch patterns around shrub symbols within a hatched area for more concise drawings and accurate plant counts. For more information, see our Exclude Shrubs documentation section and watch our Exclude Shrubs Power Tip.
- Type M for Multiple: This option allows you to select one or more closed polyline areas within your hatch boundary and exclude them from the hatch.
Note that you will not be able to use the Multiple option if you have a Stipple hatch selected for your groundcover. To use the Multiple command, edit the groundcover and select a new hatch – anything besides Stipple.
If you type either E for "Exclude Shrubs" or M for "Multiple," the cursor will change to a pickbox that will allow you to make a polyline selection.
Selecting an Existing Polyline Boundary
To select an existing polyline as your hatch area boundary, use the pickbox to select a closed polyline area to hatch.
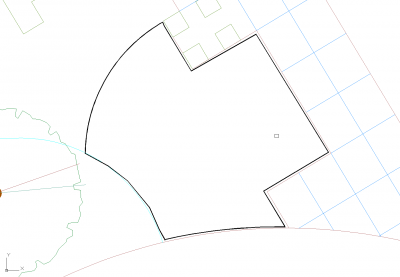
Shrub Area to hatch
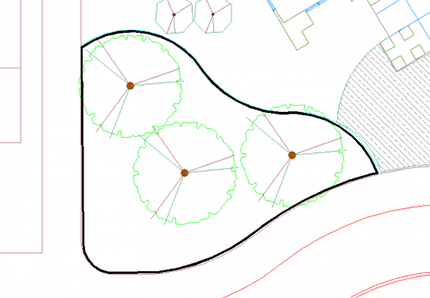
Groundcover area to hatch
When you click the closed polyline, the hatch you selected for your Shrub Area or groundcover will appear within the boundary, at the scale you've set for that hatch.
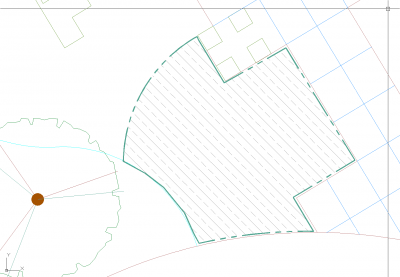
A hatched Shrub Area. Note that the boundary line has been converted to the selected Shrub Area boundary, with its corresponding linetype.
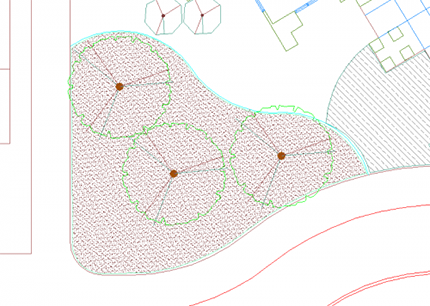
A hatched groundcover area
Drawing a Hatch Boundary "On the Fly"
If you haven't yet drawn a polyline boundary for your Shrub Area hatch, you can do so "on the fly" after selecting your hatch pattern.
When you go to place a hatch, the Command line will prompt you to Select polyline or interior point to hatch, [Draw Exclude shrubs Multiple].
Start drawing your closed polyline. Once you close it, the hatched area will appear within the polyline boundary.
In previous versions, drawing your hatch boundary on the fly would require you to first type D for Draw. We've now built in the ability to simply start drawing your closed polyline. As long as the first point you select isn't an existing polyline, the Draw command will be fired automatically.
This feature works with all of our default hatches, including:
Excluding Interior Objects ("Multiple" Option)
If you type M (for Multiple ) when placing a groundcover or Shrub Area, the cursor will turn into a pickbox, and you'll be prompted to Select exterior boundary.
Note: This option is not available when our Exclude Shrubs feature is active. If you want to exclude interior objects from a groundcover hatch in addition to excluding individual shrubs, you'll need to complete a few extra steps. Information and instructions
Use the pickbox to select the border of an area where you want to place a planting area and exclude interior objects.
You'll then be prompted to Select interior boundaries. Select each object you want to exclude from the hatch. Press Enter or right-click when finished selecting interior objects.
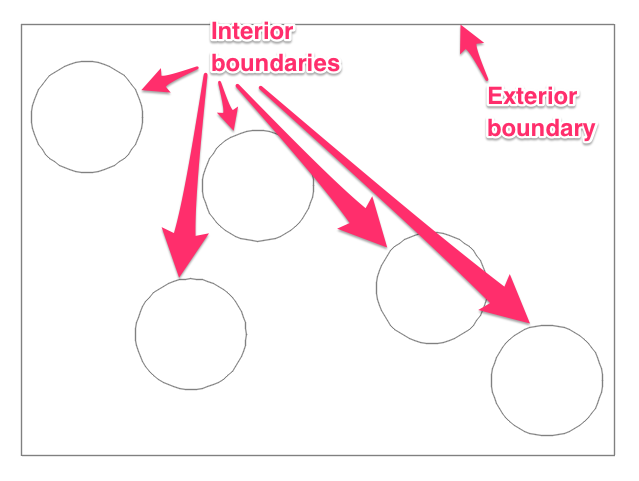
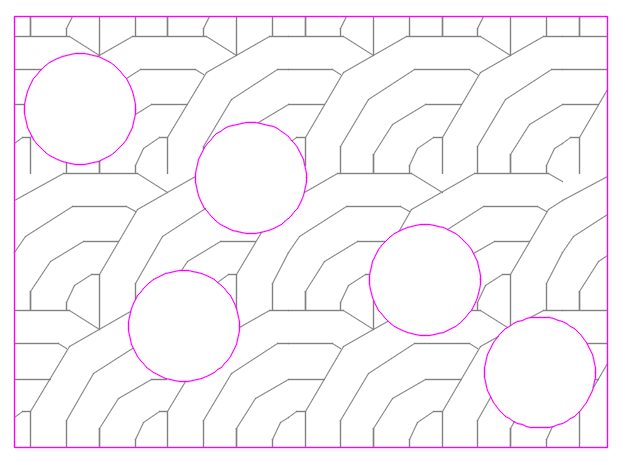
The hatch will be placed, excluding the interior objects.
Cannot process multiple boundaries because the outer polyline includes loops.
Seeing this error message when trying to use the Multiple option while placing a groundcover or Shrub Area hatch?
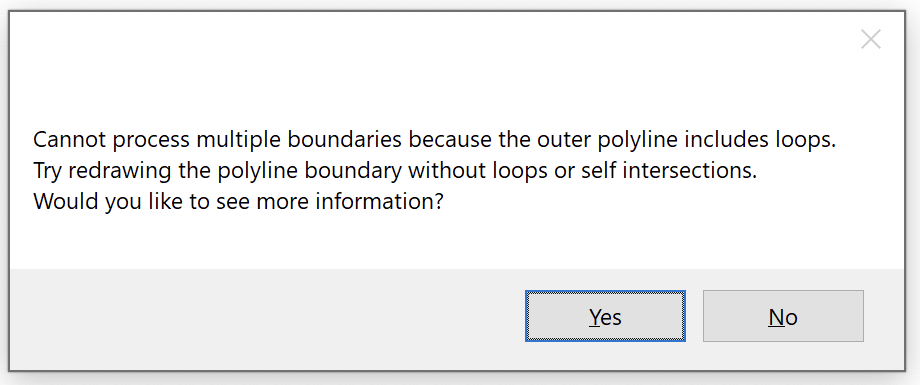
Our Shrub Area hatches do not include the Multiple options. To exclude interior objects from Shrub Areas, you can use our P-Hatch tool or simply delete the plant you've added as a Shrub Area and add it back to your project as a groundcover.
Do not use the native CAD command Hatch Edit to remove hatches from beneath interior objects.
Shrub Area and Groundcover Calculation: Area vs. Spacing/Quantity
When placing Shrub Areas and Groundcovers, you have a choice in setting the type of plant calculation that will appear in your Plant Schedule:
- Calculate your plants by area (square feet, meters, etc.)
- Calculate your plants by quantity
For further details and instructions, see our Shrub Area and Groundcover Spacing documentation.
In this case, you should check your units, which may have been changed to Inches. Type UNITS in the Command line and verify in the dialog box that your units are correct.
Our convention for groundcovers is to designate groundcovers with hatch patterns. This setting allows a clear definition of the limits of the groundcover. It also allows the system to calculate the area or quantity for each groundcover to be listed in the Plant Schedule.
All plant symbols must be placed within the hatch boundary line. The Exclude Shrubs tool will only eliminate the hatch pattern from shrubs that are completely within the hatch boundary line.
Exclude Shrubs will not eliminate hatch patterns from tree symbols.
The Multiple option, for excluding interior objects from a groundcover hatch, is not available when Exclude Shrubs is active. If you want to exclude interior objects from a groundcover hatch in addition to excluding individual shrubs, you'll need to complete a few extra steps. Information and instructions
Editing Placed Groundcover & Shrub Area Hatches: Why You Should Use Our P-Hatch Tool
Quick video
Need to add to or subtract from an existing placed groundcover or Shrtub Area hatch in your drawing?
If so, we recommend using our P-Hatch tool rather than the native CAD Hatch Edit command. Here's why.
Organizing and Filtering Your Plant List
Placed and Unplaced Plants
After placing a number of plants into a design, you may wish to reorganize the list of plants in the Plant Manager to delineate between plants you have placed in your drawing and those you have not placed.
To organize your plants in this way, check the Placed or Unplaced box in the top left corner of the Plant Manager. The list of project plants will be reorganized with the checked status on top: Placed or Unplaced.


Filter by Subcategory
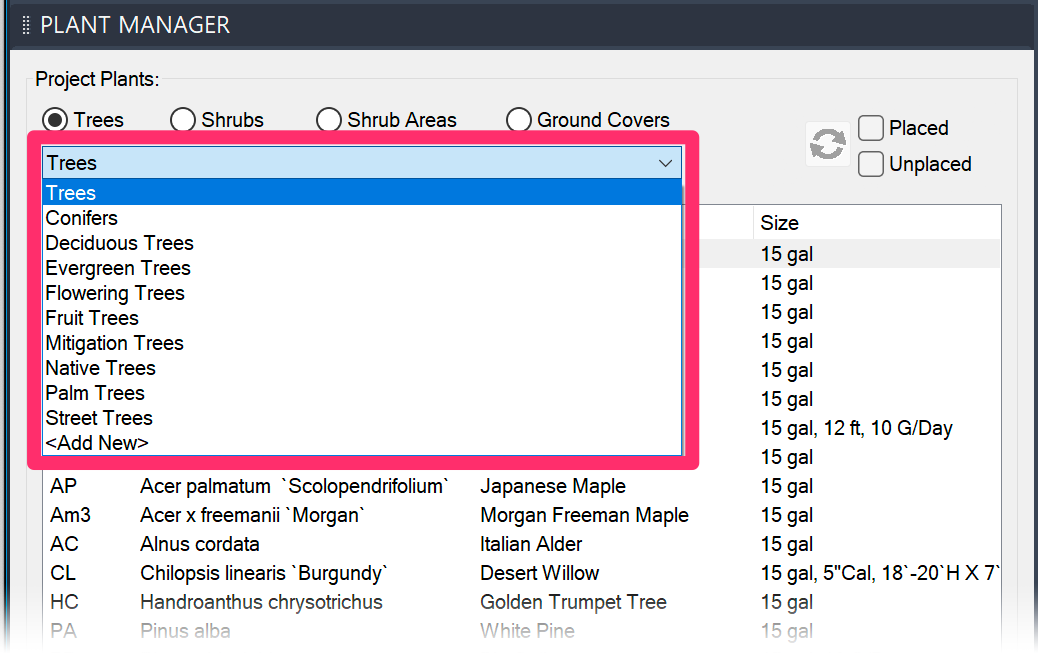
You have an option that when you add a plant to your plant palette, or when you edit a plant you have already added, you can place that plant in a subcategory of that overall plant category.
These subcategories are listed in the pull-down below the category near the top of the Plant Manager.
In the example to the left, the Trees category is selected, and the pull-down menu lists the subcategories of trees.
Notice that the menu also includes an entry for an <Add New> subcategory. Selecting this option allows you to add your own subcategories to customize this menu to your work style and preferences.
The subcategories are optional. You can simply list all your trees under the Trees category, for example, and leave it at that. Some designers like the idea of grouping certain plants into subcategories, such as Palm Trees or Mitigation Trees under Trees, or Vines or Perennials under Shrubs, and so on.
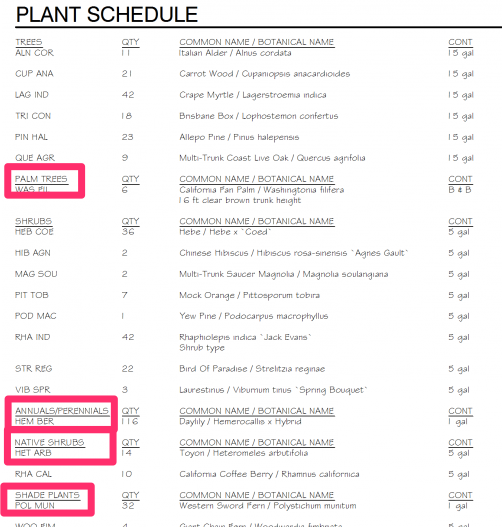
When you place a plant in a subcategory, the Plant Schedule will list all the main category groupings first, followed by any subcategories you've used within those categories.
In the plant schedule pictured to the right, the plants in the basic Trees category are listed, followed by any subcategories, such as Palm Trees.
The list of shrubs begins with all plants listed in the basic Shrubs category, followed by any subcategories, such as Annuals/Perennials, Native Shrubs, and Shade Plants.
When you place a plant from the Plant Manager, you can filter the list by selecting a subcategory, which can help you find plants to place more quickly. If you want, you can create a rough design sketch knowing only that you want plant types such as Evergreen Tree, Deciduous Tree, Palm Tree, etc., and then filter your view of plants to those types.
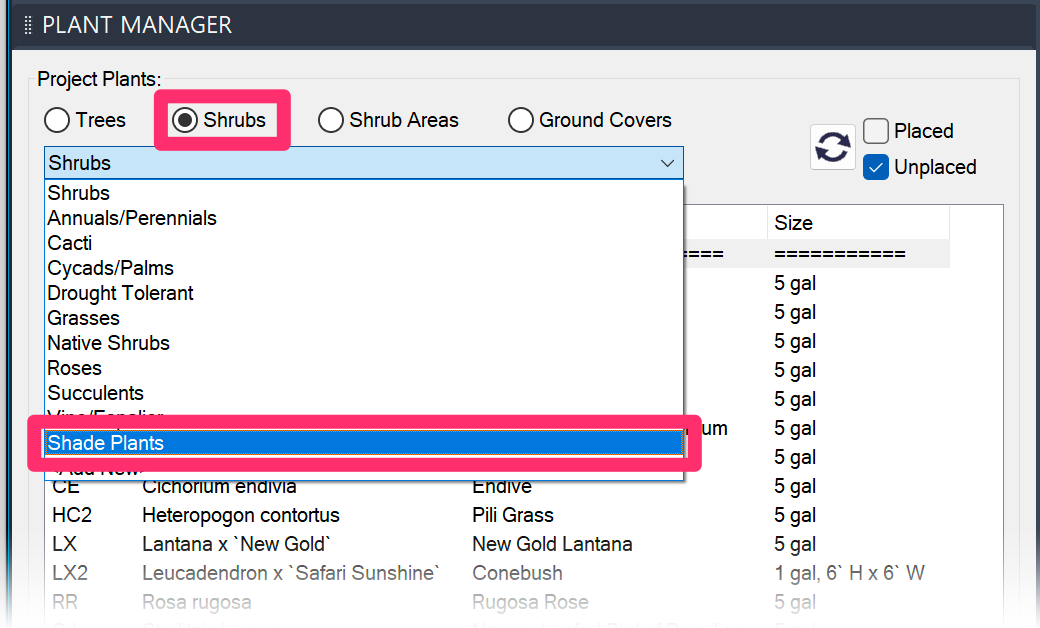
In this example, we'll select the subcategory Shade Plants under the plant category Shrubs.
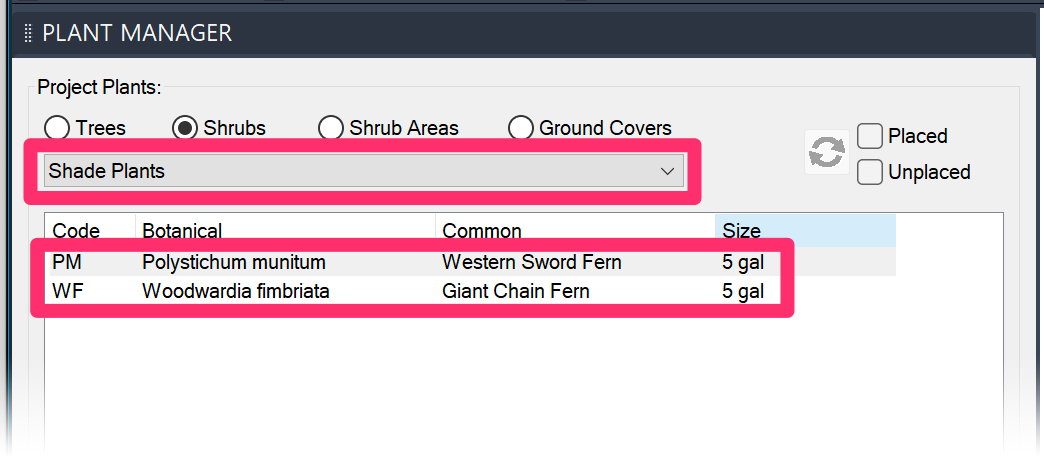
As a result, the list will only display plants in the Shade Plants subcategory
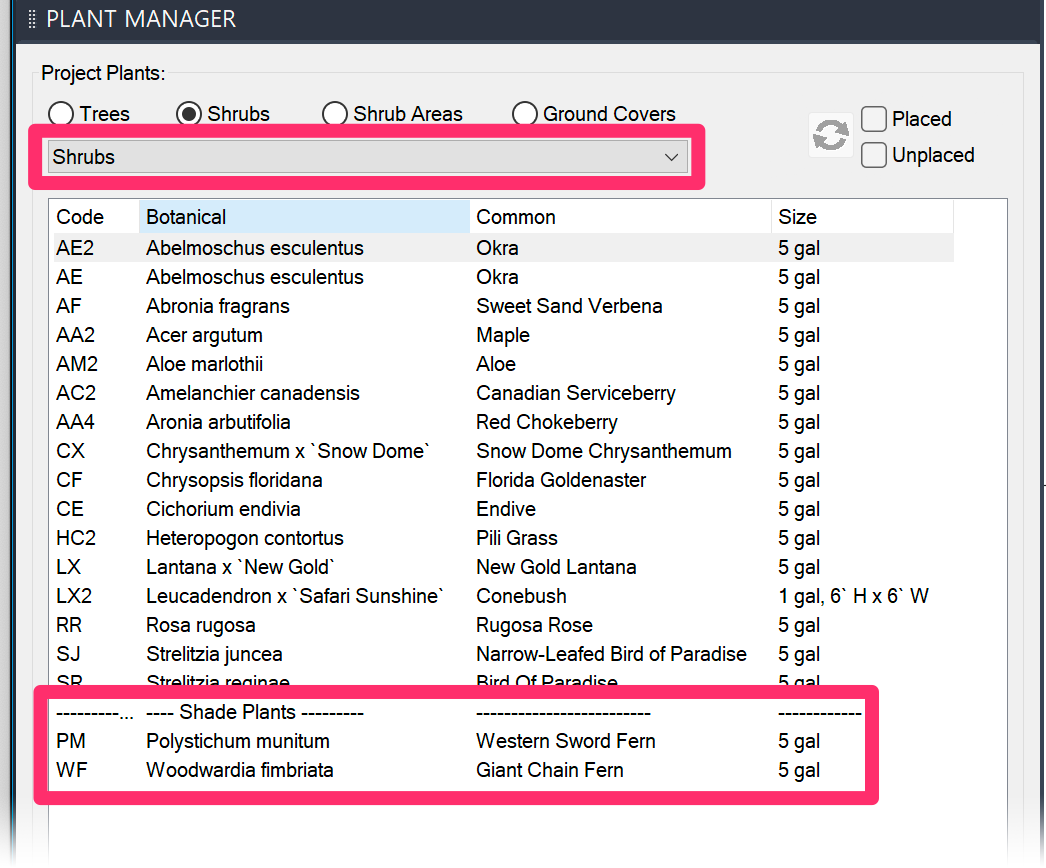
The Shrubs category will also include listings for all subcategories you've used.
In this example, we can scroll to the bottom of the Shrubs list and see the list of Shade Plants.
Note: This filtering by subcategory can be extremely helpful in a number of situations, such as:
- When your office standards or personal preferences call for the Plant Schedule to list plants separately into these subcategories.
- When you're working on a project such as a cluster of three-story condo building units that will have areas that can only have shade-loving plants. In this case, you can specify a subcategory of Shade Plants containing only plants that thrive in the shade. When you're ready to place some plants for a shady area, simply filter by that subcategory.
Placing Plants You've Imported from Another Project or Template
If you've imported plants from another project or from a project template, you might notice that some of those plants' symbols are showing as blank.
Those plants are showing as blank because they're assigned the same symbol as plants that already exist in the current project. We engineered this setting as a safeguard against duplicating plant symbols in your project. You can simply select a different symbol for each of those plants, or select a different symbol for the plant with the duplicate symbol and then select the original symbol for the imported plant.
Calculating a Total for All Planted Areas
Want to calculate a total area of all planted regions in your drawing, including individual tree and shrub symbols? Here's how.
Tools for Placing Plants
Highlight Plant
You may be ready to place a plant but want to see where in the design you have previously placed this plant. In this case, you can use our Highlight Plant tool. This feature is extremely useful not only in finding plants in your drawing but in performing error checking.
Match Properties & Match Plant
Our Mimic Plant tool applies the properties from one plant to one or more other plants.
Use our Clone Plant tool to grab the symbol and data associated with a plant in your drawing, then copy the plant symbol, along with the plant's data, into other locations.
Paint Mode
Place several trees or shrubs at once using Paint Mode. For more information, see our Paint Mode documentation.
Copy & Array Plants
Our Copy Plant tool allows you to copy a plant, creating "smart" duplicates that you can then arrange along a line, polyline, or arc.
Copy any plant in your drawing and arrange the duplicates into a rectangular or triangular pattern using our Array tools.
Copy a group of plants into a mirrored arrangement using our Mirror Plant tool.
Plant Shotgun
Our Plant Shotgun tool offers the following keyboard commands, which you can use on the fly while placing plants:
- Type 1 through 0: Set a number of plants to place (1 through 10 plants at a time).
- Type a number (1 through 0) multiple times: Toggle between plant groups (patterns).
- Type Q/E: Toggle to the previous/next plant listed in the Plant Manager.
- Type T: Enter Paint Mode.
- Type W/S: Wider/Smaller spacing.
- Type A/D: Rotate plants 90 degrees to the left/right.
- Type X: Set a crosshair (X-hair) angle for placing your plants.
- Type V/C: Copy a plant along a line/arc.
Copy From DWG
Need to grab a plant from a different drawing – even one associated with a different Land F/X project? No problem. Just follow our instructions to Copy from a DWG.
Exclude Shrubs
When placing a groundcover or Shrub Area hatch within a closed polyline that contains individual shrubs, use our Exclude Shrubs tool to exclude the shrubs from the hatch.
Placing Color Plant Symbols
If you place plants while our Color Render tool is turned on, the color plant symbols will place in your drawing.
Creating a Mix of Seeds or Plant Species
Quick video
We make it easy to create your own custom mixes of seeds, sods, grasses, or other plant species. You can do so by creating a Design Group in the Concept Plant Manager.
For more information and instructions, see our Create a Mix of Multiple Seeds or Plant Species documentation.
Having a Hatch Issue with Groundcovers or Shrub Areas? Download Our Updated Hatch Patterns Manually
Are you experiencing any of the following issues with your hatches?
- Hatches looking fragmented or broken apart
- Hatches with scales that are too large or too dense
- Hatches that place blank or empty
- Hatches that are not appearing in schedules
- File size bloating
If so, follow our steps to download our updated hatch patterns manually.
Related Webinars
- Getting Started with Planting F/X: We'll give you a full tour of our F/X Planting ribbon, covering everything from adding, placing, and labeling plants to error checking, scheduling, and turning on our quick render tools. (1 hr)
- Planting F/X for Beginners Part 2: In this second installment, we'll dive right into some of the tools you need to know about for the best experience and fastest workflow when starting with Land F/X planting plans, including several plant placement tools and how to use the Multiple option to exclude areas from groundcover or Shrub Area hatches. (1 hr 3 min)
- Migrate an Existing Plan into Land F/X: Do you plan to make the switch to Land F/X and have an AutoCAD plan you need to convert? Watch how quickly you can transform your dumb CAD plan into a smart Land F/X plan. (54 min)
Troubleshooting
Issue: Phantom (ghost) plants appearing in the drawing
Issue: Altering or editing placed plants
Issue: Error: Not all plants in the drawing match the project data
Question: Can I use pick points when I place a groundcover hatch?
Issue: When you place plants in your drawing, they are coming in at the wrong scale or size
Issue: An extra boundary (with loops or arcs) is appearing when you place a groundcover hatch
Issue: Error: Non-Planar Entity
Issue: Your plants are rotated at a strange angle when placed in a drawing
Issue: You are experiencing a significant delay when attempting to add or place plants
Issue: Work Areas are not recognizing or calculating a groundcover or Shrub Area hatch
Issue: Bad DXF group (10) error when placing a plant
Issue: Missing File error message when placing plants
Issue: Error: File ... .dwg Was Created by an Incompatible Version of AutoCAD when placing plants
Issue: Error: "Unhandled exception in dcl-slideview-load ARX" when placing plants
Issue: Tree trunks are appearing hollow, not solid, or displaying as lines only
Issue: You want to place plants based on latitude and longitude
Issue: You want to use the Multiple option to exclude interior objects such as boulders or stepping stones from a groundcover hatch in addition to using our Exclude Shrubs tool to exclude the hatch from individual shrubs in the same planting area, but the Multiple option is not available
Issue: You tried to place a groundcover as a Stipple hatch, but the hatch is placing incorrectly outside the planting area boundary
Issue: You need to remove the hatch from internal objects within a groundcover or Shrub Area
Issue: You are unable to place plants in an office using Land F/X on a shared online location, and may be seeing gray Xs on the source file icons, cannot open the plant blocks' DWG source files, and may see Invalid block or Missing file errors
Issue: "Cannot process multiple boundaries because the outer polyline includes loops" error when trying to use the Multiple option to exclude interior objects from a groundcover or Shrub Area hatch
Issue: Your groundcover or Shrub Area hatches are showing up incorrectly, or as random lines or solid colors
Issue: Your plant symbols are showing up with transparency when placed in your drawing
Issue: A placed groundcover hatch looks fragmented or isn't joined like it should be
Issue: A placed groundcover hatch looks different from its thumbnail preview slide in the Hatch dialog box


